• Friends, our 2nd Amendment rights are always under attack and the NRA has been a constant for decades in helping fight that fight.

    We have partnered with the NRA to offer you a discount on membership and Muzzleloading Forum gets a small percentage too of each membership, so you are supporting both the NRA and us.

    Use this link to sign up please; https://membership.nra.org/recruiters/join/XR045103

How to customize a Traditions Kentucky Rifle

Muzzleloading Forum

Help Support Muzzleloading Forum:

This site may earn a commission from merchant affiliate links, including eBay, Amazon, and others.

brettsut

32 Cal.
Joined
Dec 5, 2005
Messages
8
Reaction score
0
Ok, so I'm new. I really have been interested in a fowler, but was having a hard time finding what I was looking for. In the meantime, I came across a Traditions Kentucky .50 Percussion Kit for only $135. I have done a great deal of poking around in the forums in just a few days, and now have more questions than I started with. Any and all input would be appreciated.

It is a full stock, but in two pieces with a brass divider. I assume that is not historically accurate. I thought about embelishing the joint to make it more decorative. Any thoughts?

Is there anything "wrong" with this kit? KR5220

What kind of decoration would be appropriate? It doesn't have a patch box or anything other than the bare basics.

The lock is color case hardened, and I am not sure that I like it. Does one mess with it? or take it as is?

For the barrel, I'm thinking of leaving it in the white. I don't think brown is for me. I am intrigued by the charcoal blueing method.

As I am soooo new, I'm not sure what is historically accurate. I would like it to be somewhat authentic looking, but unique at the same time. I am reasonably handy in the shop and wouldn't mind a go at wire inlay or making my own brass plates and perhaps a go at engraving.

I am really looking to experiment, but don't want to muck it up too much. Just putting it together as is doesn't sound like much fun.

So, there you have it. I'm not wanting everything at once, but rather trying to get the big picture BEFORE I start.

I do have many other questions but can't get them all in one post. Thanks in advance.

Brett in Salt Lake
 
First, I'll mention that lots of folks here are typeing as fast as they can to say this gun is Not Period Correct for any period prior to 1955.

Now, with that out of the way, I'll say, Sure. Go for it. It's your gun to make any way you want.

Actually, I could point out that the gun which some say belonged to Joe Meek (famed Mountain Man) known as "Old Sally" had a two piece stock somewhat like your gun. It's lock was different though. (It also didn't have a patch or cap box.)
(Ref: Pg 115 THE PLAINS RIFLE

Getting back to your rifle, as I say, do what you want. There is no better place for learning than on an inexpensive (relatively speaking) kit.

As for the brass spacer, you could try to hide it by blackening the brass with Birchwood Casey Brass Black or celebrate it by scribing equally spaced lines around it's periphery (maybe 1/8 inch apart?)as a guide and then using the edge of a file to form little shallow Vs

Wire inlay, while not seen on trappers guns can add a lot of interest. It is not hard to do providing you buy some of the wire (actually flat ribbion that is installed edgeways).
By the way, the very best time to install wire inlay is before you finish the wood (which is right where you are now).
Most wire inlay depicts vines/leafs or other twisty folage. Even a series of connected S's getting larger or smaller makes an interesting decoration. Another idea is to draw a line about 1/8 inch in from the edge of the lockplate flat (opposite the lock side) and put in a wire which follows it. This will "highlite" the shape.
OK, it was just an idea.

One thing I will say about wire inlaying though. Use a #2 pencil and sketch what you want. Look at it and change anything you don't like. You can do this as many times as you need to before settling on the final shape.
I often draw and re-draw 10-20 times before it looks "right" to me. After you start piercing the wood is too late to change your mind. :(

The patchboxes were running out of style by the time the percussion guns were popular but there are many examples of percussion guns which do have full sized brass patchboxes.
There are many more with Capboxes or nothing at all.
IMO, the best place to buy patchboxes or some capboxes is Muzzleloader Builders Supply in Ozone Ark. Check out our "Links" section.

As you may have noticed, there are a lot of knowlegible builders at this site, and we don't always agree on everything but we will all be more than happy to give you our views and help on any question you have. :)
 
First off, you got a good deal on this kit, and the Spanish-made barrels used on Traditions and CVA rifles are good shooters. And, no, there's nothing "wrong" with it, though it's not really a historically accurate piece (in all fairness, though, it's far from the most inaccurate!). But you sound like you'd prefer to change some things on it. Taking your questions more-or-less in order:

There's not much you can do with the stock. The two-piece assembly has been used (though rarely) on fullstock guns, with a brass or silver divider between the pieces. The three original guns I've seen done this way, which include the famous Bullard rifle on display at Colonial Williamsburg (also featured in Shumway's "Rifles Of Colonial America" and Whisker's "Early American Flintlocks", among others), had a simple, round-edged divider -- nothing embellished or fancy.

You do have the option of re-stocking the gun, though a decent maple, walnut, or cherry stock, inlet for a 7/8" barrel and shaped to one of several "schools" (distinct regional types), into which you would have to inlet the rest of your parts, will run you in the ballpark of at least what you paid for the entire kit. If I were going that route, I'd probably replace most of the brass hardware with pieces compatable with the stock design I'd chosen; and, incidentally, I'd go with a fairly plain piece of maple. It's less expensive and easier to work than fancy curly maple.

One upside to the idea of re-stocking is that, done well, you'd probably have a total of less than four hundred dollars invested in the gun, and it would be (remember, I said done well) a distinctly different and, IMHO, more attractive gun than the basic Traditions. You have the advantage of having the pre-inlet Traditions stock to use as a guide for such tricky tasks as inletting the lock and positioning the various parts in relation to one another. Installing a patchbox -- again, of styling correct to the stock and hardware you might choose -- would be just as easy with a new stock as with the existing kit wood. Plus, the depth of the butt area on a Traditions Kentucky isn't much more than four inches, which is a bit small for many of the patchbox designs that are available.

You might check out Track Of The Wolf's website to get an idea of what's out there in the way of wood and parts. Also, if you do decide to go the re-stocking route, acquire a copy of at least one decent how-to book -- there are several available, and, again, the Track people can help out with that.

The case hardening on Traditions locks is (or was, on every one I've messed with) a surface finish, which can be buffed off. What's left is not quite blued, not quite white metal, and looks fairly decent.

Which brings me to the barrel (and the lock, too, if you remove the case hardening): it's been pretty well established that, while browning and bluing were both practiced by the original gunmakers, steel and iron parts were quite often left in the white and simply allowed to dull down with use. I really like the effect, myself.

Wire or sheet metal inlays.... Mmm, you might want to pass on that, unless something specific really appeals to you. Likewise engraving (which can always be added later). I'm of the opinion (which may be worthless to you, and I would not be offended or consider it foolish if you were to disagree), that, on the basic Traditions rifle, they'd be a bit out-of-place. And, should you decide to replace the wood with something of higher quality, you're going to find that you've got quite a project on your hands, right there. A patchbox all by itself does wonders in the way of dressing up a rifle.

My more involved suggestions, if acted upon, will give you a fairly extensive job to do -- more so than I'd normally even suggest to someone who's getting into his first kit -- but you indicate that you want and are willing to do the work to get something different, and the tone of your remarks and questions gives the impression you feel capable of pulling it off.

This is a long post, but you asked a lot of questions. I expect that within a few days you'll have a good number of replies, some of which will probably recommend doing things differently than I suggested (and many of which will be written by people more knowledgable than myself). Good luck with whatever you decide to do, and don't stop asking questions. I, for one, am delighted to have a forum for sharing information I've acquired over the years -- most of my family members' eyes tend to glaze over when I try to share my interest in anything having to do with these guns, other than just shooting them. Which is a great thing in itself, but you sound like you're interested in something more than that.
 
Since this is you first project I would just build it as traditionally as possible to gain some experience. You may quickly outgrow this gun and want a more advanced rifle later and you could sell this one easier if it were finished in a traditional staighforward manner.
 
I agree with Reddogge, as this is yer first try, apply the " kiss method" Keep it simple silly. Be glad you don't have one of those kit patch trunks, they put the ug in ugly. I would venture to some of the sites like TOTW, and look at the guns they have for sale to get some ideas as to what you can do. Generally these kits have too much wood left on them and need a rasp, and chisel diet to look more authentic. $150 is a small fe to pay to learn the basics, go for it and when ya got questions ask away, and you'll get three, four or fifty pieces of advice :rotf: With this kit you can try some simple carving, work on a staining, and finish technique, practice fitting of parts, and even learn a few new combinations of swear words :haha: You should also learn when to step away for a while, and think about your next step. All valuable lessons, and at a fair price. By then you will have the desease, and it's incurrable :blah: Bill
 
Hey, I just finished putting together a Traditions Kentucky flinter a few days ago. I've written some columns about it for the newspaper where I work... taken pictures... they're on my blog --[url] jderrickstar.blogspot.com[/url] -- and may give you some guidance, or at least amusement at my fumblings through the process. I'm envious of the good price you got. Please post some photos as you complete the kit, I'd love to see how it turns out.
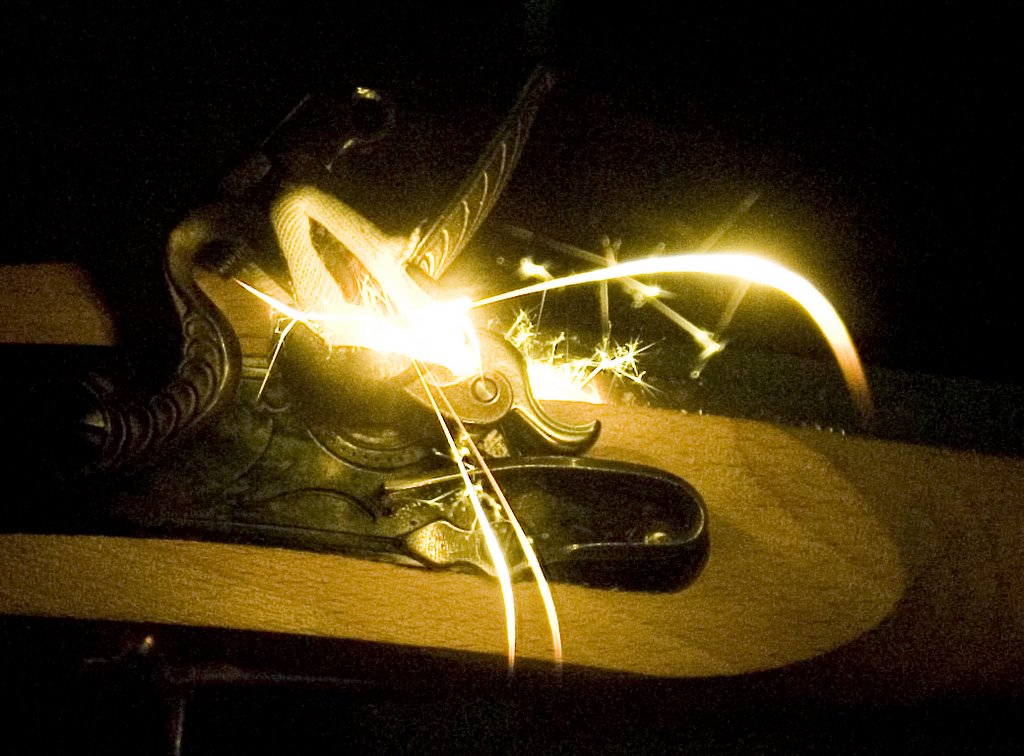
flintlock%20sparks.3.jpg
 
Last edited by a moderator:
"The two-piece assembly has been used (though rarely) on fullstock guns, with a brass or silver divider between the pieces. The three original guns I've seen done this way, which include the famous Bullard rifle on display at Colonial Williamsburg (also featured in Shumway's "Rifles Of Colonial America" and Whisker's "Early American Flintlocks", among others), had a simple, round-edged divider -- nothing embellished or fancy"

The splice in the Bullard rifle is a restoration or repair and not part of it's original construction. There is no metal plate between the two pieces of wood. I've held and examined the original rifle. A Traditions Kentucky is an ok rifle for a kid. Putting any additional money in one is a waste.
 
Lets see if this works.
4921cc74.jpg


af0234c3.jpg


My stock was made of two completely different wood types with non matching grain patterns.
Not sure if you cans ee in my pics but I used tacs all around the hand grip area and made a brass piece to look like a stock repair. I threw away the original brass seam piece and used wood glue in that area. I thought the stock would be more solidly glued without the brass between the stock pieces.
Mine shoots great and is reliable, its not period correct but its a great little gun. You cant go wrong witht he price you found.
Is that from a individual or is someone selling these at a discount?
I know my brother would buy one at that price if he could find it.
 
It looks like you are using a wad of ticking to hold the flint in that lock. Are you concerned about it catching fire? I thought that you were supposed to use a piece of leather (suede type, not smooth finished), but then again, I don't own a flinter...
 
Thanks for the many posts. I can't do anything till the Holiday. You see, Santa got it for me. So, I'm do ing my planning now.

I think all of the suggestions are great. At the price, and with the model, this won't be an heirloom. The boys and I are going to have fun doing it, then embellishing it a little at a time and have a lot of fun shooting it.

This is an experimental project. If I mess it up too bad, I'll start over with a blank piece of wood - a true project. I have about 600 bf in the shop. I'm might try something totally non traditional. I have a beautiful piece of lacewood I've been saving. I also have some birdseye alder. It is most unique, with black peppercorn looking birdseyes throughout. In addition to that, I have a few sentimental pieces I've been saving. I have a piece of ebony brought back from Africa, with the stark blonde sapwood on it. I also have some Gigi wood and Rosewood brought back from Australia. I haven't seen anything so far with wood inlays, but who knows.

I wasn't relishing the idea of playing around with a TOTW project. I think this one will give me the opportunity to experiment and see what I like with very little outlay.

In response to jderrickstar, I called a local gunshop that is normally very expensive. Glad I did. It was new old stock and the price had never been marked up. It's never been opened. And sorry, they don't have any more. I checked so I could post it.

I think we are going to have a lot of fun with it.

Ideally, I wanted a side by side fowler. The only thing I could find was the Pedersoli from DGW. I'll keep looking on that.

Thanks to all for the comments. This is a great group.

Brett
 
Sorry Cherokee, I replied incorrectly. The answers is I bought it from a local gun shop. It was new old stock, never repriced. It's been in there back room for quite some time. And..it was the only one.

Have a great day. Brett
 
Ahhh. I have never had the opportunity to handle the Bullard rifle. I've seen pictures of it and was able, finally, to view it from a short distance when my wife and I visited CW a few years ago. I envy you the opportunity to have had it in your hands.

I think you're a little harsh in your opinion of the Traditions/CVA guns, but I see where you're coming from. Normally I wouldn't suggest any of the options I did, not for a first-time builder, nor in regard to a rifle of this sort. I chose, in this case, to address the questions the person asked, rather than dismissing out-of-hand what he's interested in doing. I've had that done to me -- been treated like a child who has no business expressing or even having an opinion of my own -- by people who claim to care about this sport. If it weren't for my basically contrary nature, and the pleasure it gives me to annoy people like that by sticking around and doing as I please, I'd probably have quit, early on. And what, I ask, would that have accomplished, in any positive sense?
 
A Traditions Kentucky is an ok rifle for a kid. Putting any additional money in one is a waste.
i'm not a kid anymore (my wife will disagree) but i like my traditions kentucky. its a fine rifle for the money. granted its not pc nor a custom made piece, but its a damn fine place to start. i can outshoot many more expensive rifles with it. i say if you've got the time and money to play with it, go for it.
 
Two things I would do.

Remove the excess wood on each side of the barrel. There shouldn't be a ledge. The wood should just sorta flow into the barrel. Be careful and keep your lines straight.

Throw away the brass piece that joins the stock. Glue the two pieces together so it looks like a repair.

They are ok guns to learn the basics with. Oh and by the way, have fun!
 
I would stitch some rawhide over the two piece stock area and barrel and forget it. It will look like a "mountain" repair.
 
I have the same rifle built from a kit about the same time as Cherokee built his. I used the brass spacer and have since wrapped it with a leather thong tied. I expermented with fauz tiger strip to achieve a "Leman" look. Once the deer season is over I plan to install the Leman patchbox that I got from the Log Cabin shoppe in Lodi, OH. Oh, it is great shooter.
:hatsoff:

Waya
 
Well, I haven't had the chance to fire it yet, and I haven't run across an suitable leather, either. But the folded up patch has worked well enough to check the function of the lock. I'll try posting on the flintlock forum on whether it'll catch fire.
 
Go for it...It's a good way to start. You do know of course that your are going to get hooked on blackpowder shooting. I started out like you are with an old kit gun. Seven guns later i'm still at it. That was 23 years ago... I still have that first gun an old CVA. I've done the thing over three time. It started out as a 50 caliber and after I moved to other guns it sat in my gun cabinet for several years until 2 years ago when I decided to give it a new life. It's now a 32 caliber small game rifle. Good luck with your new project. ssettle
 
Hi, I have a Jukar Penn/Kentuky stock, barrel, and buttplate that I bought off of Ebay to practice on. I am going to lengthen the tang and reshape it. I have inlet a CVA lock that I happen to have lying around that was almost a perfect fit, it only took about an hour to "fit" it in. I am getting ready to "stake in" two lugs to pin the stock to the barrel(never used stake lugs before). It came with only two lugs and I didn't like the position of them. I am going to use the back lug, I knocked off the forward lug and I will add the other two. I fit two sights on the barrel that I had lying around also. I will pin three rr thimbles to the stock. I will probably pour a pewter nosecap(never done that yet). I am making my own single trigger by cold peening a hunk of metal(never done that before), I'm half done with the trigger and I will make a trigger plate as well. I am going to make a sideplate for it out of sheet brass(never done that). I am going to incise carve a moulding line along the RR channel and from the buttplate to the TG(never done that before). I reattached the brass toeplate with larger metal screws and filed them flat. I am open to suggestions for more incised carving ideas, examples anyone?? I might add a patchbox. I thought about adding a steel BP but opted for the brass one I got with the stock. I have two nicer kits that I have been working on but I practice on the Jukar first for any operation I am going to perform on the nicer kits. Oh yeah, I will take the sides down as much as I can on the sideplate and lock sides. I will take the forearm down to about 1/8" tapering it to a knife edge on the barrel. I will also take about a 1/8" off of the belly of the forearm. Kurt/IL
 

Latest posts

Back
Top