• Friends, our 2nd Amendment rights are always under attack and the NRA has been a constant for decades in helping fight that fight.

    We have partnered with the NRA to offer you a discount on membership and Muzzleloading Forum gets a small percentage too of each membership, so you are supporting both the NRA and us.

    Use this link to sign up please; https://membership.nra.org/recruiters/join/XR045103

LMF Barrel Brown Carding

Muzzleloading Forum

Help Support Muzzleloading Forum:

This site may earn a commission from merchant affiliate links, including eBay, Amazon, and others.

azsixshooter

36 Cl.
Joined
Feb 16, 2019
Messages
58
Reaction score
58
Location
Pinckney, MI
I've been working on this flintlock GPR off and on for around 18 months now. I'm getting close enough to completion that I want to really push to get her finished. I recently was gifted a couple of .50 cal caplocks and after shooting them I'm really excited to shoot this flintlock.

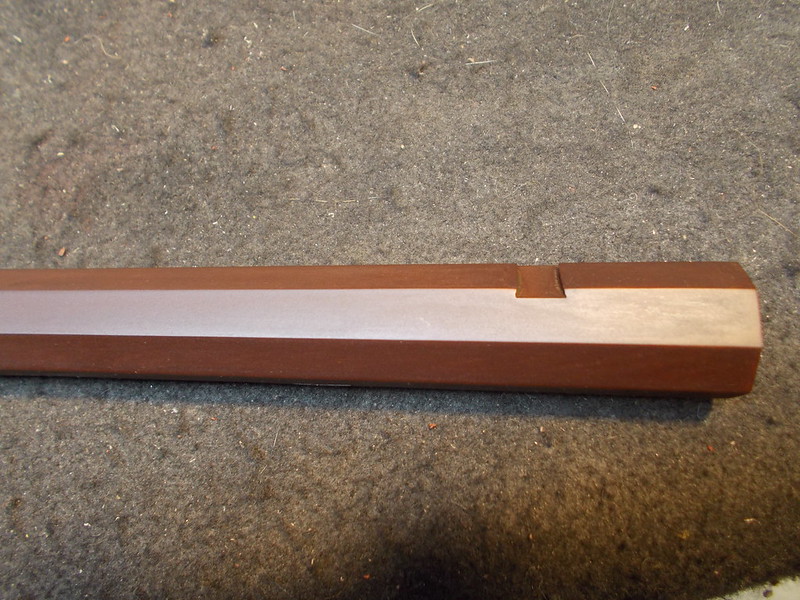
I started browning the barrel last night. I draw filed the barrel then sanded with Emory cloth going all the way to 600 grit. Before starting the browning process I decreased with 91% alcohol and plugged the bore with a wood plug and the flash hole with a toothpick.

Last night I applied the first coat somewhat generously making sure all surfaces where wet but not dripping. 3 hrs later I applied a 2nd coat sparingly just moistening the surface of the barrel flats and corners. 3 hrs later I attempted to card with hot water but I think I messed up.

I didn't have any stiff felt or denim so I cut the thick cargo pocket flap off some old shorts and used that. I didn't scrub aggressively, I pretty much just wiped back and forth because I was afraid I'd run the first thin layers of browning off and make the process take even longer.

I repeated that process 2 times last night for a total of 4 applications and another 2 today. I wasn't really liking how it was looking. The flats were getting brown and rusty but the corners are basically black so they look like stripes running the length of the barrel. And the rusted flats even were looking kind of streaky, especially around the stamped words.

After the last application I got a scrap of bridle leather and softened it in hot water and squeezed out everything I could down to bare leather. Using the coarse side I scrubbed the barrel really aggressively and really scrubbed off a lot of the rust, although it didn't take it down to bare metal. It actually looks a lot better after drying it off, much of the streakiness is gone and it looks more even.

I'm not really sure if this is going well or not because I don't know what it is supposed to look like at this point. I'm planning on doing some more applications this week, but I want to also brown the rest of the metal pieces before I use up all the solution on the barrel. I still have quite a bit left so I think I'll be good.

I'm wondering how you guys think it looks and if I should card aggressively with the leather or just use some kind of fabric like I was before. The leather actually created kind of a dark slurry and stained my hands black even though it was just regular plain brown leather. It seemed to help blend in the browning pretty good, but if there is any reason not to be using leather I'd like to know.

Thanks guys, any advise is greatly appreciated.

Steve
20201004_232125.jpg
20201004_232140.jpg
 
HI
You have not messed up.
This is how it goes.
In my experience (I have done 3 or 4 in the last 2 years with LMF) if you use boiling water you will end up with a much darker brown/black/blue colour whereas tepid water will give more a chocolate brown. Of course this will also be altered by the steel itself.
I suspect the edges are a different color due to harder carding or the metal is getting hotter here when rinsing.

For applying the solution you seem to be doing it fine. You dont want any streaks in the application. I have found warm metal works best but after the surface is started the solution sticks well.
I use either superfine steel wool to even out the finish or coarse cloth to deepen the finish. Just make sure you degrease the steel wool if you go this route. Just go easy.
Suggest you try gentle carding with superfine steel wool concentrating on the flats. Remember the worst thing you can do is remove the finish already there, so it just undoes your work and slows you down.

There should be enough LMF solution do do about 2 rifles in 1 little bottle.

Again I think it looks about right. If it were mine I would not be stressed.
To get some idea how it will look if you stop now just look at the barrel when carded and wet.

Please let me know how you go.
 
I do not like LMF. That stuff IMO is too labor intensive, and for me did not produce the results I had wanted. And before anyone says I didnt do it right, youd be wrong. I followed the instructions to the letter. I just did not like the process, or the results. Ill never use that manure again. There are better products out there.
 
Don’t rush to get done at this point! With your fine finish sanding you can get a nice brown or blue. This barrel took about five days to get the dark brown I wanted. I card with wet 4 ought wet steel wool between every other coat.
001 by Oliver Sudden, on Flickr
 
It's nice that there are options out there. I was following "theduelist's" video series on building his Hawken and he used Birchwood Casey's Plumb Brown. I was going to follow suit, but this option didn't require taking a torch to my barrel so I thought it might be easier and as a first time builder maybe I'd get a more even finish.

I just put a 7th application on and after the aggressive carding last time it looked pretty even and nice when it was wet. I think it will probably come out pretty good. As long as nobody else argues against it I will try lightly carding with some 0000 steel wool (degreased) today and see how that goes.

I have a CVA .45 cal Kentucky Pistol kit to build next so maybe I'll try a different project or procedure on that so I can compare the results. I have a copy of Foxfire 5 and that has some old school techniques for metal finishing as well as "The Gunsmith Of Grenville County".

When I am finished with the barrel I was planning to coat it with beeswax because I happen to have a large chunk of it. The instruction say to finish it off with that or linseed oil. I was wondering if there was any preference as to which of those options would be best. I also have Rem-Oil, Slip2000, 3-in-1 oil, Boshield T9, etc. I was guessing it probably doesn't matter too much but I thought maybe the beeswax might be a more traditional way to go.

Thanks!

Steve
 
The ambient humidity in your area will make a difference in how fast or aggressively the surface will rust. Things go a lot faster during my humid southern summers than in the winter-- sometimes too fast... If it's dry outside try hanging the barrel in your bathroom and periodically run the shower.
 
The ambient humidity in your area will make a difference in how fast or aggressively the surface will rust. Things go a lot faster during my humid southern summers than in the winter-- sometimes too fast... If it's dry outside try hanging the barrel in your bathroom and periodically run the shower.
I put a big wooden cutting board over the sink to stand my barrel on and filled the sink with boiling water periodically to increase the humidity around the barrel during each application. Also, last night, in addition to doing that my daughter was canning jam so she had a huge cauldron of water boiling on the range for an hour or two. It was so humid in the kitchen the sliding glass door wall was fogged and dripping water on the inside!
 
Using a torch to heat the barrel isnt a big issue. You are not heating the metal red. Just enough to make the plum brown sizzle. Its much easier to use.
 
I refinished a gun that had BC plumb Brown on it. As I was redoing all and wanted the barrel in the white.
Don’t let anyone tell you plum brown isn’t as tough as a cold brown.
I like the color of cold a little better but plumb brown will give you a good finish.
 
By all means go to LMF's website and follow their instructions exactly. The directions on the bottle are not complete.
 
The fine wire wheel that you can get from Brownell's works really well for carding between coats. Apply the LMF sparingly, just enough to moisten the barrel. One bottle should do several guns. Definitely go to the LMF website for the detailed directions.
 
I have never needed more than one day to brown a barrel with LMF. I never go finer than 120 or 150 grit, finer than that and it tends to give uneven coverage, the finish will easily cover 120 grit scratches unless you want a rust blue finish which you will get if you book it between applications. I don't bother with much of a degrease, just make sure my hands are clean and free if any oil. LMF has a strong detergent in it so no need to go nuts with the degreasing. I do it in my bathroom, first application is as light as possible to still get full coverage. Never wipe the same area twice or as tenngun says, you get a coppery look, which is not really that big of a deal, it will just take longer to get the finish you want. I reapply every 3 hours, and after the second application and all others, wipe off with an old sock turned inside out with hot water each time. This evens out the browning but does not darken it. That evening, I wipe one more time with the hot/water sock and let sit overnight. Usually 4-5 applications is enough. The next day, I scrub with a thick paste of baking soda or sometimes ammonia to kill the bloom of rust and wipe with 0000 steel wool and RIG grease. I have done over a hundred barrels and locks this way and never had a bit of problem. With LMF you do get some rust bloom for the next few days, easily removed with either a RIG covered rag or steel wool. If it is harder than this you are doing something wrong.
 
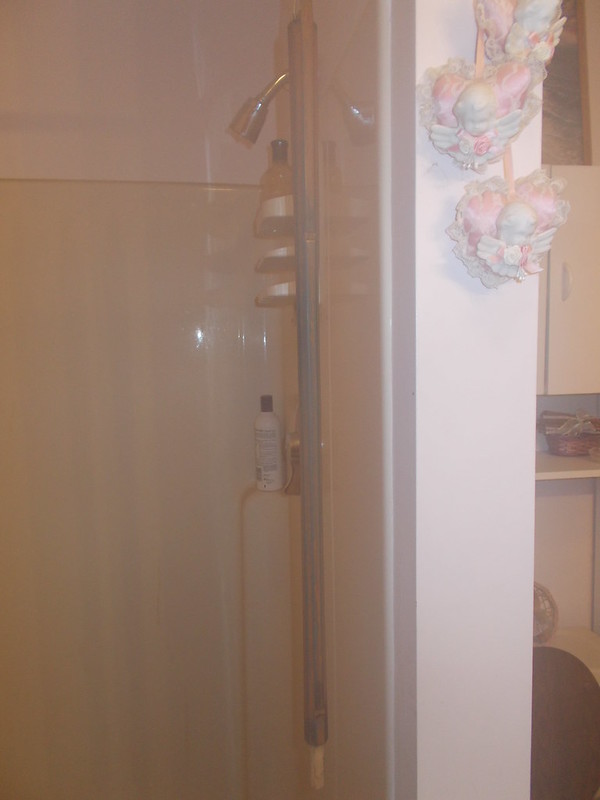
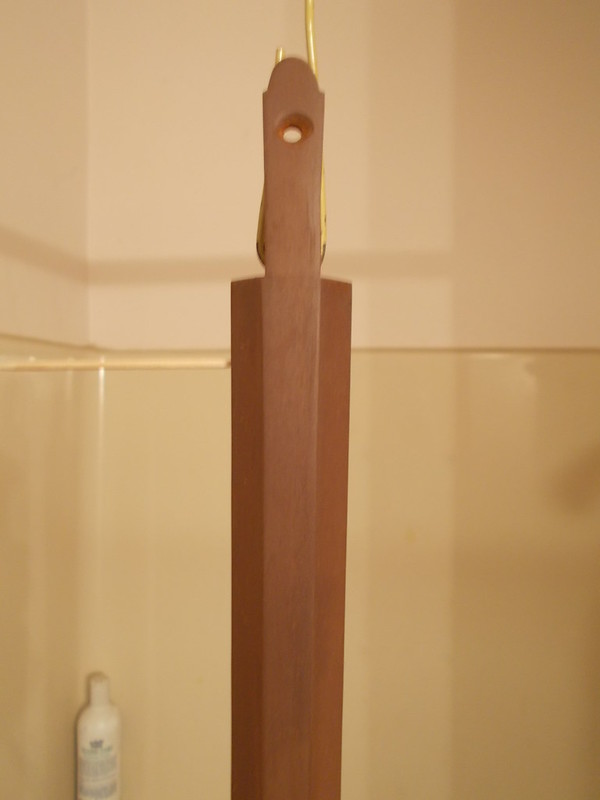
While LMF is more labor intensive than some others, I like the color better. I have a small 3/4 bath downstairs that becomes my humidity chamber. I hang the barrel from the shower curtain rod and make sure I have a bunch of newspapers under it. I put an electric heater in there and a bucket of water in front of the heater with some rags hanging out of it to wick up water. During the process, I go in a couple times a day and turn on the shower with the head facing toward the back wall and run full hot water until the room steams up to the point the mirror just starts to fog, then turn it off (I don't want things dripping). It creates a great hot and humid environment for the rust to form. Other than than, I follow the EXTENDED version of the directions from their website to the letter. If I want a smooth finish, I stop at 400 grit.

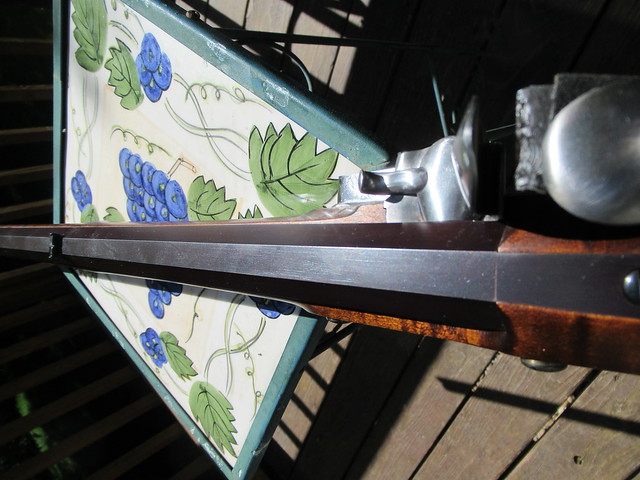
Day 1:

24818499747_180ed7844f_c.jpg


Day 2:

24818497127_58a84559d1_c.jpg


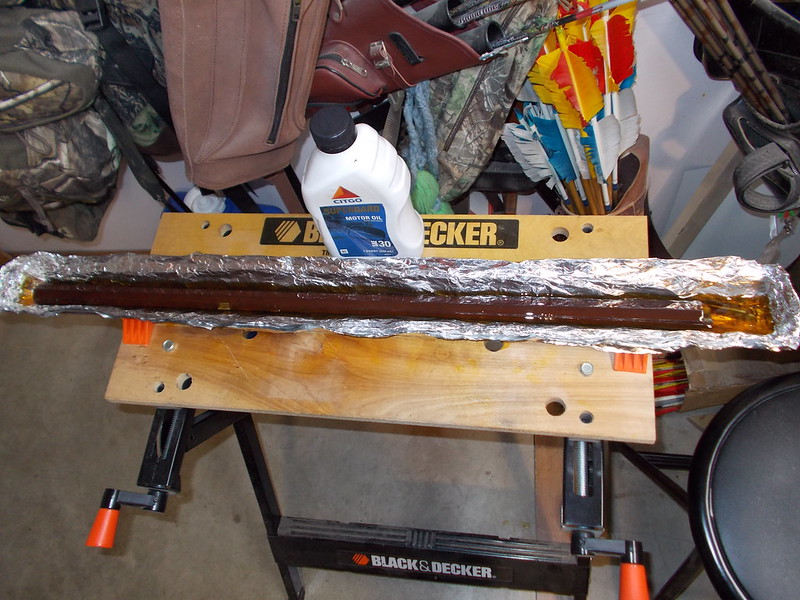
Motor Oil Bath:

24818494787_41c72f97ef_c.jpg


Finished:

24818494357_d61d5e09de_c.jpg
 
Blueing & Browning..
Formulae No.1. (Greener's solution.).
Muriate tincture of steel (strong solution of ferric chloride) 1oz.
Spirtits of wine (rectified spirit) In British Pharmacpoedia ,rectified spirit is impure (aqueous) alchochol which has been strengthened by re-distillation. Rectified spirit contains 16% by weight of water. 1oz.
Strong Nitric acid 1/4oz
Blue stone (copper sulphate) water.1/8th oz.
Mix well and allow to stand for 1 month to amalgamate. Apply cold..
 
Greener's solution should be rusted in a steam chamber, Brushed of with a wire card and re-applied until the desired Brown and White has shewn. This can be attined by duditious use of very find Wire wool soaked in the solution.. From an old volume on Gun making. OLD DOG..
 
Formula No.2..
Spirit of nitre 3/4oz.
Tincture of steel(ferric chloride solution) 1/4oz.
Black brimstone (crude sulphur) 1/4oz.
Blue vitriol (copper sulphate) 1/2oz.
Corrosive sublimate (mercuric chloride)1/4oz.
Nitric acid 1 drachm.
Copperas (ferrous sulphate 1/4oz.
Water 1 1/2 pints.
Mix well and bottle for use. From the same volume. A bit more useless information from over here. OLD DOG..
 
While LMF is more labor intensive than some others, I like the color better. I have a small 3/4 bath downstairs that becomes my humidity chamber. I hang the barrel from the shower curtain rod and make sure I have a bunch of newspapers under it. I put an electric heater in there and a bucket of water in front of the heater with some rags hanging out of it to wick up water. During the process, I go in a couple times a day and turn on the shower with the head facing toward the back wall and run full hot water until the room steams up to the point the mirror just starts to fog, then turn it off (I don't want things dripping). It creates a great hot and humid environment for the rust to form. Other than than, I follow the EXTENDED version of the directions from their website to the letter. If I want a smooth finish, I stop at 400 grit.

Day 1:

24818499747_180ed7844f_c.jpg


Day 2:

24818497127_58a84559d1_c.jpg


Motor Oil Bath:

24818494787_41c72f97ef_c.jpg


Finished:

24818494357_d61d5e09de_c.jpg
That looks nice, sounds a lot like what do. However, I don't run the shower during the process I do it right after I take my own shower, then close the door for the rest of the day between applications. I live in Florida and if it gets too humid, the metals parts will start to drip water and then you have a holy mess. Again, I don't take it below 150 grit, I like a bit more "tooth" for the solution to work on. But, the nice thing about LMF, asking as you put it on evenly and not too heavily, you will get a nice finish however you apply it. I think it depends on how much time you want to spend and what type of finish you are looking for. I prefer a darker finish, some prefer a lighter more "red" appearance. After all, what we really are replicating is mostly 250 years of rust and handling, most original guns were not finished but left in the white and most of us don't really care for that.
 
Back
Top