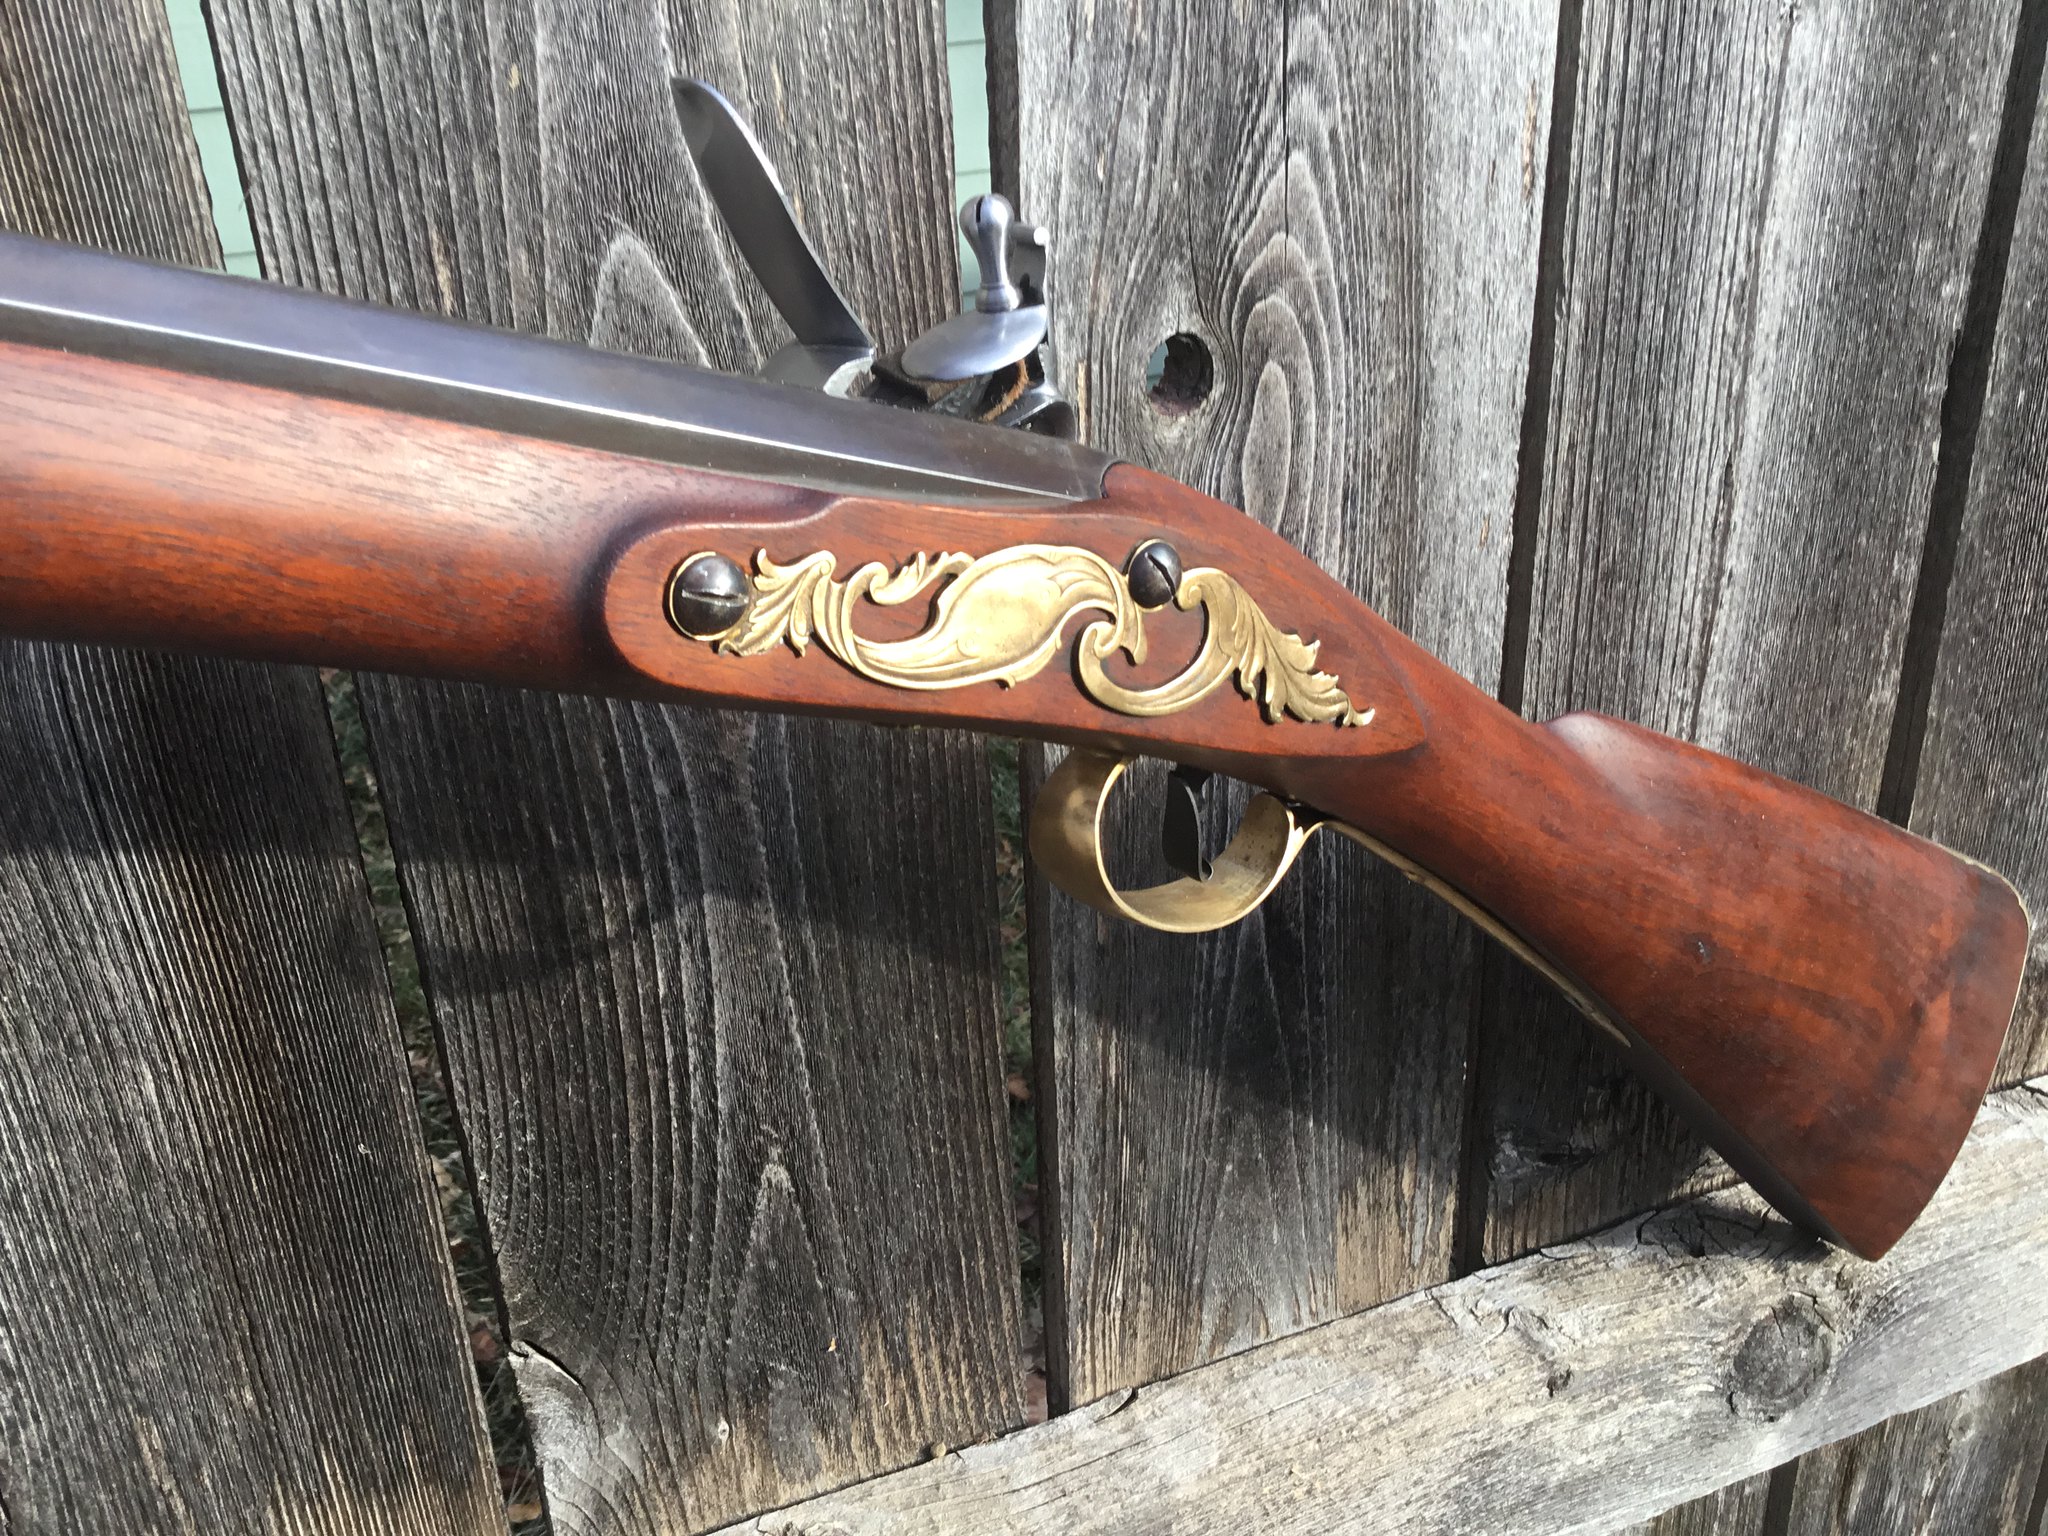
How to polish this sideplate

Muzzleloading Forum

Help Support Muzzleloading Forum:

This site may earn a commission from merchant affiliate links, including eBay, Amazon, and others.

longcruise

70 Cal.
Joined
Feb 28, 2005
Messages
10,333
Reaction score
9,098
Location
Colorado
This is for my Chambers English Sporting Rifle. As you can see it is a casting. Not terribly rough but I'm wondering how to approach it so as to ensure I don't damage the cast in "engraving". It's not fragile but neither is it thick and stiff like a solid sideplate.

Any thoughts?
 
Not sure why the photo didn't load. Here it is.

20241103_154527_copy_689x246.jpg
 
I would wet a piece of 600 grit wet or dry paper and lay it flat on a piece of glass, put the sideplate face side down and carefully move it in a figure eight pattern checking often.
 
If it's flat you can heat glue or epoxy it to something flat to hold it while you work on it. A little heat will turn it loose when you're finished.
I hadnt thought of that. My main concern was that due to the very soft brass it would be difficult to control.
 
Don’t neglect to file the edges with a little draft so you can have sharp clean inletting.
The inletting is going to be the challenge, at least for me! 😬

Barbie sent me a plain sideplate that's also a fit to the kit. It will cover the area of the fancy one so there is sidedoor if needed.
 
If you use sandpaper, go very, very light, and check progress often. Lots of opportunity to lose definition on that piece by oversanding a curve or an edge.
 
This is one instance where the dreaded Dremel tool would be the solution. They make small barrel shaped felt tips that would be ideal for working the contours. The deeper crevices should be left as cast so the anchor profile would be darker, highlighting the brighter high spots. Tedious jewelry polishing, but it’s not a huge piece. It would look great if inlet to a depth that left the shiny floral scrollwork slightly proud of the flat wood.
 
Here’s an example of a poorly inlet one can still look pretty nice. I got this finished rifle and reworked nearly every thing to include the side plate. Don’t get overwhelmed just take it one cut at a time.

Zoom in to see the filler.
IMG_0513 by Oliver Sudden, on Flickr
I see what you mean by the zoom in. And also see it left a bit proud according to shadows. FWIW, it looks very good. Hoping I can do it as well. Thanks
 
This is one instance where the dreaded Dremel tool would be the solution. .....
I agree, though I can't count how many times I've been stomped on for mentioning Mr. Dremel's tool, so generally I don't any more, but one of those soft felt tips with some Mother's would work just dandy on those detailed shaped surfaces and engraving. Plus maybe one of those little nylon brushes (NOT the brass or steel) to clean out the engraving interior and make them shine. Just use it at low speed. ;)

PS: popsicle sticks as backers for sandpaper also a great idea. ;)
 
another tool I used before the birth of the dreaded Dremel was a pencil chucked in a drill motor.
dip the eraser in valve grinding paste. slow will polish, fast will cause engine turning, AKA jewelling.
nowaday's I steal those emery boards my wife uses to polish her talons. she got so tired of me stealing them she bought me a 24 pack. not as much fun as the filched ones!
 
Last edited:
Back
Top