A pair of Piettas

Muzzleloading Forum

Help Support Muzzleloading Forum:

This site may earn a commission from merchant affiliate links, including eBay, Amazon, and others.

girth

Pilgrim
Joined
Aug 13, 2013
Messages
4
Reaction score
0
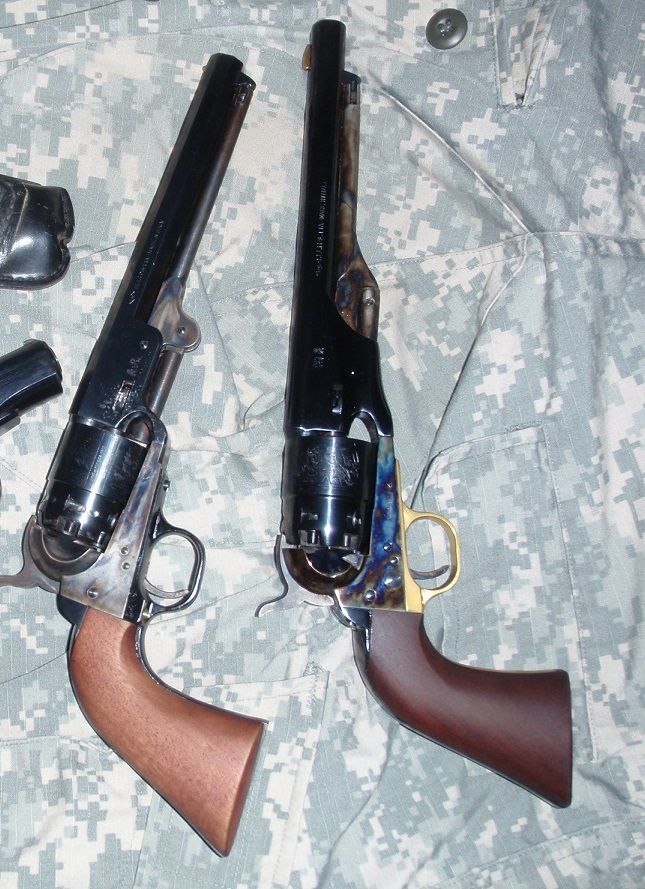
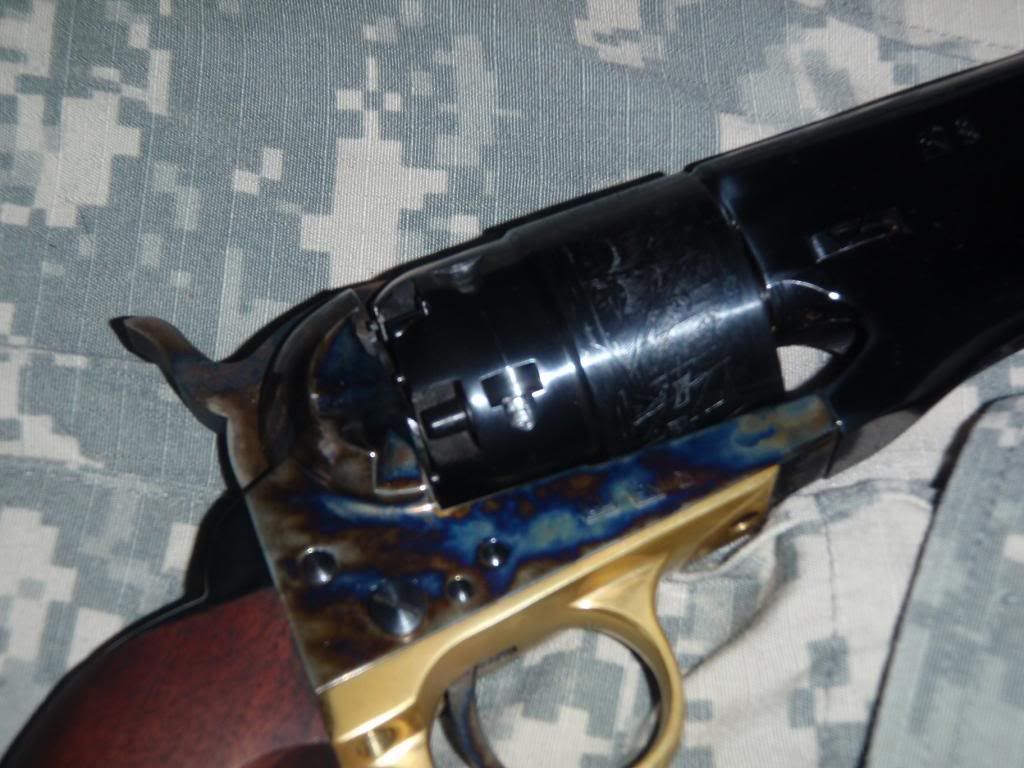
All right...first post, I'll try not to mess it up. :haha: I am NEW to muzzle loaders. Got a wild hair about a month ago and went searching for a cap and ball revolver, since thats what struck my fancy. Turns out, I ended up with TWO, for the price of one. Picked up an unfired Pietta 1860 Army and an abused Pietta 1851 "Navy" .44

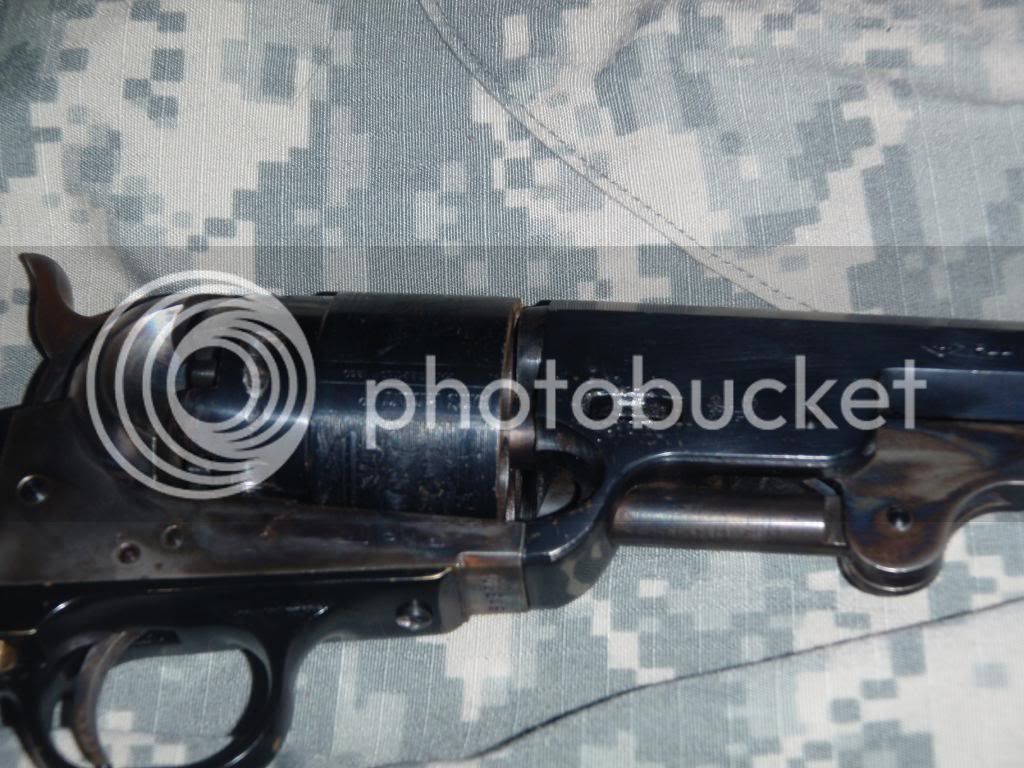
I knew right off the "Navy" would be a project, but as I read more it seems the Army will require some tuning as well. Just from handling, (by the previous owner) the bolt is riding the lead into the cylinder notch and peening the lead edge of the notch. As I understand it, this might just be an issue of fitting the bolt to the cylinder? I dunno...Im learning.

The Navy.... well thats another story. The bolt seems to drop REALLY early, as evidenced by the gouges/peening ahead of the lead notch. While playing with it, I noticed the bolt pops up JUST past the half cock position. Removed the barrel (get to that in a sec) and with the cylinder removed, when the bolt pops up it STAYS there. Not sure if this is normal for the bolt to get stuck with the cylinder removed or not, but with just a light touch it pops back down to its "normal" engaged position.

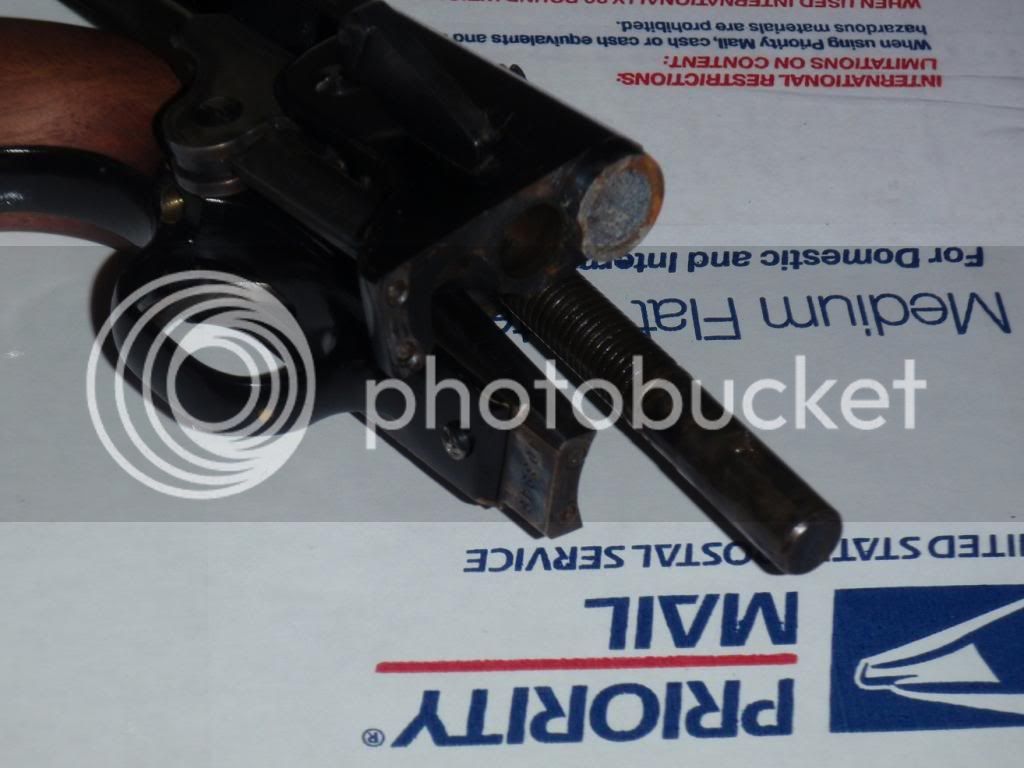
The barrel.... someone has really been abusing this poor pistol. Bolt "locating pins" are sheared off. Half in the barrel assy, half in the frame. I think the parts are available, though making my own pins might be easier. Any tips on replacing those? OH...and yeah, the gunk/corrosion, poor, poor pistol.

As it is, I plan on fixing up the Navy, using it as a learning experience. Then tuning up the Army and seeing what this whole black powder thing is about. :wink:

And advice/recommendations/etc welcome. Heading out of town in an hour or so, but will check back this weekend.
002B_zps94d11bab.jpg


006A_zps36dab1e3.jpg


005A_zpsbd808b34.jpg


0012_zpsc6687c9b.jpg
 
I don't know enough to be able to offer any advice (yet - I'm learning too) but you're right, poor, poor gun! Some people just shouldn't be allowed to own nice things if they can't look after them.
 
You do have your work cut out for you. I for one am glad they now have a good home. The finish is pretty good still so that's a start! Geo. T.
 
I saw those two on armslist. The bolt could have a spent cap jammed down there, you're going to have to take it apart for cleaning and a looksee.

VTI and Deer Creek will have the parts you need, my first choice would be the latter as I deal with them regularly.
 
swathdiver said:
I saw those two on armslist. The bolt could have a spent cap jammed down there, you're going to have to take it apart for cleaning and a looksee.

VTI and Deer Creek will have the parts you need, my first choice would be the latter as I deal with them regularly.

Armslist is indeed where I picked them up. Was lucky to find a local guy willing to make a deal.

I was looking at VTI, but will have to check out Deer Creek. I saw that Dixie had a bolt, hand and screw set, (every screw on the Navy is boogered)but not the pins. I'm still thinking it might be easier to make my own pins and maybe a locating jig so I keep the holes where they are supposed to be....depends on how hard the pins are.

I will have to pick up a proper set of screwdrivers I think, then I'll take her apart and check for those cap remnants you mentioned. All my good screwdrivers have gone walkabout, which seems to happen when you have as many projects going on around the house as I do.

For now, I was thinking of stoning down the gouges in the cylinder, and cleaning up the notches. Unless I would be time ahead or better off to just pick up a new cylinder.
 
Oh my, that would be a tough one for me and I've been working on them for a long time. I'd start by getting a master set of removable bit drivers from Brownell's
Bolt has really chewed up the cylinder as you said and you may very well need a new one. The barrel looks like it may be toast as well.
The good part is you can't very well hurt it much to learn on.
This would be a good one to learn how to peen the screw heads on and re-cut the slots.
Alignment pins will probably have to be drilled out if there is nothing to get a grip on.Use a center drill in a mill or drill press to start them.
From the looks of the cylinder it may have been fanned. The bolt window and nocks will be wallowed out if it has been.
Looks like some clod used a tack hammer and prick punch to remove the wedge.
I've been looking for a good used 51 now for about a year. Not quite that used though! Mike D. :rotf:
 
M.D. said:
Oh my, that would be a tough one for me and I've been working on them for a long time. I'd start by getting a master set of removable bit drivers from Brownell's
Bolt has really chewed up the cylinder as you said and you may very well need a new one. The barrel looks like it may be toast as well.
The good part is you can't very well hurt it much to learn on.
This would be a good one to learn how to peen the screw heads on and re-cut the slots.
Alignment pins will probably have to be drilled out if there is nothing to get a grip on.Use a center drill in a mill or drill press to start them.
From the looks of the cylinder it may have been fanned. The bolt window and nocks will be wallowed out if it has been.
Looks like some clod used a tack hammer and prick punch to remove the wedge.
I've been looking for a good used 51 now for about a year. Not quite that used though! Mike D. :rotf:

:rotf:You're right, at this point theres not much I can do to make it worse.

I'll have to look up "peening and recutting" the screws.

Nothing about the bolt window caught my eye as being damaged, but what should I be looking for? Im guessing nothing too exact, but "just enough" clearance?

Yes, the alignment pins will have to be drilled out. They are sheared off flush. Not to worried about that part. I drill holes in $60mil helicopters for a living. :rotf:
 
One of the first things I do when I pick up a new to me revolver,used or not is check out cylinder alignment by looking down the barrel with a goose neck auto lamp in each cocked chamber position.
You are lining up the bore with the chamber mouth and your eye will see misalignment that a range rod will not detect.
Most are not perfectly aligned and will shoot fine anyway. Heavy misalignment can cause lead shearing/spitting and poor accuracy. This can be correct in some cases by fitting a new bolt and or cylinder. In extreme cases even the bolt window can be adjusted and off set bolt or over size bolt fitted to line things up.
Next I check bolt drop on the cylinder. It's nice if they drop in the lead in trough on guns that have them but personally I don't mind if they drop just past center movement as the bolt drag bleeds of cylinder inertia before it abruptly stops it after dropping into the noch of notch. The bolts need to have their faces dressed to a polish though for them not to gall the cylinder as your 51 clearly shows has not been done. You have sharp edges on your bolt face and that is what has chewed up the cylinder.
A lot of revolvers suffer from late bolt lift which is far and away a more sever problem than a early bolt drop that leaves a little wear line on the cylinder.
It will manifest on the back side of the bolt notch and look like it has been peened off at the top rear of the notch. The hand is turning the cylinder before the bolt is clear the notch. This bangs the bolt against the window and deforms the notch.
Most folks don't even know it's happening unless there is a noticeable catch on it. This condition is also very hard on the hand nose and ratchet teeth. Mike D.
 
Peening screw heads is easy and fun to do. It will make an almost useless mangled screw head look like factory new in most cases.
Make a pair of copper vise jaw liners for the heavy bench vice. Place the screw head up all the way into the copper liners clear up to the underside of the head and cinch it down. Now get a little ball peen hammer and polish up the face of it to remove all dings and divot.
Now just start lightly tapping all around the head area of the screw trying to move metal back into the slot are. You just keep moving around the head area lightly tapping until you have made it as smooth and round as possible.
Remove the screw from the vice and chuck it up in a lathe , drill press or even hand drill and re-establish the head side walls if fillister or angle shape of wood or pan head screws with files and stones.
Once the sides are filed and dressed to shape now start on the top of the head. When that is complete place it back into the copper vice jaws and re-cut the slot with a file or slot cutter in the mill or drill press. When the slot is finished chuck the screw shank into a hand drill and spin the screw head down on a piece of emery cloth backed by wood or glass. Blue or brown and you will have a perfectly reshaped and finished screw head. This is really important on antique guns and hard to replace screws. Mike D.
 
girth said:
I will have to pick up a proper set of screwdrivers I think,

I recommend Grace USA, the HG-3 Colt Peacemaker set. It will do Pietta and Uberti Colts and Remingtons, ASMs and even Palmetto NMPs. I also have some of their other sets and the cheapo Winchester set with replaceable bits and Wheeler Engineering set but the Grace drivers are tops.

Broke a thin blade driver on a rusty screw and sent an e-mail to Grace asking where to buy a new one on Friday after 5. Dan replied at 1230am and in Tuesday's mail came a new one free of charge. That's service!
 
swathdiver said:
girth said:
I will have to pick up a proper set of screwdrivers I think,

I recommend Grace USA, the HG-3 Colt Peacemaker set. It will do Pietta and Uberti Colts and Remingtons, ASMs and even Palmetto NMPs.

Thanks for the tip on the screw drivers. Looks like they'll do the job and cheaper than other sets I was looking at.


Mike D. THANK YOU, for the lengthy and informative posts! After reading that I went and broke it down again and take a closer look at the bolt and window. Upon closer examination...I have noticed some other issues. :cursing:

So, the bolt drops a bit early and is certainly NOT polished as evidenced by the gouges in the cylinder. Pulled the cylinder back off and it appears the bolt is ALSO "lifting" late. The leading edge of the bolt has a bevel worn on it, and the "back" sides of the cylinder notches are peened a bit. Didn't notice that before.

Got to looking closer at the bolt window. Without grabbing my feeler gauges, it appears there is less than 0.010 gap around the bolt in the window. Fits fairly tight and I dont feel much, if any, lateral play. The window cutout might be a little rough, and it looks like its actually the bolt binding (only with the cyl. removed) thats causing it to get stuck in the up position. Probably not an issue since it doesnt do it with the cylinder installed.

Now for the next question.... how much play is OK in the "arbor" or cylinder pin as the Pietta parts breakdown calls it? I just noticed mine has a slight wobble. Not much, but I can wiggle it a bit. Probably didnt help that someone was shooting it with the locating pins sheared off. :shocked2:

I figure I will pick up a new hand, and bolt and see what I can do. Thanks for the screw peening description too. Im sure I can save all but one of the screws that way. The fwd screw on the trigger guard is truly knackered. Someone was determined. Not only is it tight but not seated, they stripped half the metal off the head.

Im feeling Im certainly in over my head :rotf: but also determined. I want to see this pistol function like it should. Someone recommended David Chicoines Gunsmithing guns of the old west book. Not cheap, but supposedly a good reference. Im sure when it comes to getting the timing right, I'll need a good reference.
 
One of the things I love about this hobby/sport is that there is so much to learn - and I am always learning.

Thank you so much for the post.
 
Back
Top