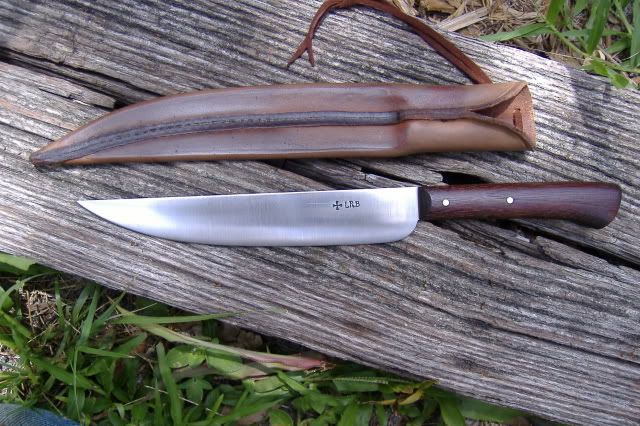
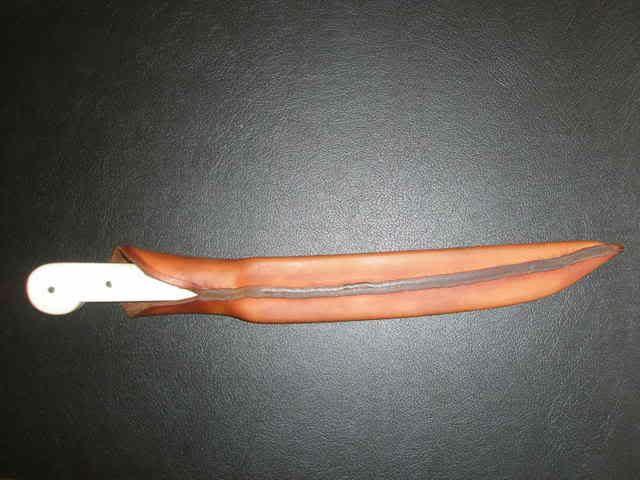
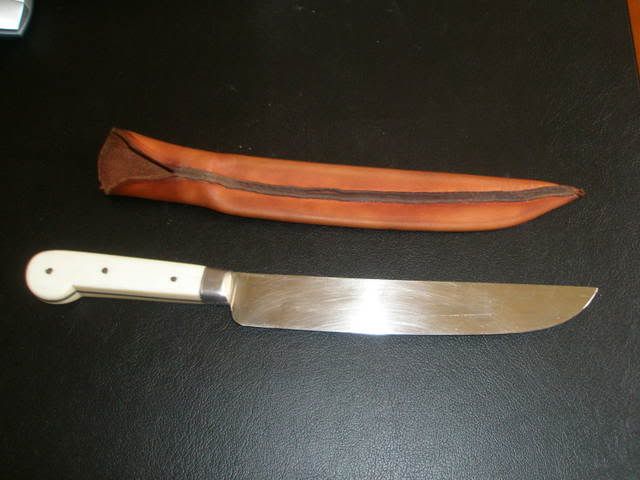
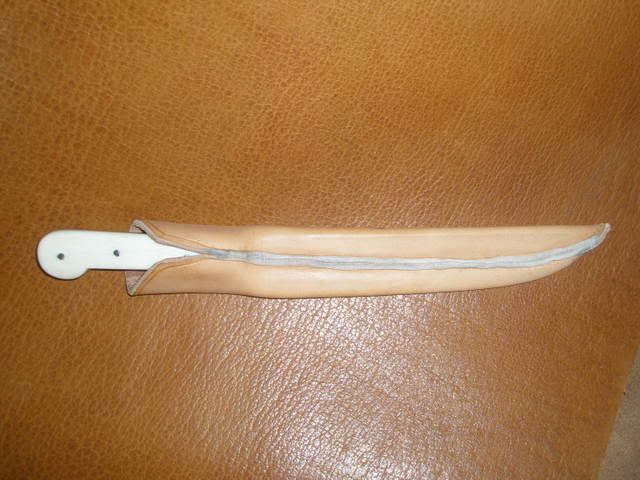
center seam sheath

Muzzleloading Forum

Help Support Muzzleloading Forum:

This site may earn a commission from merchant affiliate links, including eBay, Amazon, and others.

Goldhunter

54 Cal.
Joined
Mar 27, 2006
Messages
1,596
Reaction score
6
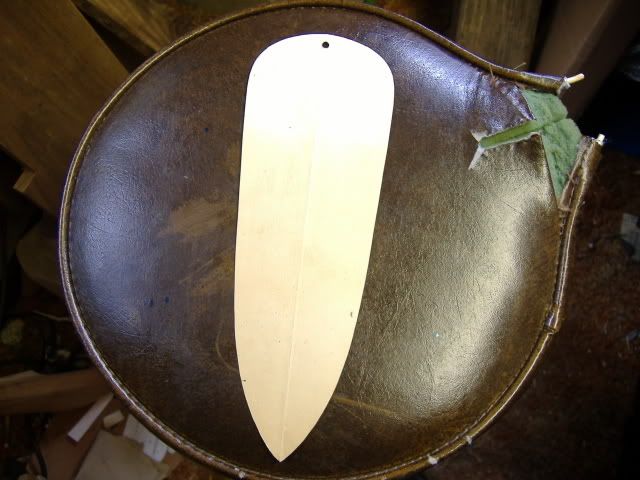
I've looked and can't find anything (my search foo isn't very strong today I guess), so here is the question. When making a center seam style knife sheath, do you cut the leather and stitch with the seam along the blade's edge, then wet and role? Or is there another way I'm missing? It would seem that stitching along the edge and then roling center would create a bump in the seam because of the original curve, which you are now making straight (does that make sense? :hmm: :shake: )

Anyway, any help would be greatly appreciated. :thumbsup:
 
You can do it that way, or sew up the middle. Buddy o' mine showed me how to wrap the blade in blue painter's tape so you can sew the leather tight and still have a loose sheath. Also you don't accidentally cut the leather while sewing it tight.

Use a mallet to flatten it all out once you take the knife out. BTW be sure to sew the belt loop on FIRST. Learned that one PDQ. :redface:

:haha:
 
Cut your pattern as you would a side seam. You want about 1/8" extra leather than the blade size when it is cut out. Just a small tad more won't hurt. Sew it up with close stitching about 1/8" in from the edge. A wide stitch count will allow the seam to snake on you. Once sewn, trim the excess past your stitching to about 1/16". Wet the sheath with rubbing alcohol. Cover your blade with duct tape or a similar protective coated tape, then roll the sheath center, beat hell out of the seam with a hammer, then insert the blade. center the seam. You need two smooth surfaced strong thick plates to act as press faces over the blade portion of the sheath. Mine are 3/4" maple, with Micarta on top. It makes a neater looking job if the plates are rounded where the blade meets the grip. Put the sheath with the knife in it, between the plates, and then into a vise and tighten. Remove it immediately to make sure the seam stayed center. If so, put it all back in the vise, crank it down tight, let dry overnight. It helps to tightly C clamp the point end of the plates. My method does not allow a belt loop to be on when the sheath is pressed. They get squished flat, wide, and very misshapen.
pennyknife009_640x480.jpg
 
Wick: Neat idea on the thong with the holes spaced apart. I did a center seam a bit different, I cut the sheath as if it was going to have the seam on the edge but stitch it up in place. You need to protect the sheath from rusting- due to the wet leather and if you wrap the sheath in plastic and then try to roll the leather- can't be done very easily.
I leave the stitching loose as I stitch- the idea to to just get all the stitches in their holes. I then slowly start at the bottom and pull everything up tight, keeping the seam straight.
The leather is going to shrink on the blade such that you won't be able to remove it after the leather dries unless you take proper measures. I place some thin plastic sheets on both sides of the blade and then a plastic bag. I use an entire bag because if you wrap in bands, etc some may get stuck in the bottom of the sheath.
When the leather is dry pull out the plastic sheets to loosen things enough to pull out the blade.
If you screw up (can't pull the blade out or part of the plastic tears and gets stuck inside) cut out the stitches but leave the leather dry, you can re-stitch without too much trouble.
I have never wetted the leather with alcohol. Wick, does that work without rusting the blade?
 
Nice job Wick, and nice blade too! I'm going to have to try making myself a centerseam sheath...:)
 
Something I forgot. Before sewing, It helps to skive the underside from the edge in for about 1/2", about half the leather thickness at the edge, then blending out as it the skive goes toward the middle. I glue mine together first with contact cement. That holds the sheath together while you sew. This type sheath is best done with 6, to 7 oz vegetan. I used to wax over the duct tape on the blade. The last sheath I made, I forgot the wax. The blade came out of the sheath next morning easier than ever. So, I can't recommend which is best, until I do another later this week. I am thinking that the duct tape doesn't bond with the natural hide glue in the leather which is released by the alcohol, or acetone I often use. but somehow if it mixes with the wax, it tries to. I use aluminum bladed dummy knives to do my fitting, but on custom orders, I use the actual knife. It is also wise to put a narrow spacer in under the grip section while the sheath dries, shaped to allow blade clearance without cutting when the knife is sheathed. Just a slender piece of wood wide enough to give clearance.
 
Wick: Would it help if the belt loop was sewn loosely on the back of the sheath, and then removed before the center seam is done as you describe?

I like a sheath that covers all about 1/8 of both the blade AND handle, as the friction around the handle helps to keep the knife in the sheath, even when doing somersaults !( as in an unplanned tumble down a hill!)

One sheath I saw years ago, had a keeper strap for a double guard, that went through part of the " welt " for the center seam stitching. A tab stuck out from the stitched line, and had a 1/8" hole punch thru it, with a slit at a downward angle through the edge of the tab. The tab consisted of an extension of both sides of the seam, so it was plenty wide, and stiff. I don't remember now where the other end of the keeper was attached, as I don't think the knife and sheath were ever taken out of the case to show us. However, it was a thong, with a knot on the bottom end, and could easily be slipped into the hole in the tab, and then pulled tight, The thong was twice as wide as the hole, so the friction was quite good to hold the heavy bowie knife in the sheath, even upside down.

I was impressed with the ingenuity of the knife maker in solving the problem of keeping the big knife in the sheath( without using modern snaps, or buttons), and it was the first center seam sheath I had ever seen.
 
Paul, the problem would lie in the resewing. It would be very difficult. For those that demand a belt loop on them, I will sew it on, and let it get squished out of shape. I tell the customer it will look like crap, but will work. The best way to go is to add the loop afterwards, with four holes, and two heavy tread loops tied together on each end. That has the look that it was added by the owner at a later time, just because. The ones I normally make are designed to slip into a belt, or sash, then are secured with a thong that is supplied with the sheath. The upper end could easily be sewn, but the bottom would require a very short curved needle, and a lot of determination. For what I charge for these sheaths, time would be a formidable enemy. I suppose the bottom end could be copper riveted though. Thanks for your post, it made me think. I never before considered a rivet. That is just too easy!! It would work! :doh: Long tined needle nose plyers could get the rivet in place, then a piece of steel bar slipped in over it, hammer it down on an anvil with a piece of heavy paper to protect the off side. Very good Paul, I thankyou. :hatsoff:
 
Wick? Did I say the word, Rivet???? :shocked2: :rotf: :thumbsup: Any time I can help you out like this, just let me know!! :rotf: :rotf: :rotf: :hatsoff:

Actually, I was thinking of sewing the lower end onto the sheath, before forming and sewing closed the seam. I was thinking about just leaving the stitching thread hang loose during the forming and sewing of the centerseam. Then, the upper end of the loop could be sewn to the top end of the sheath, with that V-cut you have artistically made in your seam allowing a need to get into the sheath to feed the thread through pre-cut( leather punch, awl, etc.) holes.

Actually for a blade that is 6 inches and longer, I like a sheath that can be worn across the width of the back, with the belt holding the sheath to the body, and a long " drop loop" attached near the bottom of the sheath, and a " keeper " loop attached near the top of the sheath, both attached to the belt. That helps the knife stay in position, for a very easy and quick draw to the side. Depending on how long the blade is, and how wide a person is, the knife can be well concealed behind the back, rides in the small of the back so it doesn't pose a hazard or a pain when sitting, yet can be reached with a subtle movement to scratch a kidney, or stuff a shirt tail into your pants. My sheath is designed so that the edge of the blade is UP in this form of carry. Shorter knives are carried in a vertical position and the blade goes into the pocket of my jeans, to keep it from catching on things, or being seen very well. Most of my working knives have blades less than 4 inches long.
 
Paul, the whole problem involved doing just what you said. If the bottom is sewn, loose, or not, the loop gets pressed with the sheath. How would you not press the loop, without having to sew afterwards? Look at the photo and picture the loop connection about halfway down the blade shaft. How could that be sewn after being pressed to shape? You didn't mention rivet, but in thinking about the situation, the idea came to me. If I'm overlooking something obvious, let me know. OK!!!! I think I just figured out what you mean. That absolutely will not work. If the front is not sewed down tight, the seam will not end up flat, and neat, and the pressing will leave the imprints of the thread to the sides of the seam, and the seam would spread out to a very unsightly gap, that could not be closed in any sort of a neat manner.
 
Thanks, I'll give it a try. I only have some 5 oz right now. I'll try it with that first. :hatsoff:
 
Ok, first impressions. Fairly easy to make, but I need to tweek how I do it.
P7090001.jpg


I need to make the upper part a little bigger than I think because when I went to insert the wedge under the handle, I couldn't get it in all the way. So, you can see the narrow part in the sheath where the blade will cut the leather as it is drawn in and out.
P7090003.jpg


With the blade covered in duct tape, it slide out easily. The alcohol soaked leather didn't grab onto it at all. But I think I'll redo it, make the top a little bigger to account for the wedge, and try to use heavier leather.

Wick, thanks for the help. :hatsoff:
 
OK, tried it again, with wider top. Much better results. Now I just have to finish it with something.
P7140014.jpg
 
All I normally do is give them one good soaking with oil, and let them drain, and dry. That usually gives them a rich mahogany color, but I have had leather that stayed lighter than I prefered. If you want it really dark you might need to stain it.
 
Most often, I use mineral oil. It is cheap, and as far as I know does not harm leather, but olive oil should work great unless it would attract bugs. That was always my fear, due to earlier experiences with other vegetable oils. Around 1983, or 84, I aquired an OM Ruger .45LC. I found an old Bucheimer holster someone left in my shop years before. It was a little dry and stiff, and had seen some use, but it fit the gun perfectly. I had nothing on hand but some 30w motor oil. I gave it a soak and am still using that holster. It is in fine condition. I cannot recommend motor oil, but the bugs don't eat it, and the leather stays strong and pliable. Motor oil is supposedly a no-no for leather, but it sure worked good on that holster. Chuck Burrows can tell us what's wrong with using it, cause I am not sure. That holster is likely 30, to 35 years old, cause it was old enough when I got it that the linen thread had totally rotted.
 

Latest posts

Back
Top