• Friends, our 2nd Amendment rights are always under attack and the NRA has been a constant for decades in helping fight that fight.

    We have partnered with the NRA to offer you a discount on membership and Muzzleloading Forum gets a small percentage too of each membership, so you are supporting both the NRA and us.

    Use this link to sign up please; https://membership.nra.org/recruiters/join/XR045103

Color Case Hardening

Muzzleloading Forum

Help Support Muzzleloading Forum:

This site may earn a commission from merchant affiliate links, including eBay, Amazon, and others.

gmww

70 Cal.
Joined
Sep 4, 2004
Messages
4,693
Reaction score
4
Anyone color case harden anything using simple tools? I'm toying with the idea of doing this with the underhammer receiver. It's approximatley 5.25" long (well sort of bent) and 1.25" round. I'm looking at using the product Kasonite and a propain torch since that's was available to me (cheaply).

Also will it cover up the very fine machine marks or do I have to get this polished to mirror?
 
Case hardening will not cover up anything. If there is a mark there before hardening, it will be there after.

A propane torch is nowhere near sufficient heat (frankly, when people tell me they can do this with a propane torch, I think they're lying... ::) Using Kasenit and an oxy-acetylene torch is a good way to case harden small parts up to about the size of a lockplate. Anything larger, and it just really won't work. The part is just too large to heat evenly and keep it at heat evenly. There are people who do case harden rifle receivers, but they have to have a fairly substantial operation. Forges and/or ovens. They case harden things like Mauser rifle receivers which are all made of mild steel and were case hardened to begin with.
 
Thanks for the reply. I heard you can use propane on small items but it did not say what a small item would be. Apparently my items is too large. I guess I'll be going back to the drawing board and do the plumb brown instead.
 
I think you asked about "Color" case hardening? I am no expert on the process .. but ... that is not the same as standard "case hardening", and Kasenit cannot do the color aspect of it! Two different ani-mules! :eek:

Also from what I understand .. there is a significant possibility of warpage on a larger piece such as a reciever without certain precautions .. ruining the part in the process!

Davy
 
I use Turbull restorations for my case color hardening. They do excellent work for reasonable prices.
POKE HERE FOR THE TURNBULL LINK
borders7.jpg

borders3.jpg

silvey3.jpg

silvey7.jpg

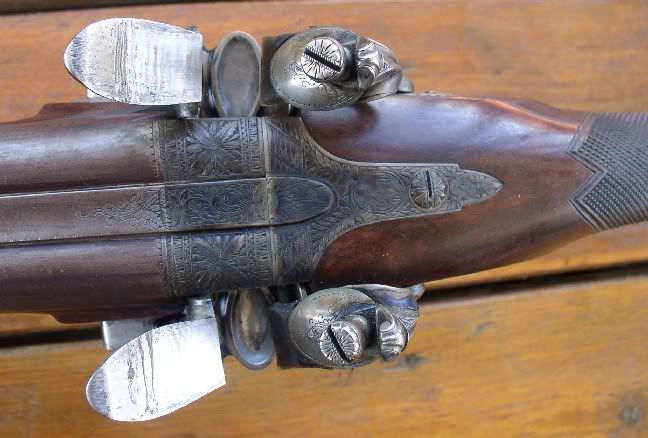
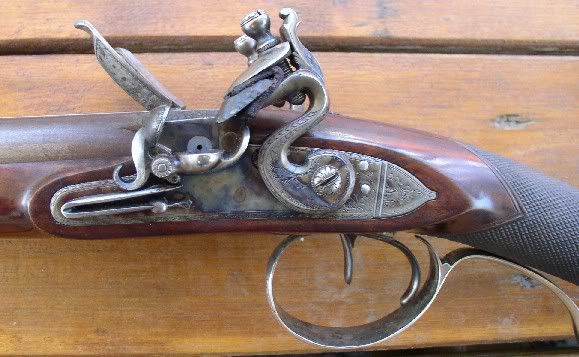
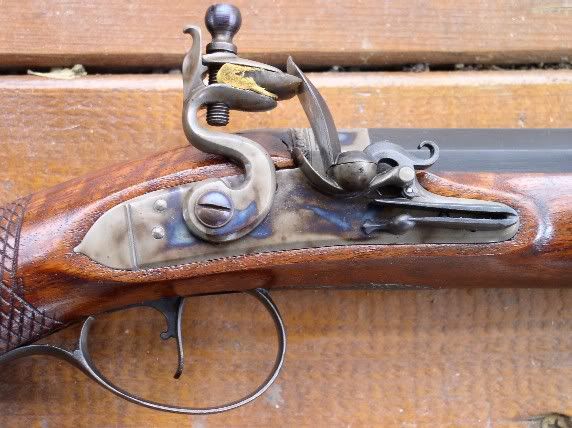
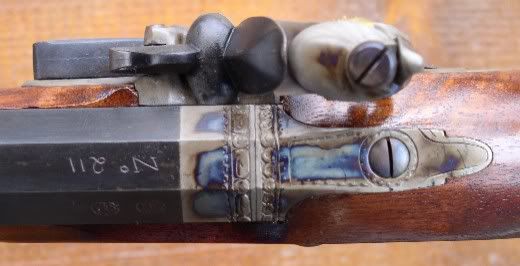
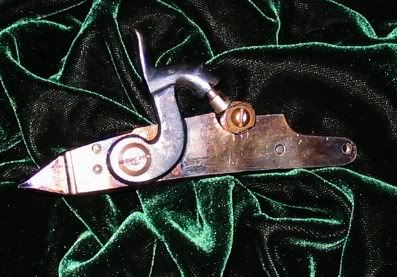
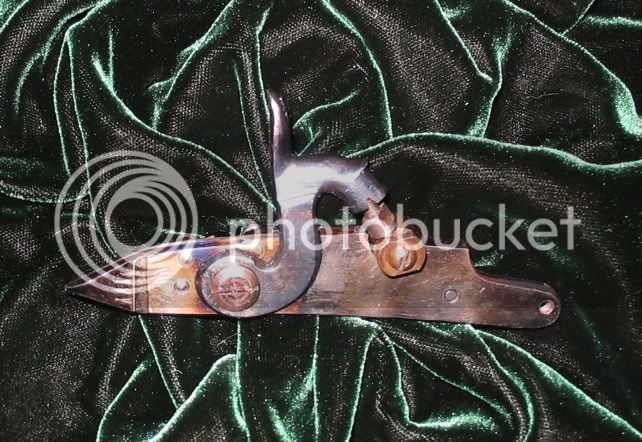
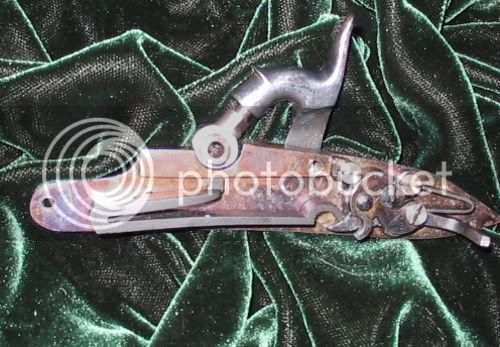
Here's some of the color case hardening they did for me, I'm pleased with the results. :thumbsup:
 
Very beautiful piece. :thumbsup: I checked them out and sent an email for a quote. Do you know if they polish it or is that extra?

GMWW
 
Color case hardening is a fairly complex process envolving packing the object in a box with ground bones and/or leather scraps and heating it to very high temperatures. Then quenching it. In my opnion, it is beyond the range of things a home gunsmith can do (although others may say they have done it).

Creating colors on steel to make it look like it was color case hardened on the other hand, is fairly easy.
case001.jpg


I did this to this lock plate using a very small propane torch. This torch is the kind with a hose that screws onto the Propane bottle and it is intended to do things like solder small parts, etc. The reason for using a very small torch is you will want to keep the heat localized to only one small area.
If you can't get a pencil torch, you could try using 2 pieces of steel or aluminum to "mask" the adjacent surface, leaving a gap of about 1/4 to 3/8 inch between the masks. This would protect these areas from the large flame from a standard torch, but they would keep you from seeing what's happening there until you removed them. Who knows, the suprise might be just what your after.

The idea is based on the fact that steel will turn different colors as it is heated. (These colors are important to those who are Tempering hardened steel but for this decorative purpose tempering has nothing to do with it. We just want to heat the steel to change its color.
The colors will form in this order, at these temperatures:
430 degrees F Yellow, 500 degrees F Brown, 540 degrees F Purple, 570 degrees F Blue.
case003.jpg


Before doing this, I removed all of the parts from the lockplate and polished it. Then, I applied the heat to a small area, using a bright light to look for the color to develop. As soon as it got to the Brown/Purple stage, I quenched the part in oil.
After cleaning the oil off of the plate, I repeated the process in another area.

If you overheat the area, it will turn gray. Once this has happened, no amount of heat will turn it back, but if you sand off the gray finish and start over, the colors will return.

case004.jpg

As you can see, the heat colors the inside of the lockplate as well as the outside. If you don't want the inside colored, you can sand the color off.

This Coloring is not very durable but if it is not subject to much abrasion, and it is kept oiled, it will last for years.
 
Very nice. Why did you go with oil quenching vs. water? The few articles I've found talk about water quenching.

I'd like to get my receiver to look like this Zepher that Jimbo posted.

zeph3.jpg
 
You will find usefull info in the last two Machinist's bedside readers of Lautard. Also seeweb page (wish i had the second part of this article) and web page 2.

Recievers like those of falling block rifles need to be carefully supported so the sides doesn't cave in slightly. this is called shoring. This is covered somewhat by De Haas in his book Mr Singleshot's gunsmithing idea book.

If you get the temperature to high you will get the hardening without the colours.
 
Mike did you do the engraving on that double? Beautiful, fine work, I don't have the patience to learn that.
 
I usually do all of my own engraving. But, this double was engraved by John Schippers of Fishers Indiana. Pretty spectacular job ain't it?
the best part is , the owner has won top gun on several occasions at the nationals at Friendship with it. It may be fancy, but it gets a good work out every year.
 
"Kasenit cannot do the color aspect.." wanna bet?....

IM000078.jpg


I have NEVER had difficulty getting nice colors using Kasenit.
 
The parts were simply heated with an oxy-acetylene torch, covered in Kasenit, held at heat for several minutes, and quenched in warm, rather dirty water. Very simple. Even I can do it! :p Yet another:
IM000219.jpg


A washed-out color case hardening look can be created using cold blueing like Oxpho blue from Brownell's. Just splotch it on...it makes the colors on it's own. Mess around with it with some steel wool until you get it the way you want it. Like I said, it will do a "washed out" look...the way real case hardening will look after a while of handling. You have to scrub it out a bit, because just putting the blueing on makes the color splotches too sharp and it doesn't look right. I used to do this on old single shot shotgun receivers that had no color left on them.
 
Hats off to ya Mr Dutchmins .. I have allus heard it was for hardening only .. not "color case" as I have little or no experience with it, only what I read ... ya learn everday! What is the difference? Heat control?

Thanx for clearin that up!

Davy
 
Hardening like this is one of the FEW things I have been able to do with little difficulty...EVERYTHING else I do is a fight, fight, fight. :curse:

Just to note, the **** on the 1800-1820 lock is case hardened, while the **** on the early English lock is not. The pan on the 1800 lock is not case hardened, but simply heat-colored as described above. (I COULD have case hardened it, but didn't feel like it...)

Smaller parts sometimes don't color that well, though there will always be SOME color. Triggers I make from mild steel sometimes color well, sometimes not, but they're always rock hard! (well, you can see some color on the trigger above..) On the other hand, bridles that I make from the same mild steel ALWAYS give me really nice colors... Don't ask me why. I figger if I start fiddlin' with the way I do stuff, I'll screw everything up and not be able to do it again!!!
 
Hardening like this is one of the FEW things I have been able to do with little difficulty...EVERYTHING else I do is a fight, fight, fight. :curse:

Just to note, the **** on the 1800-1820 lock is case hardened, while the **** on the early English lock is not. The pan on the 1800 lock is not case hardened, but simply heat-colored as described above. (I COULD have case hardened it, but didn't feel like it...)

Smaller parts sometimes don't color that well, though there will always be SOME color. Triggers I make from mild steel sometimes color well, sometimes not, but they're always rock hard! On the other hand, bridles that I make from the same mild steel ALWAYS give me really nice colors... Don't ask me why. I figger if I start fiddlin' with the way I do stuff, I'll screw everything up and not be able to do it again!!!

Well I know I feel much better ... since I gave up hope! ::

We just do the best we can I guess! Thanx for the info amigo! ::

Davy
 
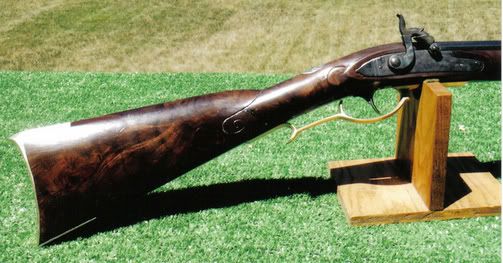
Zonie- very nice colors. Thanks for the how-to. A friend colored my lock with an acetylene torch. He would heat a small spot until it colored, jerk the heat off and let the plate cool some, or go to a different spot. I then cold-blued the whole lock with Brownell's OxyphoBlue. This rifle is my copy of a Joel Ferree.
waferree.jpg
 
Ditto on that Chris.

I was hardening a rather large tool once with Kasinit, did not use the Keeperyt (anti-oxidation compound) pre treatment and the tool turned out with a very pleasing case hardened effect. Not sure if it was how I played the oxy-acetylene flame while heating, or what, but the result was good.

Never thought of trying it on gun parts, but your work shows Kasenit does it very well indeed.
 

Latest posts

Back
Top