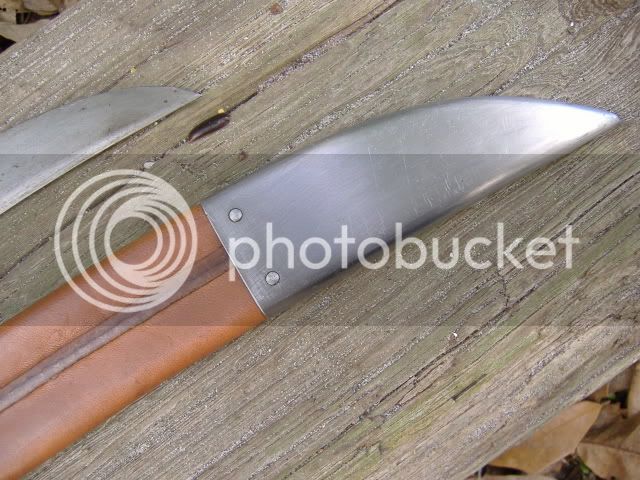
First Sword Scabbard

Muzzleloading Forum

Help Support Muzzleloading Forum:

This site may earn a commission from merchant affiliate links, including eBay, Amazon, and others.

LRB

75 Cal.
MLF Supporter
Joined
Aug 25, 2003
Messages
6,535
Reaction score
1,512
My first attempt at a sword scabbard. A bit of a challenge, but after three trys on the leather, it all worked out. All steel fittings. The tip is three pieces silver brazed together. Two halves and a bottom plug. The throat is also three pieces. The main body with a brazed seam in back, and 650° silver soldered top plate. The frog hook was made from a bar of 3/8" steel, sawed and filed to shape, then pinned and brazed to the throat. The sword was made by Jared Secrest under the guidance of Kyle Willyard, light in weight, and wonderfully balanced.
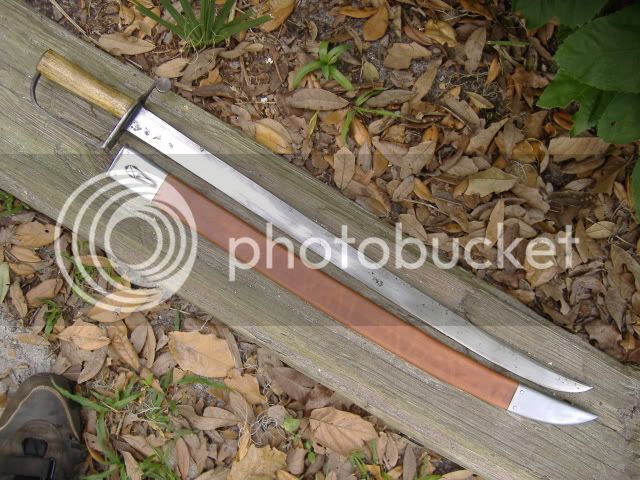
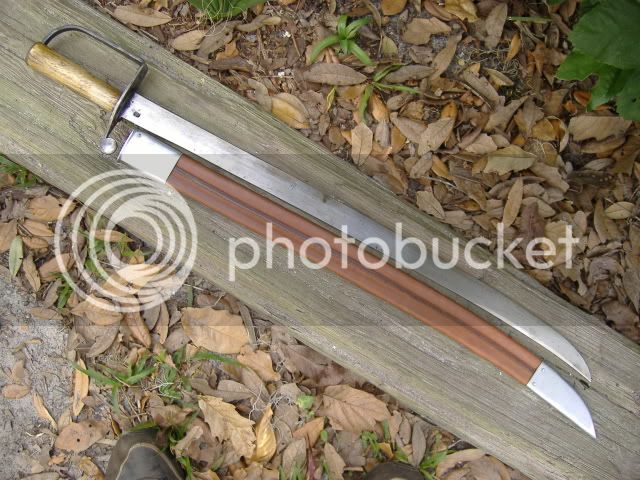
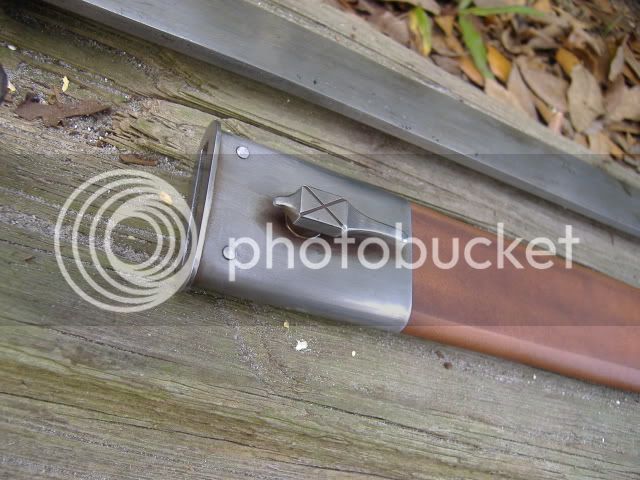
Picture182.jpg


Picture183.jpg


Picture186.jpg


Picture189.jpg
 
Very nice Wick your metal fittings are great of course your leather work is also :bow:
Always a joy to see your work
 
Man that is awesome work Wick! :bow: Just about the time I think I have seen it all out of you, you pull another one out that is even better than before! :hatsoff: :thumbsup:
 
I used 9oz shoulder. Before it completely dried, I very carefully used a heat gun to harden it a little. I was pretty conservative with the heat, and keep a constant check on it by feel. It is easy to go too far, and too fast with a heat gun. The surface heats much faster than the inside, and can wrinkle while the inside is not yet hot enough to harden, but I did not want to try it in my oven. I think next time I will put it in the oven though. Much easier to do.
 
Wick:

I have had very good luck with molding heavy leathers by soaking them in VERY hot water and then molding.

They come out harder than leather molded with cold liquids, with no heat distortion.

The hot liquid also offers a longer working time.

What prompted you to use 9oz. vs. 6-7 oz? I would imagine pressing the seam must have been challenging.

How did you pin the metal throat and chape? Iron pins peened using a hard inner surface inside the sheath?
 
You can bake it from 130° to 150°. I did a sheath at 175°with no problems. Any higher and the leather can be damaged. You bake until it is dry. This can checked by inserted the blade for a few seconds, and then checking for water droplets on the steel.GBLACKSMITH, I believe the way I do centerseams the leather would cool before it was set to be formed, so would be of no advantage. I hammer the seams to get them started, then it takes time to set the leather in a press, while getting the seam straight. I will try what you say though, but the leather would still need a heat treatment to harden as it should. The pins are not riveted. I carefully barbed them, and hammered them into an undersized hole with a tiny dab of epoxy.
 
Wick

In my curiosity about your technique, I forgot to compliment you on a BEAUTIFUL scabbard. Appeared to be flawless work.

The sword is nice...I'm guessing that the balance point is near the D-guard, based on the blade width distribution. I'm guessing it would have good tip speed.

Anyway, i have had very good luck with very hot water, near boiling, frankly. This was how "Cuir Boullie" (Fr. "boiled leather)armor was done. I think the collagen in the skin is partially denatured by the hot water, same as baking w/o the drying. Also seen in California, worn by Mexican "Soldados de Cuero" into the mid-19th century.

I have seen replica shields and curaisses of this armor. Secret is to not over expose the leather to heat of any type. The more the collagen is denatured, the harder the dried product will be.
 

Latest posts

Back
Top