Folk Art Flavored Flintlock Build

Muzzleloading Forum

Help Support Muzzleloading Forum:

This site may earn a commission from merchant affiliate links, including eBay, Amazon, and others.
Not only do your carving and inlay look great, but I really appreciate the pics & description of your methods.

Taking the edge off that "where do I begin??" feeling inspires me to embellish a little on my projects. Thanks!
Ifs so good to know that posting here is helping inspire others in creating and building. Makes it even more rewarding 😊
 
A couple of small silver hearts or birds inlayed into the cheekpiece carving would help 'fill out' the area and add depth, as would a touch of silver wire vine inlay... Great Idea and carving, Geo.
I want to keep it rather simple without much in the way of embellishments, though on another piece your ideas could work nicely- Thanks!
 
Ramrod Channel Molding
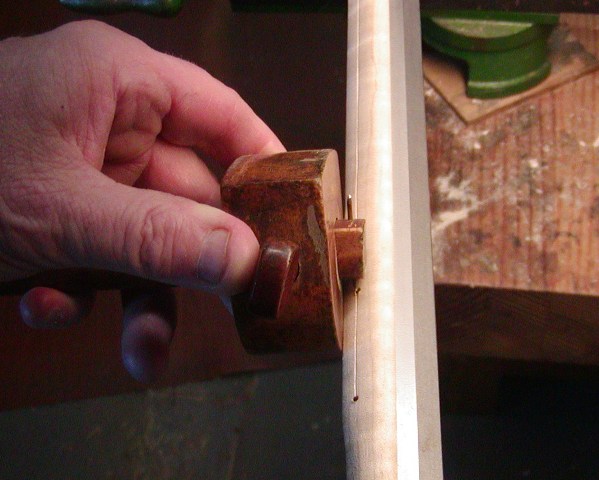
I have wanted to do an accent line in the fore stock (I apologize that I don't know the actual name for that feature) on a Kibler Colonial rifle. I can manage carving a line in the lower butt stock pretty well, but the fore stock is too long for me to want to try and do free-hand. So, I decided to try something and made a simple, crude scribe, using a couple of blocks of wood and a nail.
Once I made it, I held the block flat against the top of the barrel channel walls and gently drew it down the length of the wood several times, leaving an inch or so early before the ends. I plan to do the ends free-hand with a knife.
The lines came out nice and straight. I didn't need to go too deep, because with the cut groves I am able to use various small files to work on the lines to give them some definition.
The thing that scared me in doing this is the thinness of the stock. I would feel more comfortable if there was more meat to take away, which is kind-of a buffer for when I make a mistake. Here, it's pretty close already to the finished thickness so I just had to be careful, and see what I could manage.
When the Ramrod pipes are in and the barrel pinned, I will go over it again with some bits of sandpaper to clean it up. It's just one way to approach this job- I would be interested in how others do it!
(p.s.: I had my work on the hard table surface -not the towel- when I did it so the scribe slid along easily. The pic below shows the line after I dressed it with some files)
 

Attachments

  • 7 f.jpg
    7 f.jpg
    189.9 KB
Last edited:
That’s what I want to be able to do some day. What method do you use to get the molding line straight?
If, I remember correctly (big if) @dave_person uses a similar jig. He has detailed how he does ramrod channel molding in one of his topics.
He has a great full build tutorial on the ALR site and might have covered it there. But, I can't remember his handle over there.
 
If, I remember correctly (big if) @dave_person uses a similar jig. He has detailed how he does ramrod channel molding in one of his topics.
He has a great full build tutorial on the ALR site and might have covered it there. But, I can't remember his handle over there.
Smart Dog is Dave at the ALF. I will ask him for the thread title. Always best to learn from the best.
 
Hi,
So I am working on the gun and thinking, "I am on vacation", only having to do what I want, like carving. Kibler & Co. took care of the grunt work. Then I get to the patch box lid and the brass end cap. The kit supplied a piece of sheet brass! What!! I have to make it? Are you kidding Mister Kibler cookie man? I was beginning to pretend I was a Millennial here, ya know! Now you expect me to actually make something? "Sheeesh!" as Jean Shepard used to say, :rolleyes:

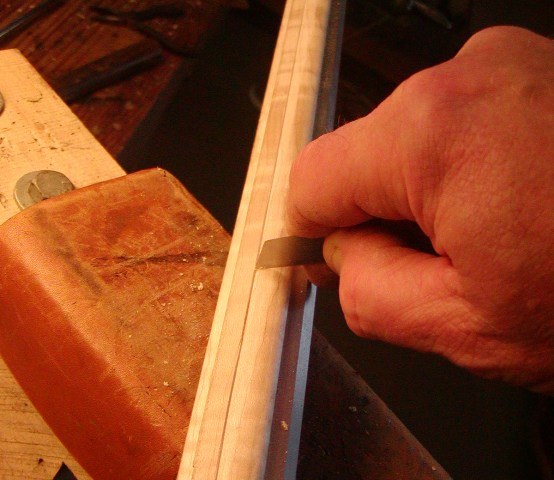
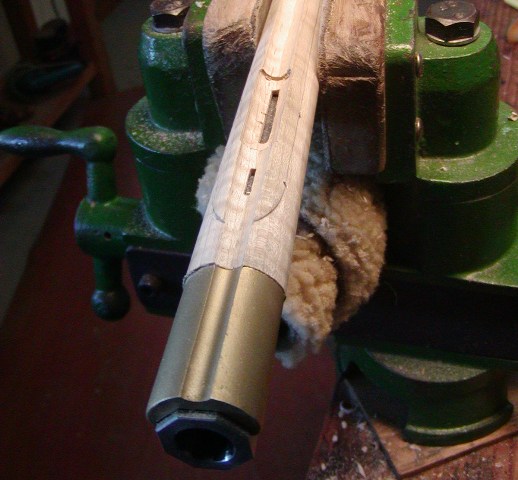
Well I stirred myself from my fiercely defended lethargy and got some work done today. I started adding details to the stock. The fore stock needs little finishing other than sanding so I cut the fore stock moldings along the ramrod channel. With Kibler's machined stock, this was easy! Some folks use jigs to do this but I am much more low tech. I use an old marking gauge that was my great, great, grandfather's and mark the distance from the edge of the ramrod channel to the thimble pin holes. I want the edge of the molding to be lined up with those holes. Then I use the gauge to incise a deep line marking the edge of the molding.
lPKNTfe.jpg

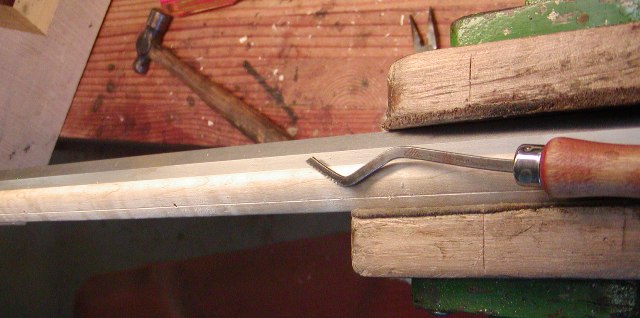
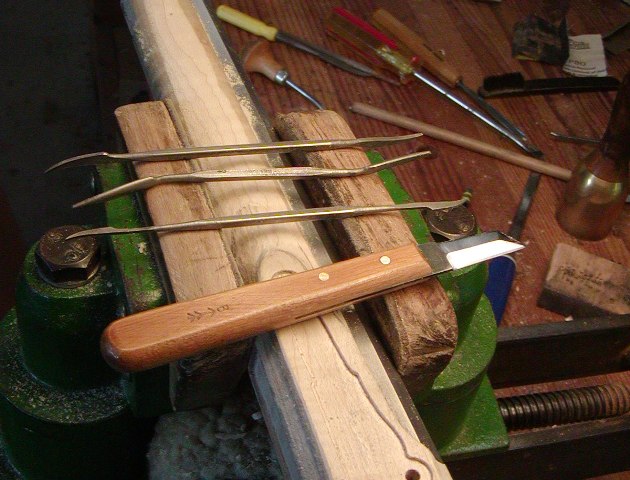
I cut that line using an English checkering tool with long axis.
MSbrhrZ.jpg

Then I deepen the cut with a 60 degree Gunline checkering tool.
M2UH5zT.jpg

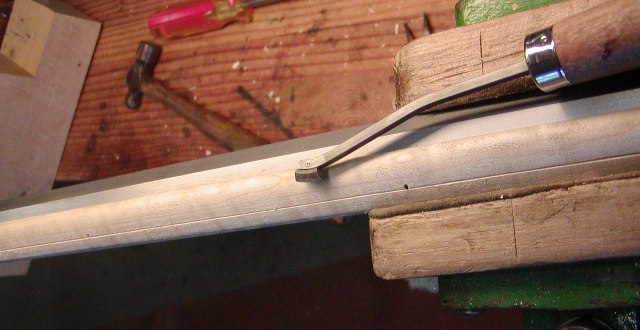
Next, I peel away the background to form a raised edge to the molding using a scary sharp dog leg chisel.
GP8IY5X.jpg

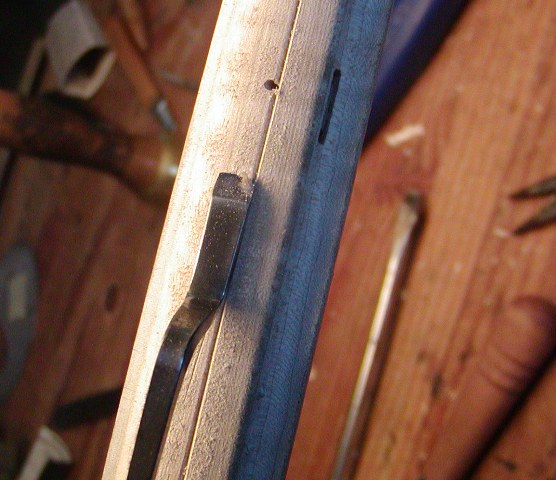
I clean up the edge and level the ground using a bottoming file.
WQKuJPA.jpg

Then I scrape off the tool marks with a 3-edged chip carving knife.
i9wfEax.jpg

I used those tools to shape the terminus of the molding at the muzzle end.
0mBpGwW.jpg


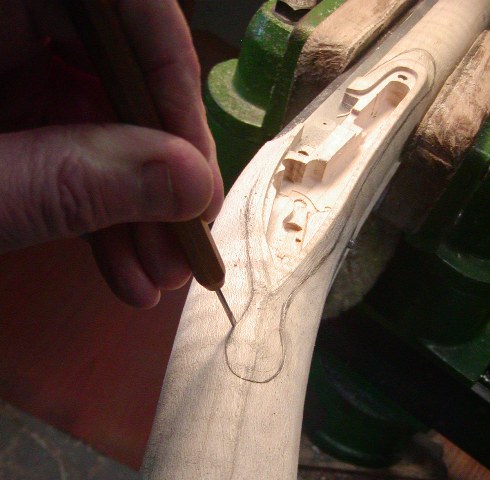
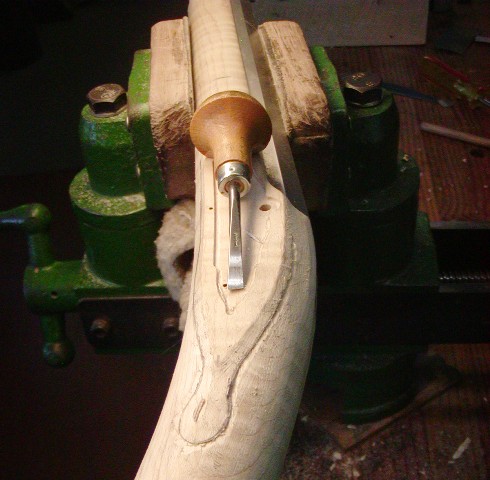
Next I cut the lock and side plate panel moldings. But first, I scraped and sanded the contours of the lock area to clean up the shape and machine marks. For those of you intending to make a gun from a rough stock, the level of shaping and smoothing exhibited by a Kibler kit is the point of shaping at which you should even consider starting to cut any moldings. I sketch the design on the stock. In this case I decided the "apron and beaver tail" should be long to match the long, narrow shape of the lock and side plate. I also made the tail and apron large because the wrist of the gun is large. I've seen some photos of Kibler Colonial rifle kits with thin, tiny beaver tails that are so obscure they remind me of "Where's Waldo" given the thick wrist of the Kibler rifle.

I draw the design, and then use my stabbing in chisel to outline it.
iDvqIX4.jpg

Then I back cut the edge with a small flat skew palm chisel.
tGkNADy.jpg

Now I want everyone to understand that my choice of tools is affected by my disability in my hands. I suffered severe frostbite several times during my mountain rescue days and have neurologic damage in my fingers. I rely on palm and micro chisels where others use full length tools just as well. My hands are extremely strong allowing me to use palm chisels effectively but they may not work on hard maple as well for others.
I clean up the cuts with a variety of tools including my chip carving knife and riffler files.
hkjJF7f.jpg

Here is where I am. I'll clean up the molding later as I finish the gun.
wWJUzph.jpg


dave
 
To get lines straight (either incised or raised) use a tool with a long bearing radius, and takes small amounts of wood at a time. Something like a file works really well. That won't dig in to the soft parts of the wood, while skipping over the harder parts leaving you with a washboard or wavy line.

For smoothing out the irregularities in your incises or concave cuts try really small gouges and keep themsupeu sharp. When you get close then you can use sandpaper. I've used sandpaper wrapped around a spoon in the past and the varying contours of it seem to work on most inside radius curves. The key is to be patient and go slow.

Then, take some digital pictures of your work and blow them up on your computer. It'll be amazing to you how many flaws you find when you view it at 10x normal size. If you wet it first with water that will show off scratches too.

Just remember to be your own worst critic.
 
Back
Top