Hunting bag flap edge treatment

Muzzleloading Forum

Help Support Muzzleloading Forum:

This site may earn a commission from merchant affiliate links, including eBay, Amazon, and others.

phoenix511

40 Cal.
Joined
Jul 28, 2008
Messages
380
Reaction score
1
I see some hunting bags with the flap and sometimes the top of the inside pocket having the raw edge covered by what looks like rolling the edge and stitching it down, and some with an added flat piece, like a leather tape, stitched over the raw edge.

If you roll the edge, how do you form it and how do you keep it from puckering up around the curve?

If you add a flat piece of leather tape, what kind/weight of leather would you use?
 
Wet Willie said:
If you add a flat piece of leather tape, what kind/weight of leather would you use?

Not sure about the other method you're describing, but for taped edges, I cut the leather from the same hide the bag came from unless I want a contrasting color (almost never). Taking it from the same hide sure makes dying easier.
 
The leather edging you are mentioning is very thin leather rolled in a "C" with the edges tucked in (or not). It won't pucker because it is thin (or darts "V" are cut out inside the curves.

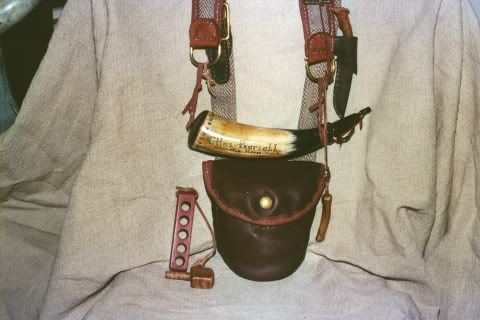
Here's a moose leather bag with a deerskin edging. Edges exposed. To keep it from puckering some put a "tack" of a loop of thread every few inches before stitching it together.
PouchandHorn2.jpg


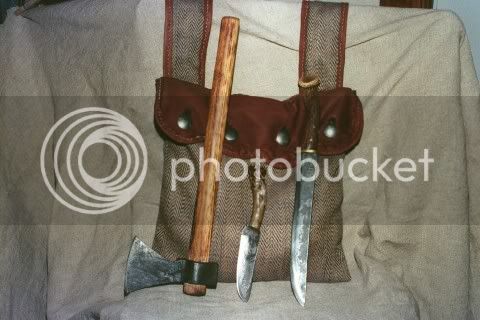
Leather flap on haversack done the same way (both not by me - by Calico Jack).

HaversackandPollAxe.jpg


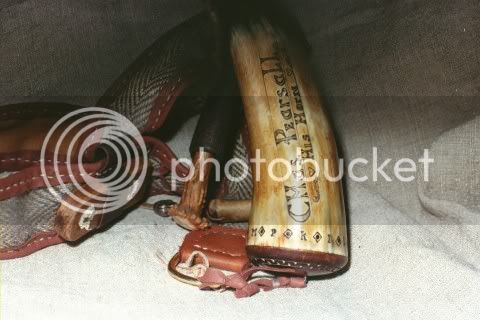
Deerskin edge on jute horn strap with canvas backing.

Horn2.jpg


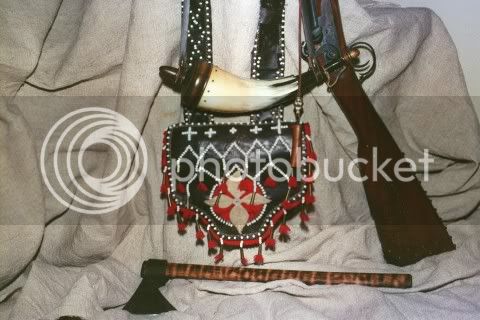
I got really, really bored one long winter.

Flap is buckskin under wool under the bag's leather flap. The red circle shows through a cut-out in the flap center. The dogwood petals are buckskin and the center is an original ivory button.

Shotpouch.jpg
 
You need to get you T.C. Alber's book on making bags and pouches. That book will answer all the questions you've asked on bag and pouch making.

Rick
 
Exactly!

I've a copy of Albert's "Recreating the 18th Century Hunting Pouch" and made some pouches using his excellent instructions ... but I can't find anything in it about finishing raw edges. His illustrated examples use a simple saddle stitch around the edges.

But, an original pouch on p90 looks like it has a leather "tape" covering the edges, and on p97 another pouch looks like it has a rolled edge on the flap.

I'd like to know the techniques for making these features.
 
Me too ! It looks like its easy but as pointed out you can have a pucker effect. Its hard enough to sew an edge like that,but when done to have it curl would be a bummer.
 
I've "taped" quite a few edges, and I've seen a lot that way from Swampy. I'll let him add from his greater experience, but here's what I've learned:

I'm not sure it would require any special directions other than to pre-fold your tape, and be pretty careful about uniform tension on your stitches. There will be a tiny bit of puckering in the corners, but it's less an issue as the radius on the corner increases or you use more (closer) stitches. Basically the "rounder" corners allow it to spread out, and smaller stitches hold it tighter. Saddle stitching virtually makes the puckers disappear if you don't over-sinch them.

I also use a very sharp awl and punch my holes one at a time without punching a whole bunch in series, then stitching. Keeping stitching straight is mandatory for good looks, but a bit of a trick if you have no way mark the leather, especially softer leather. I use an edge creaser on leather with a good temper, but that's pretty much out of the question with something like elk.
 
I usually use Elk and use a lighter weight strip for edging. I have rolled the edge too but usually do that on inside pockets. Pretty much do the same as Brownbear but while using Elk, don't have much of a problem with puckering. If so, a rawhide hammer works wonders at times. :wink:
 
Swampy said:
...have much of a problem with puckering. If so, a rawhide hammer works wonders at times.

Another great Swampie tip. Thanks!!!! :hatsoff:

As for rolled edges, I do them all around the entrance to the main pocket and any smaller ones- inside or outside. The one trick I have found is to do them in two stages. Start in the middle and sew all the way to one side. Then go back to the middle and start new thread and sew in the other direction to the end. I do use a mallet after I roll and before I sew, then use an edge creaser to mark the course of my seam. Since I'm awling by hand, an overstitch wheel is inavaluable for spacing stitches.
 
Oh hell yes, I realized early on that things just worked better if I halved everything in the construction of a bag. Find center and work to one side, come back and do the other side. :thumbsup:
 
My thanks to Swampy, Stumpkiller, and Brown Bear for the hints on doing the edges on a hunting pouch. The link on Swampy's post show some pouches that are remarkable. I wonder if I will ever get some this good?
 
When I "tape" an edge seam, I use light weight, 2.5 to 3 oz. veg tan leather. I dampen it like I would for marking the stitches, fold it in half, crease it at the fold with a slicker or awl handle,and mark out a row of stitches and awl in my holes through both sides at once...be careful as the thin leather will want to streatch and drift...so keep the edges aligned as you go.If you are not comfortable doing this, mark your holes down each edge seperately and awl them in...its twice the work, but sometimes the results are also twice as neat and proper looking when you are first learning.

If you are going to cover a seam with leather tape, the actual seam of the bag that joins the two panels can be whip stitched along its edge...or even simply tack stitched, it will not show under the tape anyway...then using the same wheel I mark a row of stitches along the seam. The only trick is being sure the tape strip is just wide enough so that all the holes line up, a set of dividers will help you to measure everything out here.

While the tape is still damp, I saddle stitch it over the edge seam thus "binding" it (I think this is usually called a bound edge)....and yes siree, starting in the middle and stitching out to each side is a real good idea.

I believe the image on pp 97 is actually a bound edge as well? But rolling an edge is even easier...simply wet the leather, roll it a good quarter inch or so, slick the fold down with the edge of the awl to make a tight crease...lay out your holes with a wheel, awl them in, and saddle stitch them...rolling the mouth of a bag is a nice touch too, it stiffens the edge and allows nice access to the bags interior.

It seems that most "professional" flat stitched bags, meaning that it's not stitched inside out and turned after stitching, were bound along the exposed edges of the body panels...
TCA
TCA
 
I watched a bag being made with a rolled edge and the maker had thinned the back side of the leather with a special tool that tapered the thickness of it back for about 3/4 of an inch. He then wet the leather and rolled the edge toward the inside of the bag and clamped the leather in place. While he didn't have any bags with the leather rolled toward the outside, I am sure you could do it that way if you were looking for a suede trim around the edge. He used a rawhide mallet to pound out any puckers. He told me that when it was dry, he would come back and run a small bead of glue under the rolled seam and reclamp it until it dried. Once the glue was dry, he could easily stitch it. I saw some examples of his work and it looked like he really knew what he was doing. If you, like most of us, lack the tool to do the thinning of the edge, you may be able to get it done for you at a shoe repair shop.....if any exist any more. Another idea would be to simply sand the raw side down with a sanding block.

Here's a thought from my little pea brain, you could buy some leather welting from an upholstery shop or trim shop and sew that to the underside of the edge of your bag flap. They may not have what you want on hand but may be able to order it for you. This wouldn't be historically correct (not important to me because I don't play dress-up games). If being HC is not that important to you , it could provide another way of giving a nice looking finish to the edge of your bag flap.
 
Thanks to TCA for the tutorial. It is exactly what I needed.

I'm doing a "bound" edge now (I previously used "taped," but that is not the proper leatherworking terminology) which is turning out very nice.

Maybe, when I get better, I'll post a photo.
 
Back
Top