• Friends, our 2nd Amendment rights are always under attack and the NRA has been a constant for decades in helping fight that fight.

    We have partnered with the NRA to offer you a discount on membership and Muzzleloading Forum gets a small percentage too of each membership, so you are supporting both the NRA and us.

    Use this link to sign up please; https://membership.nra.org/recruiters/join/XR045103

Jack Knife Project

Muzzleloading Forum

Help Support Muzzleloading Forum:

This site may earn a commission from merchant affiliate links, including eBay, Amazon, and others.

fischereco2

36 Cal.
Joined
Aug 7, 2014
Messages
95
Reaction score
1
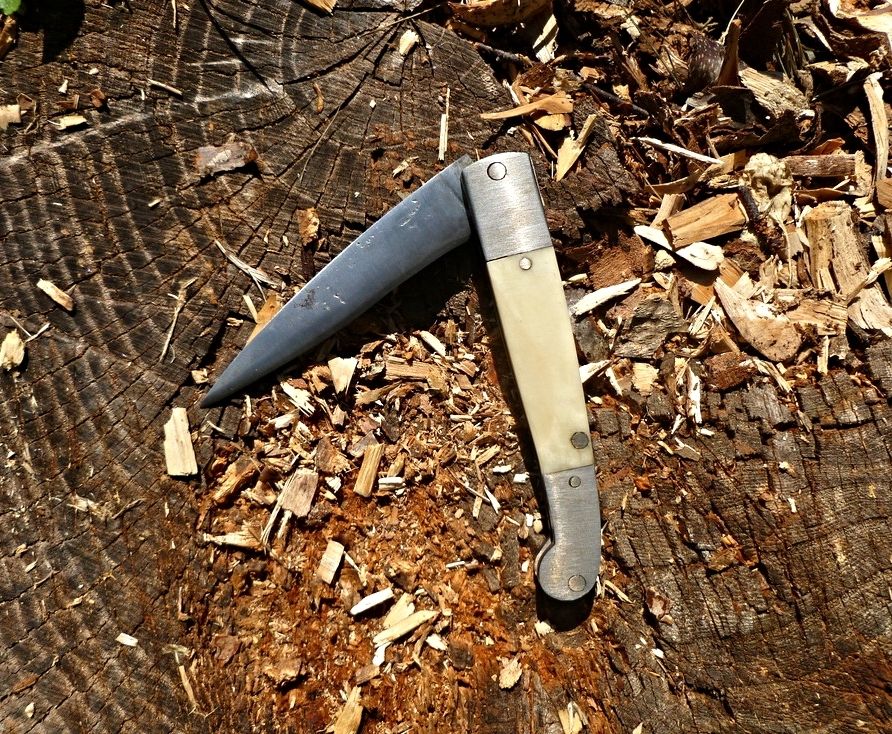
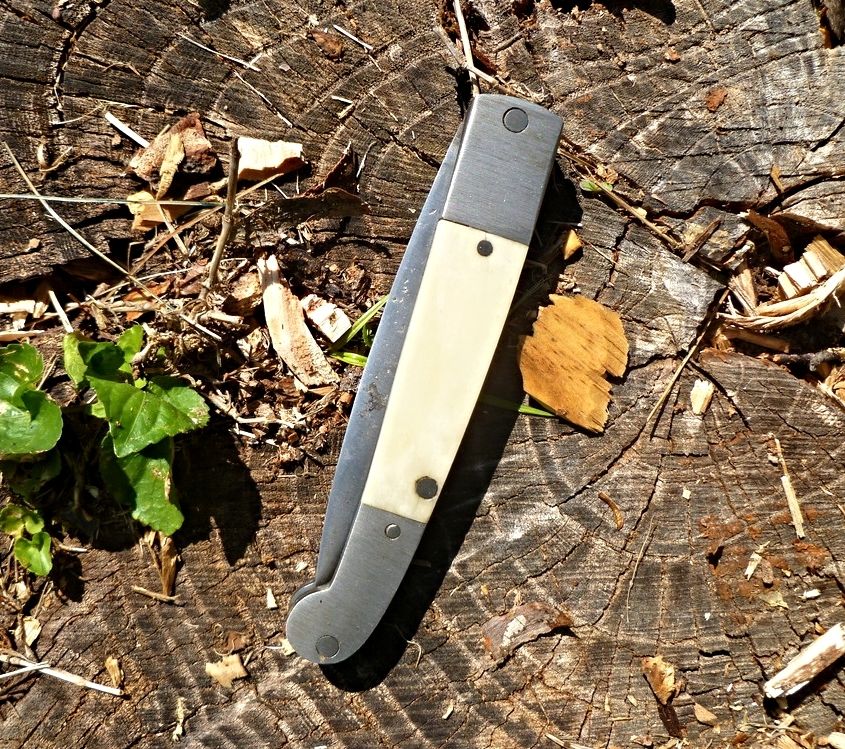
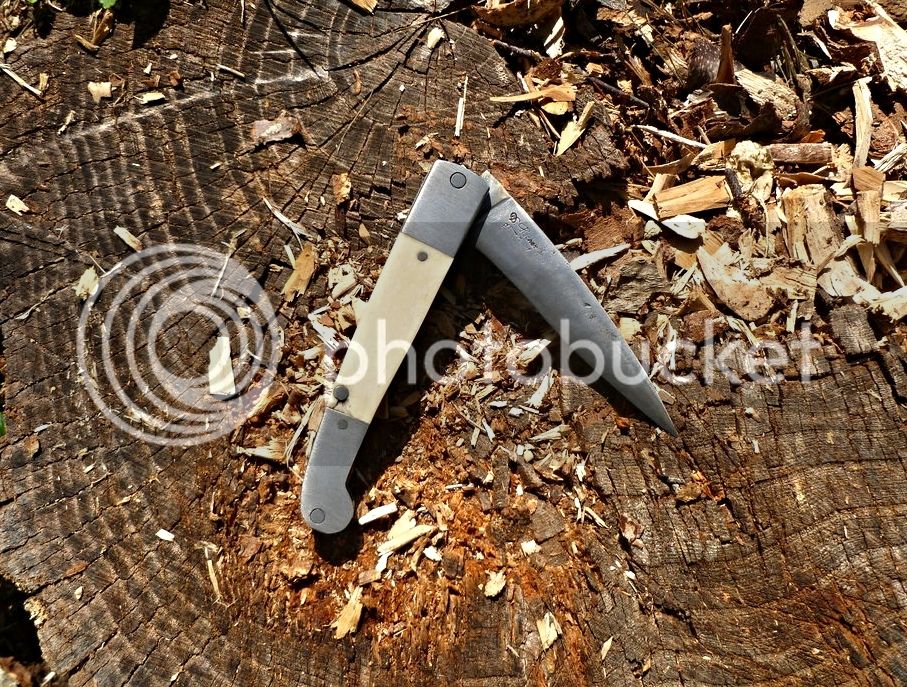
Here's a little pocket knife I just finished. It's not based on anything in particular other than those el-cheapo Pakistani ones you see floating around. This was more of a proof of concept piece since I've never made any kind of slip-joint folder before. Definitely way more painstaking than I anticipated and there a lot of things wrong with this knife, but lessons learned.

In the future I think I'll try brazing the bolsters on instead of using pins. I wasn't super careful when drilling all of the holes so my scales were slightly mismatched. This meant I had to force them together, which caused one of my bone panels to blow out in the process. I also have this problem every once and awhile where my blades develop these shallow spots along the edge, making the whole thing kind of wavy. I do my best to make sure everything is even before I start the sharpening process, so I'm not sure why this always seems to happen in the same spot. It basically ends up looking like a used knife that's been over-sharpened. Also I forgot to forge in the nail-nick, but luckily the tension is just right so it doesn't need one.

I have a goal for this year, which is to perfect a few basic styles of knife and make enough of each of them to sell on a trade blanket at one of the big fort events around here next year. I think with a little more practice and fine tuning I'll get there.

Anyway, thanks for looking.
P1040839_zpsdxp1kzgf.jpg

P1040840_zpsqsoekb1t.jpg

P1040842_zps3nqqqff8.jpg
 
Nice!

In the metal, you may wish to peen the pins over a bit larger so when you file the excess, they come out flush without any of the countersink area showing. In the bone, peen as little as needed to hold the scales, as they are not structural.

Think about rounding the sharp edges on the handle - it will make the knife more comfortable to use.

It is also my understanding that earlier knives did not have a nail-nick.
 
Thanks for the advice! I was having a difficult time peening these pins for whatever reason, I intended for them to be flush but after all of the problems I was having I think I was worried about smacking something I shouldn't with the hammer so I kind of called it good. And you're right, the edges would be better off a little more rounded.

It is also my understanding that earlier knives did not have a nail-nick.

In that case, I totally intentionally did not forge in a nail nick.
 
My biggest difficulty with peening pins is when I make them too long and the countersink too large. This leads to bending the pins before the countersink is filled. I've found that making them shorter and setting them with many light blows working around the circumference of the pin makes them go easier. Slightly rounding the edges of the ends reduces the chance of the pins mushrooming unevenly and cracking.

I too am happy when I screw up in the right direction... :wink:
 
I think you are off to a good start and I have made some friction folders and now I am also just starting on the slip joints. I'll put in what I have learned so far.
First, I want to be as pc as possible. A lot of the knives had integral bolsters, that is, the liner and bolster were all made from a single piece of steel. This was how the Sheffield trade did it and they used a mandrel and trip/tilt hammer that stamped/forged out these pieces rather quickly. I use 1/4" thick steel and file away the middle part for the scales- so a lot more work.
When you look top down on these originals the liner segment is thicker than on a modern knife so the scale is therefore much thinner. All of these types use iron, not brass.
The other method of manufacture was the "applied bolster" method. I figured the bolster should be soldered to the liner but an expert told me this was never done, the soldering is a twentieth century method. The bolstered was "chopped" on. Well I have spent a lot of time trying to find out what this chopped method was and never could get a straight answer.
What did I do??? On the inside of the bolster I drilled a blind or dead end hole of 1/16" or slightly smaller size. I then drove a 1/16" pin into this hole. This pin is 1" long. Ace Hardware has "wire" size drills and the hole should actually be a little smaller than 1/16" so the 1/16" pin fits very tight. I then used the sharp end of a needle file as a punch and struck a series of holes all around the pin. This "stakes" the pin in place. The dimpling actually moves the metal against the side of the pin. The pin was about 1" long.
How well does this hold??? Pretty good. I clamped vise grips on the pin and tied a 5 lb. dumbbell plate to the bolster and the pin held.
What you now have is a bolster with a 1" pin. I "chopped" off the pin so there is just a stub. This stub goes through a hole in the liner and is peen hammered in place.
Once the blade rivet or the spring's anchor pin are also peened in place they offer additional bonding so I figure the staked pin is the way to do it. To the best of my knowledge it is the pc method.
You'll need to make a spacer for the blade slot and insert it while peen hammering. When you peen hammer the rivet if you over do it you can freeze up the operation. Go slow and test for function. If things are becoming too tight drive a wedge into the slot and you can loosen up things again.
The integral method was far more common. Before modern manufacturing it was more work to forge a thin liner, forge the bolsters, and then pin everything together. Sheet metal production, from what I've found came around pretty close to 1840 so the applied is pc, in fact the applied was a mark of a quality knife, the integrals were the common man's knife.
The nail nick has been a problem for me. On a modern pocket knife this nick is flat on top and dished on the bottom. The old nicks were stamped and instead of being flat on top the whole nick was a crescent shape. You can tell these nicks were stamped because one side of the nick is often deeper than the other or the stamp wasn't held accurately and the alignment is a little off. Ideally I want to make a stamp for this task.
Thanks for sharing your projects. There are lots of folks very knowledgeable on the firearms and fixed bladed knives but the area of folding knives is sort of an untouched area. I myself am trying to find as much information as I can.
 
One more thing, on the bone scales, a little skip line checkering looks really good, and -as stated-round off the corners.
I use a hacksaw blade for checkering. I use a plain blade for the first line. For the subsequent lines I glued two sections of hacksaw blade together with a spacer inbetween- so all the lines are evenly apart. This gives me a square "notch" type checkering. V notch- such as created with modern checkering tools is also pc but I believe the square was more common.
Good looking knife, please keep us informed on your progress. You ought to also make a stamp for the blade (with your name and mark) if you're going to sell them.
 

Latest posts

Back
Top