• Friends, our 2nd Amendment rights are always under attack and the NRA has been a constant for decades in helping fight that fight.

    We have partnered with the NRA to offer you a discount on membership and Muzzleloading Forum gets a small percentage too of each membership, so you are supporting both the NRA and us.

    Use this link to sign up please; https://membership.nra.org/recruiters/join/XR045103

Let's Talk Tuning

Muzzleloading Forum

Help Support Muzzleloading Forum:

This site may earn a commission from merchant affiliate links, including eBay, Amazon, and others.

longcruise

70 Cal.
Joined
Feb 28, 2005
Messages
10,029
Reaction score
8,418
Location
Colorado
I'm not a flintlock shooter but I'm headed that way. The lock I'll be using in an L&R Manton. I'm wondering what are the actual tuning steps and factors involved. Any good references in addition to y'all's hands wisdom would be greatly appreciated.
 
I'm not an expert on the internals of the lock, but I can speak about "tuning" your flint.
A sharp flint that is the width of your frizzen face is what you want.
I was first instructed to make sure the tip of the flint rests centered over the pan when the **** is at rest.
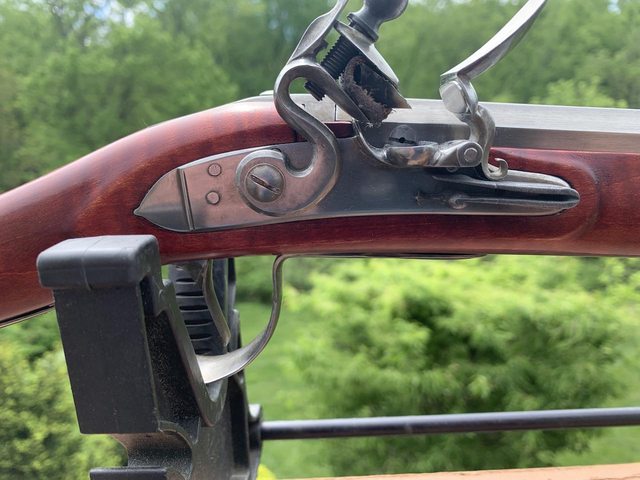
Second, pull back the hammer to half **** and lower the frizzen so it covers the pan. The flint should not touch the frizzen, but should be pretty close to it (between an eighth and quarter of an inch) and should point at the frizzen face at or above the half way mark up the frizzen face (I prefer it at least 60% up the frizzen face). Itoit points too low, you can flip the flint. It shouldn't point directly at the face, but have a slight downward angle or it will wear your flint quickly.
Third, you should be able to release the hammer from half **** and lower it slightly while holding it. With your other hand raise the frizzen up slightly and you should get a mostly straight line between the flint and frizzen base.
That should get you a long strike/scrape to make sparks and ensure the frizzen isn't blocking them from dropping into the pan while simultaneously avoiding smashing flints.
The caviot is that individual lock may have varied geometry so this set up won't be quite identical between locks of different style/geometry. That said, it is a guideline that has held pretty well for me.
 
Long cruise,
Be very careful who you take advice from on the subject of lock tuning. It’s very easy to screw up a really good working lock into nonfunctional in a hurry.
It’s not magic, but finesse and precision is a must.
Good luck.
Thanks for the response. That's the main reason I'm opening this topic. I hope to see all the suggestions and warnings as possible.
 
I don’t tune a lock that works well. If it’s not working well, lube it and try again. If it’s still not working well then the problems must be diagnosed. It’s like going to the doctor because you feel sick. The doc will want to know symptoms and run some tests or at least do an exam. Explaining tuning is like explaining medicine. It would take many pages to explain how to diagnose each problem and treat it.
 
The L&R Manton lock is one of their best locks and is based on a very good original design. At this stage, all that would need to be done is lightly polish the sharp burs off the edges and apply a little bit of grease on the rotating parts. Make sure none of the internal parts are rubbing inside the stock mortise. Try the lock and if it is performing as it should then the tuning is done. As @rich pierce notes don't try to tune the lock if it is working well.
 
I don’t tune a lock that works well. If it’s not working well, lube it and try again. If it’s still not working well then the problems must be diagnosed. It’s like going to the doctor because you feel sick. The doc will want to know symptoms and run some tests or at least do an exam. Explaining tuning is like explaining medicine. It would take many pages to explain how to diagnose each problem and treat it.
Very good advice Rich. The old adage applies, ( if it ain't broke don't fix it) !
 
I'm not an expert on the internals of the lock, but I can speak about "tuning" your flint.
A sharp flint that is the width of your frizzen face is what you want.
I was first instructed to make sure the tip of the flint rests centered over the pan when the **** is at rest.
Second, pull back the hammer to half **** and lower the frizzen so it covers the pan. The flint should not touch the frizzen, but should be pretty close to it (between an eighth and quarter of an inch) and should point at the frizzen face at or above the half way mark up the frizzen face (I prefer it at least 60% up the frizzen face). Itoit points too low, you can flip the flint. It shouldn't point directly at the face, but have a slight downward angle or it will wear your flint quickly.
Third, you should be able to release the hammer from half **** and lower it slightly while holding it. With your other hand raise the frizzen up slightly and you should get a mostly straight line between the flint and frizzen base.
That should get you a long strike/scrape to make sparks and ensure the frizzen isn't blocking them from dropping into the pan while simultaneously avoiding smashing flints.
The caviot is that individual lock may have varied geometry so this set up won't be quite identical between locks of different style/geometry. That said, it is a guideline that has held pretty well for me.
I like to put the new or sharpened flint into the **** jaws with it's leather or lead sheath snug but not tight. I center it side to side against the frizzen and let the spring tension of both level it against the surface then tighten the **** screw. This allows the lock itself to gauge/set the flint edge level against the frizzen face.
 
I'm no @rich pierce and I didn't sleep at a Holiday Inn last night, but I'll give it a go:

Basic Lock Tuning (without removing any needed metal or modifying tumbler notches or engagement angles)
  • You need a good understanding of the lock parts, relationship and fundamentals
  • Need a good spring vice and other good tools
  • Check existing trigger pull of the musket/rifle/arm using a suitable trigger pull gauge
  • Review all parts carefully 1st - Do you see any wear points, i.e., gouges in the lock plate where perhaps a part if dragging, etc.? (If so, IMHO those 'burr's' or such could be dressed/filed so as to eliminate even more wear or drag (friction), but ensure you're only removing a burr or other 'excess material' and are not changing the engagement feature per se)
  • Carefully disassemble
  • Clean (dirty/gummy tumlers/sears/fly's in a rifle can inhibit a good working trigger, making them mushy)
  • If confident and careful, polish (not metal removal!) engagement surfaces and dress wear features, i.e., diamond hone the lockplate where the parts sit (Dave Person has shown us pictures of lock plates polished so darn HARD that there is now a 'dished' concave feature around the tumbler hole)
  • Lube
  • Reassemble and re-test the trigger pull
  • Note - Sometimes a lock works great out of the stock, but acts up or misbehaves when installed. Check for wood clearances or inletting, i.e., like perhaps the trigger plate is inlet too deep (noted on here with CVA arms/kits at least once per month, lol)

Advanced Steps
  • I'm not going to go into it here with neither of the uninitiated or unexperienced, but there are many instances or examples on here where people have not just done 'trigger jobs', but have changed the notches on the tumbler as well as have improved the engagement surfaces
  • For that, besides the ideal design elements/intent, one must also be cognizant and aware of what it means, and how to deal with, a trigger mechanism to have either positive (slight positive ideal) or negative engagement ( a no-no!), where negative engagement could hurt or kill someone unintionally
  • With that said, Zonie (and others, one post where @rich pierce added comments) had posted some great info on 'what to do' when you have an otherwise good working lock, but with TOO heavy of a spring, where 'to me' that should be within the realm of a good/competent DIY'r
 
Last edited:
Shoot it for a few months and then remove the lock, disassemble it and give it a good cleaning. Look for scrape marks on the plate / bridle or other places of interference. Polish those areas, reassemble, oil and go back to shooting.:thumb::)
 
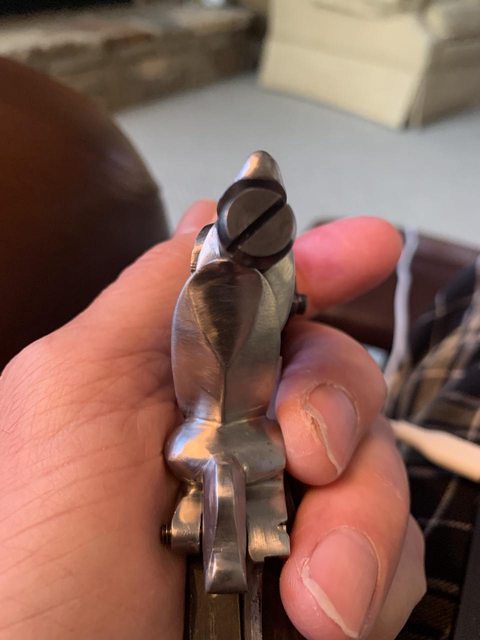
I recently finished a build using the L&R Manton lock. When I received the lock I disassembled it and began the routine task of polishing the lock plate, hammer, etc. Then I noticed the lock vs the frizzen was out of alignment, as the pic below shows. I sent the lock back to L&R and the turn around was very fast. The lock now was lined up as I thought it should be.

As for "tuning" I followed the instructions in one of my M\L builders books. I (carefully) chucked one side of the tumbler into a drill, then using 400grit sandpaper I removed any rough spots on both sides of the tumbler. This doesn't take but a few rotations...you're not trying to remove a lot of metal. Then I used a 5000 (yes, five thousands) grit polishing paper and shined up both sides of the tumbler.

Any other parts that rub or contact I also polished up. The lock functions very well and lock times are fast. Now, I don't shoot competition so I'm sure others could get it better, but the lock is fast, consistent, and the hammer\frizzen geometry must be right as I'm not burning through flints.


YBhce0cl.jpg
JF6XjAol.jpg
 
I use my gravers sharpening vise to hold the parts. A 6" fine diamond sharpener is set on a pane of glass, and the graver vise moved back and forth on the glass.
I check and recheck I have the angles set properly, then lightly work the parts until they are well polished, being sure to not change any angles. Reassemble, put a dab of gun grease on the contact areas.
You should watch it done a time or two. I had a good instructor years ago, and pretty much destroyed a couple cheap locks by screwing up angles in the learning process. However, I also learned at the same time how to weld up those parts, so I could bugger them up again!
 
Very good advice Rich. The old adage applies, ( if it ain't broke don't fix it) !
Personally I've never believed that polishing any thing serves a mechanical advantage, it does however add aesthetics . Smoothing however( not polishing to a shiny luster) to achieve tight mating of parts is paramount to best function and when accompanied by good geometry the best action is accomplished. One needs a certain amount of texture left on close fitting metal parts to better secure lubrication to said parts so that the friction is reduced by the lubrication film not polished metal contact.
If you've seen the texturing of interior parts of high end arms this is as much about lubrication retention as it is about decoration.
To me the most important part of any lock is the bearing fit of the tumbler through the lock plate and square to the frizzen face through out the swing. A loose bearing fit of the tumbler will allow a random, ever changing flint edge strike with the frizzen face as well as inconsistent sear edge contact thus effecting both trigger break and spark production. It also increases rate of parts wear and shortens flint life.
The geometry of the **** swing in relation to the frizzen swing is actually quite easy to adjust to a tight fitting and plumb tumbler bearing fit of lock plate if needed but if the bearing fit is loose then it will be ever changing in it's randomness of both trigger break and spark generation. One mans opinion.
 
Last edited:
Polishing parts held together by spring force is always advantageous in my view. This is because polishing will not cause a loss of precise part-to-part fit. So, the top of a frizzen spring and the toe of the frizzen can be polished to a high polish to benefit. But how long will it last, being subjected to fouling? The top of sear arm near the pivot and the end of the sear spring can stand a high polish, as can the tumbler toe and end of the hook of the mainspring.
 

Latest posts

Back
Top