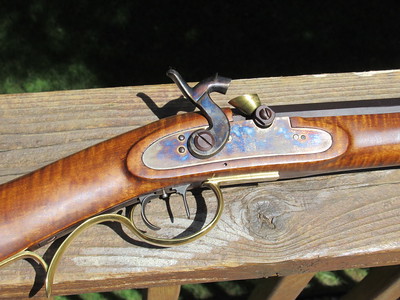
• Friends, our 2nd Amendment rights are always under attack and the NRA has been a constant for decades in helping fight that fight.

    We have partnered with the NRA to offer you a discount on membership and Muzzleloading Forum gets a small percentage too of each membership, so you are supporting both the NRA and us.

    Use this link to sign up please; https://membership.nra.org/recruiters/join/XR045103

Lock finish

Muzzleloading Forum

Help Support Muzzleloading Forum:

This site may earn a commission from merchant affiliate links, including eBay, Amazon, and others.

Phil Coffins

69 Cal.
Joined
Dec 7, 2017
Messages
3,804
Reaction score
11,560
Location
Colorado
An other way to finish a lock rather than blue, brown or in the white. Back in the age of wrought iron case hardening was used to make a more durable metal. Most were probably polished back to “white“ and I have done that. This lock I cased and got less color that pleases me. The screws have been heat blued and the frizzen has a bit of cold blue that has been rubbed back. This should look alright on my Woods Runner.
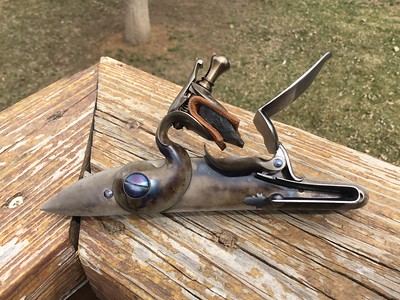
AA0149F3-4E50-45BB-8CAC-B4D4D9909E96 by Oliver Sudden, on Flickr
 
That looks very nice.

Gives me some ideas for the shiny new Chambers Large Siler percussion that arrived today.

What grit sandpaper did you use prior to the case hardening?

Thanks.
 
The lock was stoned to remove the machine marks then stoned to four hundred grit. The wood and bone charcoal is four to one and the de-greased parts packed in a large crucible and heated to 1400 degrees For an hour at temperature. I lower the heat to 1375 near the end then these were quenched in 73 degrees water. After blow drying the parts are drawn at 375 for an hour. I use no backing or braces and got no warping this way. Colder water gives more blues and stronger patterns .
IMG_0424 by Oliver Sudden, on Flickr
 
Phil if I had 10% of your talents I'd be 1000% better than I am. You do very nice work. I still remember that knife you posted months ago.
 
thankyou for the info. now to talk the cfo into letting me buy a furnace!
The oven was only $1300 about 30 years ago so shop around for a used one. You’ll need a fairly large oven for some projects about 12x12x12 is good. The bone charcoal is about $50 a bucket and the wood charcoal is cheaper. I use a plastic 55 gallon drum for the quench water. The crucible can be welded up from various large pipe and flat stock and a garage sale is where I found a set of fire place tongs needed to handle the glowing red crucible. You will want a non flammable jacket and heavy gloves to go with the face shield and hat. It can be exciting work and some times I don’t get burnt, but don’t expect that! I’ve shown three guys how to do this work and so far none of them came back for a second time. Maybe my teaching style is lacking. :dunno:
 
The oven was only $1300 about 30 years ago so shop around for a used one. You’ll need a fairly large oven for some projects about 12x12x12 is good. The bone charcoal is about $50 a bucket and the wood charcoal is cheaper. I use a plastic 55 gallon drum for the quench water. The crucible can be welded up from various large pipe and flat stock and a garage sale is where I found a set of fire place tongs needed to handle the glowing red crucible. You will want a non flammable jacket and heavy gloves to go with the face shield and hat. It can be exciting work and some times I don’t get burnt, but don’t expect that! I’ve shown three guys how to do this work and so far none of them came back for a second time. Maybe my teaching style is lacking. :dunno:
i would bet your teaching is fine.
i have had people beg me to teach then knapping and or reloading. some take to it like ducks to water, and others whose eyes glaze over and roll back in their heads because of the work involved.
 
Back
Top