Took delivery of my winter project a few days ago: a .54 cal Lyman Great Plains Rifle with a flintlock ignition system. I plan on documenting the major steps and publishing my progress on this forum.
I'm in the process of fit checking all the parts at present. So far only two problems identified (more on those later).
The kit came partially assembled; that is, the lock, butt plate, heel plate, nose cap, ramrod entry guide and trigger assembly were all installed in the wood; the butt and heel plates and the lock were screwed in place, the nose cap and ramrod entry guide were pinned in place (with small pins that I frankly failed to notice for a good half hour while I struggled to get those parts off the stock). Small parts were enclosed in a ziplock plastic bag.
This kit is not a "bag of parts" by any means. Inletting appears to be completely done. Very little, if any, shaping needs to be done on the stock external lines. There are a couple of spots that need to be "ground down" to the contours of the metal parts, but not much. There is one place where the metal is proud of the wood contour (more later). With that one exception I'm very pleased with the fit of the metal parts on the stock, as well as the general condition of the stock and metal parts.
Regarding draw filing the barrel: there is quite a bit of stamped lettering on the barrel. I know some people draw file this information off, but it doesn't bother me, so I think all I'm going to have to do is polish the metal with some steel wool. The trigger guard does have some surface rust but no pitting.
I plan on either cold browning with the Laurel Mountain chemicals or doing a hot brown with Birchwood Casey's Plum Brown. I've used both and am on the fence at this point as to which I'll choose.
I was frankly surprised with the stock being a nice piece of walnut. I had planned a fairly red stain but I'm rethinking that. I may get a piece of walnut from the local sawmill and try out some different finishes before I make up my mind.
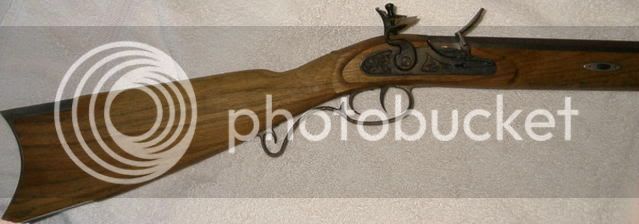
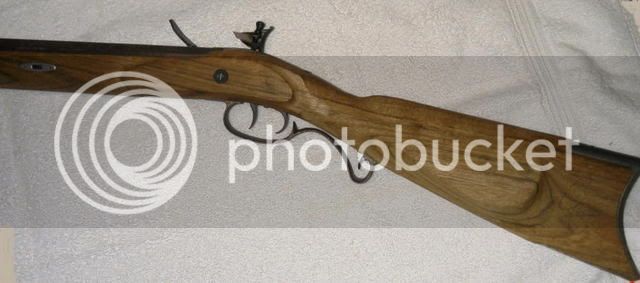
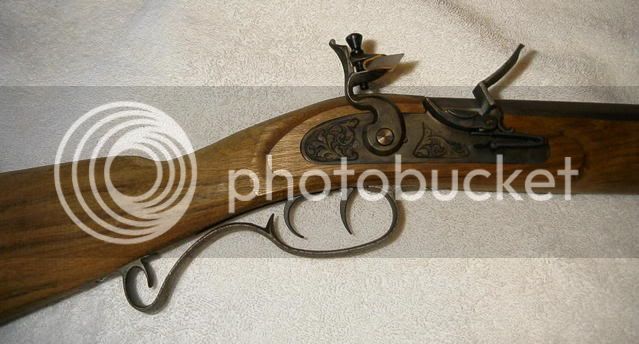
To start off, I'm generally quite pleased with the quality of the parts and the kit iself. The wood is (at least appears to be) a fine grade of dark walnut:
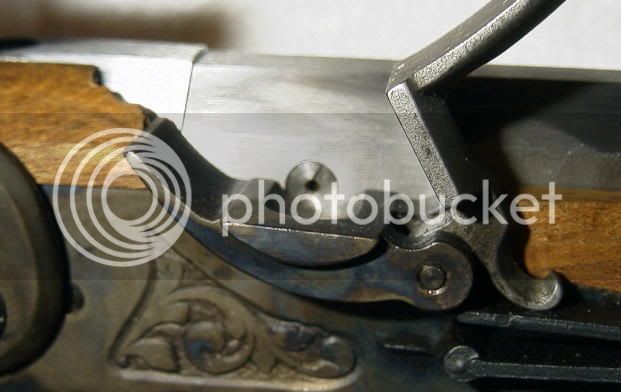
The barrel fits very nicely, tight but not difficult to install/remove. Here's the touch hole alignment with the lock:
The flint appears to need no serious adjustment, although I'm still learning about this subject (this is my first flintlock). Here's the result of a couple of tests:
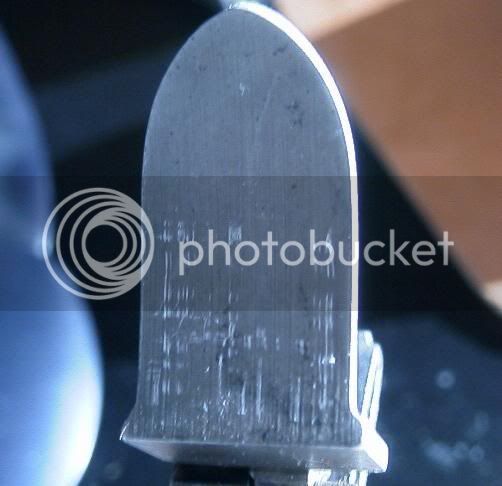
Paul V. - here's the flint against the frizzen with the frizzen in the closed position. Is the angle you talk about measure between the front face of the frizzen and the top of the flint in this view? Do you have any comments about the geometry of this installation?
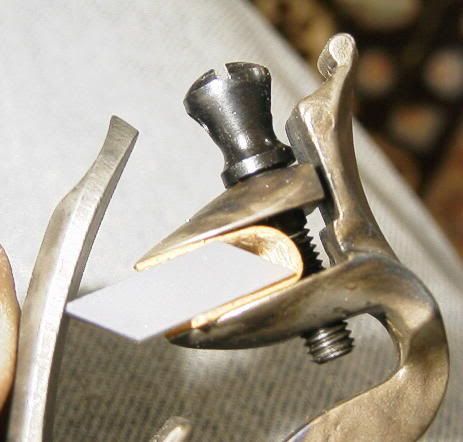
Things I don't like:
1) the wedges fit too loose. I'm going to have to "adjust" the brackets the wedges fit into to tighten them up.
2) the tang is proud of the stock and will need to be draw filed down a bit:
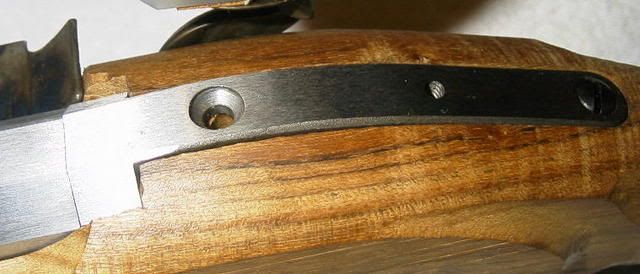
3) The hole in the stock for the tang screw is just slightly out of alignment with the hole in the tang, enough so that the screw won't pass through enough to reach the nut. In fact, I can't get it past the tang.

4) The general fit of the tang in the stock is not as good as the rest of the metal parts. It fits tight, but looks like there's room between the tang and the wood. I couldn't get a good picture of this; the flash negates the effect. This may turn out to be an illusion.
I'm in the process of fit checking all the parts at present. So far only two problems identified (more on those later).
The kit came partially assembled; that is, the lock, butt plate, heel plate, nose cap, ramrod entry guide and trigger assembly were all installed in the wood; the butt and heel plates and the lock were screwed in place, the nose cap and ramrod entry guide were pinned in place (with small pins that I frankly failed to notice for a good half hour while I struggled to get those parts off the stock). Small parts were enclosed in a ziplock plastic bag.
This kit is not a "bag of parts" by any means. Inletting appears to be completely done. Very little, if any, shaping needs to be done on the stock external lines. There are a couple of spots that need to be "ground down" to the contours of the metal parts, but not much. There is one place where the metal is proud of the wood contour (more later). With that one exception I'm very pleased with the fit of the metal parts on the stock, as well as the general condition of the stock and metal parts.
Regarding draw filing the barrel: there is quite a bit of stamped lettering on the barrel. I know some people draw file this information off, but it doesn't bother me, so I think all I'm going to have to do is polish the metal with some steel wool. The trigger guard does have some surface rust but no pitting.
I plan on either cold browning with the Laurel Mountain chemicals or doing a hot brown with Birchwood Casey's Plum Brown. I've used both and am on the fence at this point as to which I'll choose.
I was frankly surprised with the stock being a nice piece of walnut. I had planned a fairly red stain but I'm rethinking that. I may get a piece of walnut from the local sawmill and try out some different finishes before I make up my mind.
To start off, I'm generally quite pleased with the quality of the parts and the kit iself. The wood is (at least appears to be) a fine grade of dark walnut:


The barrel fits very nicely, tight but not difficult to install/remove. Here's the touch hole alignment with the lock:

The flint appears to need no serious adjustment, although I'm still learning about this subject (this is my first flintlock). Here's the result of a couple of tests:

Paul V. - here's the flint against the frizzen with the frizzen in the closed position. Is the angle you talk about measure between the front face of the frizzen and the top of the flint in this view? Do you have any comments about the geometry of this installation?

Things I don't like:
1) the wedges fit too loose. I'm going to have to "adjust" the brackets the wedges fit into to tighten them up.
2) the tang is proud of the stock and will need to be draw filed down a bit:

3) The hole in the stock for the tang screw is just slightly out of alignment with the hole in the tang, enough so that the screw won't pass through enough to reach the nut. In fact, I can't get it past the tang.

4) The general fit of the tang in the stock is not as good as the rest of the metal parts. It fits tight, but looks like there's room between the tang and the wood. I couldn't get a good picture of this; the flash negates the effect. This may turn out to be an illusion.


