Making a possibles bag

Muzzleloading Forum

Help Support Muzzleloading Forum:

This site may earn a commission from merchant affiliate links, including eBay, Amazon, and others.

ryzman

40 Cal.
Joined
Jan 11, 2011
Messages
289
Reaction score
1
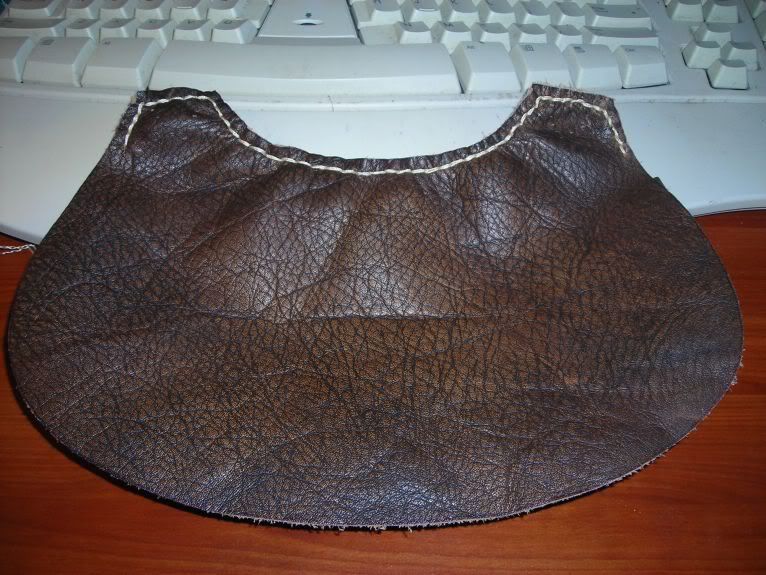
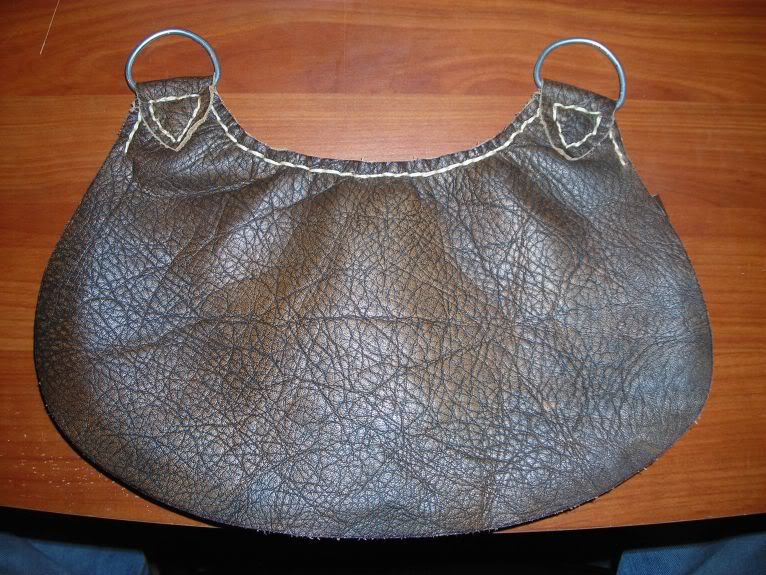
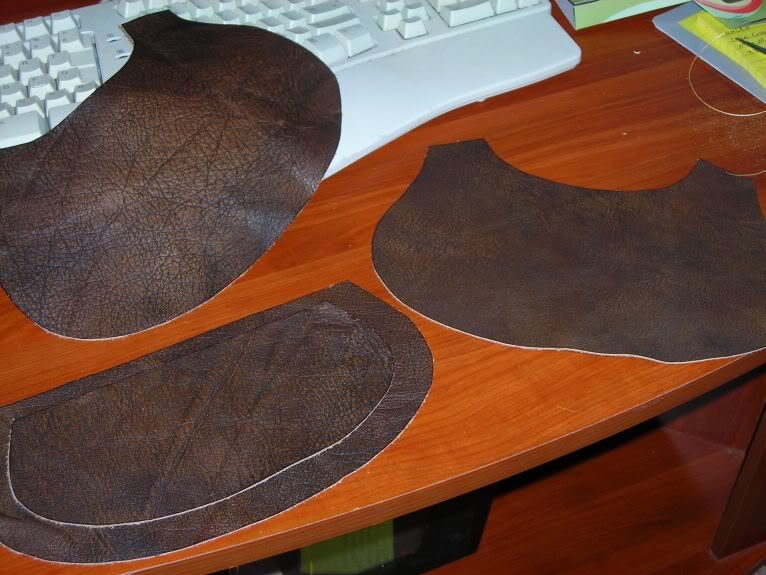
i still have more work to do to the bag but i thought i would post some pics of my progress so far.
i like this leather much more than the suede stuff i was working with before. attaching the rings is the most difficult as its 4 pieces of leather i have to stick a needle through. my fingers are feeling it for sure but very rewarding.
im sort of copying the leatherman Eastern Style Hunting Pouch but will never be as nice cause i am hand stitching everything.
possibles1.jpg

possibles2.jpg
 
ryzman said:
i still have more work to do to the bag but i thought i would post some pics of my progress so far.
i like this leather much more than the suede stuff i was working with before. attaching the rings is the most difficult as its 4 pieces of leather i have to stick a needle through. my fingers are feeling it for sure but very rewarding.
im sort of copying the leatherman Eastern Style Hunting Pouch but will never be as nice cause i am hand stitching everything.
possibles1.jpg

possibles2.jpg


Actually you can hand stitch a pouch nicer than the machine sewn bags that are massed produced for the market if you take your time, lay out the seam allowance and stitch length, it will look just fine, maybe on your next pouch you will double needle saddle stitch it, that will fill the voids in between your stitches that you have now, all in all the seam allowance and stitch length looks very even and clean, good job
 
Nice!! I got one of those leather stitchers from the hobby store, and it does that stich that has no spaces between. But I still can't stitch that good. Takes lots of practice. I'm making a tool to better space the stitches. :thumbsup:
 
Mike Brines said:
I'm making a tool to better space the stitches. :thumbsup:

Hey Mike,

I'm not going to discourage anyone from making their own stuff. If you need design ideas or yours doesn't work out, consider an overstitch tool such as this one. I like a 7, but when starting out you might prefer a 6 or even a 5.
 
I though stitching spacing was determined by leather thickness. The thicker the leather, the wider the spacing. Am I wrong?
 
Looks like a good start to me. You may concider dying the edges of the leather too.
 
flintlock62 said:
I though stitching spacing was determined by leather thickness. The thicker the leather, the wider the spacing. Am I wrong?

I doubt it, because I just don't know! I've got 5, 6, and 7 wheels and just like the looks of the 7 best. I do about half my sewing on 2-3 oz leather and the rest on 4-5 oz, and have never noticed any difference in application or in durability.

Probably a question for some the expert folks here who know a lot more about it than I do. I've seen where you can buy even smaller than 7, and I've heard that the real craftsmen back in the day of leather actually used 12. Now THERE would be a challenge! :rotf:

Here's an example of 7-line on a briefcase I just finished. I'm a little embarrassed that the stitching isn't as straight as I usually do, but you get the picture anyway. That piece of leather is 7" wide from point to point on the arc of the stitching for size reference. The leather is 4-5 oz, and the stitching is more "inset" than usual on a shooting bag because I used a stitching groover.
bag5.jpg
 
flintlock62 said:
I though stitching spacing was determined by leather thickness. The thicker the leather, the wider the spacing. Am I wrong?

Not really, kind of depends on the size of the needle and awl that your using, heres a pouch I just finished using a #5

Vernsbag1.jpg
 
possibles3.jpg

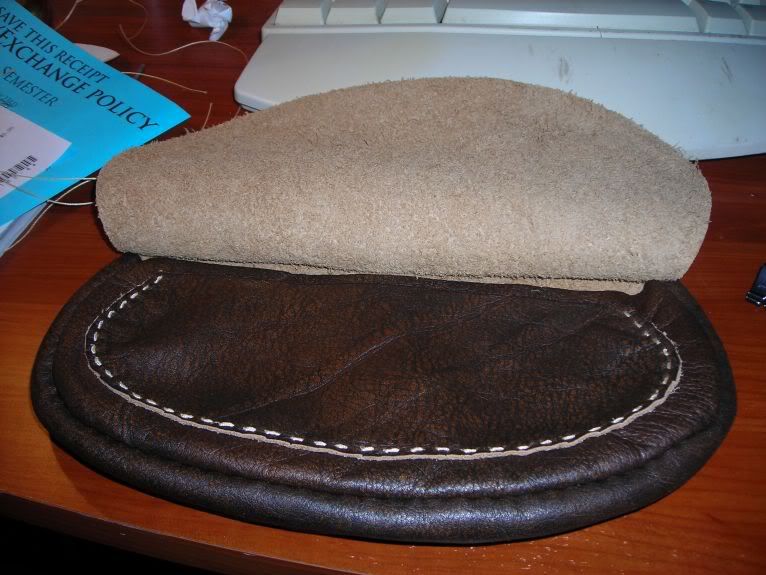
i guess this is my version of the double needle saddle stitch. i just went over the same area twice. i really like how it hides imperfections in my initial stitching plus makes the bag that much stronger. any ideas on attaching the pieces that will hold the rings on the bag that attach to the strap? im having difficulty holding the pieces in place to get decent stitches. its 4 pieces i have to go through and its tough stuff...
 
Thin line of tight bond will hold it, and I do mean thin. I use a C clamp and two pieces of wood to clamp them tight. Let them dry and then punch the holes and saddle stitch them. Same thing I do when building saddles.
 
ryzman said:
possibles3.jpg

i guess this is my version of the double needle saddle stitch. i just went over the same area twice. i really like how it hides imperfections in my initial stitching plus makes the bag that much stronger. any ideas on attaching the pieces that will hold the rings on the bag that attach to the strap? im having difficulty holding the pieces in place to get decent stitches. its 4 pieces i have to go through and its tough stuff...


There ya go! your 1st pic only shows a running stitch, keep at it, it gets easier!
 
any recomendations or ideas on where to go from here?
possibles4.jpg

what about stitching a heart or a cross into the flap? or...???
i need to make the strap next and am thinking of ways to do it. i have enough hide to make a nice one but attaching it to the rings and making it look nice is gonna be tricky i think...
 
if it were me, I'd copy the shape of the fold over pieces that you used to attach the rings to the pouch, cut a double ended piece for each ring, then sew the strap to that piece after it has been passed through the rings, see the pic above how the woven strap is attached to the pouch, same principal, different shape, when your done making that shape you should have what looks like an elongated football, good luck!
 
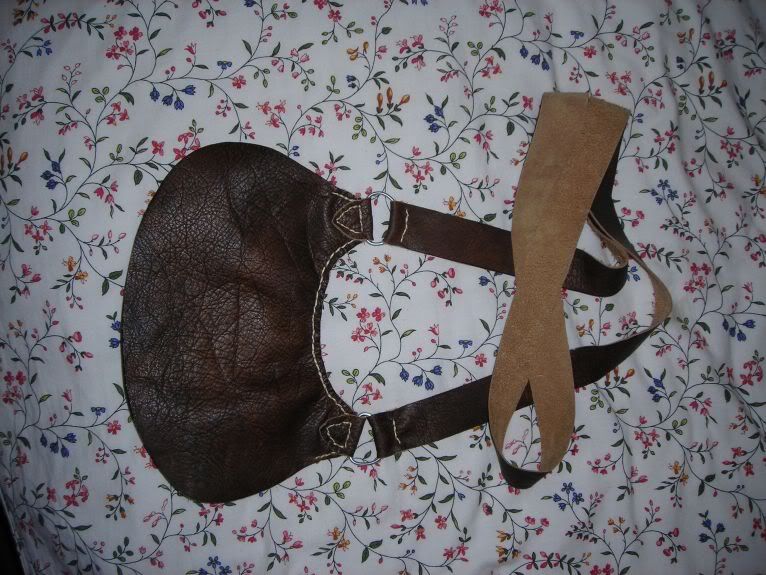
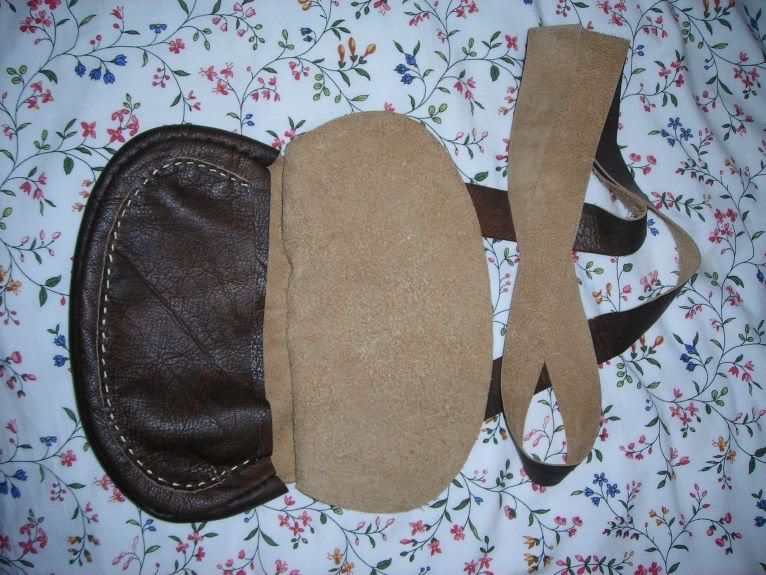
Here is the completed bag
possibles5.jpg

possibles6.jpg

i sort of rushed to get finished as my gpr kit arrives tomorrow and need to get ready for the build. i have enough of the hide left to make 4 more bags so this one is probably a prototype. it has been rather rewarding i must say. the time and energy i put into this bag really relaxed me and allowed me to clear my thoughts of the daily grind for a while and the completed product is something i can be proud of however modest it may be. i will be crafting something else with my needle and thread soon for sure.
 
I'm sure that will work for ya until you decide to make a better one. Making your own stuff for this hobby of ours is very rewarding and the more you do it the better at it you will become. :thumbsup:
 
Jeb, one of the things I find alluring to the art of the muzzel loader is everything you need for the weapon you can just about make. I make all my own possibles. The bags I make are all made from tanned deer hides,These are deer that either I my son or father have shot. It is important to me that as much of the animal I harvest is used as possible.I have found that the thinner leather works better if you line the bag, this can be a touchey subject as to correctness, I personally like the lined bag and if you are truthful with folks when ask questions about your kit and the period you portray, and the equipment you carry things work out for all.Hope this helps, the boy is home for a bit and if I can get him to help we will post photos of the set up and bags. R.C.BINCAMAN A APPALICHIAN HUNTER
 
Thanks, Brownbear, but I have one. I just thought it would be cool to make my own tools, like swampy says. I got one out of plastic from XXXXmart, and I'd like to have one out of metal.
Right now, my focus is finishing my rifle(that's why I'm wasting time here). :rotf:
 
Thanks for your feedback I have a deer skin from a friend I had tanned I going to give it a go, If it comes out like anything I'll post it. I know what you mean about needed the younger ones to help post pictures but I would really like to see some one else before I started cutting my hide up.
 
Back
Top