My First Knives

Muzzleloading Forum

Help Support Muzzleloading Forum:

This site may earn a commission from merchant affiliate links, including eBay, Amazon, and others.

yoda1624

32 Cal.
Joined
Jan 17, 2007
Messages
42
Reaction score
0
Thanks to everyone for their help. There are a lot of fine craftsmen here to study and get ideas from. A very special thanks to Wick for answering all of my questions quickly and thoroughly. As Crockett said, since it is a hobby, I can take my time and it has been a while since I posted the first images.

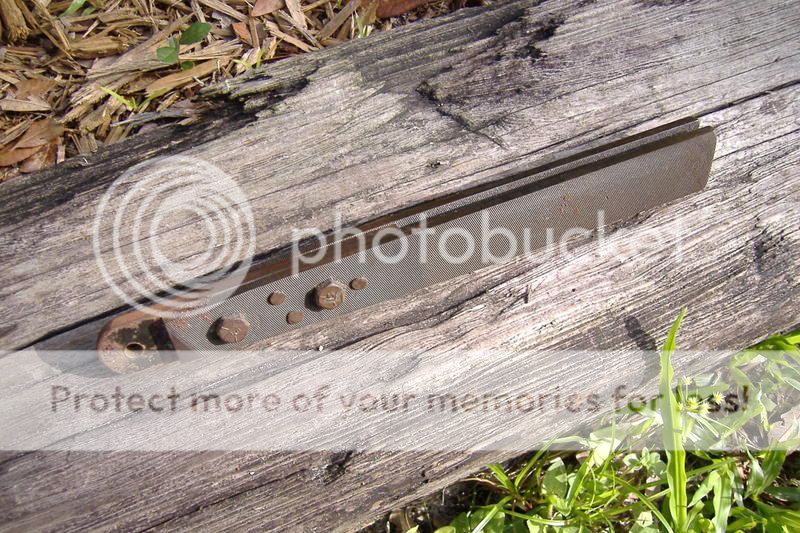
I am about 1/2 way done with my knives. They are ready to heat treat, put handles on and then finish.

My first one has some problems around the front finger guard, but for my first knife is isn't too bad. The second one of this style I make will be a little longer. Not to mention, the steel was a little thick and took quite a while to hand file.
DSC02202.jpg


DSC02203.jpg


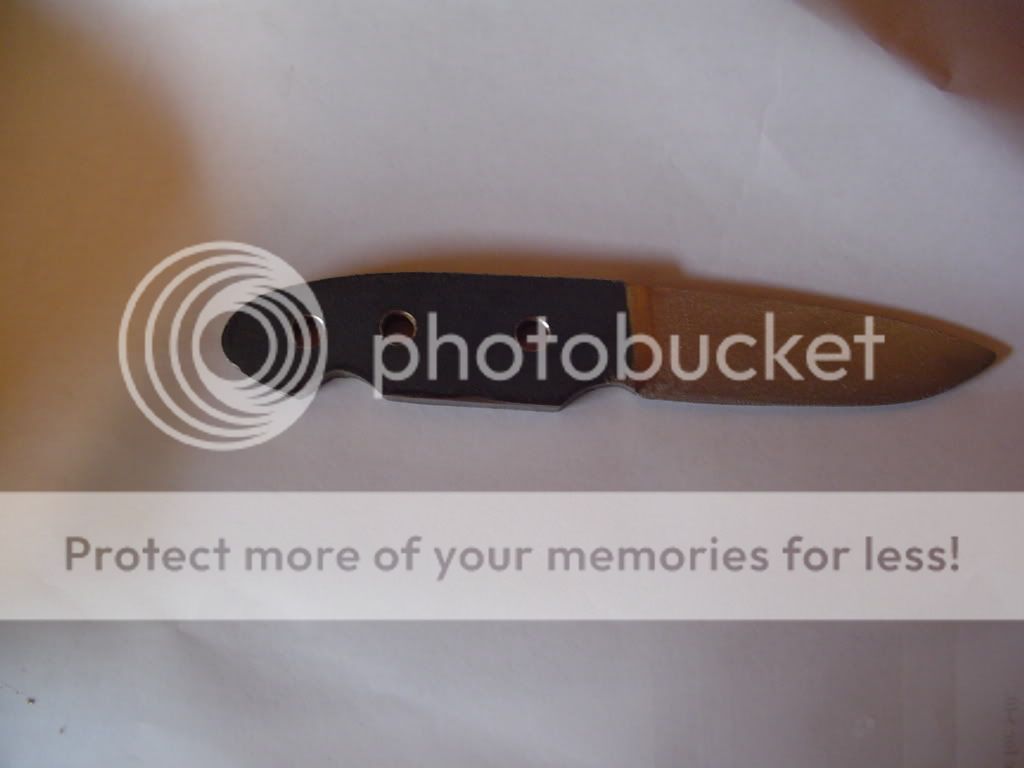
I started a second knife, a throwing knife. I am pretty happy with how it turned out. I might have removed a little too much material on the point because it is pretty flexible there. I am hoping that heat treating will help with that. All in all, I can see a definite curve in my learning curve.

Again, thanks for all the help. Any comments are appreciated.

Brian
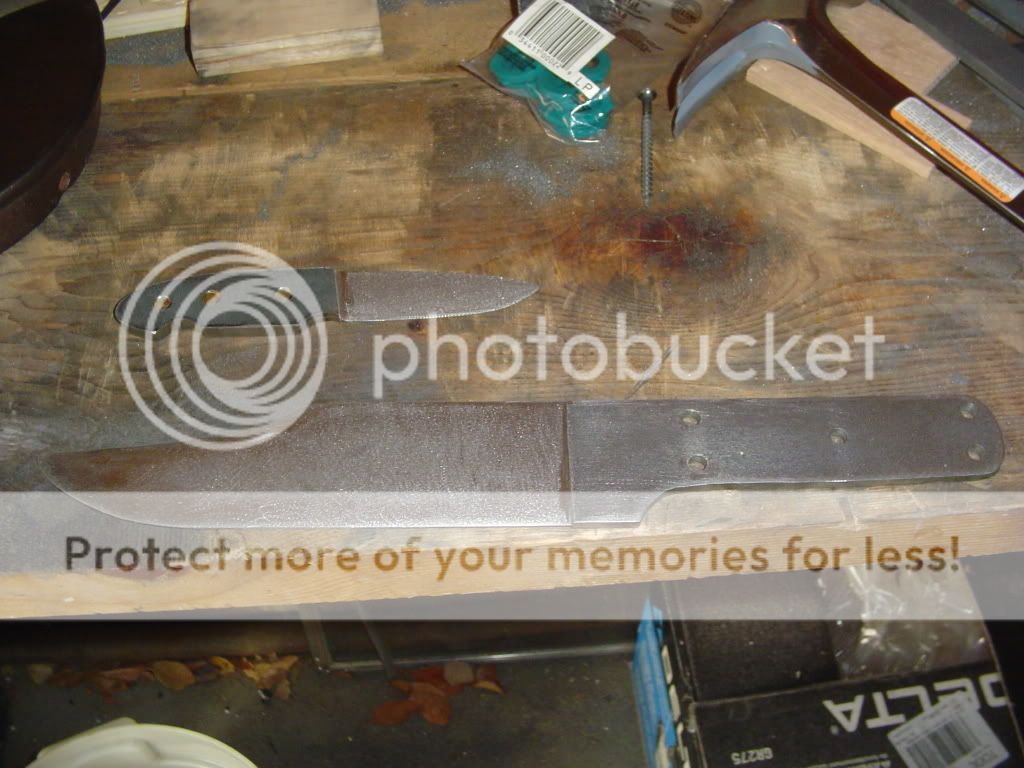
DSC02206.jpg


Any comments are appreciated.

Thanks.
 
Are you using a file guide, or cutting the plunge free hand? I see you cut the plunge on through the spine. Nothing wrong with that, I realize you are thinning the blade, but the plunge would be much stronger if you cut it with a round file to give a it a radiused bottom, rather than a 90o bottom. A 90o can be done, and I do it on some myself, but it needs to stop short of the spine, and be blended for that last tiny bit, so that the thickness of the spine can give the blade support in a side load. Then you can taper the spine from the plunge, or just foreward of the grip, to the point. A radiused plunge is always stronger, but the 90o is rarely a problem if the spine is supporting it. Here is an example of both. The rule of thumb is to use a round file with a diameter of the thickness of your steel. That way you get a crisp line, with a good radius because you are going to file very close to halfway in at the bottom. It helps if you have a file guide though.
IMG_0332.jpg

pennyknife529_640x480.jpg
 
Thanks for the comments. Not bad is how I would describe it. Not great either, but I am working on it. The first knife, I drew a line and tried to file it back to the line. I am guessing this was freehand and didn't work so well. I got it done, and they didn't quite line up and they kept moving back a little each time I changed sides. The second knife I figured out that I could screw the knife to the bench and then c-clamp a piece of steel with a straight edge to use as a stop. It made them straighter and I was able to line them up better.

I will find the receipt for the steel when I get home to let you know exactly what it was. It was regular flat steel. I tried to get 5160 steel, but they didn't have it. I seem to remember them saying that 1095 which they said was about the same.

Brian
 
Thanks for the information. That is the kind of information that you cannot see without seeing a high quality custom made knife.

I will start rounding them over and try to get them to stop short of the top. As a matter of fact, I can probably round these out a little. I haven't gotten them heat treated yet.

Thanks for the good tips.
 
I made file guides from old files. Soften the tang ends of two, and make a sandwich with a piece of steel that is at the thickness of your knife steel. Drill at least three holes and rivet, or tap and bolt together. With a good machinests square, and a straight edge, grind or power sand one side of the jig true straight, and true square, and then C clamp this in place on your blade, and you're ready to file. I have three of these, and can cover all the steel sizes I work with. This doubled guide will give you perfect shoulders for your guards to set down on, as well as perfect plunge lines. Here a shot of one of mine. You can make them shorter, and they never wear out. You can see that I used the tapered ends for the sandwich on this one. It doesn't matter, just don't draw the hardness out where you would be filing, only where you need to drill holes. Protect the working section in water, heat the area to drill red hot, and let cool. Do this 2, or 3 times and you will be able to drill it. At least with a cobalt bit, but you may do it with a standard bit.
pennyknife019.jpg
 
if you drill those tangs while they are red hot, an ordinary High Carbon drill bit will cut through the metal like a hot knife through soft wood. YOu do have to mark the holes to be drilled with a center punch before heating the metal, but have someone hold the torch to the tang to keep it hot while you drill. I dip the bits in motor oil-- although it stinks, and should not be breathed-- before drilling, and re-oil to cool the bit periodically to the bit doesn't lose its hardness, either!

A fine oil seems to last longer than water ever does, and the holes go through so fast, I don't recall needed more than a couple of dips in oil for the bit to finish a hole. If you do ruin a standard drill bit, they are lot cheaper to replace than those ones made of carbide!
 
That is really cool. I am going to have to make a set of these quick.

When you cool them to remove the temper, do you cool it slowly?

Thanks Wick.
 
Just let them air cool. As soon as you can handle them, do your next heat. Once may be enough though. When you heat, get that area red-orange. If money is no object, you can buy a file guide with two guides that is adjustable for thickness, but these are not that hard to make, and do the same job.
 
I think I will try to make one first and see how it goes. It looks pretty straight forward.

Brian
 
If you clamp the file to be softened in the bare jaws of a benchvise, the steel jaws and mass of the vise will act as a " Heat Sink", drawing the heat to the tang( to get it red hot)away from the rest of the file below the jaws. I found this out trying to drill laminated steel tangs in some patch knife blades I bought. I originally planned to have the blades sit in a bucket of water to protect the blades from discoloration as I heated the tangs with my propane torch. Nice Idea, but I didn't figure out how I was going to HOLD THE BLADES so I could drill them when I got those tangs red hot! Plan B was to move to the bench vise. I first clamped as set of vise grips just above the jaws. But, when I found that I didn't have to worry about the blade being tarnished, and the blade was not any colder at the vise jaws, than at the visegrips, I went to Plan B-1, and left the vise grips off the tang.

" Ain't learnin' fun??" :redface: :haha: :rotf: :hmm: :hatsoff:
 
Back
Top