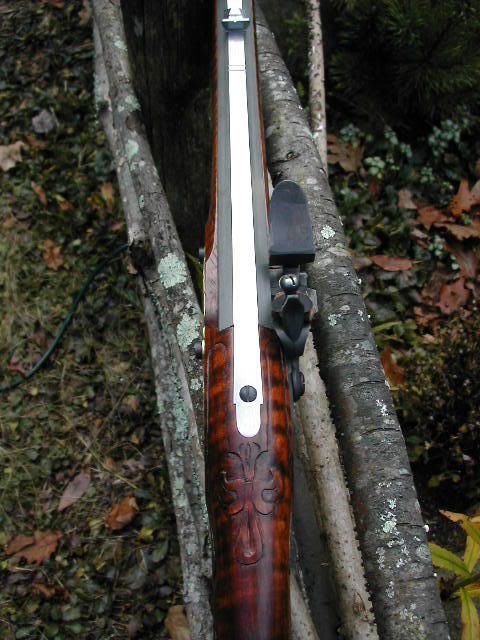
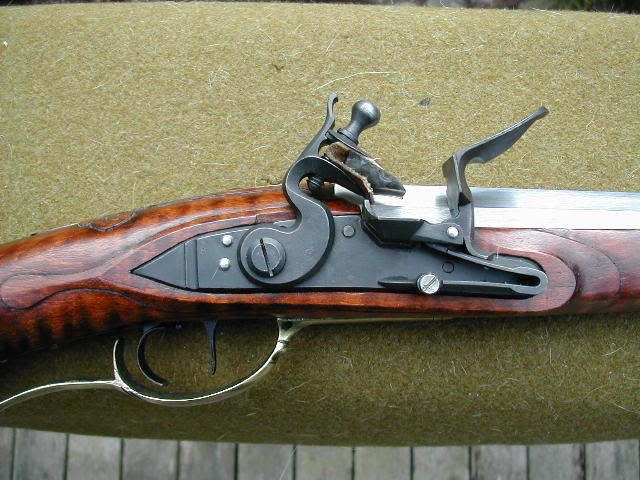
my new rifle

Muzzleloading Forum

Help Support Muzzleloading Forum:

This site may earn a commission from merchant affiliate links, including eBay, Amazon, and others.

oldarmy

50 Cal.
Joined
Nov 16, 2004
Messages
1,468
Reaction score
54
This is a new rifle that my friend Geoff Jones built for me.
When I first became interested in building my own longrifles, Geoff helped me out.. With his time, advise, opened up his shop for me to use.
This friendship was founded and grew because of this website :thumbsup:
I bought this kit and due to job changes was going to be unable to build this "kit" for a long while.
Geoff offered to build this for me for free. As a gift. Of course I couldn't.. A gunsmith deserves to be paid.
Well to make a long story shorter. I am getting this wonderfull rifle and he is getting a much poorer built pistol.. my work... and a little money as a trade. Enjoy the pics
MikesYorkF005.jpg
MikesYorkF013.jpg
MikesYorkF002.jpg
DSCF0332.jpg
DSCF0333.jpg
DSCF0338.jpg
 
I did want to note on the pistol, the silver wire on the bottom picture doesn't have a big gap.. it's the poor pic.
 
Both guns look great to me! I'm curious about the stain and finish on the rifle also. It's a nice color.
 
Old40rod / Plink,

Thanks...I'm also pleased with the way the finish turned out.

The rifle has a scraped finish, no sandpaper. This really seems to enhance the figure in the wood. I then stained with a mixture of Laurel Mountain forge Nut Brown and Lancaster Maple...mixed 50 / 50. After two applications of the stain...the stock was rubbed back to the present color with 0000 steel wool I then sealed with shellac made from shellac flakes and denatured alcohol per manufactures recomendations....1 lb shallac flakes / 1 gallon denatured slcohol. Mix only what you think you'll need. Shellac dries very quickly and offers a great moisture barrier. I then finished with Jim Chambers oil finish. One coat a day for 5 or six days. 0000 steall wool between coats. Here's another shot of the finished color.
MikesYorkF001.jpg
 
How did the scrapping technique work for you? was it hard to get the curved areas like the wrist to come out nice and contoured? I am going to try the scrape methoudn on my first stock.
I like the color! great piece of work!
 
I wanted to show a better picture of the wire work on the pistol.[url] http://i29.photobucket.com/albums/c253/bigwwody/DSCF0341.jpg[/img[/url]]
 
Last edited by a moderator:
That's a great gun Geoff, yer gonna put me out of a job!
Keep up the good work! :thumbsup:
 
Mike,

Thank you, Sir. It's only because of builders like you that are willing to share their expertise that the rest of us can improve relatively quickly. I think you can learn more in a very short time on these Forums then many of us did for all the years we plodded along blindly, with only a few references to guide us. Thanks!
geoff
 
flashpanner said:
How did the scrapping technique work for you? was it hard to get the curved areas like the wrist to come out nice and contoured? I am going to try the scrape methoudn on my first stock.
I like the color! great piece of work!

Flashpanner,
I was torn between the sandpaper and using scrapers for a long time. I was having this discussion with a furniture builder here in NH...he does museum quality 18th Century reproductions. He uses no sandpaper at all! He taught me to sharpen them properly.

Basically, the edge of the scraper is filed as close to a 90 degree angle as possible in relationship to the sides....a hardened tool is then used to produce a burl or edge on the scraper. The angle of this burl determines whether the scraper will cut large curls and remove wood quickly...or for fine finish work before staining. These 3 scrapers will do 99% of the stock work...You can always make scrapers out of hacksaw blades or saw blades for any special areas or shapes. I use scalpel blades to clean up around carving...you can get them in many shapes.
scraperssharpener002.jpg
[/img]
Hope this helps....geoff
 
Good Golly, look at the neat and spiffy bench. :shake:
Mine has piles of plane shavings and sawdust 4" deep with tools scattered all over the place. :haha:
 
Old Army and Schimmelsmith, great work! You both got a fine piece of work AND you have the extra benefit of a good friendship. Altogether a win - win situation. :applause: (And ho do you keep a bench that clean?)
 
Mike Brooks said:
Good Golly, look at the neat and spiffy bench. :shake:
Mine has piles of plane shavings and sawdust 4" deep with tools scattered all over the place. :haha:

Mike...this more like it? Had to sweep up a bit to find room to take the pic!
VinceNEFowler003.jpg
 
Whew!!
Now I know you'er alright. That first picture of your bench made me think you must suffer from some form of dementia. LOL
By the way, very nice work.

Regards, Dave
 
He lives in one of the oldest house in Amherst.
Built in the 1760's with oringinal floors, fireplaces and stonework.
That's why he is such a tradionlist. Had a fit when I showed him my dermel tool with the cutoff wheel :nono:
 
ahhhh I feel better now!!! looks more like real world work bench to me!!
Old motto revamped:
"This mess is a place"
:rotf:
 
Thanks for the reply. My scrappers are similar. I made mine from a piece of circular saw blade. I have made several as needed for certain areas. I like the less airborne sawdust cloud, and so does the wife. I am building my gun in a finished basement with a work area adjacent to the family room.
 
Back
Top