• Friends, our 2nd Amendment rights are always under attack and the NRA has been a constant for decades in helping fight that fight.

    We have partnered with the NRA to offer you a discount on membership and Muzzleloading Forum gets a small percentage too of each membership, so you are supporting both the NRA and us.

    Use this link to sign up please; https://membership.nra.org/recruiters/join/XR045103

Pins or Rivets?

Muzzleloading Forum

Help Support Muzzleloading Forum:

This site may earn a commission from merchant affiliate links, including eBay, Amazon, and others.

Oregonjohn

36 Cal.
Joined
Aug 28, 2001
Messages
64
Reaction score
0
Hello. I have a nice crown antler piece from my friend the Dread Wechlo in Medford, OR, that I have slotted to receive the tang. Now, would rivets (2) or pins (possibly 3) be more appropriate for the 1750s-60s era? Also, I see more examples of iron rivets than brass in the old pieces, which would be more appropriate? Any sources for iron/steel rivets? Thanks.
All the best,
John in Coos Bay
 
There was a great article in Muzzleloaders back in Sept 03 on trade butchers and scalpers.
Pin's where the most common,(they were cheap). The trouble with rivets is the head! To look nice, the head needs to be recessed or in-let,tough to do with antler.
Most any Hobbie Shop will have small diameter steel rod and Harware stores have rivets,but likley not long enough.
I have used brass rod simply because it's more malable,when it's hammered it tends to give me the expansion I want too perminantly set the rod/pin in place, and U can use a small steel punch to shape the ends easily.
Track of the Wolf has "Cutler's rivets" in brass that is actually a two piece rivet,male and female. I've used those with wood handled knives and they work and look good.
hope that helps,,,YMHS
 
I have used plain old iron box nails as handle pins for catching the tang on antler handles. They are cheap, readily available and look good when the head and point are clipped after driving in the pre-drilled hole and then filed flush. They upset some, but not much, so the hole needs to be tight. If using them in wood scales you need to be careful not to glance a blow and crush the surrounding wood when the nail tilts (but you should with any pin, anyway).

Just remember that nails were rectangular in cross section back in 1750, so don't 'splain they is nails: they is iron pins.
 
Do you mean slotted for a partial tang or slotted for a hidden tang. For a partial you should rivet, if hidden you can go either way. Which ever way you go you should use iron pins or rivets. Brass and copper were rarely used. To make it look correct, depending on the blade, you can just peen heads on the pins and leave them at that. To look more refined do the same, but countersink the holes a little, peen the pins, and dress them off. Just use nails or welding rod or cold rolled rod. Brass and copper were not as prevalent as iron, and not as strong, although plenty strong enough for this purpose.
 
Hey Sumtacks, Stumpkiller, and Wick.
Thanks for your information.
I have access to 1/8" welding rods. Is this size "about" right for this knife?
My slot is a full slot and not for a hidden tang but cannot find iron rivets. This knife is not going to get hard duty so am hoping that pins shall be enough. I plan on using some really period correct 2-part epoxy on both the tang- handle fit as well as put some on the pins before seating them in.
Am guessing also that I would use a 1/8" bit and put the drill press on kinda slow and take my time? Any hints or problems to watch out for when drilling?
Thanks again. This shall soon be a heckofa knife and special 'cause I had something to do with it with help from my forum friends.
All the best,
John in Coos Bay
 
I plan on using some really period correct 2-part epoxy on both the tang- handle fit as well as put some on the pins before seating them in

The epoxy would actually be enough if you do it right. Use a Q-tip and acetone (or at least denatured alcohol) 15 minutes before mixing the epoxy to clean any oil/wax/grease off the tang and wood/antler handle/scales. I like to drill the holes slightly undersized so I know the fit is tight, but the epoxy will guarantee that. Be sure to wipe any up quickly after you drive the pin in. Epoxy will darken wood scales where it soaks in (which is not a problem if you were going to rub an oil finish on them).

A problem drilling would be the bit catching and the blade spinning into your hands. Secure it well in a vice. The tang should be soft enough that it drills well, but cutting oil never hurts (if you clean it off before the epoxy). If it's a blind tang into an antler section or crown, drill the tang hole a tiny bit (1/16" or 1/32") further forward than the handle holes so it draws the blade in tight when the pins (round the head first) are driven in.

Oh yes, should mention that I drill the tang seperately from the handle. Handle first, then fit the blade in and mark where the holes need to be with a punch, remove the blade from the handle, and then drill the blade.

And be sure to try-fit everything dry before mixing the epoxy. I hate the 5 minute stuff, will use the 15 minute, and much prefer the half hour kick epoxy. If you add some sawdust it fills the gaps better and looks more like cutlers pitch than clear epoxy. /ubbthreads/images/graemlins/wink.gif
 
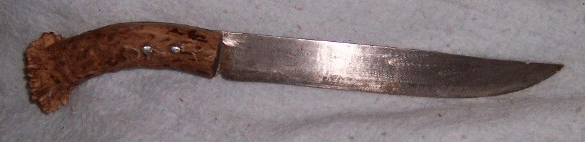
I am assuming this is a partial tang. Full width, but slips into a slot in the grip. First off, do not drill undersize, and epoxy is not necessary, and will give little strength to this type of grip. !/8" welding rod, or 3/16", if this is a large blade. You may epoxy if to just hold it in place when you drill, but a C clamp should hold it. Check the tang for hardness with a file. If it cuts without to much trouble, you should have no problem drilling it. If in doubt use a cobalt bit. Drill your holes, insert the pin-rivets, and peen them over. Do not drill closer than 1" to the front of the grip or it may crack later. Space your holes at least 2" apart, more if practical. Fill in any gap with wax. If the tang is too hard you will have to anneal it. When you fit the pins you need about 1/8" above the holes to rivet down. You can pre-finish the grip before you rivet down and save some work you would have later around the rivets. If you have any problems or questions, email me, this is what I do for a living.
 
Hey guys. You can view my humble effort in finishing the knife herein discussed. It's the third knife from the bottom at:
www.northcoastknives.com/northcoast_knives_gallery5.htm


With the help of Wick and others, got 'er done and do like the result. Was exactly what I was aimin' for...now if I could just shoot that way...oh well.
All the best,
John in Coos Bay
 
Not a bad looking knife...
Gallery5_BarberLrg.gif


Now comes the leather work... :)
 
Nicely Done,, and qudos' for keeping the 18th cent, repo lines you we'er noted for,,many don't do that.

Niceley done,,How much ya want fer the next one!??
 
Vell, yumpin' yimminie...t'was ye little olde gray headed Svedish Lady....Mrs. Olsen it were...and she broke in here, threw me into a arm lock she did and insisted on a pot of double strength Folgers...Red can thank ye very much...
That green can stuff just don't stain well, nor give me a kick in the duff. I, of course, complied...learnt that ye never stare down a granny cause olde gramps will be there boxin' yer ears if'n ye do. She actually was not a lonely widow as I find out...she's livin' with a biker in Albuquerque and dancin' on the side.....:) Dances under the name, Coffee Lady....go figgur!
All the best,
John in Coos Bay
 
I purchased a beautiful knife from this guy last year. Excellent quality and a very practicle knife. Assuming from his devotion to historical accuracy that he would have everything historically correct, you may take special note of the copper rivets on the one labled "Small Backwoods", several others on this page.

http://www.olddominionforge.com/knives.html
 

Latest posts

Back
Top