• Friends, our 2nd Amendment rights are always under attack and the NRA has been a constant for decades in helping fight that fight.

    We have partnered with the NRA to offer you a discount on membership and Muzzleloading Forum gets a small percentage too of each membership, so you are supporting both the NRA and us.

    Use this link to sign up please; https://membership.nra.org/recruiters/join/XR045103

Questions on the Kibler Colonial

Muzzleloading Forum

Help Support Muzzleloading Forum:

This site may earn a commission from merchant affiliate links, including eBay, Amazon, and others.

Murphinator

36 Cl.
Joined
Mar 10, 2022
Messages
80
Reaction score
43
Location
Millersville, Maryland
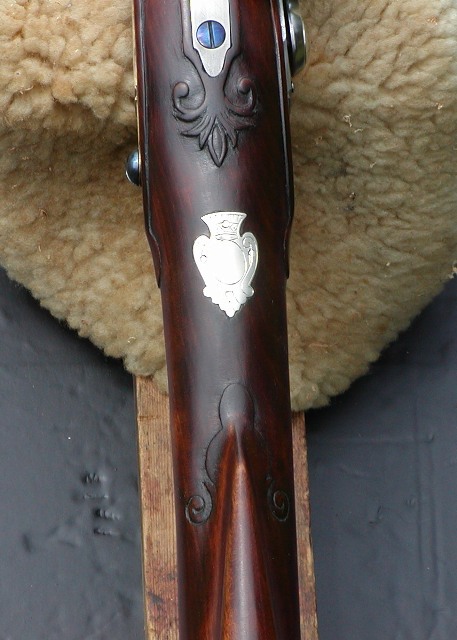
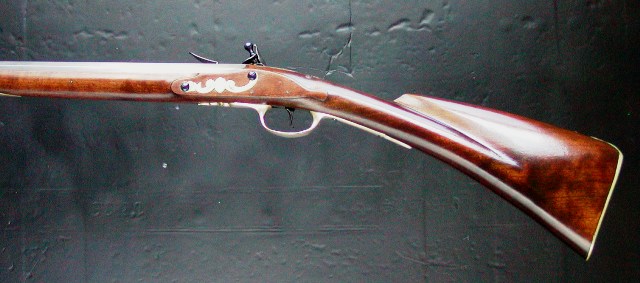
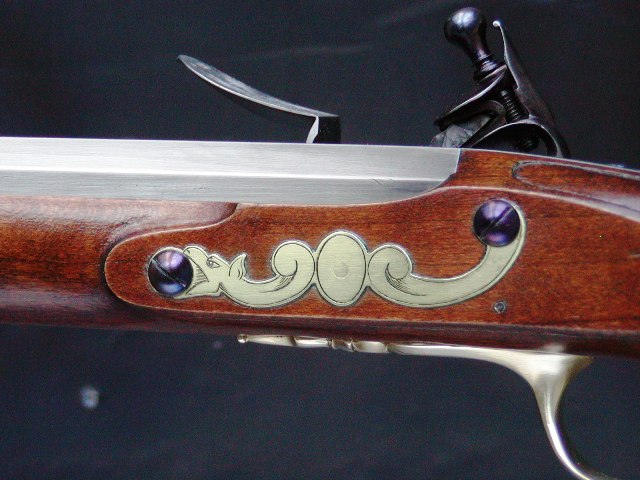
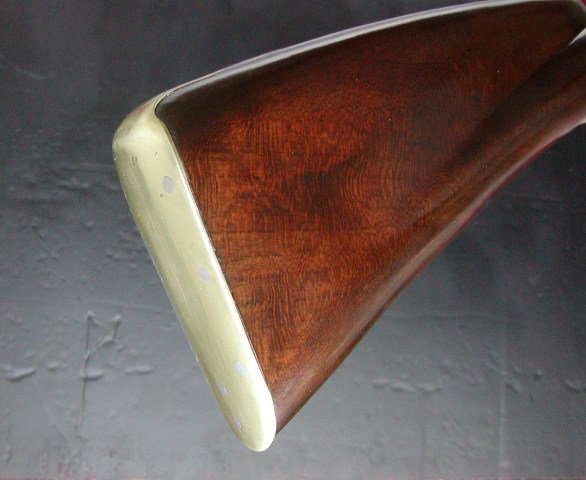
I am ready to get my first flintlock rifle, after many months of footing around and after many PM's from forum members I have finally decided to settle on a Kibler Rifle. Firstly, I have never put together a kit rifle before I have never even owned a muzzleloader lol. That being said I have been watching videos on the internet of the assembly of the Kibler and it looks complicated too me although it is quite easy according to most. Should I pay for the in the white service or pick up the kit and take the bull by the horns ? I dont want to mess up the rifle, since its like $1,300 for the kit. Secondly, I want it to be different so I want to get a Cherry stock. My question for that is do the Cherry stocks always turn out red when you stain them ? I would like to have a somewhat red colour. If anyone has or had a Cherry Stocked Kibler colonial could you post some pictures to this thread or PM me. I want to see how these rifles turn out before I 100% settle on Cherry wood. Lastly I think I want to go with .58 caliber rifle figure I cant hunt everything with it. Thanks to the whole forum for answering all my questions in the past.
 
Eight out of the nine Kibler Colonials I built were of Cherry. Its wonderful wood to work with.
I mix dyes to add color.
Here are four examples.
 

Attachments

  • IMG_5051.jpg
    IMG_5051.jpg
    125.2 KB
  • Col 4_ 4.jpg
    Col 4_ 4.jpg
    241 KB
  • CR done 13.jpg
    CR done 13.jpg
    180.6 KB
  • kibler 6.jpg
    kibler 6.jpg
    264.8 KB
https://www.muzzleloadingforum.com/threads/kibler-colonial-assembly-timeline.136570/
I had never put together a rifle before my .58 colonial. I do have wood working skills and spent a few hours watching videos. Experienced folks can put it together in less than a week and had I more time than I did, I would’ve been done in a week.

Can’t speak on Cherry, but Pathfinder is versed in this area. It’s one of the few woods I’ve never dealt with (I have a live edge wood business so I have worked with dozens of species). I hear lye works, I want a cherry red finish on my next gun (turkey gun-smoothbore) so I’ll be following.

You’ll be fine. Go slow, but it’ll move fast for you, I’m sure. Be sure to post pictures as you go. It’s mandatory to post pictures of the final product, otherwise you forfeit your gun to the forum 😁
 
Hi,
In my opinion, you really have to work at screwing up a Kibler kit. I don't think you need worry much about building it yourself. It could be done on a kitchen table if you could attach a vise to it. A large caliber like 58 is a good choice for the colonial rifle because it will balance a little better. I've stocked quite a few guns in cherry and it is a fine wood to work, however, unless you get a piece with a little figure in it, it has a very boring and plain appearance. On a plain gun, a nice piece of curly maple adds a lot more interest. Cherry can be stained many different colors but it will darken over time. Below are some examples showing some color ranges that can be achieved with cherry. The first 2 photos show an original 250-year old New England fowler stocked in cherry.
YrNJ3XG.jpg

CxgAdFM.jpg

The next batch show 2 NE fowlers I've built stocked in cherry. The almost glowing appearance comes from first staining the stock black and then scraping that off. The black embeds in the fine grain, highlighting it and giving a shadow effect. Then the cherry is stained to give the reddish-brown color.
sDbrTC1.jpg

RO0xbJ0.jpg

hRYbIcT.jpg

0DTD1vd.jpg

0WYfefu.jpg

F7QEuKI.jpg

The last gun was stained to look more like aged apple wood rather than the redder tone usually employed with cherry.
yipekOT.jpg

QjH4mfs.jpg


dave
 
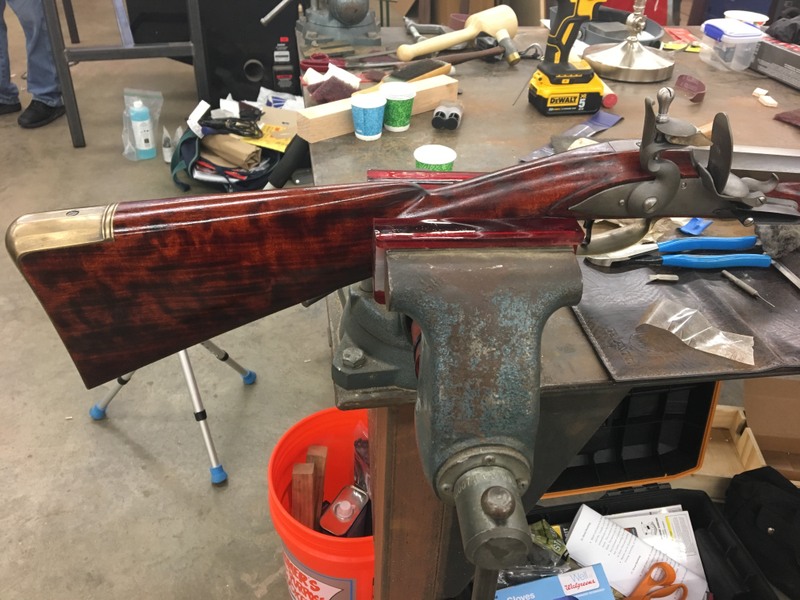
I agree with all of the above! Kibler is really hard to screw up! Get a 58 lightest of all the calibers and best balance. I also went with cherry an awesome wood for a first gun. Also this was the first gun I built ever so if I can do it you can too! Also, read other threads to get ideas on finishing. This gun was finished with oven cleaner.
 

Attachments

  • 93D2CF08-946D-404F-9A4E-4A581536E6C1.jpeg
    93D2CF08-946D-404F-9A4E-4A581536E6C1.jpeg
    52.9 KB
  • 98A79023-412D-47AF-906F-4CFB85670ABA.jpeg
    98A79023-412D-47AF-906F-4CFB85670ABA.jpeg
    36.6 KB
  • 485410ED-8CDE-446E-BA1C-BC659ED187DC.jpeg
    485410ED-8CDE-446E-BA1C-BC659ED187DC.jpeg
    44 KB
  • B4B8A89C-FC18-4280-837F-98A5FC25E153.jpeg
    B4B8A89C-FC18-4280-837F-98A5FC25E153.jpeg
    38.6 KB
  • 0CF4CD39-1717-41F2-9110-A8E281421C34.jpeg
    0CF4CD39-1717-41F2-9110-A8E281421C34.jpeg
    51.2 KB
  • D481E3DB-2231-4137-B6BF-5B1E62CF044A.jpeg
    D481E3DB-2231-4137-B6BF-5B1E62CF044A.jpeg
    49.8 KB
  • 3B17800A-DFCE-4B17-83C9-F36A4E2B314F.jpeg
    3B17800A-DFCE-4B17-83C9-F36A4E2B314F.jpeg
    39.4 KB
  • 372FBD54-70DF-419A-88F0-8D7C37EF939D.jpeg
    372FBD54-70DF-419A-88F0-8D7C37EF939D.jpeg
    41.9 KB
  • 0DBB73FB-D5B8-4EAC-B76C-D888AD09D30E.jpeg
    0DBB73FB-D5B8-4EAC-B76C-D888AD09D30E.jpeg
    29 KB
  • 58504A0F-6D8F-4962-B9FB-89296A49317A.jpeg
    58504A0F-6D8F-4962-B9FB-89296A49317A.jpeg
    45 KB
All these rifles pictured are dazzling to my old eyes. I've never heard anyone say a Kibler kit was a tough build; Super easy is the term I hear most often on the forums. I won't repeat the "fool proof" descriptions. This is due to a rare class of (yet undiscovered) fool to which sharpening a straight stick is an impossibility. :doh:
 
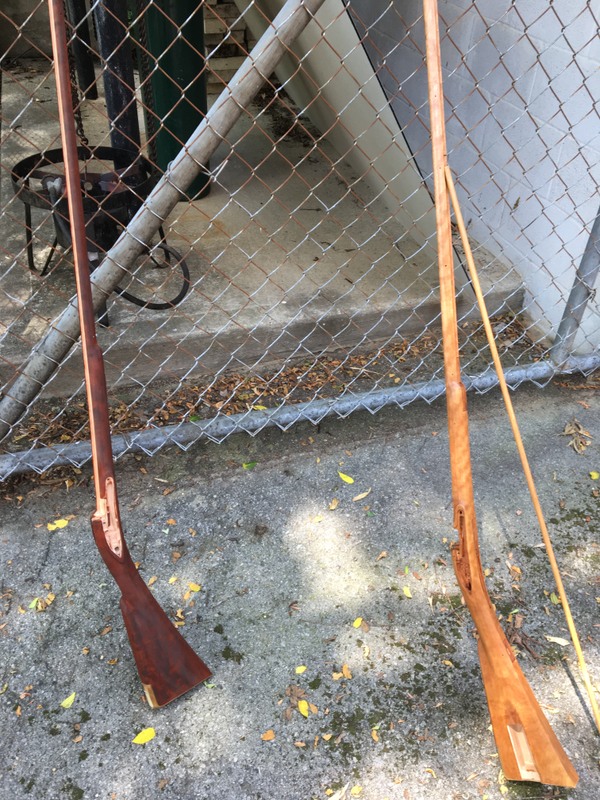
This is a dormant thread but I wanted to add my two cents for future posterity. I built a cherry stocked Colonial at the NMLRA class at Bowling Green a few years ago. I chose cherry because I wanted it red. I used a Fiebings "dark brown" leather dye, which has a lot of red content. I love the color. A fellow student built the same rifle but just finished it without staining it. You can see it below.

As far as kits go, these are easy. Rather than turned on a duplicator, the stocks are CNC machined. It takes minimal effort to get the barrel fitted to the stock and then just sanding before you can start staining and finishing. No major wood removal necessary. Most of the work involves fitting the lugs to the barrel, draw filing, polishing and finishing the barrel and cleaning up all the cast hardware. When I got home I ordered a fancy maple .40cal Southern Mountain and have it about halfway done. I'll do aqua fortis on it.

014.JPG


023.JPG


003_1.JPG
Can you explain the dying process on this. I love that red. My next Kibler will be a smoothie and I want a dark red finish. Haven’t decided between cherry or fancy maple
 
Mine is a smoothbore 58cal. wanted something to hunt grouse bear, elk or deer. I finished it with just danish oil and a touch of bone black between the last three coats I rubbed it down with pumice stone powder. Target was shot @ 45 yards best group I have shot so far with it. I have no problem hitting a 8x9 steel gong at 65 yards. I was going to get the 58 rifled but sure glad I went smoothbore!
 

Attachments

  • 20221018_131003.jpg
    20221018_131003.jpg
    9.6 MB
  • 20221018_120359.jpg
    20221018_120359.jpg
    1.1 MB
  • 20220823_140818.jpg
    20220823_140818.jpg
    2.9 MB
Last edited:
Can you explain the dying process on this. I love that red. My next Kibler will be a smoothie and I want a dark red finish. Haven’t decided between cherry or fancy maple
It's an alcohol based dye. Just wipe it on and let it dry. I dilute it 3:1 for leather work but not for wood. I haven't tried it on maple but it would probably be real nice.
 
I used the aniline alcohol dye approach on my curly maple Kibler Colonial. I think it went very well! One has a fair amount of control over color saturation and tint. I went light, but any color combination is possible
 

Attachments

  • 19F544DA-D24E-4910-B937-3D32AA7AE509.jpeg
    19F544DA-D24E-4910-B937-3D32AA7AE509.jpeg
    3.3 MB
I bought a Kibler in the white SMR, and it probably took less than 8 hours of work to finish.
Now that I have all my stuff ready, and some experience, I probably could get it finished in half that time.

I ordered a woods runner, and looking at the videos, I'm guessing 8 hours. And to clarify, maybe 4 or 5 days, with a couple hours each day. Anyway, to me, it looks like a woods runner is a near in the white product. Less work need is less possible mistakes.
 
The first 25 Woodsrunner kits were essentially in-the-white kits as @James Kibler was making sure all the parts would properly fit. After the first 25, the packaging would be more like an assortment of parts that will fit together easily, but not assembled in the shipping box. It will still be an easy to assemble kit, but assembly time will be longer and more like the time to assemble a Colonial Rifle.
 
Back
Top