• Friends, our 2nd Amendment rights are always under attack and the NRA has been a constant for decades in helping fight that fight.

    We have partnered with the NRA to offer you a discount on membership and Muzzleloading Forum gets a small percentage too of each membership, so you are supporting both the NRA and us.

    Use this link to sign up please; https://membership.nra.org/recruiters/join/XR045103

Refurbished Pedersoli Bess

Muzzleloading Forum

Help Support Muzzleloading Forum:

This site may earn a commission from merchant affiliate links, including eBay, Amazon, and others.
Joined
Nov 26, 2005
Messages
5,153
Reaction score
10,571
Hi,
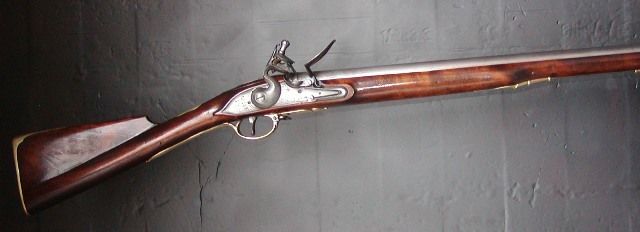
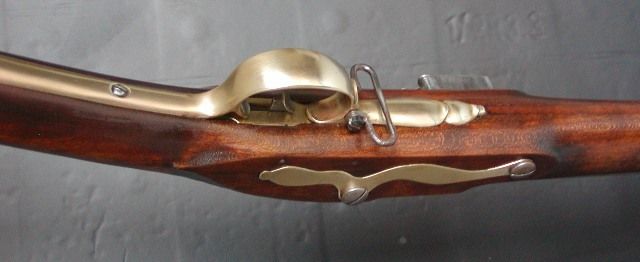
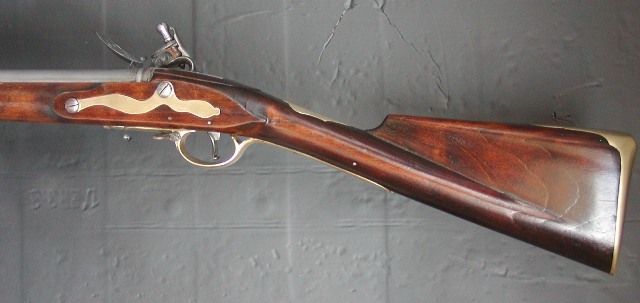
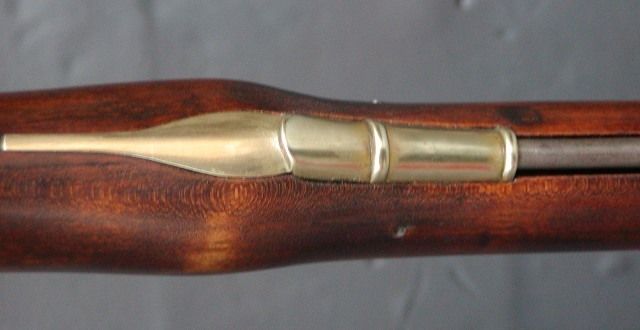
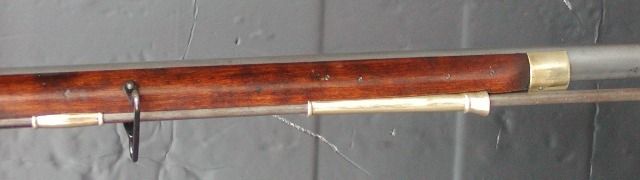
Below are photos of a 1980's era Pedersoli Brown Bess that I worked over to fix some problems and make more historically correct. This Pedersoli Bess is modeled after the pattern 1769/75 musket, which was issued to troops in North America in 1776 (Bailey, Small Arms of the British Forces in America 1664-1815). I had to fix cracks in the stock, rework some stock details, and refinish the gun. I also had to substantially work over the lock, a task which was aided immensely by advice from Gus(Artificer). The major deviation from the original Bess pattern is that Pedersoli uses a buttplate 3/8" too short from heel to toe. While that does not sound too bad, it really changes the butt stock profile making it look too small in proportion to the large lock area. Nothing I could do about that. Anyway, I hope you enjoy the photos.

dave
Rowland%20Brown%20Bess%20long%20view_zpsacpryuui.jpg

Rowland%20Brown%20Bess%20lock%20side_zpsfeo3njnt.jpg

Rowland%20Brown%20Bess%20lock_zpsgvpqjx2c.jpg

Rowland%20Brown%20Bess%20tang%20apron_zps1e5kxvzx.jpg

Rowland%20Brown%20Bess%20guard_zps9awxfhqb.jpg

Rowland%20Brown%20bess%20Cheek%20side_zpsakitvgnj.jpg

Rowland%20Brown%20Bess%20rear%20thimble_zpspmebzmer.jpg

Rowland%20Brown%20Bess%20forestock_zpsvuinxcvs.jpg
 
Nice pictures!!

Would you please describe what you did to rework the stock details to make it more historically correct?

I have my Brown Bess in my lap as I type this, but I’m having a bit of a difficult time seeing everything you did.

Thank you for the kind words and I was honored to give some slight assistance.

Gus
 
Hi Gus!
The list is long:
1. scraped off the old worn finish down to bare wood, which was a blonde-colored walnut that was not very dense and even punky in spots.
2. straightened the profile of the top of the comb, which had a slight funky arch.
3. correctly reshaped the barrel tang apron.
4. the lock was inlet too deep so I removed wood so the lock was at the correct depth.
5. shaved the lock panels down a lot to a more correct width and shape
6. reshaped the beaver tails into tear drops
7. Filed the barrel tang down so it was more flush with the wood.
8. the trigger plate and guard were inlet much too deep so I corrected that problem
9. added cross pin to the butt plate return.
10. shaved wood away from the rear ramrod thimble so that it was inlet flush to the wood.
11. thinned out the entire forestock right to the nosecap.
12. shaved wood from the sideplate inlet so it was 1/32" proud of the wood.
13. re-inlet the buttplate so it fit better.
14. cleaned up and refit the tang bolt and buttplate screws. Case-hardened all the screw heads.
15. shaped and finished the wood with pattern-makers rasp and files, then scrapers. No sandpaper and I worked fast and deliberately to simulate a workman-like military finish.
15. stained the wood with water based aniline dyes to get a better, more correct color
16. finished the wood with polymerized tung oil with a tiny bit of spar varnish added. That gave a good penetrating finish with a bit of brittle surface gloss. The finish was lightly rubbed back with steel wool and water after curing. After all that, I started in on the lock, barrel, and other metal parts.

Thanks for you interest Gus.

dave
 
Lookin' very fine.
But, yer embarrasing me. :redface:
My BB was more intended as a 'take home after the AWI' user smoothbore than a reenactors hc piece. I personalized it by uglifying some features. :doh:
To top, or bottom, that, the browning did not take evenly and I never redid.
So, now.....because of you.....I'm seriously planning on redoing mine a making it purty again. Deserves it. Gave me a lot of years of service and good times.
 
Thank YOU for explaining what you did. I found it VERY interesting.

My Bess needs a good going over again for semi long term storage and I am going to look at these areas for correction.

Gus
 
Hi,
Thanks for looking and the kind comments. It was fun to do and in the process I educated myself about many details of Brown Bess patterns. It helped to have some original guns to examine and my notes from several original Besses I disassembled and lightly cleaned recently and years ago. The most important nuance that I imparted to the gun was a sense of a human hand in the work. I left some tool marks, did not fuss overly to make sure everything was perfect, and rubbed off sharp "machine-produced" edges. All together the effect looks authentic. Thanks again for your interest in my work.

dave
 
Back
Top