When you get ready to put a finish on your gun you'll have to ask yourself, "Do I like the color of the wood?" To find out what it's color will really look like, take your gun outside into the sunshine and use a rag dampened with water to wet the wood. While it is still wet, that is exactly the way if will look after the finish is put onto it.
If it is too blond for your liking, you are going to have to darken it with a stain.
The type of wood CVA used (beech) is a very tight grained wood that will NOT absorb oil stains well so your going to have to use a water based or alcohol based stain. The stains sold by Birchwood Casey are the kind to use. If there is a good woodworking store in your area they might also have a stain called "Solar-Lux which is alcohol based.
The companies like Track of the Wolf and Dixie Gun Works also sell good alcohol based stains from Laurel Mountain.
BEWARE of the stains sold by your local hardware store. Most of the stains they offer are oil based and as I mentioned, oil based stains will mess up the look of your gun.
I've had good luck with Walnut as a color to start with.
Now, getting down to the process. The first thing is to totally sand the wood, sanding "with the grain". The grain of the wood almost always runs from the butt to the muzzle so sanding with the grain means your sanding strokes will be in that direction.
(Sanding cross grain will leave scratches that will show up as darkened streaks and look really bad.)
I do NOT recommend sanding with a sandpaper grit finer than 220 for this final sanding. Using a 320, 400, 600 or finer paper will not make the wood any smoother and it will tend to close the grain so it will not absorb the stain evenly.
After you've finished sanding the stock you need to "whisker" it. Whiskers are the result of little grains of wood that were pushed down against the surface while you were sanding. If they get wet (as they will when you stain the wood), they will stand up when they dry, making the surface feel very rough.
You don't want this so, what you need to do is to get a damp rag. Then, thoroughly wet the surfaces of the wood and sit it aside to dry. When it is dry, pick the stock up and rub your hand gently from muzzle to butt. In one direction it will feel rather smooth.
In the other direction, it will feel very rough. Remember this "rough" direction.
Now, using a brand new piece of 180 or 220 grit paper VERY LIGHTLY push the sandpaper in the same direction that felt very rough.
You are trying to make the sandpaper cut off those rough whiskers only. You do not want to push them back down against the wood. That's why its important to use new paper and a very light pressure.
It only takes a stroke or two to cut off these whiskers so don't over do it.
Also, DO NOT use steel wool to whisker the stock. If there is any water in the stain at all, the steel wool fragments will rust causing freckles all over the wood.
Now, with the stock whiskered you are ready to apply the stain.
Right here I'll say, I never use the stain full strength out of the bottle. I've found it is better to thin it with some denatured alcohol at about a 1 to 1 ratio. In other words, a tablespoon of stain to a tablespoon of alcohol.
With this thinned stain, use a small, fine hair paint brush about 3/4" to 1" wide and paint the stain onto the wood. Apply the stain "with the grain".
Try not to overlap the strokes but also try no cover all of the wood so there are no unstained places.
While your doing this, look at the darkness of the stain. While it is still wet, that is the same darkness it will be when you apply the finishing oils. Now, sit the stock aside to dry. (When it is dry it will look much lighter than it did when it is wet. This dry look is not the same as the stock will be with the finishing oils applied so don't be fooled by it.)
If it is not as dark as you want, feel free to apply another coat or two or three. Each time you apply another coat, the color of the wood will be darker than it was before. This is good. It allows you to sneak up on just the right color and darkness.
You might also think of buying a Maple Brown stain and applying a coat of it to make the color a bit browner. Mahogany stain can be applied if it is thinned to produce a reddish color to the walnut. That's one of the neat things about the alcohol or water based stains. They are easy to thin and easy to apply multiple coats to change the color.
Once the stain is applied, you can use boiled linseed oil to finish the stock but, linseed takes days to dry and it is very poor at protecting your gun from water.
Other good finish oils are Tung oil although if it is real tung oil it too will take days to dry.
Many people including me like to use Birchwood Casey Tru-Oil. It is like linseed but it drys much faster and it protects the wood better.
Do NOT brush the finishing oil onto the wood. You don't want to paint it on. Instead, you need a small soft clean rag. Dampen the rag with the oil and start rubbing it onto the wood in a circular pattern. Rub hard while your doing this. Apply more oil as it is needed.
When an area is thoroughly oiled, move on to another area. When the stock is totally covered, sit it aside to dry.
When it is dry, use some 600 grit or finer sandpaper to VERY LIGHTLY sand off the small bumps that will show up. These are caused by dust that collected while you were applying the finish or while it was drying.
After lightly sanding, repeat the oiling process. It is not uncommon for as many as 6 to 12 coats of oil to be applied before some people are happy with the finish. This is especially true when they want a "deep" looking coating.
After the final coat of finish has dried, many people like to use a wax like Johnsons Paste Wax to finish it off.
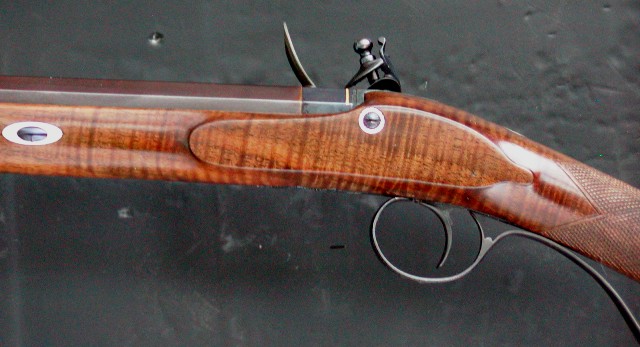
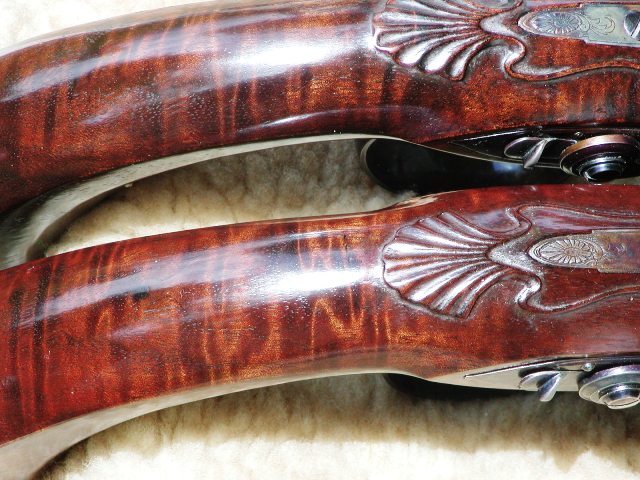
Here's a look at a CVA beechwood stock with Walnut stain and Tru-Oil finish.