• Friends, our 2nd Amendment rights are always under attack and the NRA has been a constant for decades in helping fight that fight.

    We have partnered with the NRA to offer you a discount on membership and Muzzleloading Forum gets a small percentage too of each membership, so you are supporting both the NRA and us.

    Use this link to sign up please; https://membership.nra.org/recruiters/join/XR045103

The Half Flap

Muzzleloading Forum

Help Support Muzzleloading Forum:

This site may earn a commission from merchant affiliate links, including eBay, Amazon, and others.
Joined
Nov 1, 2018
Messages
390
Reaction score
942
Location
TN
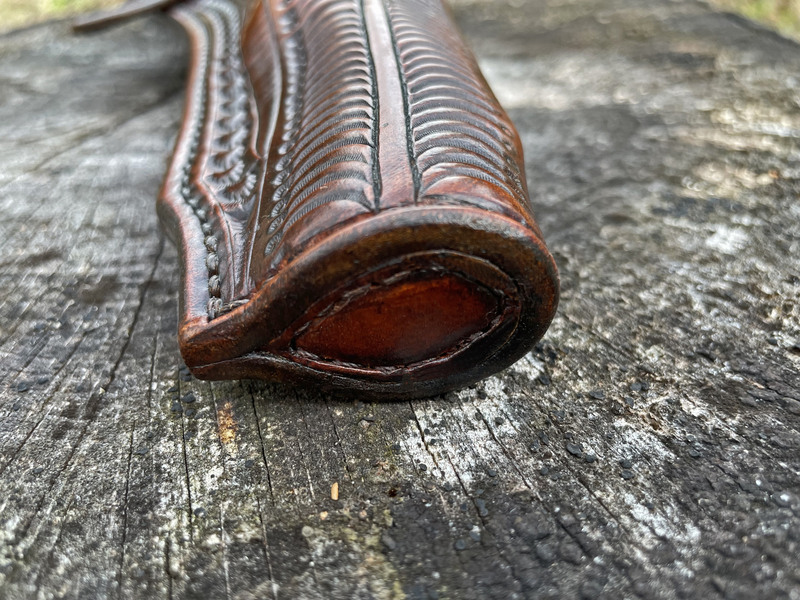
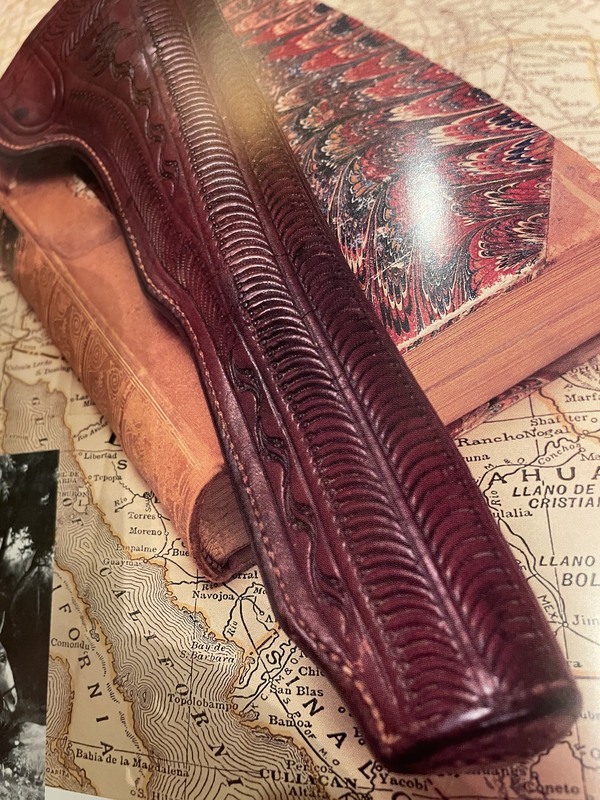
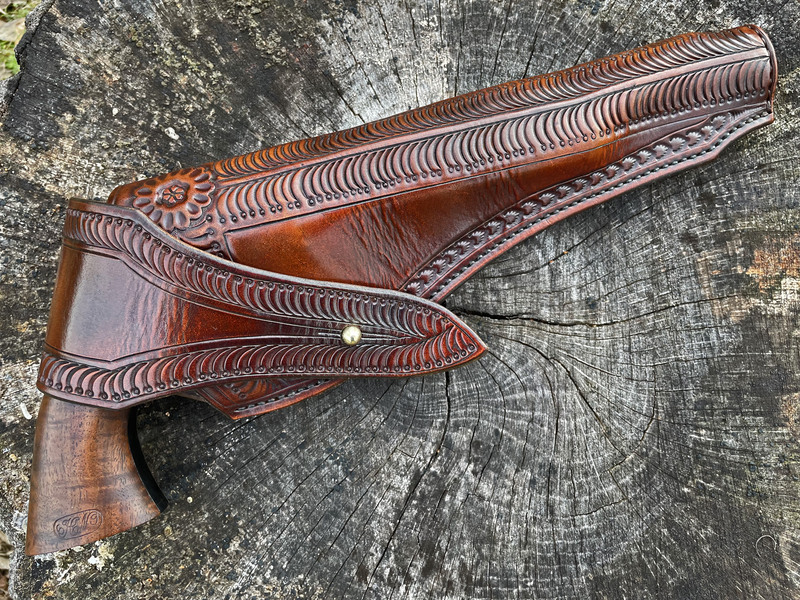
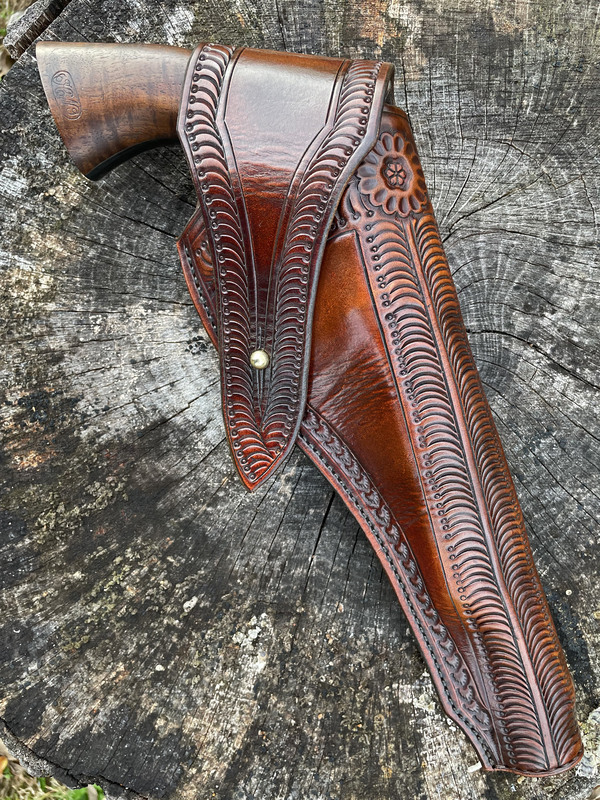
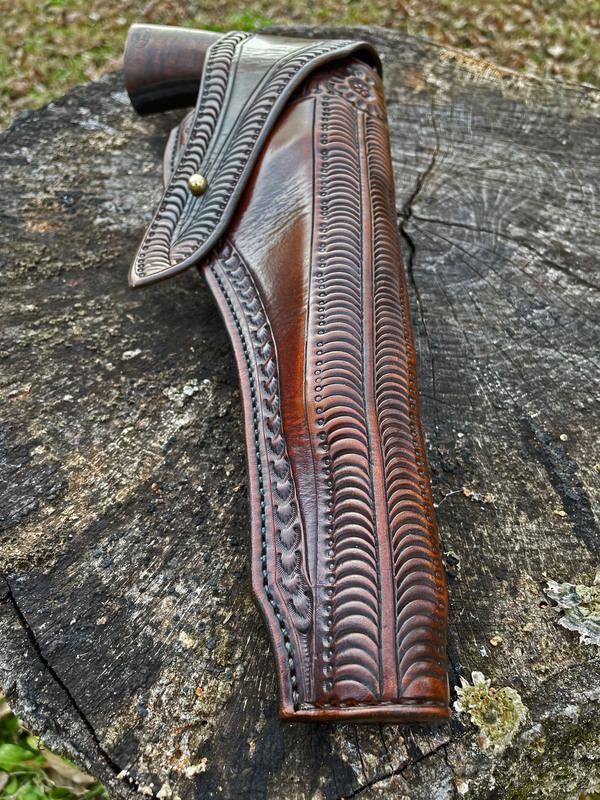
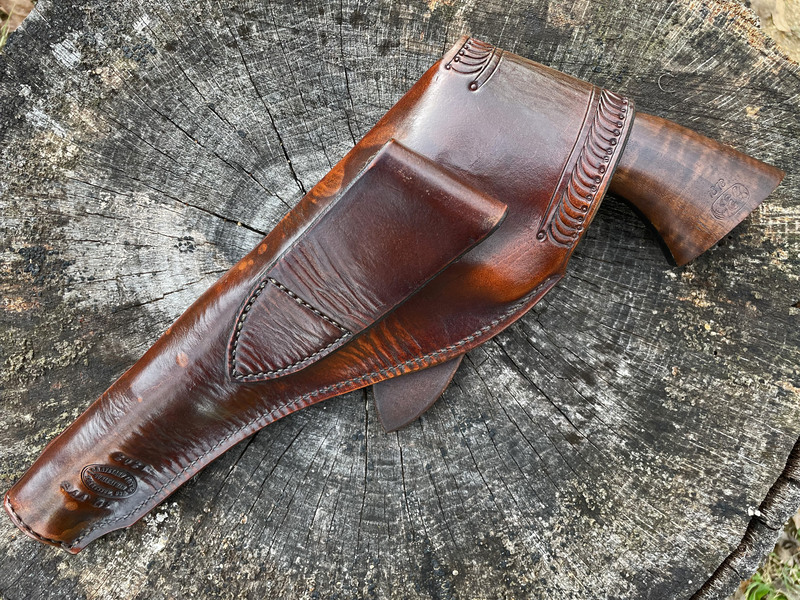
I've wanted to try this pattern for a long time but always dreaded the trial and error involved in designing the flap. I started to do a plain black military pattern but just couldn't do it. I took design queues from both military and civilian versions. Sam Browne button instead of the usual keeper. The stamping pattern from page 74 of Packing Iron. I didn't really like the way the pattern on the original turned the corner at the top of the throat, so I used a rosette to facilitate the turn in the pattern. I had to wait until the holster was assembled and wet formed before I could finalize the design of the flap and stamp it out. Chestnut brown with some aging effects. Decided to do a sewn toe plug as well. It turned out pretty good.
008b_3.jpg


005b_2.jpg


003b_5.jpg


004b_6.jpg


007b_2.jpg


Page 74 of Packing Iron.

001_3.JPG
 
Nicely done. The stamping and fit/position of the half flap is great. Your plug finish and stitching have great lines,
Far beyond anything I could do, it's amazing, 👍
critique if any?,, Ya kinda hurried that stamping along the barrel length a bit,
, if that stuff was a bit more measured, it'd be A++ for cowboy era.
Frontier is a bit out of era for this trad form, but Thank You for sharing your skills. 😇
I hope to see more,,
 
Thanks all.

Few things at work here. Firstly, I am anal retentive and have to resist the urge to make everything perfect. It would be in my nature to take a lot more time to make it all as perfect as possible. Problem with that is that none of the original work is perfect. That said, the line work down the pouch is done with a straight edge. It's when I wet mold and the holster starts taking the shape of the gun inside, it starts distorting the stamping pattern. Original holsters were not wet molded and many were not even made for any specific model. I like my holsters to fit properly so, we live with it.

Flap holsters appeared in the 1850's and the stamping pattern dates to 1850-1855 so we're good for the era.
 
Yep! It is really tricky. I hate doing them and for function I prefer an open toe. For me it's more of a technical exercise but I do like the way they look. I think this makes only about four or five that I've done.
 
GYJ,
Excellent work! I love the look of your holster. My question is about no hole in the toe plug. No dings intended, just a question.
John
Bit of an oversight on my part. Wasn't 100% sure I wanted to do a toe plug, especially if the rest of it didn't turn out right. I didn't bevel the inside edge of the toe so I'd have the option later on. I usually draw up the plug pattern starting with a circle and then mark the center for a hole. This time I used a 3/4" round strap end cutter to do the large end and cut the rest with the round knife. The holster was about 90% finished when I sewed the toe plug in place and I was in a bit of a hurry to get it finished.
 
I've done the toe plug a couple of ways. For those who haven't done one, the issues are several. First, the spacing on the holes is different, The holes in the plug are closer than those going around the outside of the holster. Then you have to run the awl at exactly 45 degrees or the holes won't be even from the edge of the leather.
What did I do? Easy, after the first one I cheated. Holes go straight which exposes the thread on the inside of the holster, BUT at least all the holes are lined up. THEN to protect the thread I had a second duplicate plug I rammed down the inside of the holster. I didn't even glue it, the pressure fit has always just held it in place.
 
I've wanted to try this pattern for a long time but always dreaded the trial and error involved in designing the flap. I started to do a plain black military pattern but just couldn't do it. I took design queues from both military and civilian versions. Sam Browne button instead of the usual keeper. The stamping pattern from page 74 of Packing Iron. I didn't really like the way the pattern on the original turned the corner at the top of the throat, so I used a rosette to facilitate the turn in the pattern. I had to wait until the holster was assembled and wet formed before I could finalize the design of the flap and stamp it out. Chestnut brown with some aging effects. Decided to do a sewn toe plug as well. It turned out pretty good.
008b_3.jpg


005b_2.jpg


003b_5.jpg


004b_6.jpg


007b_2.jpg


Page 74 of Packing Iron.

001_3.JPG
Very nicely done, and the rosette fits right in perfectly. Excellent!
 
I've wanted to try this pattern for a long time but always dreaded the trial and error involved in designing the flap. I started to do a plain black military pattern but just couldn't do it. I took design queues from both military and civilian versions. Sam Browne button instead of the usual keeper. The stamping pattern from page 74 of Packing Iron. I didn't really like the way the pattern on the original turned the corner at the top of the throat, so I used a rosette to facilitate the turn in the pattern. I had to wait until the holster was assembled and wet formed before I could finalize the design of the flap and stamp it out. Chestnut brown with some aging effects. Decided to do a sewn toe plug as well. It turned out pretty good.
008b_3.jpg


005b_2.jpg


003b_5.jpg


004b_6.jpg


007b_2.jpg


Page 74 of Packing Iron.

001_3.JPG
Looks awesome. I'm about to take a stab at my first holster. I've done knife sheaths and an assortment of unusual leather products for my family as gifts. I try to think up something that's never been done, then look for it on line and if I can't find it, I make it!
This was a folding sunglass case I made for my wife for her birthday. I also got her the folding Ray-Bans.
KIMG0193.JPG
 
If you can do a molded case like that, a holster will be a breeze! I just wouldn't suggest a half flap as a first effort. ;)
Paper patterns don't make that flap a little easier? Less trial and error.
Here's something I made for my son and his wife for Christmas. They're big into dungeons and dragons. It was an attempt to mix materials (leather and wood)
KIMG0564.JPG
 
Back
Top