Tomahawk, 400 layer edge

Muzzleloading Forum

Help Support Muzzleloading Forum:

This site may earn a commission from merchant affiliate links, including eBay, Amazon, and others.

rustylaidlaw

32 Cal.
Joined
Apr 13, 2010
Messages
44
Reaction score
0
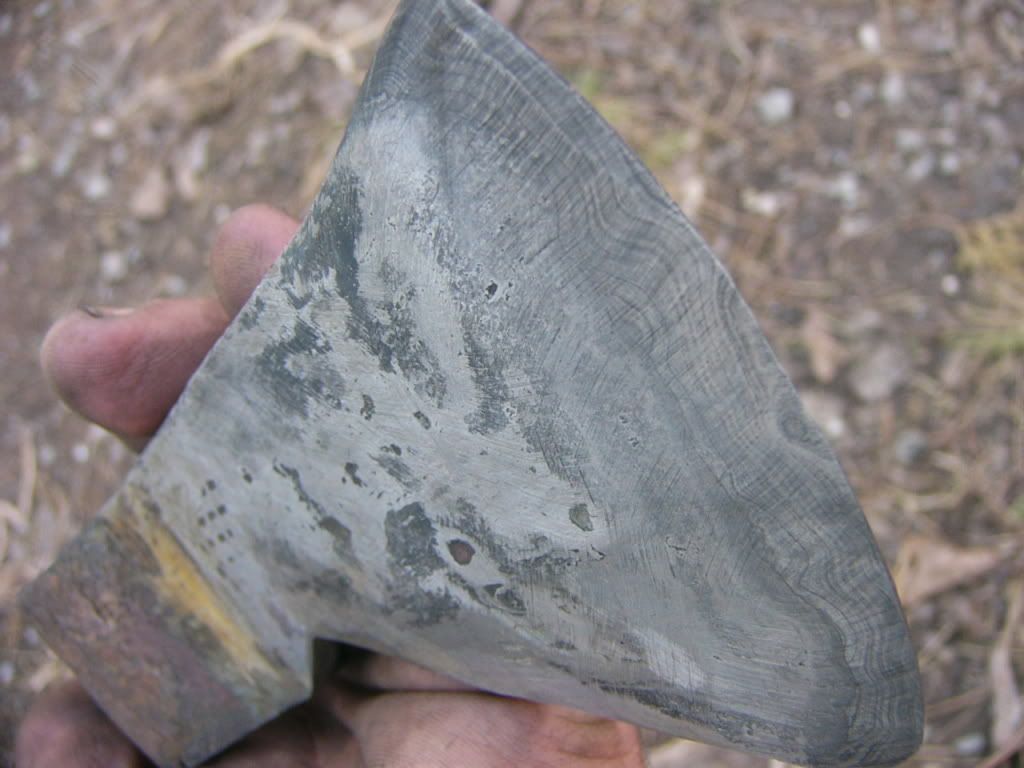
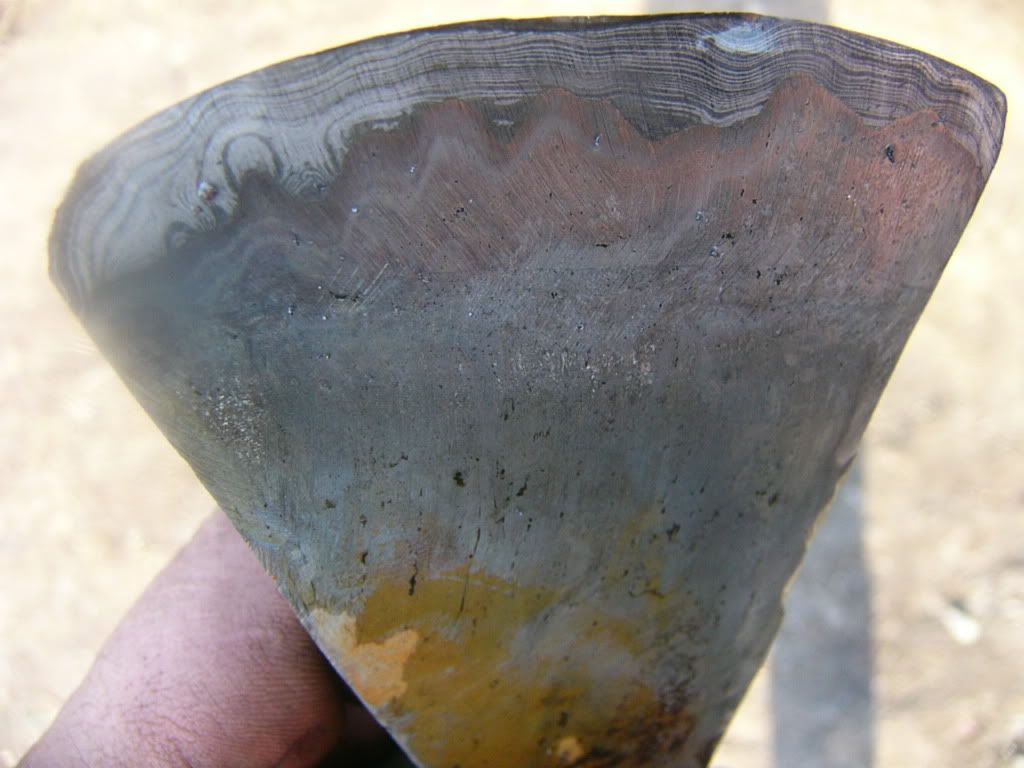
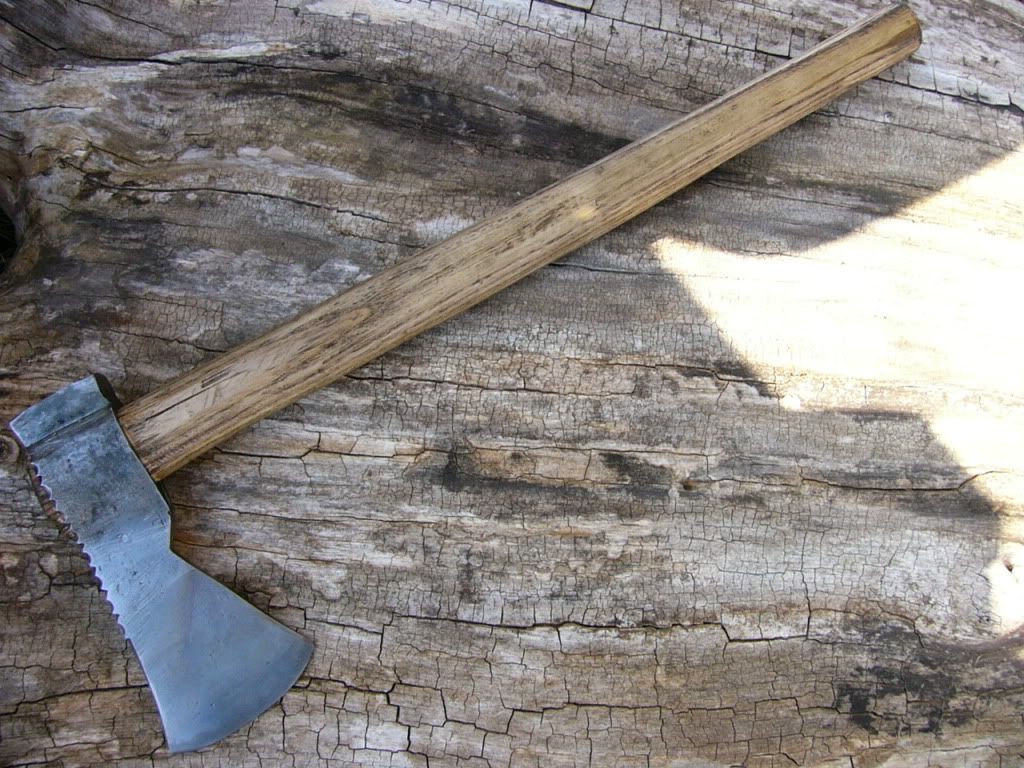
Here's a few pics of a hawk I'm in the process of making on my free time. It's all wrought iron with a 400 layer damascus steel edge welded in.

EglantineandLeda019.jpg


springpics031.jpg


tomahawk001.jpg


Hope you all like it so far! I'll post some pics when it's finished!
 
Cool, haven't done a hawk in a while, and never a full welded one with high carbon edge like that. Guess I need to get busy.

Can't wait to see the finished product.
 
Ok, I gotta ask, why do you fold the metal? I'm no blacksmith, just trying to learn something here. I've heard each new surface picks up carbon from the fuel, thereby eventually making iron into steel. I've also heard that the folds add strength to the metal by giving it a grain structure like wood. What is it? Thanks, Bill.

P.S. Nice work. I can see where it looks like you folded the metal around to the front, then welded on the steel. I would love to learn that someday.
 
I think what he is talking about when talking of folding the steel is that wrought iron by itself has no real carbon to hold an edge.

It can be done one of two ways. One the tomahawk is formed from the wrought iron and the blade is then split with a chisel and a piece of good carbon steel is inserted into a slit in the tomahawk and the wrought is then forge welded or folded back around the good carbon steel.

Or two it can be formed as one piece spit into two halves of the tomahawk and folded back around the piece for the bit. The second is like the one I refer to from this website below!

Much like this in this from another web site! As you stroll down through the text he shows how this one was done! You will see him form the two halves of the tomahawk out of one piece, then bend them back on themselves and then insert the bit and forge weld the entire piece together! http://www.vividlight.com/articles/3705.htm
 
Last edited by a moderator:
The idea basically is you layer 2 or 3 different type steels these will be of different carbon content and overall make up will be some what different, you may have more chromium in one and more vanadium in another or a combo of other elements. You stack it up every other layer is different type steel and tie it up with wire flux, weld it and cut it part way through bend over and start all over re weld it this gives multiple layers which add to the design that you will get plus it makes for a tuff blade. Also the smith may weld this a couple times or more drawing it out longer as he goes and then he may twist it and then fold again and weld it. Some of these guys know just how to fold and twist to get a certain pattern. As far as converting iron to steel it takes a lot more then carbon migration from a coal fired forge. Sorry for being long winded hope it helps you understand.
 
snowdragon said:
Ok, I gotta ask, why do you fold the metal? I'm no blacksmith, just trying to learn something here. I've heard each new surface picks up carbon from the fuel, thereby eventually making iron into steel. I've also heard that the folds add strength to the metal by giving it a grain structure like wood. What is it? Thanks, Bill.

P.S. Nice work. I can see where it looks like you folded the metal around to the front, then welded on the steel. I would love to learn that someday.


LHunter said:
The idea basically is you layer 2 or 3 different type steels these will be of different carbon content and overall make up will be some what different, you may have more chromium in one and more vanadium in another or a combo of other elements. You stack it up every other layer is different type steel and tie it up with wire flux, weld it and cut it part way through bend over and start all over re weld it this gives multiple layers which add to the design that you will get plus it makes for a tuff blade. Also the smith may weld this a couple times or more drawing it out longer as he goes and then he may twist it and then fold again and weld it. Some of these guys know just how to fold and twist to get a certain pattern. As far as converting iron to steel it takes a lot more then carbon migration from a coal fired forge. Sorry for being long winded hope it helps you understand.


I am sorry Snowdragon I thought you were asking about how the tomahawk was made. If your asking about making of Damascus here is a link to how it is made. http://www.ehow.com/how-does_5498214_do-make-damascus-steel.html

As for Damascus it wasn't used much in America in the 1800's. There were some guns mostly shotguns but they were usually not manufactured in America! In fact most Damascus in that time period came from Sheffield and places like that.

Most blacksmiths in what was to become the states were too busy repairing guns, traps and making things for the Indian trade.

I just finished reading Firearms, Traps, and Tools of the Mountain Man by Carl P Russell in which they intensively describe the process of either splitting the steel that an ax or tomahawk was to made from or the other process where both halves are forged from on piece of steel to install a quality piece of steel to make the bit for that ax or tomahawk. At times quality steel was a premium and the back side of the ax or tomahawk could and would be made from lesser steel such as wrought iron.
The book goes on to say, that at most forts and such as they were scattered through the wilderness that a blacksmith was so prized that he often received twice or more the pay of a bookkeeper!

By the way I don't think I said it but Rusty I like the tomahawk.:thumbsup:

This is a process that can be hard to get right so I can appreciate the great amount of work the went into this one!
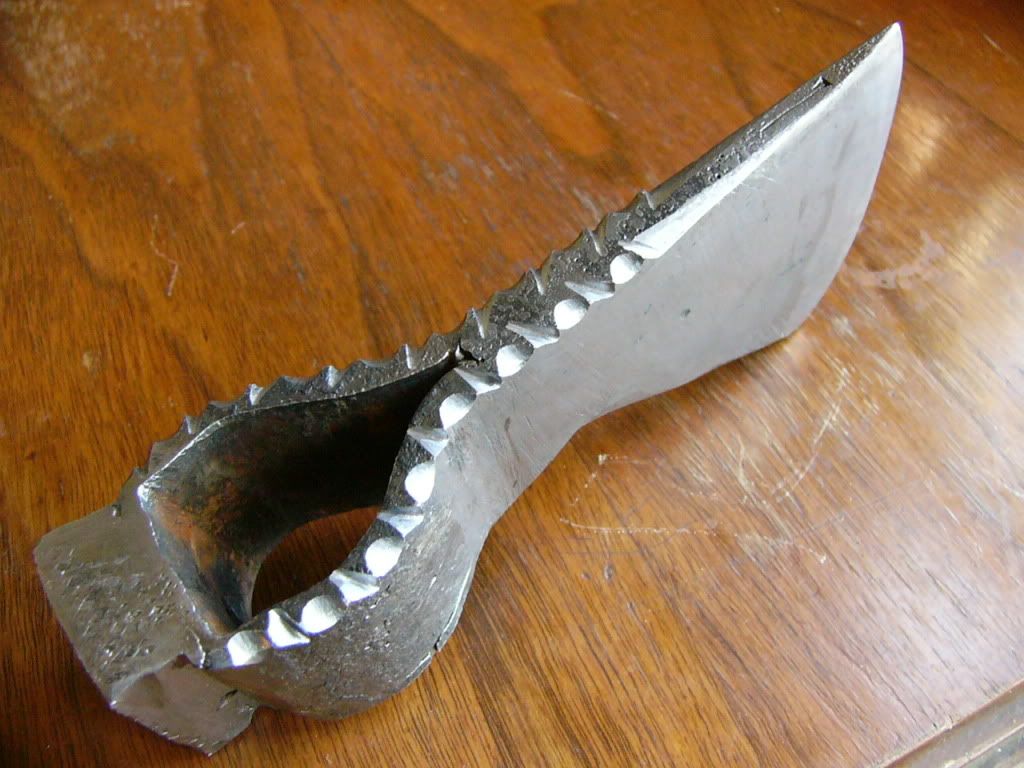
The book talked about the American Indian loved to get their hands on a file. Not only could they use it too sharpen their tools but loved to embellish them with file work too! So all the file work fits very well. A tomahawk was one of their most prized possession, as I am sure that will be one of yours!
 
Last edited by a moderator:
Rusty I didnt say it in the above posting but thats a nice hawk/ax head like your handle socket
 
Rusty,

Looking real good so far!... and a lot of work to get it that far I bet. Please continue to post future progress... I have learned quite a bit already from this post. :thumbsup:

Suz
 
Thanks everyone for the kind words! Snowdragon, I folded the steel for the edge for mostly aesthetic reasons. I believe that folded steel was uncommon on the frontier, but I do know that people who didn't have ready access to steel might have tried to "mix" the high carbon steel with lower carbon steel to try and stretch it farther perhaps. That's sort of the premise I was exploring with the edge steel. But mostly it just looks cool!

The site that 50 cal Cliff posted is exactly how I made my hawk, except that I welded on the poll as well in the exact center of the strap so when I wrapped it, it would be on the back of my axe. The poll is wrought iron as well.

Here's a shot of the finished hawk! The handle is ash, and I'm no woodworker so that's about as purty as it's gonna get I think!

tomahawk026.jpg
 
Looks real good Rusty I assume you made the handle too did you use a wedge to hold in place
 
I don't put a wedge in it, the handle has a taper and the head has a tapered eye so the handle wedges itself onto the head with a bit of tapping. If you do it right it locks on real good because the top of the handle is bigger than the top of the eye, though only slightly, and the handle is just right to snag the bottom of the eye. Much like a pick-axe or mattock.
Did I explain that right?
 
Yeah ok I understand I was just wondering how you did it. I thought it might be more like a standard hawk handle would fit or you used a wedge
 

Latest posts

Back
Top