• Friends, our 2nd Amendment rights are always under attack and the NRA has been a constant for decades in helping fight that fight.

    We have partnered with the NRA to offer you a discount on membership and Muzzleloading Forum gets a small percentage too of each membership, so you are supporting both the NRA and us.

    Use this link to sign up please; https://membership.nra.org/recruiters/join/XR045103

TOW kit came today... mostly.

Muzzleloading Forum

Help Support Muzzleloading Forum:

This site may earn a commission from merchant affiliate links, including eBay, Amazon, and others.

jethro224

Moderator
Joined
Sep 29, 2005
Messages
7,428
Reaction score
17
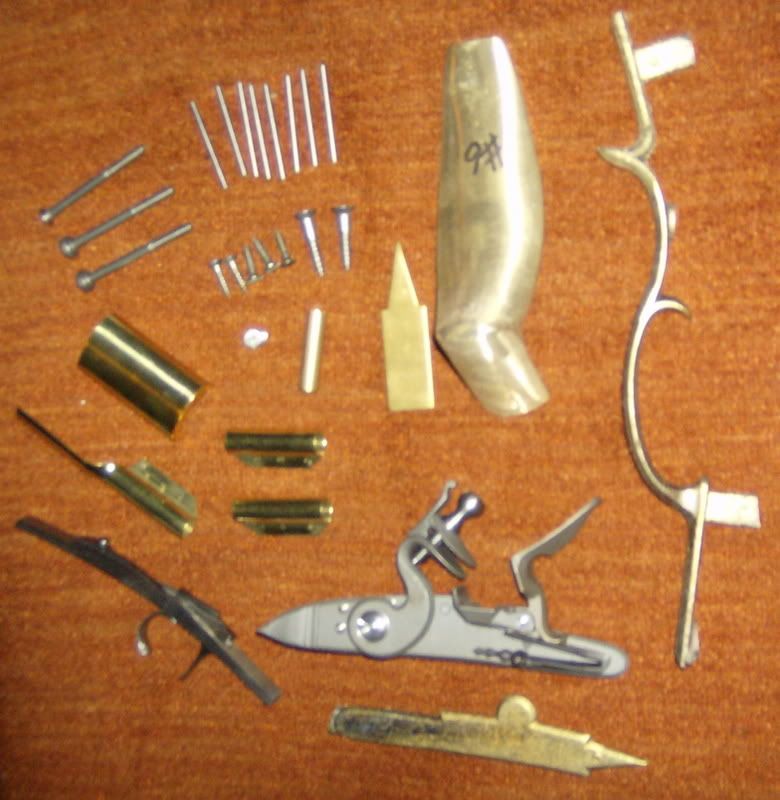
Got the stuff today from Track, except for the stock. It's on backorder. Most of the brass needs lotsa polishing so I'll start there I guess. The trigger guard, butt plate, and side plate are sand cast brass and really rough. The muzzle cap, toe plate, and r/r thimbles are shiny already. But the pipes are kinda cheezy cheap ones and I might get some nicer ones...

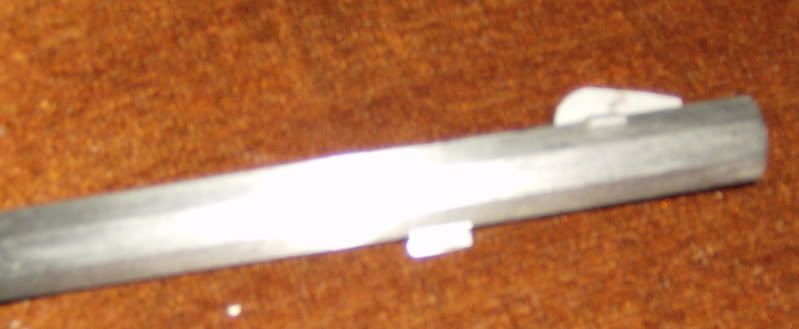
The barrel will be easy. I wussed out and had the plug, sights and lugs installed. :redface: I'll try that on my second rifle. The stamp is on the bottom flat out of sight and the rest looks like it'll polish up easy enough.
The sights will need a bit of cleaning up and the tang sticks up a little higher than the top flat. Once I get 'er cleaned up I plan to brown the barrel.

The triggers look nice and I kinda like the grey finish on the lock. I might leave it like that for a while. :hmm:

Here's a few pics of what I got so far. Except the ramrod. It looks just like a long, skinny ramin wood dowel. :grin: I'll probly get a hickory one.
HPIM0083.jpg


HPIM0085.jpg


HPIM0086.jpg


Now I ain't never done this before, and there ain't no instruction sheet, so I might hafta ask you guys a bunch of dumb questions to get this thing done. I've been reading some, and I am pretty mechanically inclined (better be, I'm a mechanic :) ), so I kinda have a clue, but I'm sure glad I know about this site.
 
No sweat Jethro. It looks just like the front-end on a 64 Chevy pick-up. :grin: I can't help ya much on the buildin part but will be glad to help ya break it in. Lookin fwd to seeing the final product. GW
 
Funny thing is, I just sold my '64 Chevy pickup a few months ago. But I still have the '66 Chevy Panel Truck project in my garage... that ain't gonna get worked on now. :grin:
 
:hmm: The dovetails wuz probably the easiest part of building one........... :hmm:

One thing I don't see that you Definately need........ The Gunsmiths of Grenville County builders book. :winking:
 
Jethro, generally the brass is always cast. It takes a bit of work but you'll have it shaped up and shiney in no time.
Then if your like me, you can't wait until it gets patina so it doesn't glare in the woods and spook your prey.
Not sure if the library will have the book mentioned - may be easier in the long run to purchase one.
 
What Birddog 6 said, or get Dixon's book on building. Also there is the building tutorial by Mike Brooks on this site. With a precarve it starts with installing the barrel, lock and trigger assembly, and that includes the bolts. Then you would do the the butt plate to get the proper length of pull. With the length of pull, you need to consider the amount of clothes you will be wearing. Remember this is now a custom gun and you can make it fit you proper. If this is going to be a deer rifle, you need to shorten the pull some for the clothes.
After you have installed all of the metal parts, then you start to shape the stock wood. 95% precarved is just a rough number, some stocks will need more, and some less wood removed. One of the biggest begginer mistakes is not removing enough wood. The originals were scarry thin guns. Post pics as you progress, and get some opinions, and critique from some of the pro's, and don't take them personal. Resist the temptation to finish up quickly, after you have all the parts together. There are gonna be times you will need to take a break and step back from the work. Look at lots of pictures of guns like what you are building. Most of all have fun.

Bill

I started with nothing, and I still have most of it left!
 
I would leave the brass alone, fit it to the stock when you get it, then you can shape and polish, sometimes the machined inlets are less then perfect and what you take off in the polishing you may need.
 
Now is a good time to get those books, and do some serious studying IMHO while waiting for that stock to come in & BEFORE you commence to cuttin, 'n sawin!! :hatsoff:

Davy
 
The dovetails looked scary to me. :shocked2: Seems like an easy way to booger up a barrel. I will try it on a future build (so long as this one goes OK).

I don't have The Gunsmiths of Grenville County, but may get one. I do have Recreating the American Longrifle and Building the Golden Age Pennsylvania Long Rifle and I've been reading Mikes tutorial.

The stock I ordered is not inlet for anything but the barrel and ramrod. Does that mean it's OK to go ahead and shape and polish the brass? I do like a patina on the brass but it's gotta be smooth!

It's a .36 caliber squirrel rifle so it'll get used from August 1 thru mid February. Mostly in shirtsleeve weather tho so that's what I'll fit 'er for.

I'll definitely keep posting as I go. Opinions and critique (and tips and help) from the pros are exactly what I'm gonna need most! I've seen the pics from some of the builders here. You guys are awesome.:bow:
 
Fullstock58 said:
I would leave the brass alone, fit it to the stock when you get it, then you can shape and polish, sometimes the machined inlets are less then perfect and what you take off in the polishing you may need.
Yep I learned that one on another guys gun a couple weeks ago. He brought a nicely polished butplate over to Bookies. and I saw him wince when Bookie peened it to fit. Decided right then I would not polish much till it fit.
 
I initially file only the surfaces of the brass components that are necessary to inlet and the parts include the buttplate, trigger guard, RR pipes and muzzle cap. The steel parts include the trigger plate and lockplate. Of course the sides of all parts will have draft filed on for easier inletting. The books you mentioned are excellent and started me on my way many years ago......Fred
 
I just got an e-mail from Track. My stock has been shipped today! Woo Hoo! :) :) :) I can't wait to see the wood. Should get here in a couple of days.

OK, I'll keep any filing to just the edges where it has to be cleaned up for inletting and read some more while I'm waiting for the stock.
Thanks for the tips!
 
Please don't use those Huge underlug pins that Track sends.
They are too big, use a 1/16 pin instead, or a 3/16 if you must.
those will stick out like a sore thumb on a small .36 cal stock/rifle.
Plus the are hardend and are a bear to file down.
Don't know why they insist on using them
IMHO
 
oldarmy said:
Please don't use those Huge underlug pins that Track sends.
They are too big, use a 1/16 pin instead, or a 3/16 if you must.
those will stick out like a sore thumb on a small .36 cal stock/rifle.
Plus the are hardend and are a bear to file down.
Don't know why they insist on using them
IMHO
2/16 = 1/8
4/16 = 1/4
wow 3/16 is damn near a ramrod
 
Hey OldArmy,
I'm guessin' you meant to say 3/32. I measured a pin and it is .094 on my mic. Maybe a tad thick, but purty close to 3/32. I never even thought about how hard they'd be. I'll have to test them with a file. Might find some smaller ones anyway. Good tip. Thanks.
 
The trigger guard, butt plate, and side plate are sand cast brass and really rough.


Be glad it is sand cast brass, soft and easy to work. If it work hardens from final peening with hammer to get wood fit, can be easily annealed back to dead soft, unlike a lot of the bronzes. :(
 
Rough, sand cast brass TGs require a lot of filing to bring them down to acceptable thicknesses, especially to achieve thin edges. For faster stock removal, I use a coarse or medium sandpaper drum in a Dremel and it's surprising how many surfaces can be rough shaped in a short time.I use 1/16" dia. piano wire for all pinning.....it's hard, very stiff and has fine tolerances that make it ideal when using a 1/16" drill.......Fred
 
Sorry
didn't have my ruler handy :surrender:
Only know those TOW pins are too big.
used them on my first build, never again.
Now use a 1/16, works fine
 

Latest posts

Back
Top