Vent Liner Installation

Muzzleloading Forum

Help Support Muzzleloading Forum:

This site may earn a commission from merchant affiliate links, including eBay, Amazon, and others.

Erzulis boat

45 Cal.
Joined
Jul 14, 2005
Messages
566
Reaction score
78
Picture214.jpg


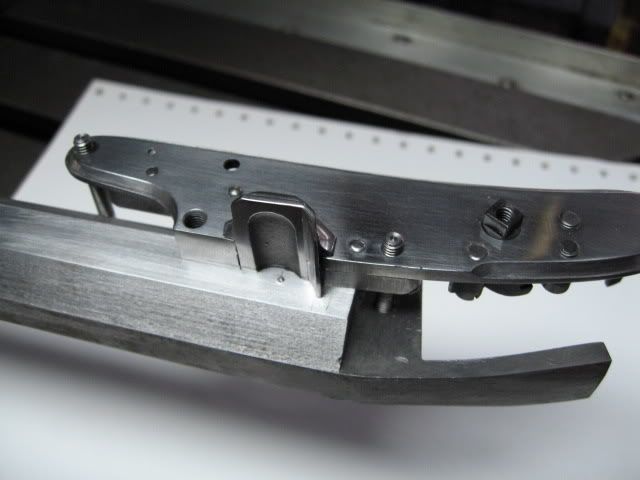
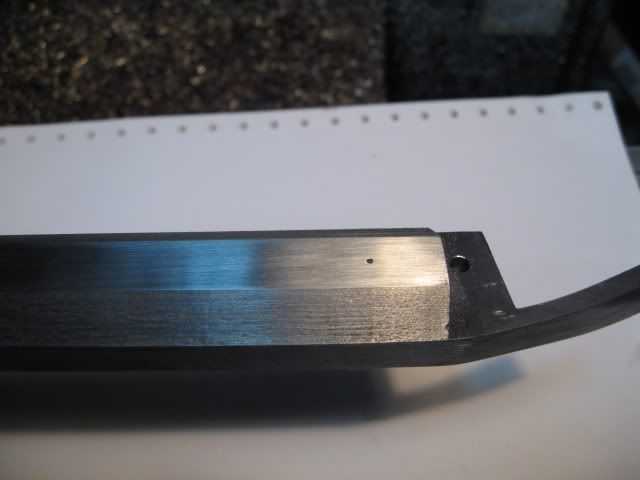
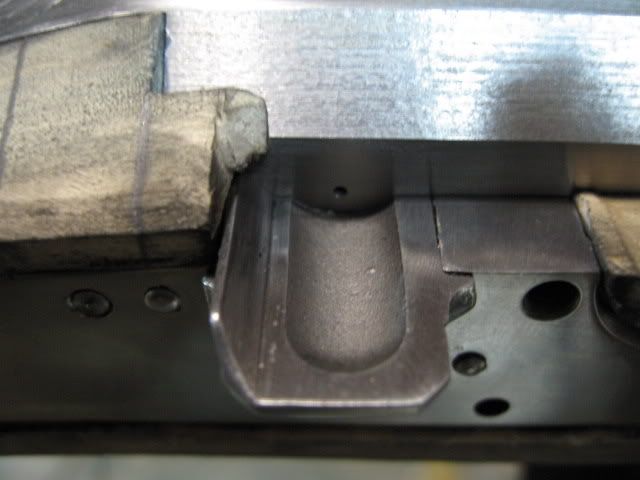
This depicts the indicated location of the ventliner (Chambers- White Lightning), and was done with the lock installed within the stock mortise. This assembled image shows the relation of the lock/barrel/lockscrews in a clear setting.

You will note that I have not really cleaned up or polished the barrel tang junction yet. As the breechplug will be removed during the install. Save the fine cosmetics for last.

The vent will be located in the center of the octagonal flat, and since the barrel is swamped, the center measurement must be taken at the vent hole location. The width of my flat at this spot measured .460, so .230 bisects the flat.
Picture217.jpg


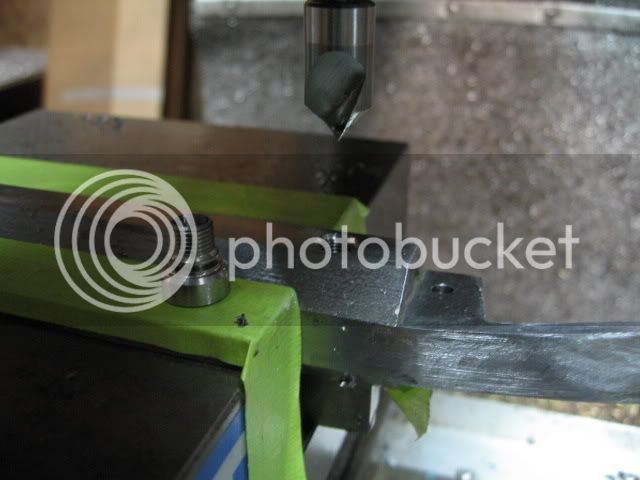
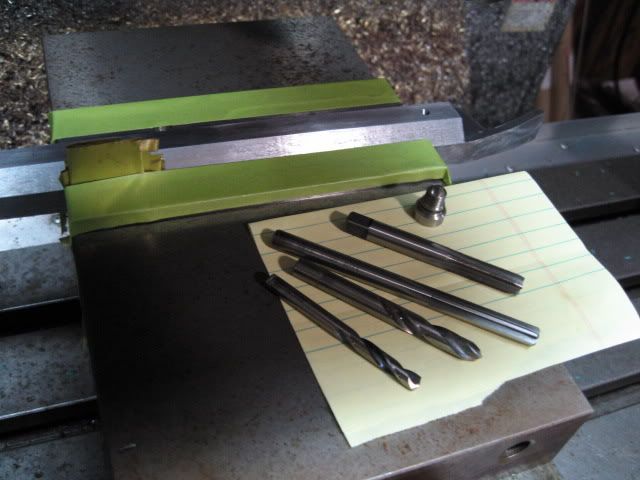
This is the tool layout for the drilling and tapping. I chose the 5/16" or .3125 diameter vent liner, as the size will be pleasing to the eye on the rather large barrel. The 1/4" vent available would also be fine.

The brass shimstock is the differential thickness of the "swamp" on the near vise jaw, and the barrel flat on the back jaw is in full contact.

Some builders will remove the breechplug for the drilling and tapping, but since the mill is so solid and accurate, I can forego this step. It is your choice.

I start with a small drill, then drill again undersize, then run a reamer before tapping. The reamer is not required, but since I had one laying around, I used it.

If your drill press has a lot of indicated run-out, a reamer might be in order, as the fine pitch (32 TPI) large diameter fasteners and ventliners require a more accurate hole(dimensionally) than would a "coarse" fastener.

As long as it is not a sloppy fit, you will be fine. Chambers ventliners measure maximum dimension on diameter/thread root etc. A very quality product.
 
Picture215.jpg


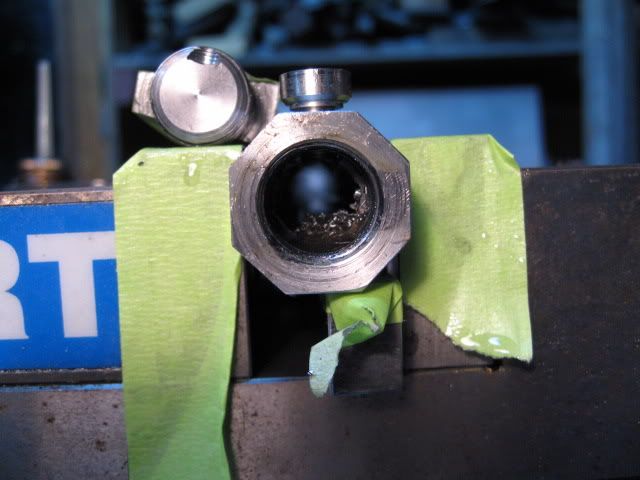
This is the bushing allocation drilled, tapped, and counterbored. The counterbore is 82 degrees (included angle)and should be done at a very low RPM. I ran this carbide single flute chamfering tool/counterbore at 120 RPM. If your drillpress is variable speed, kick it way down. The most common error in reaming and counterboring operations is excessive RPM, that leads to chatter.

Chatter, if it is severe, will not permit the ventliner to "vanish", but will leave a telltale trail at the junction. After rust bluing, or aging (if left in the white) will expose the liner, but chatter will leave a microscopic ring at the junction.

Do not go too deep! The liner has only a small shoulder at 82 degrees. Study the liner carefully before installation.

Picture219.jpg


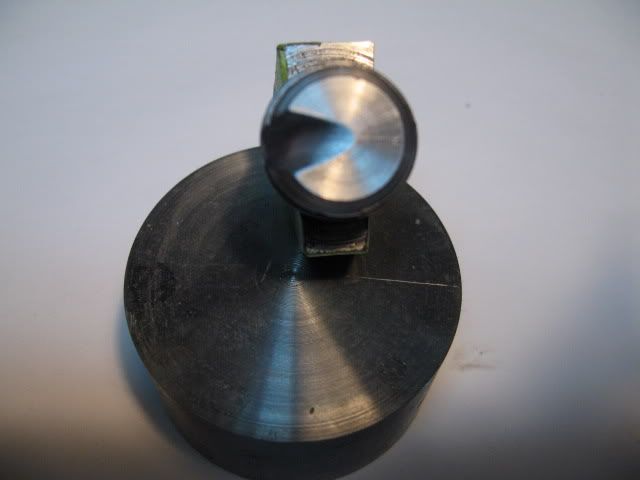
Remove the plug. You will note the drill notch in the breechplug face.

You could have drilled and tapped, but not removed the plug, and the rifle would fire, but that is not the correct method.

The notch is centered, and only penetrates the lead thread. I like to get into the plug a bit, as this allows you to control the vent configuration.

Picture220.jpg


With a round file make a smooth transition to the ventliner. The powder will fill the liner reliably.

This breech transition will allow the use of a breechplug scraper without it snagging. I then polish the groove, apply grease to the breechplug threads, and re-install the breechplug.

I have done my part to ensure fast ignition when it comes to the barrel. Now the lock has the big responsibilty!
 
Picture224.jpg


Picture227.jpg


Done. Draw filed level with the barrel flat. Initially, prior to rust-bluing or natural aging, the liner should completely vanish (except for the venthole!).

The lock is installed, and the target location was met.

Now I can finish draw filing the barrel and polish the pan! :shake:
 
If you are going to file it off so it is not removable, then why use a liner? Not arguing. I just don't understand the reasoning.
 
I would not ever remove a liner unless it was required. A liner should become part of the barrel.

The reason that I use the liner, is that it has a large, precision cavity that allows the powdercharge to sit very close to venthole.

This configuration is superior to just a drilled vent, as on my barrel for instance, the span is considerable (wall thickness).

You can internally or externally cone a touchole, but I prefer the ventliner.

The liner is removeable, and can be done if required, but removing a vent at every cleaning is an incorrect method in my opinion.
 
This is intersting. I used a Chambers round faced english lock on a Colerain swamped 44" .54 caliber. I marked the vent hole center the same way and it cleared the face of the breech plug. didn't have to go through this. This is very illustrative. I will b btter prepard whn the next barrl arrives!!!

Thanks :thumbsup:
 
I probably should have stressed this point-

If you are using a drillpress, or any kind of hand drill, REMOVE the plug before drilling and tapping. If the bit snaps................. :(

Then re-insert the plug, and check clearances.

Only with a mill, or heavy duty variable speed drillpress with a substantial vise securely anchored can the drilling operation be accomplished safely with the breechplug installed.

Sorry that I did not stress this previously.
 
DrTimBoone said:
I used a Chambers round faced english lock on a Colerain swamped 44" .54 caliber. I marked the vent hole center the same way and it cleared the face of the breech plug. didn't have to go through this.

Tim, English locks typically are longer from the fence to the pan center than germanic locks. If the locks are inlet with the fence in the same placement, then the pan center will further along the barrel and possibly/likely, ahead of the breech plug. I do it a little different in that I locate and mark the breech face location before inletting the lock, then position the lock so the TH will be 5/32" past the breech plug face. Then when I put in my 5/16 liner, the back edge of the liner will just touch the plug face. Many prefer to position the lock so the fence is even with the barrel breech and with germanic locks this will always require the plug face to be relieved as shown by EB. It's my understanding that many originals were done this way.
BTW Great tutorial EB :thumbsup: :thumbsup:

Cody
 
Nice tutorial. I would like to suggest an alternate order of operations for us drillpress users. After the layout is complete I will normally drill a really small pilot hole first(5/64)Dia. Then I will countersink the hole to the finished dia now. On a drillpress where you can't slow the speed down as much as you can on the mill this will help prevent chatter. Now drill the pilot hole for tapping. The countersink will act as a funnel to help you keep true position location. As you said pull the breech plug before any drilling. Just another way to skin the cat. BJH
 

Latest posts

Back
Top