silent sniper
40 Cal.
- Joined
- Jul 29, 2008
- Messages
- 251
- Reaction score
- 3
hello guys i reciently had the urge to do something daring and exciting.aaron, my friend ( thomp shooter)reciently bought a brand new crockett rifle. he really enjoys it but he kinda wanted to get a good flintlock squirrel rifle. instead of buying another gun i talked him into trying to convert it to a flinter. i have never converted anything before and had never heard of a crockett rifle being converted. it was time to chance that ! first we had to deal with the drum. i thought it simply unscrewed like some of the other traditions caplock guns but sadly it wasnt going to be that easy. we were going to have to remove the drum. i wanted to use a hacksaw but we couldnt find one so we took a electric sawzall and cut it off :haha: it was scary but it worked. we were very excited because it looked like the hole from the drum would work as a touchhole.the new flintlock fit perfectly in the stock with no modifications needed. we lined up the new flintlock in the stock and found that the hole was to low to be used as a touchhole. :cursing: it was going to be much harder then previously thought. luckly my dad ownes a machine shop where there are some very skilled toolsmiths and engineers. so the next day i took it to them to see what they could do. first we tapped the drum hole with a 8X30 tap and inserted a screw. we then cut off the head of the screw. we buffed it on the belt grinder and the old hole was now completely plugged.
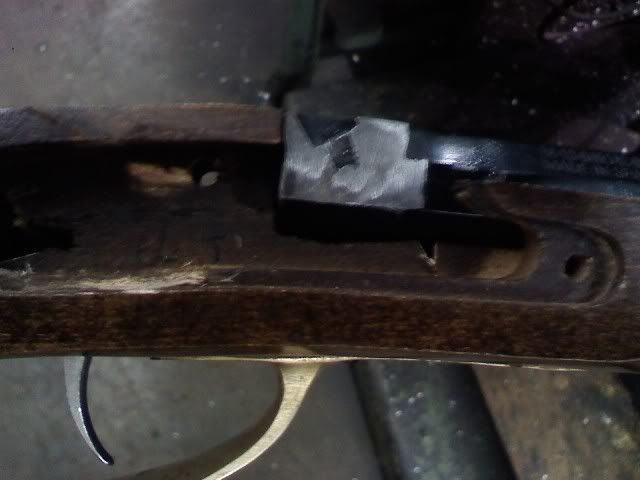
next we had to make sure the lock fit against the barrel. the main spring was to wide and hit against the barrel, causing the lock to stick 1/4 inch from the barrel. i took the lock to the belt grinder and took some of the mainsprings width off. i grinded it until it fit against the barrel with no problem. now the hard part, putting in the touch hole. we decided to use the standard traditions touch hole. we drilled the hole but we were slightly to high and we missed the chamber of the patent breech ! i was very afraid now of what to do, as this was not part of the plan :shocked2: we had 2 options, 1. drill inside of the existing hole at a downward angle with a smaller drill bit to hit the chamber or 2. take off the breech plug and ream it out until it hit the new hole. we decided 2. was the better choice. we unscrewed the breech, put it in the drill press, and got a drill bit slightly bigger then the opening of the patent breech. we reamed it out until we hit the hole. ok now we had the channel and it looked like it might actually work. we lubed the threads of the breech plug and screwed it back in2 the barrel. now we countersunk the hole for the large lip on the touch hole liner. we then tapped the hole for the liner.we hit the plug when we countersunk it but we had it firmly in so we didnt worry about it. the lip of the liner would cover it so there was no chance it would ever come out. here was our next problem, the end of the tap was tappered to a point and it hit the end of the channel without threading it all the way. so the liner wouldnt screw all the way in. we fixed this by grinding the end of the liner down 2 threads. now it fit perfectly. i took it home and reblued everything that we cut.
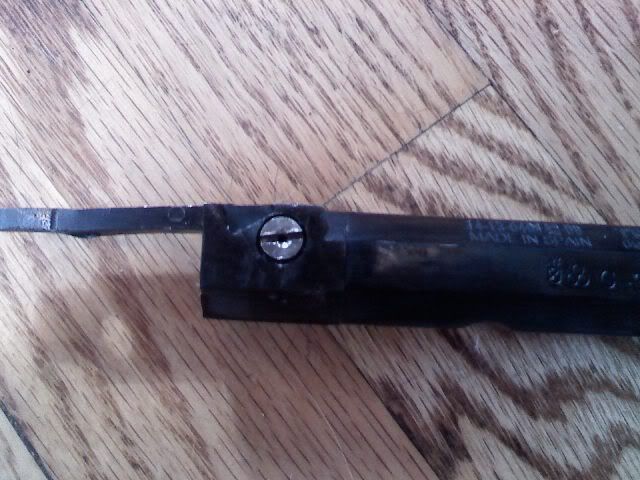
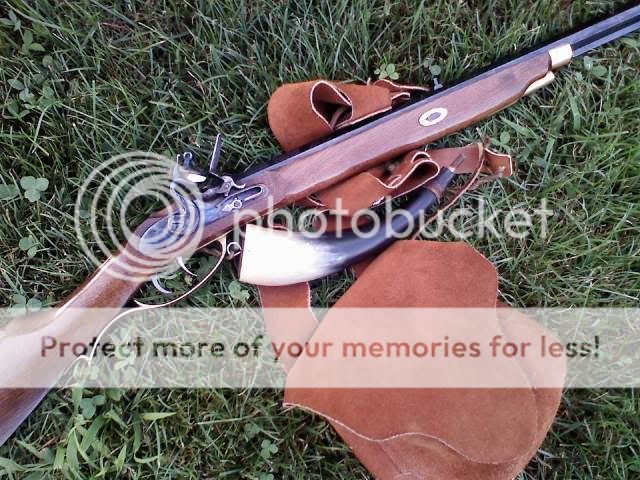
i took it outside for a test run.i put 20 grains of FFF down the barrel and primed the lock for a blank load. i pulled the trigger and KPOOF!!! it went of like greased lightening.i was suprised by just how fast it went off. i loaded a live round and tried it. it shot no problem. i am very impressed on how it came out. it looks very nice and if you didnt know you would think it is a factory job. aaron hasnt seen it sens we cut the drum off 2 days ago but i know he is going to absoulty love it. it balances very well and looks like it was always ment to be a flinter. i would suggest anyone who wants to convert there crockett rifle to be pretty experenced and know what they are doing. it would also help if they could get to some machines like drill presses exc... i would of never been able to do it without the toolsmithes and the machine shop. we had a few hold ups but we got er done in the end. the total cost for us was only the lock and liner sense we had all the taps and drill bits. the new crockett flinter is a great little rifle !
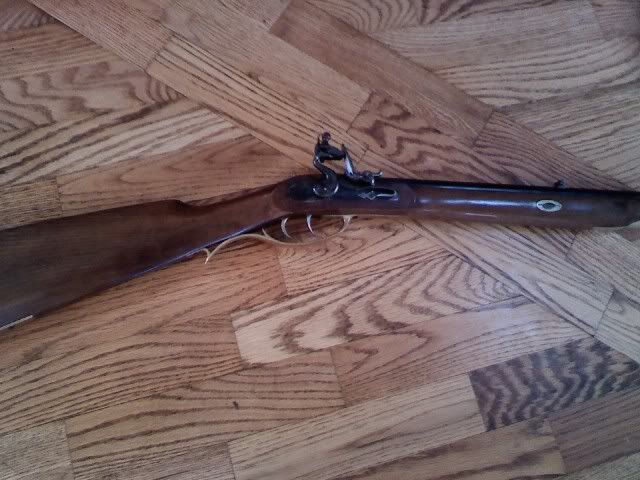
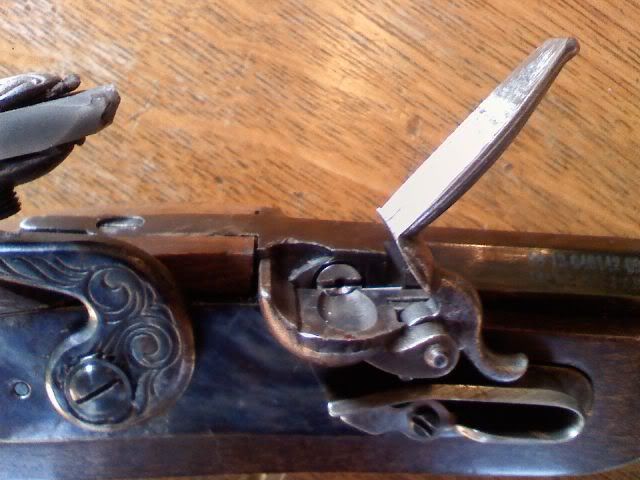
i really enjoyed this project and i might just have to do some more conversions in the future. enjoy SS.

next we had to make sure the lock fit against the barrel. the main spring was to wide and hit against the barrel, causing the lock to stick 1/4 inch from the barrel. i took the lock to the belt grinder and took some of the mainsprings width off. i grinded it until it fit against the barrel with no problem. now the hard part, putting in the touch hole. we decided to use the standard traditions touch hole. we drilled the hole but we were slightly to high and we missed the chamber of the patent breech ! i was very afraid now of what to do, as this was not part of the plan :shocked2: we had 2 options, 1. drill inside of the existing hole at a downward angle with a smaller drill bit to hit the chamber or 2. take off the breech plug and ream it out until it hit the new hole. we decided 2. was the better choice. we unscrewed the breech, put it in the drill press, and got a drill bit slightly bigger then the opening of the patent breech. we reamed it out until we hit the hole. ok now we had the channel and it looked like it might actually work. we lubed the threads of the breech plug and screwed it back in2 the barrel. now we countersunk the hole for the large lip on the touch hole liner. we then tapped the hole for the liner.we hit the plug when we countersunk it but we had it firmly in so we didnt worry about it. the lip of the liner would cover it so there was no chance it would ever come out. here was our next problem, the end of the tap was tappered to a point and it hit the end of the channel without threading it all the way. so the liner wouldnt screw all the way in. we fixed this by grinding the end of the liner down 2 threads. now it fit perfectly. i took it home and reblued everything that we cut.

i took it outside for a test run.i put 20 grains of FFF down the barrel and primed the lock for a blank load. i pulled the trigger and KPOOF!!! it went of like greased lightening.i was suprised by just how fast it went off. i loaded a live round and tried it. it shot no problem. i am very impressed on how it came out. it looks very nice and if you didnt know you would think it is a factory job. aaron hasnt seen it sens we cut the drum off 2 days ago but i know he is going to absoulty love it. it balances very well and looks like it was always ment to be a flinter. i would suggest anyone who wants to convert there crockett rifle to be pretty experenced and know what they are doing. it would also help if they could get to some machines like drill presses exc... i would of never been able to do it without the toolsmithes and the machine shop. we had a few hold ups but we got er done in the end. the total cost for us was only the lock and liner sense we had all the taps and drill bits. the new crockett flinter is a great little rifle !


i really enjoyed this project and i might just have to do some more conversions in the future. enjoy SS.


