• Friends, our 2nd Amendment rights are always under attack and the NRA has been a constant for decades in helping fight that fight.

    We have partnered with the NRA to offer you a discount on membership and Muzzleloading Forum gets a small percentage too of each membership, so you are supporting both the NRA and us.

    Use this link to sign up please; https://membership.nra.org/recruiters/join/XR045103

Wet sanding a stock

Muzzleloading Forum

Help Support Muzzleloading Forum:

This site may earn a commission from merchant affiliate links, including eBay, Amazon, and others.

Vaino

Cannon
Joined
Jan 21, 2006
Messages
8,266
Reaction score
460
When I first started building LRs {1977}, I read about wet sanding stocks and this was espoused by John Bivens......who was the foremost builder of LRs at that time.

Wet sanding is a process of staining and applying LMF sealer which normally would be the finish. But then the wet sanding is done to really smooth all the surfaces including the carving. LMF sealer is slightly thinned w/ mineral spirits or the cheaper paint thinner and the finish is removed by sanding the finish off. This requires 220 grit wet/dry paper to be shaped into rolls or flats to suit the surface being sanded and constantly being dipped in the thinned LMF sealer.

The sanding is done to the bare wood and makes one realize that the stain and finish don't really penetrate hard maple very deeply....at the most a couple of .001s.

But if the sealer has gone deeper, the "Super Stain" penetrates right through any sealer and the result of all this is an extremely smooth, perfectly stained stock.... a very nice reddish brown.

Below is the original color of my last Bucks county LR which I didn't really like and as soon as I apply the LMF sealer and Wahkon Bay finish to the wet sanded stock and "Super Stained" stock, I'll post some picks.

Just thought this might be an altertnative to stripping stocks w/ various finish removers....Fred
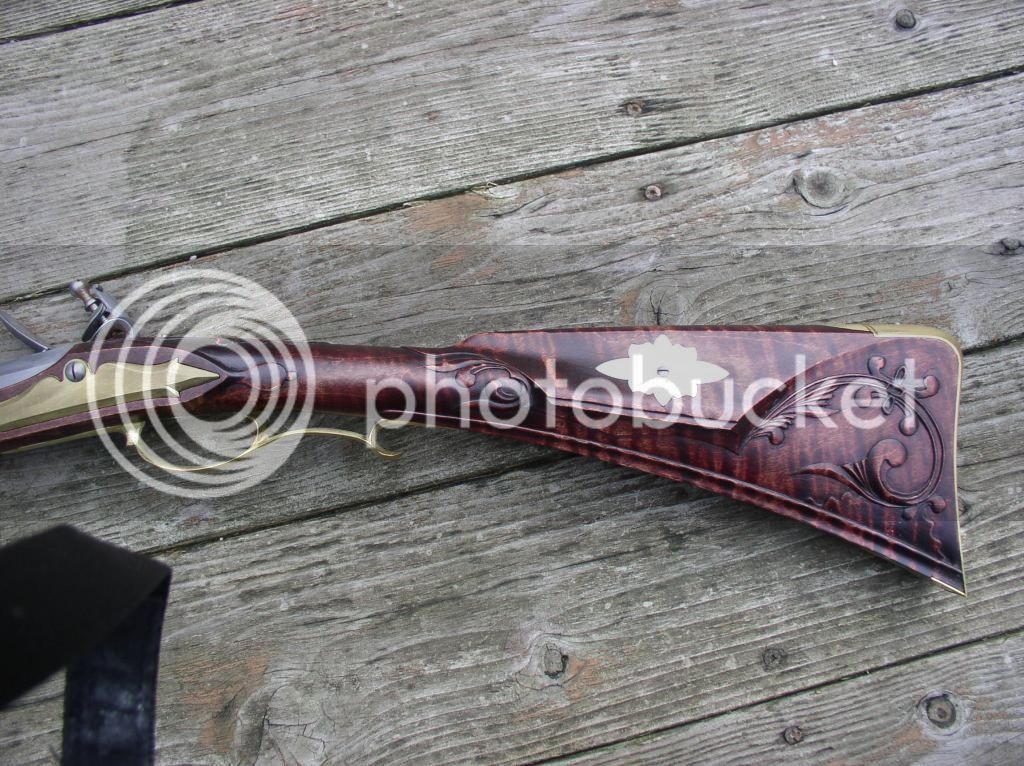
 
I thought the method you described was used with Tru-oil type finishes and was to fill the pores, etc.-on modern type stocks (walnut). On the muzzle loaders I've always done a linseed oil, hand rubbed. Takes forever and a lot of coats before the pores are really filled.
 
LMF sealer was the finish of choice for wet sanding.....would work w/ other varnish type finishes if not too heavily applied. Wet sanding yields very smooth surfaces...including the carving and surrounding areas.

Never tried other stains to penetrate any remaining finish.....perhaps some stains will. Too bad "Super Stain" made by the Wampler Chemical Co. is no longer made. Luckily I've still got some in walnut and mahogany.

I no longer use "wet sanding" as a process for finishing my LRs....but I use a much less labor intensive finish which in the process, I've never had any problems "filling the pores" in maple. W/ open grained walnut, a filler is used after the sealer is applied and hence walnut isn't a problem either.

My first LR originally had a hardware store BLO finish and was a complete disaster while deer hunting in the rain....one big gooey mess. Don't think the original builders used this stuff because it really never hardens even after very loooong drying times. Just about any other finish is better than hardware store BLO........Fred
 
Yes, I can attest to the super smooth finish that can be achieved with wet sanding although I have never done it to any of my gun stocks.

My wife, who has a slight level of impatience could never understand the layers of polyurethane, wet sanded between each coat, that I apply over a couple of weeks when finishing a table top etc.

But in the end when you can literally look into the finish and you won't get a "dent" in it unless you really "smuck it", the time it takes to produce the finish is justified in the quality of the finished product.

But it is tedious and slow.
 
I've also used wet sanding, using a dab of finish on 200-600 grit paper, sand, then wipe off. Fills the grain nicely on walnut. Had poor results with stained wood that the sharp edges, despite my care, lose the stain when sanding. Steel wool seems to not remove the stain from sharp edges.

My best results with stained wood is hand-rubbed, then wiped off, re-apply many times.

I'm always interested in how others get a fine polished finish, especially around carving. Let us know.
 
W/o wet sanding, achieving smooth surfaces in and around the carving requires a lot of sanding and scraping before the stain and finish are applied. Having the carving itself a little lighter makes it stand out.

The Super Stain mentioned previously will penetrate sealer if the wet or dry sanding produces corners or carving that's too light.

How smooth the carving and surrounding areas are, depends on how much time is put into sanding and scraping and the patience of the builder.......Fred
 
Hi WW,
One way to achieve a high polish is to apply a finish that hardens (polymerized oil, oil-varnish) slowly and using thinned coats. Once the finish is built up and cured, which may take a few weeks, you rub the stock with a "rubber" dipped in linseed oil and rottenstone. A rubber is a small flat piece of stiff foam wrapped in cheese cloth. Around the carving, you use pencil shaped hardwood sticks dipped in the oil and rottenstone. This is a very old method going back to at least the 17th century and it can produce a glass finish that looks like the wood itself is polished rather than a glossy topcoat.

dave
 
A talented builder, once told me, that he always used wet sanding paper, instead of regular paper, due to the grit coming off of regular wood sanding paper. He never mention using it wet but I think it would be better, just due to the hardness of maple.
 
I use 220 grit wet/dry paper for wood....220, 320 and 400 for brass w/ a final rubbing w/ 0000 steel wool.

After draw filing the bbl, a very light rubbing w/ 220 wet/dry paper before browning.

Don't like sandpaper....it loads up too quickly and doesn't last because the grit rubs off.....Fred
 
Thanks for the kind words. Am in the process of applying the "soak in/wipe off" coats of LMF sealer. The "new" color is kinda "antiquey"...much better than the pictured color. Missed the staining altogether on the first attempt. Intially decided to go w/ ferric nitrate and then changed my mind.....big mistake and a whole lot more work because of the wet sanding.....Fred
 
I'll post some pics of this LR w/ the "new color"....the last coat of finish will be done today. Thanks for the kind words.

The color of the stock in the pic isn't what the color looks like.....I have a hard time achieving the actual colors of the stocks....harder in fact than making the LRs. And have tried many different types of lighting and backgrounds.....Fred
 
Back
Top