• Friends, our 2nd Amendment rights are always under attack and the NRA has been a constant for decades in helping fight that fight.

    We have partnered with the NRA to offer you a discount on membership and Muzzleloading Forum gets a small percentage too of each membership, so you are supporting both the NRA and us.

    Use this link to sign up please; https://membership.nra.org/recruiters/join/XR045103

Making a Pattern 1756 Long Land British Musket

Muzzleloading Forum

Help Support Muzzleloading Forum:

This site may earn a commission from merchant affiliate links, including eBay, Amazon, and others.
Hi,
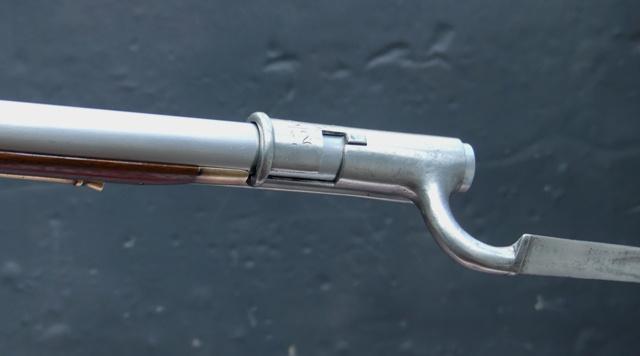
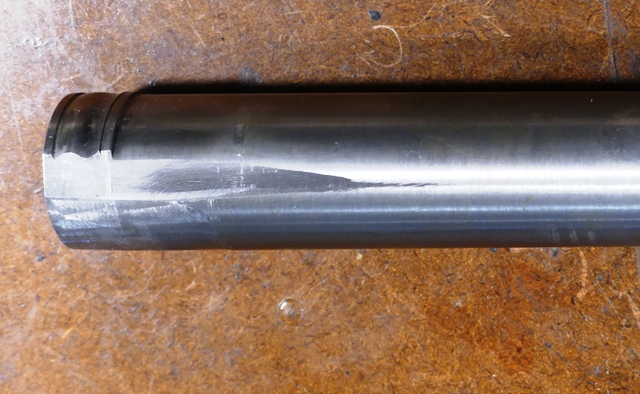
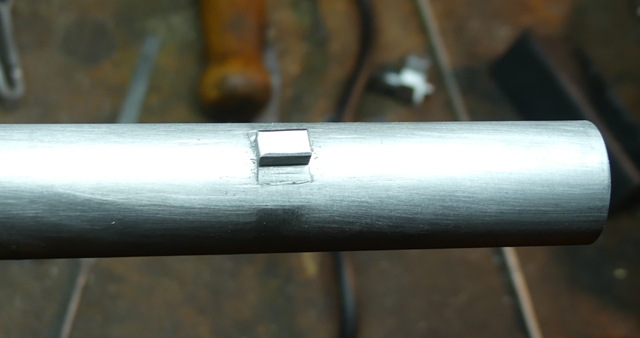
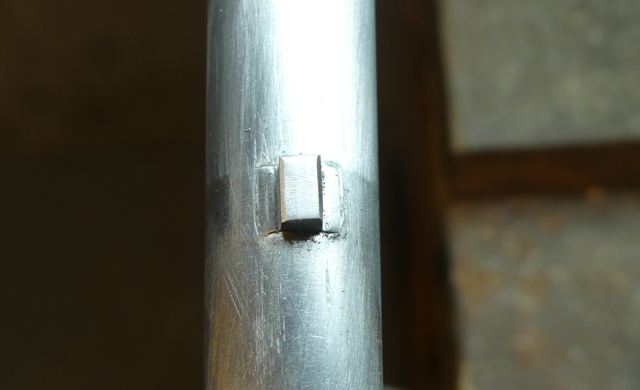
Several folks over the years have asked how to position and mount a lug for a bayonet. I will describe how the British did it on their King's pattern muskets. On British muskets with full sized bayonets meaning the socket is about 4" long and the blade about 17", the lug or front sight (as it was referred to) was 2 1/8" back from the muzzle. TRS provides a little rectangular lug with a curved bottom meant to be soldered or brazed to the barrel. All the commercial repro simply solder a lug to the barrel. Neither of those methods are correct. The lug was shallowly dovetailed into the barrel and then brazed. Here is how it was done except I solder the lug rather than braze it. The lug is about 1/4" wide and 3/8" long with a wider base that has dovetailed ends fore and aft.
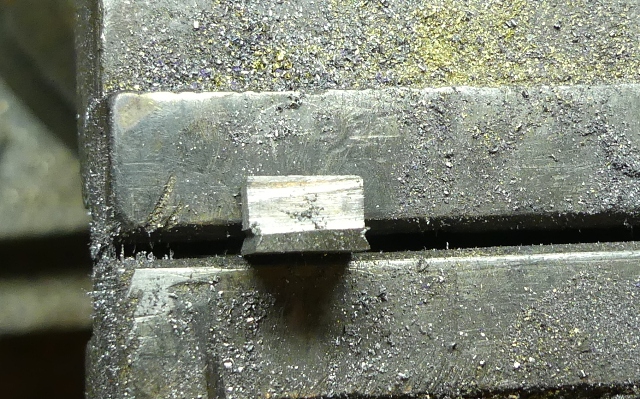
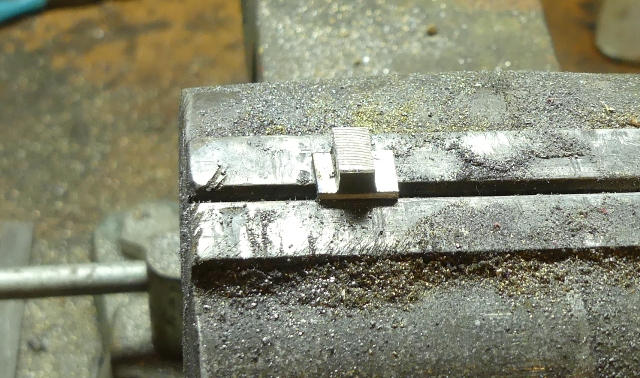


I make the sight from mild steel, cutting away the excess and using a triangular file to make the dovetails. Next I locate the position on the barrel. The front of the lug should be 2 1/8" back from the muzzle. To find the center line of the barrel, I put the barrel in my vise and place a level across the barrel tang at the breech. I level the barrel horizontally in he vise. Then I mark the position of the sight and balance the level at that position. The center of the bubble marks the center of the barrel.
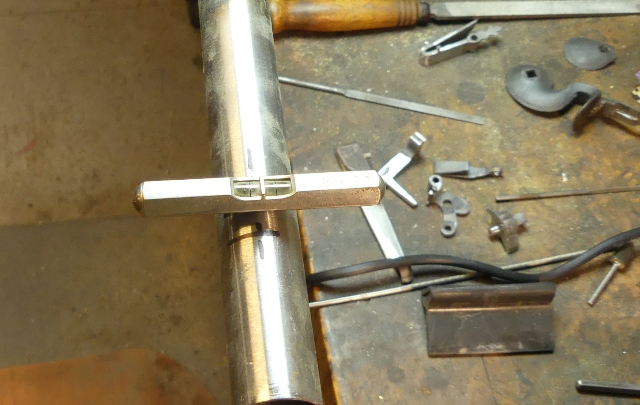
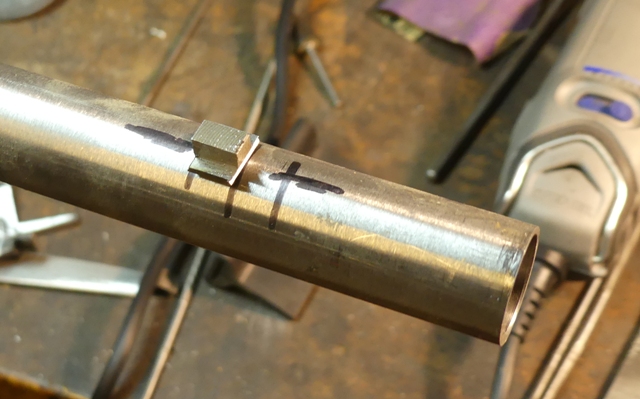


I mark the position and then cut horizontal lines with a hacksaw to begin the dovetailed slot in the barrel. I don't measure the depth, just cut a few strokes for each line.
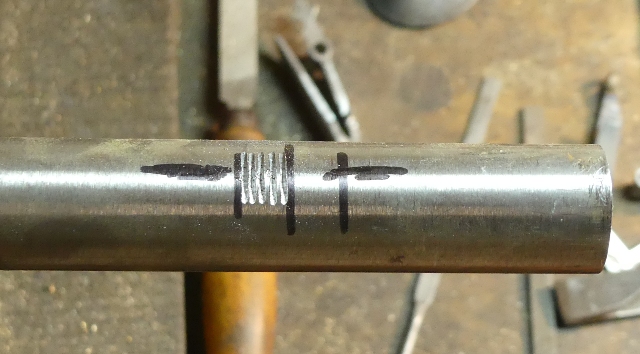


Then I file the dovetails in the barrel with a small triangular file that has one edge safed.
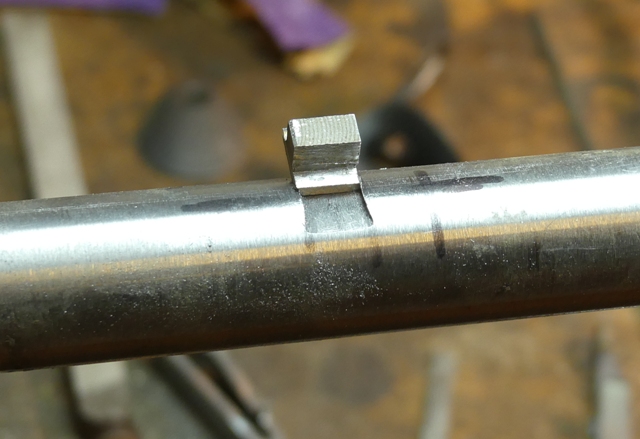


Once the sight fits, I flux the bottom of the sight and the barrel and lay a piece of low temp silver bearing solder on the edge of the sight base after tilting the barrel to one side.
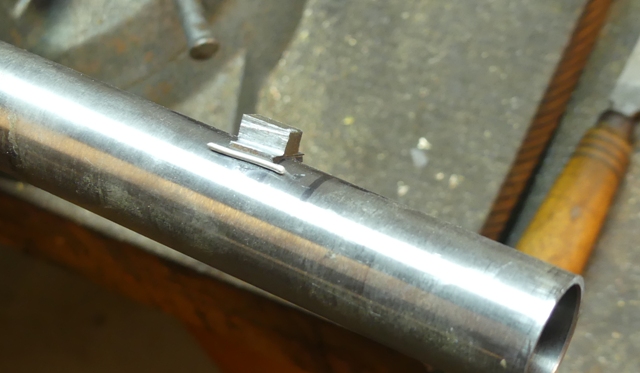


Then I heat from below, drawing the solder under the base to the lower edge.
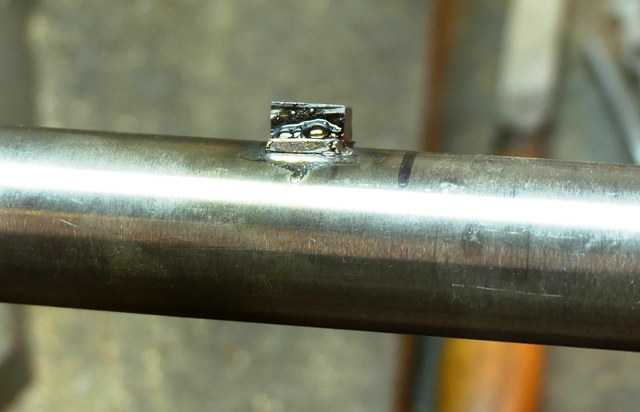


Finally, I file the base flush with the barrel and clean up the solder. The sight will eventually be filed a little thinner and lower. It appears exactly like the originals.


dave
 
Hi,
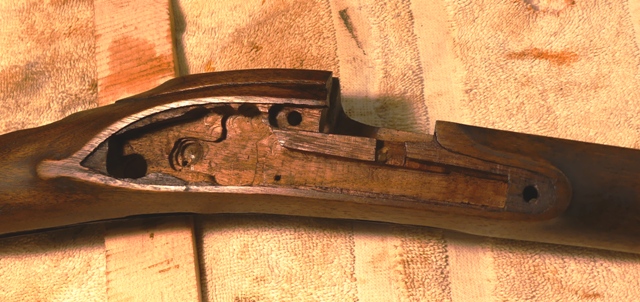
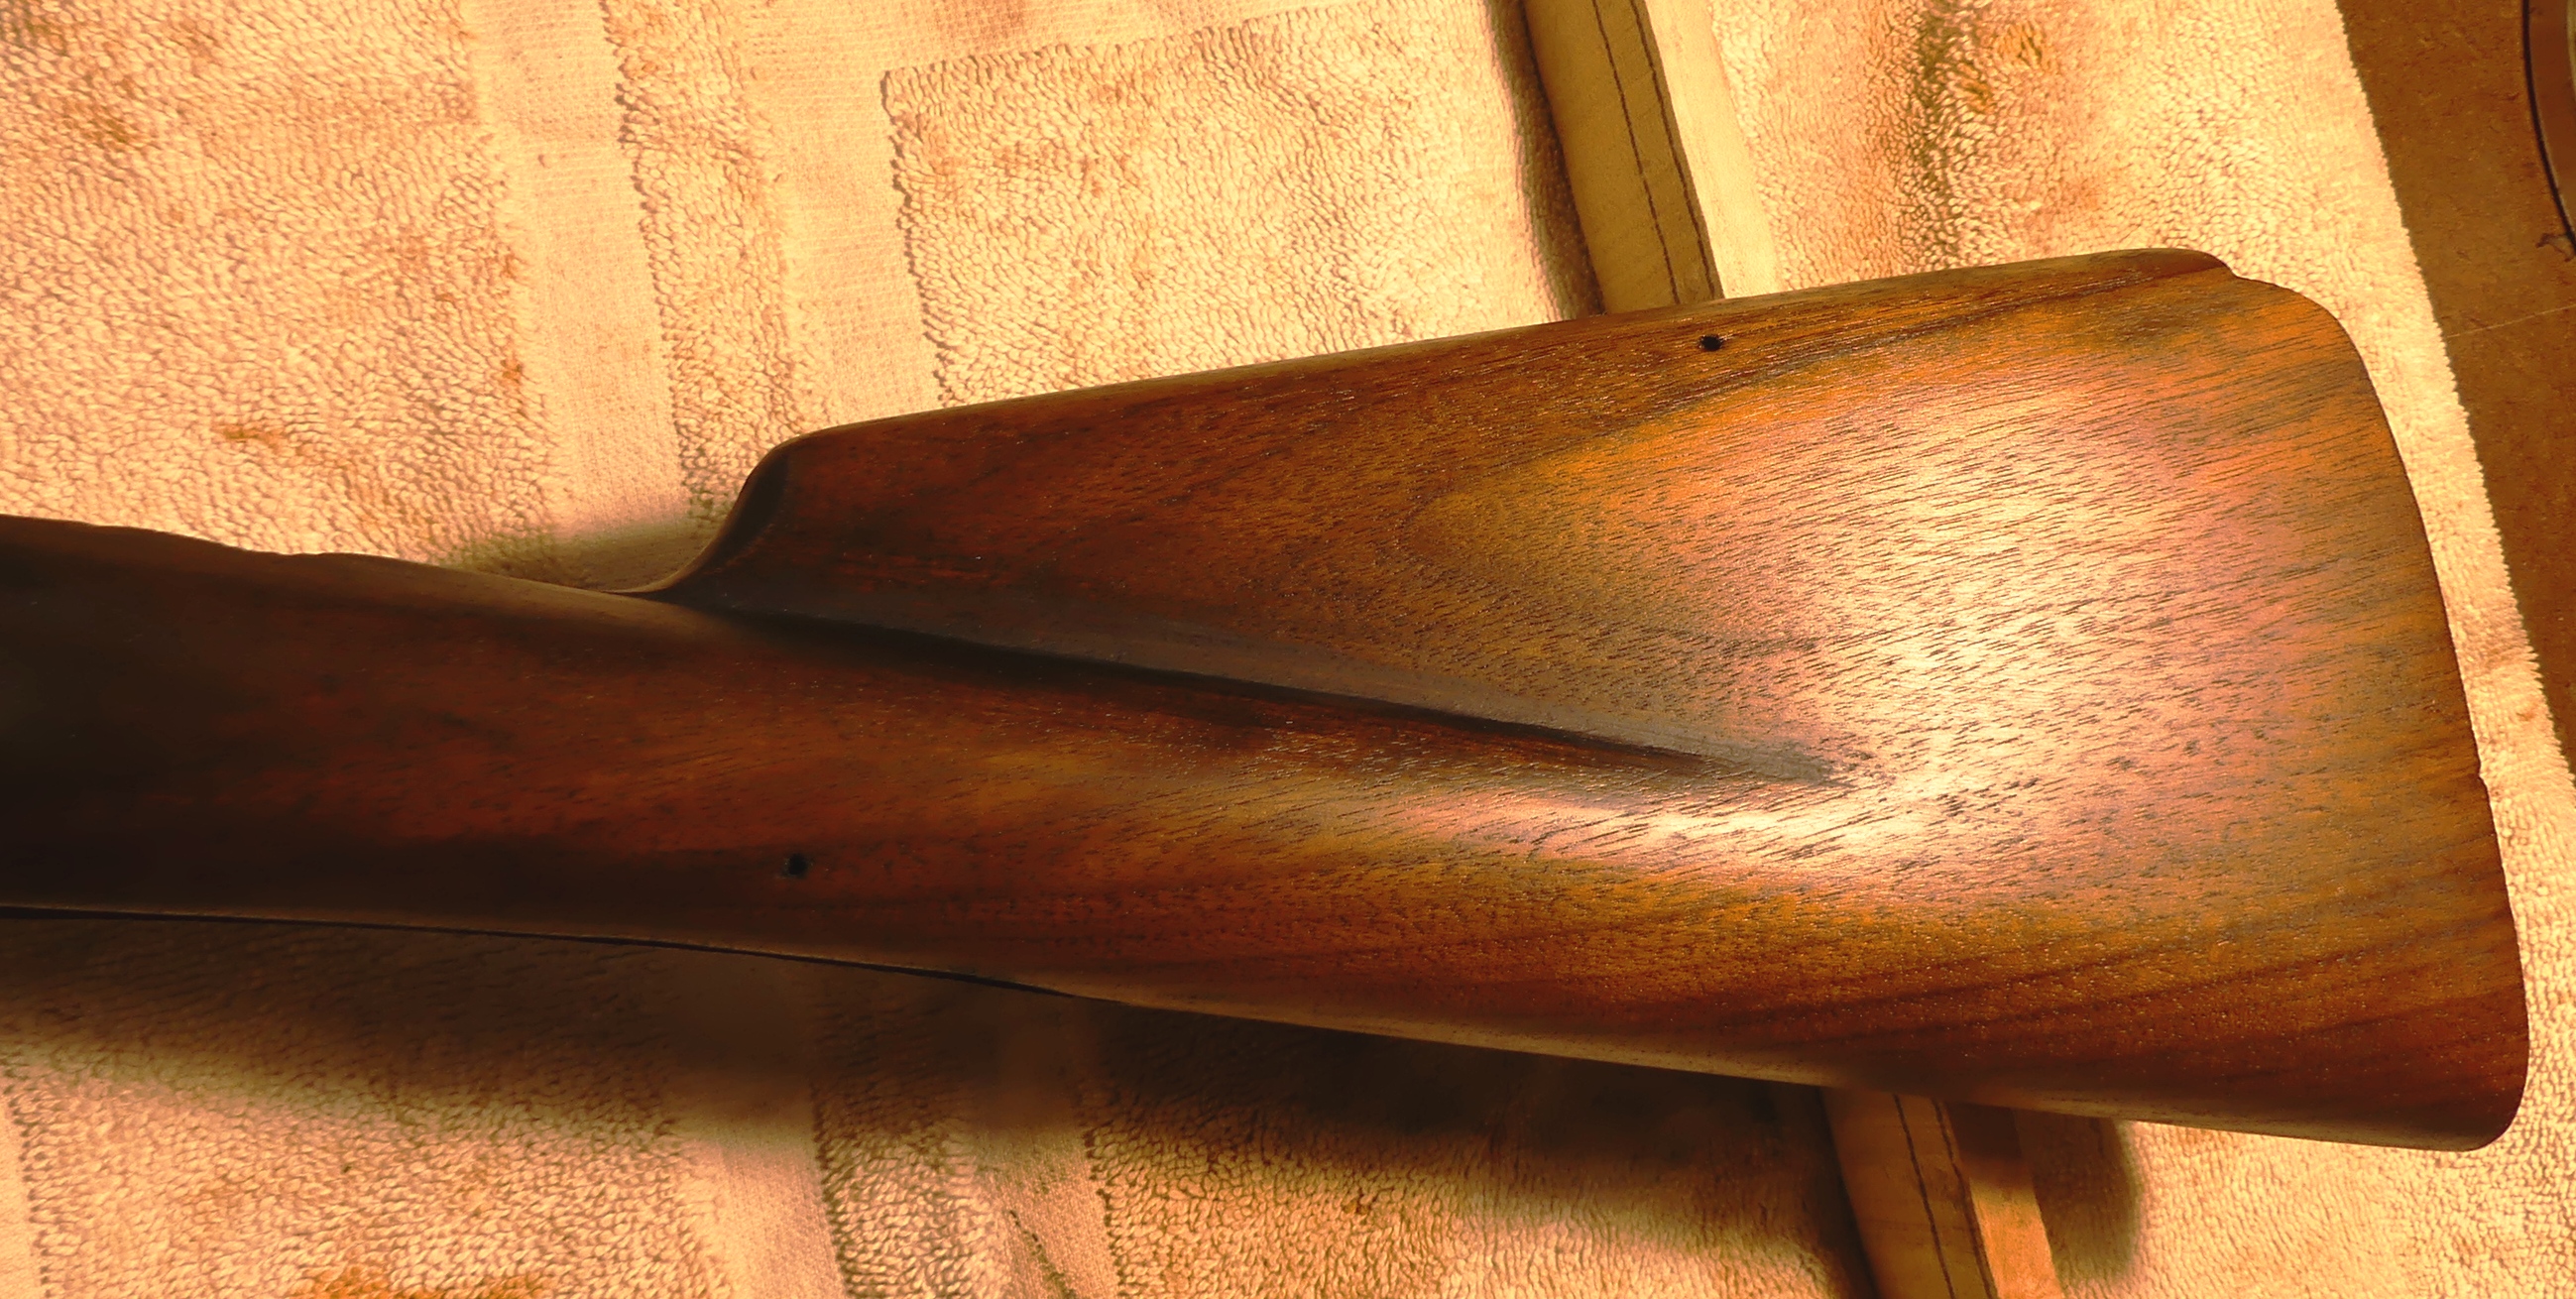
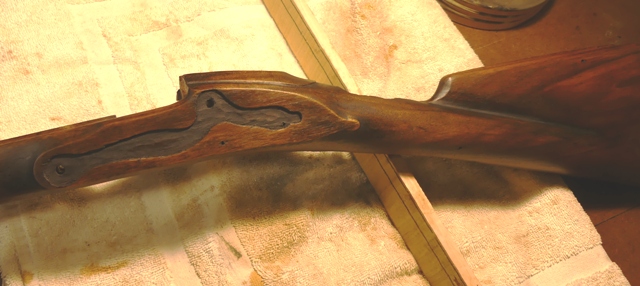
The stock is stained and finish is applied. I covered most of the shaping details I can think of but one more thing. Note how shallow the edges of the lock mortise are.
FM6XifP.jpg


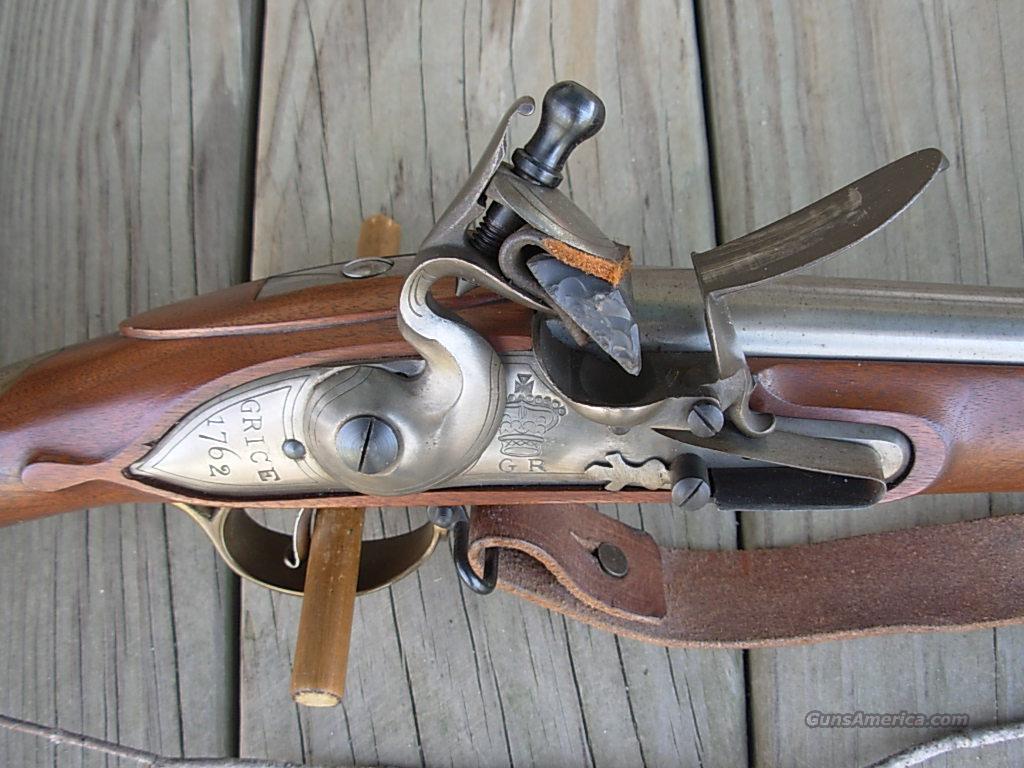
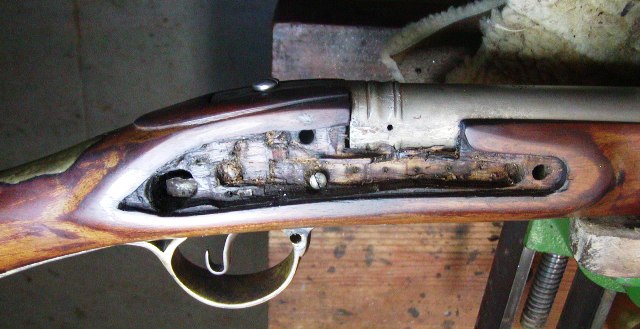
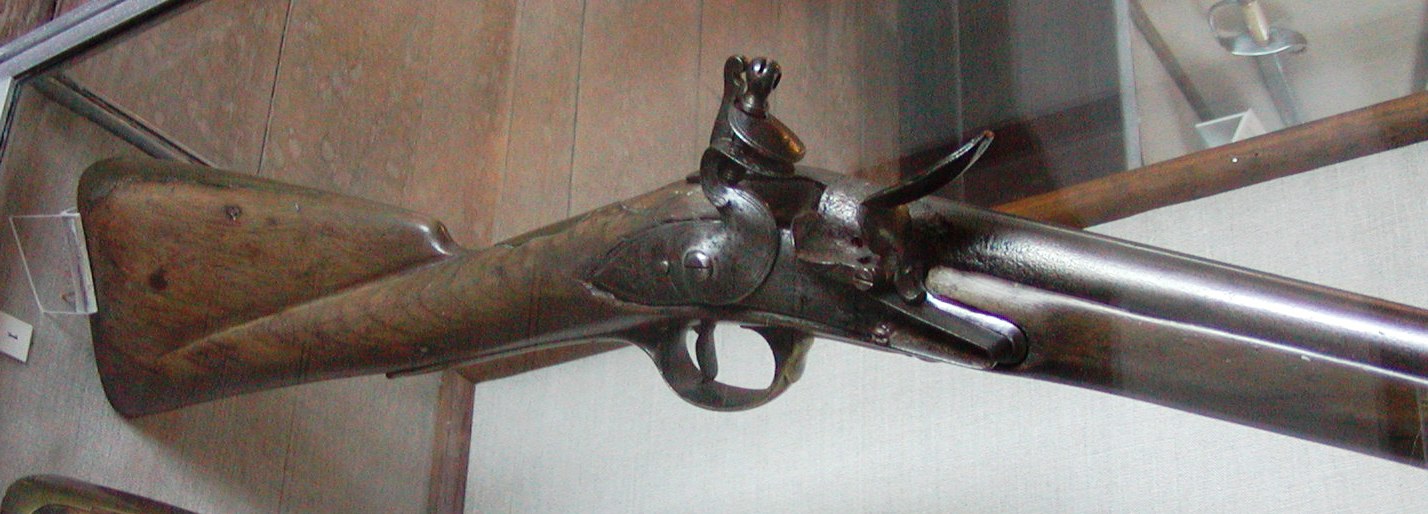
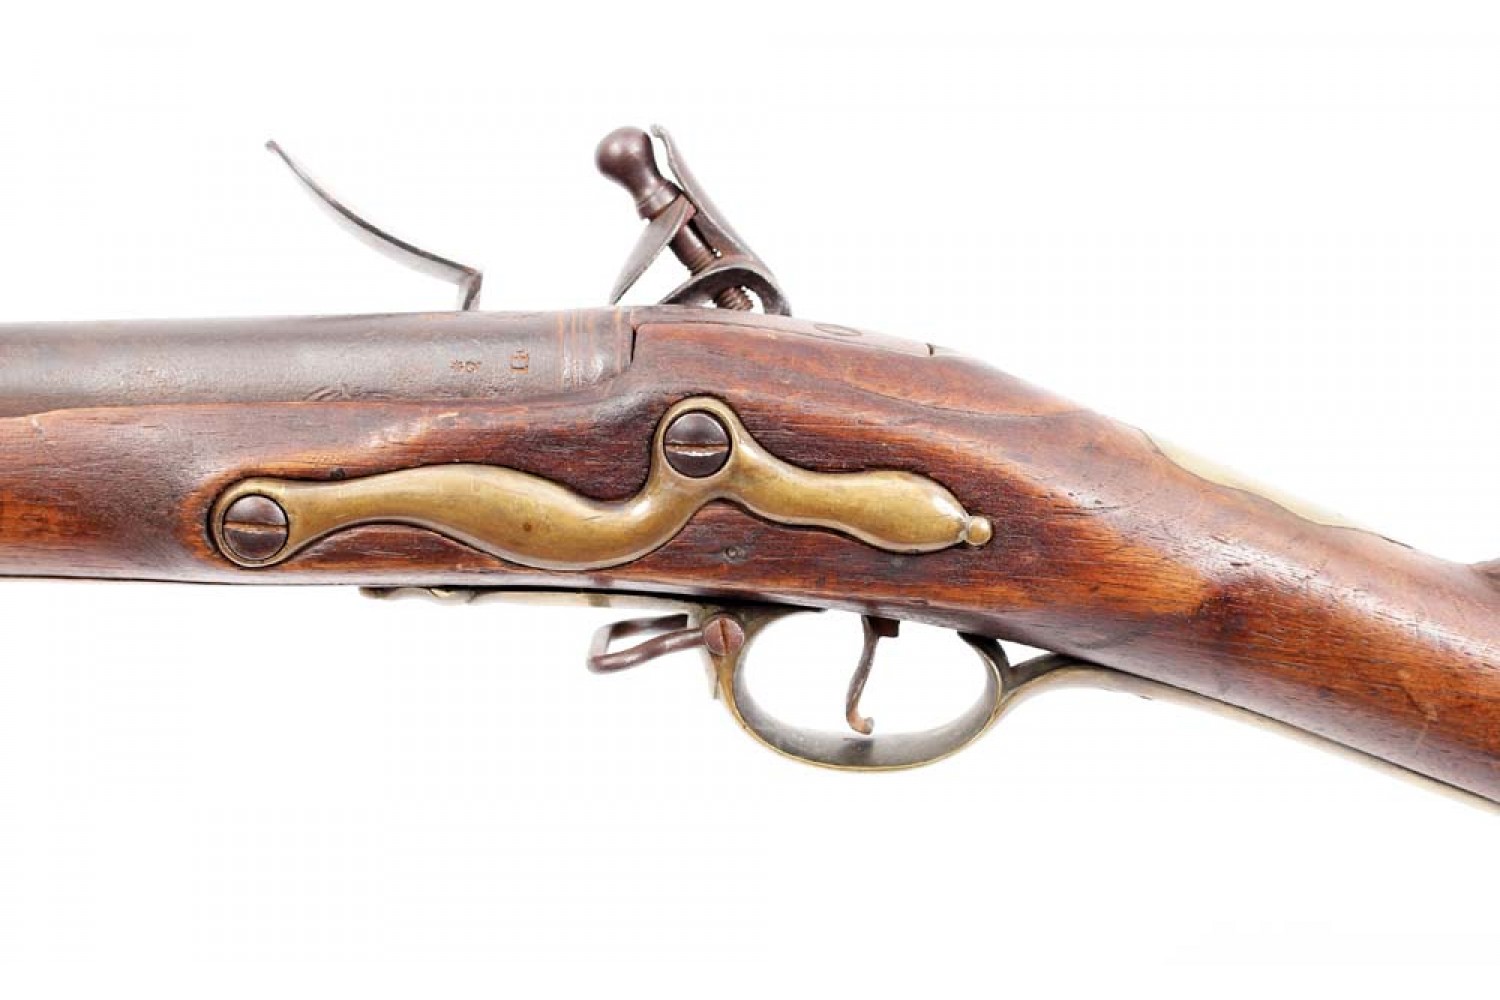
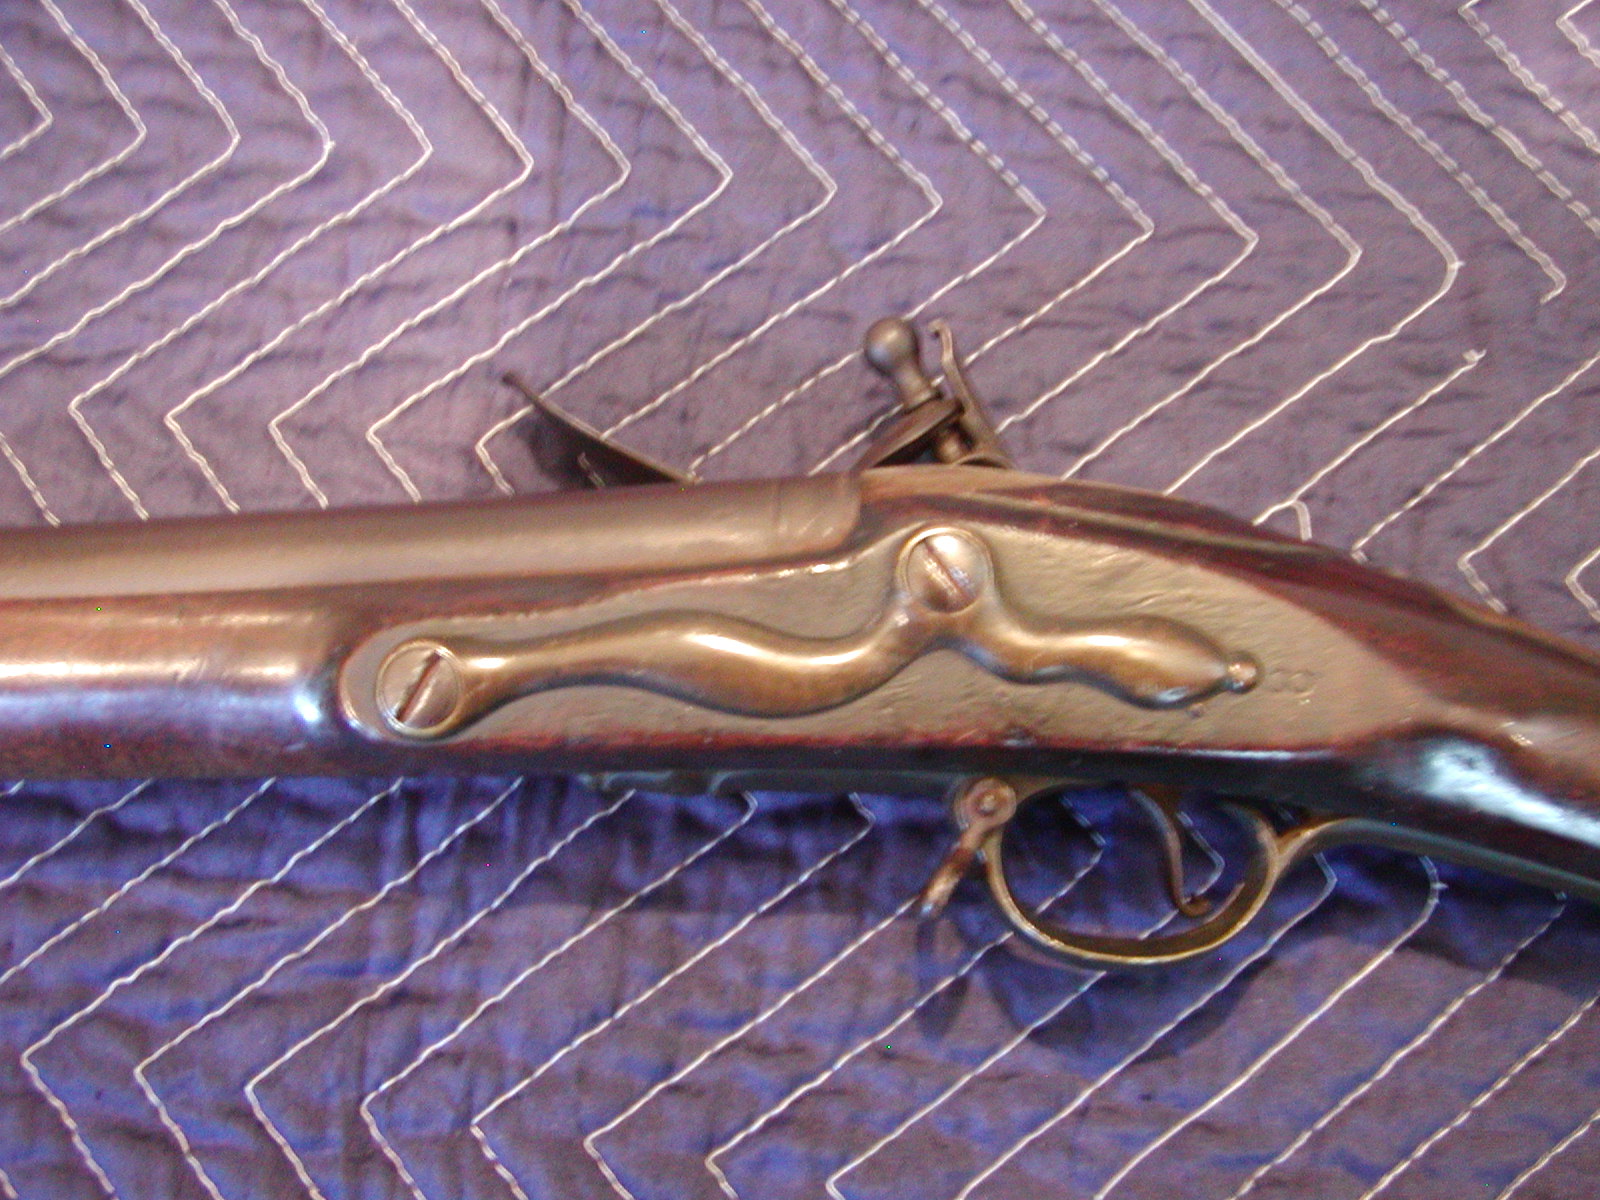
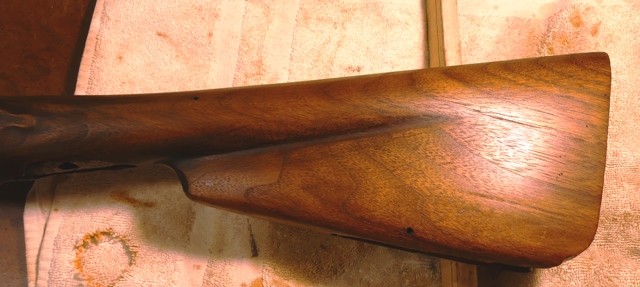
This is not our best work with respect to historical accuracy because we had to fight the machined mortise that was sloppy. But it is pretty good and you can see how shallowly the lock is set in around the edges exactly like the originals and unlike all of the commercial repros. Here are some examples of those guns for comparison.
BZB1KK3.jpg

cvk72Pl.jpg


British ordnance demanded good work, which is why the commercial repros will never measure up. If the stock was English walnut, I would have narrowed the flats surrounding the lock further but not with this piece of black walnut.

The original stocks were probably finished with fine files and scrapers. The British had sand paper beginning in the early 18th century but I wonder if it was ever used on these utilitarian guns. They did not fuss much with cosmetic concerns when finishing the stocks. I've examined a lot of original muskets and most were stained in some fashion. However, some showed no evidence of that and finish was applied over unstained wood. Here is an example that I believe was not stained.
Zv1hIjx.jpg

However, most originals I've examined have warm tones that I believe could only be achieved by staining the wood or tinting the finish.
3yohpSV.jpg

z2s07Jo.jpg


You can see color changes in the stocks where they are very worn. So I stain my stocks and particularly because black walnut does not look like English walnut. I finished the stock with fine files, scrapers, and sandpaper up to 220 grit. Most of the sanding occured when I whiskered the stock using black stain first, then 2 cycles of yellow stain. I use black and yellow aniline dyes purchased from Brownells that are water soluble and dissolved in water. The dyes raise the grain, which gets sanded off and then I leave a final coat of yellow unscraped. Then I painted the stock with turpentine infused with alkanet root. This added a deep red color. When that was all dry, I started applying finish. I use Sutherland-Welles tung oil wiping varnish. This is a mix of polymerized tung oil and urethane varnish. It can create a very authentic varnish look. Brown Besses were not soaked in linseed oil and did not have dull in the wood oil finishes. They had somewhat glossy linseed oil VARNISH finishes. Does this look like a dull linseed oil finish?
Tirz4Bh.jpg


VARNISH and don't turn the stock black like so many modern makers do! British ordnance would never apply an oil finish that took months, maybe a year to dry. They used VARNISH and seemed to apply it pretty thick. My choice looks perfect when applied correctly. I could also used Sutherland-Welles polymerized tung oil without the varnish added but it takes a bit longer to produce the proper finish particularly during winter. Hence, I choose the wiping varnish. Here is one of our muskets finished as I described.
7jaAEJe.jpg


Here is the stock stained and with several coats of finish applied.

iW0JjQo.jpg

5NykFO8.jpg

zsf7HpM.jpg


Several more coats will be needed to bring up the gloss.

dave
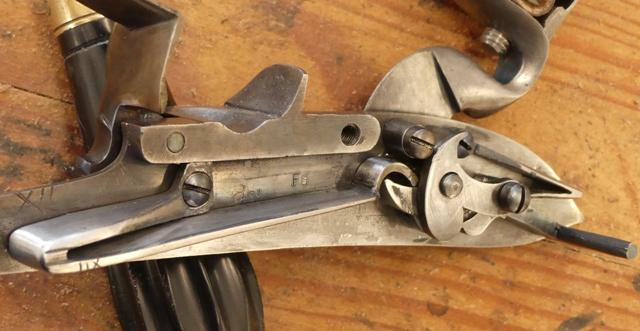
 
Hi,
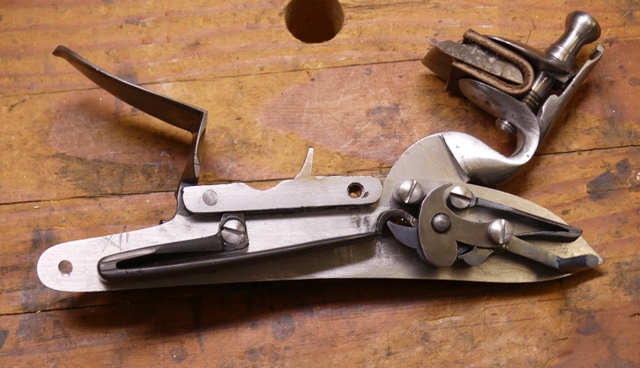
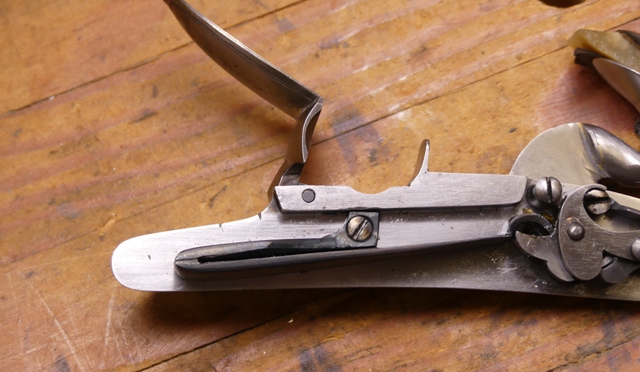
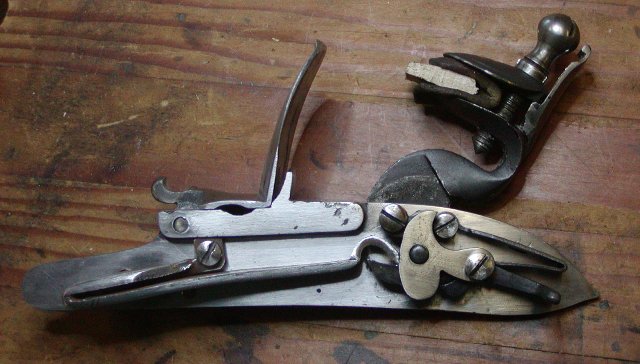
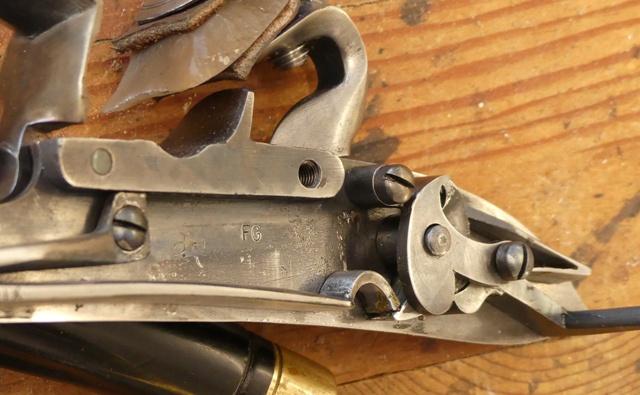
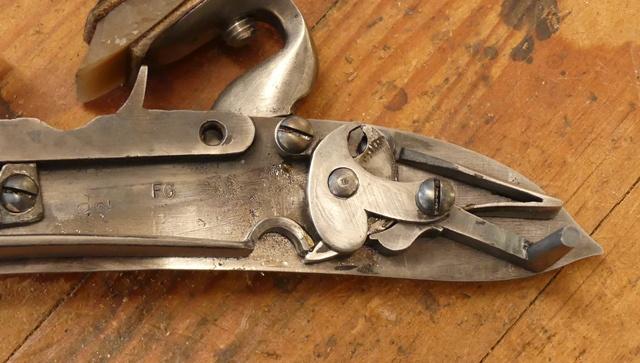
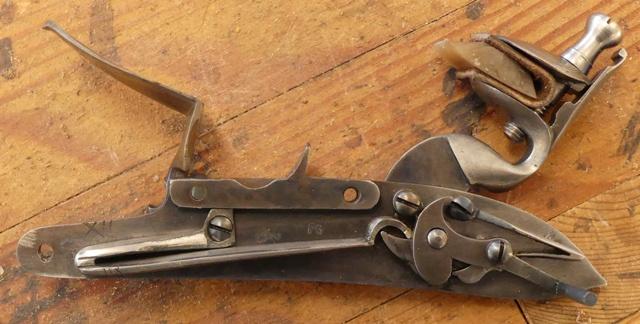
I finished heat treating the lock parts. The lock is almost done. The battery, bridle, sear, and tumbler were case hardened and tempered. All the springs were shaped, hardened, and tempered. I still have to final polish the flint cock but everything else is done. In fitting the main spring, you ideally want the lower leaf to be straight when the lock is at full cock. That can be difficult with the TRS cast springs but they come acceptably close. Here is the musket lock showing the internals and at full cock. The mainspring bends upward at the middle but not too badly and it will work fine.
d1GgicB.jpg


Here is a lock for a pattern 1756 artillery carbine showing a little better geometry.
n0REdGE.jpg


Here is the ideal using a mainspring I forged for a short land musket lock.
YfMFv7a.jpg


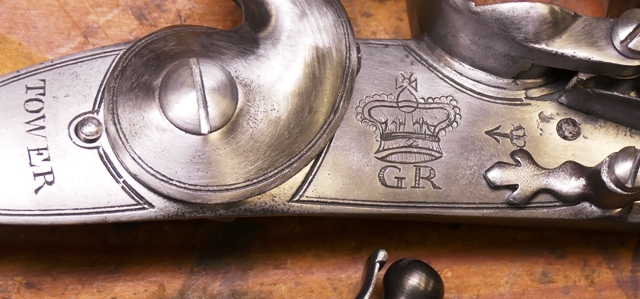
The cast in engraving on the lock parts can be a problem. If you file and sand away all of the cast surface and defects to achieve an authentic appearance, you often wipe out most of the engraving. I always have to engrave the crown over "GR", the government ownership stamp, and often the engraving on the tail of the lock. Sometimes I also have to engrave the border lines. None of that is difficult and none has to look like a fine English gun or a piece of art. They are just hand engraved markings and the shapes and quality varied tremendously. Here is the crown over GR on the musket lock that was completely engraved.
c99Fg9H.jpg


At times it is hard to know if you should preserve the cast in engraving, preserve its faint outline to help you re-engrave it, or wipe it out entirely. Most often I wipe it out entirely. On this musket, I engraved the crown over GR, the government ownership stamp, and "TOWER". However, the double border was pretty well preserved and I will just clean it up a little. Here is a crown that was completely engraved on a carbine lock using the design found on an original carbine gun.

ZfUZzfw.jpg


As you can see, they were not stamped and hand engraved with a lot of variation both in design and quality. Engraving Brown Bess locks is a really good practice for budding engravers. The double border is a basic skill you must learn and the other components, letters, crown, arrows are simple and do not require great precision to look historically correct.

dave
 
Hi,
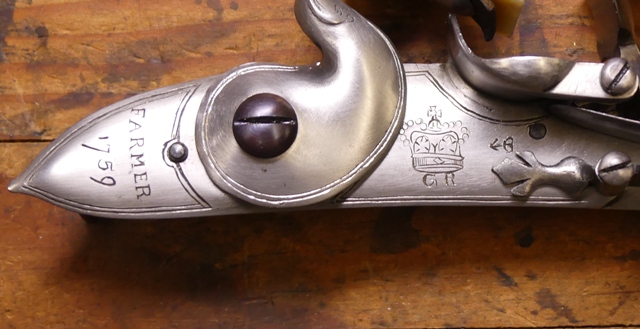
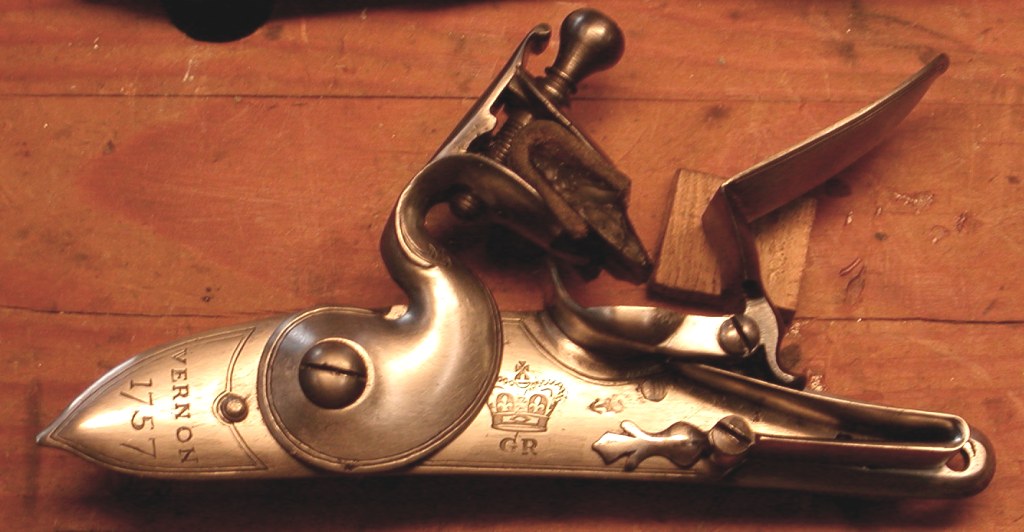
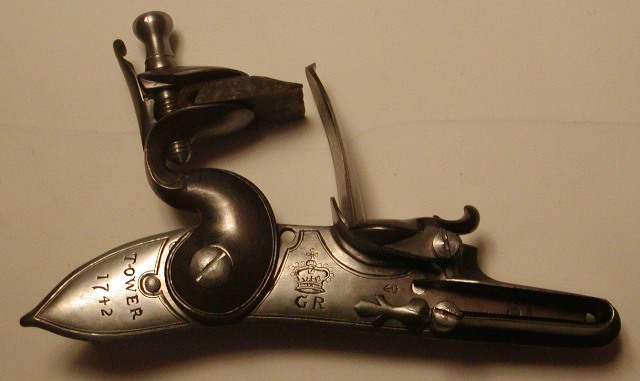
Tonight's post is for those suffering from CODD - Compulsive Obsessive Detail Disorder. There is a variation of the syndrome called COHDD or Compulsive Obsessive Historical Detail Disorder. It is pronounced the same way a Bostoner says "cawhd" meaning the fish, cod. So I am going to show the government markings common to most British muskets and carbines during the 18th century. I make these guns for museums, collectors, and historical reenactors so these details matter. First up is the outside of the lock plate. The key markings are the name on the tail of the lock plate, the crown over "GR", and the little crown over the arrow under the pan.

c99Fg9H.jpg


On many muskets assembled at Dublin Castle there is also a mysterious "T" stamped between the leaves of the feather spring. The crown and "GR" indicate British ordnance production and of course the letters changed with the ruler. There was "AR" during Queen Anne's reign, "GR" during the reigns of the 4 Georges, and "WR" when George IV's brother took charge in the 19th century before Victoria. Markings on the tail of the lock varied over the 18th century. Before 1764, they usually indicated either the private contractor who made the lock, or the lock setter uppers in the Tower of London and Dublin Castle. There usually was a date that was also engraved. That date does not indicate the date the musket was produced only the date the lock was made and accepted by ordnance. The musket it was used on may have been set up a decade later. Here is an example showing the lock contractor's name and the date it was made.
65uNnCl.jpg


Here is another showing "TOWER" and a date of manufacture.

NlKNJEs.jpg


On TRS parts, I always end up engraving all these marks completely. The cast in engraving always gets almost completely wiped out when I file and polish the parts. So I spent a lot of time studying originals and learning the appropriate fonts. I have COHDD so I pay attention to details, obsessively. The crown and "GR" and contractor's name and date were hand engraved, not stamped. They were stamped in the 19th century but were engraved during the 18th. Consequently they varied a lot and showed considerable variation in design and quality.

In 1764, British ordnance stopped allowing contractors names and dates to be engraved on the locks. Subsequently, all locks just had "TOWER" or "DUBLIN CASTLE" engraved on the tails. The contractor still stamped the interior of the lock so he could be identified. On the lock for this pattern 1756 musket, "TOWER" with no date is on the tail. That means it could have been produced after 1764 or it could also mean an earlier musket was refurbished in the Tower after 1764 and they wiped out the contractor's name. Both of those scenarios would be appropriate for a musket used in the American War for Independence.

The other very important mark is the crown over the arrow. That indicates the gun was accepted into Royal ownership and was potentially issued to troops. That is one way to separate government issued muskets from those contracted and issued to volunteer militias. The crown over the arrow means the gun was likely issued to and used by a British soldier.

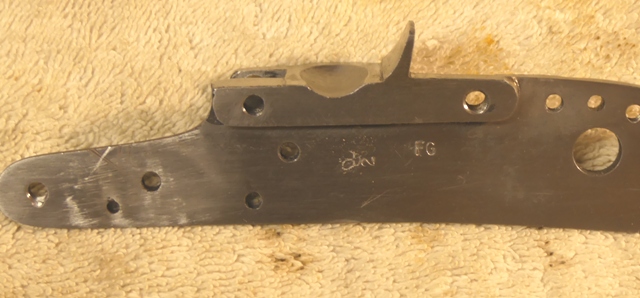
Inside the lock plate you usually will have stamped initials of the lock maker and a British inspectors mark consisting of a crown over a number.
ELg4Rc7.jpg


I used a crown over #2 and "FG" indicating the firm of Farmer and Galton as the maker.

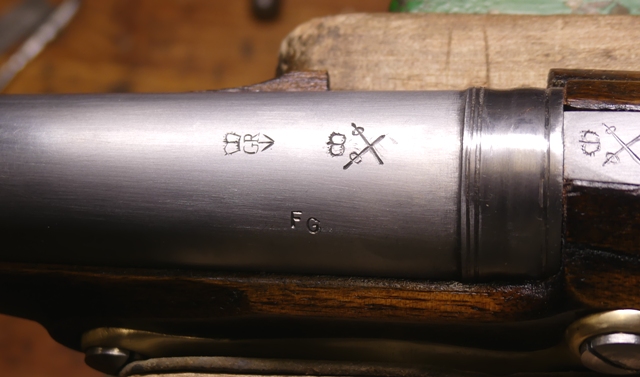
Now to the barrel. First there are the government view and proof marks stamped near the breech. I engrave and then stamp them. The engraving indexes the stamps, holding them in place when hit by a 5 lbs hammer. I also stamped (unevenly) "F" and "G" indicating Farmer and Galton as the barrel contractor. Finally, the crossed scepter mark is stamped on the barre tang and well as a small crown at the very end of the tang.

2xO26xT.jpg


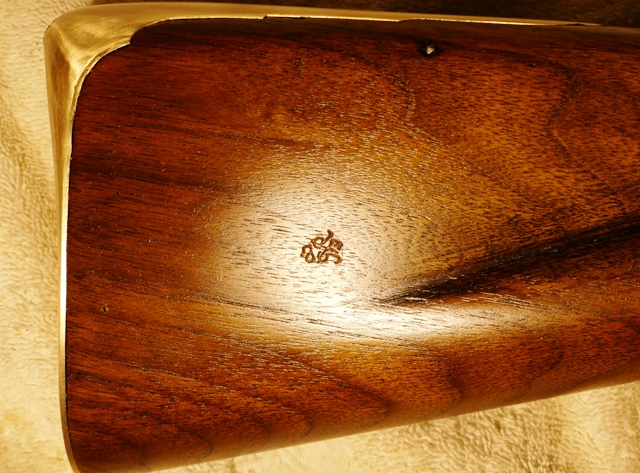
Now for the stock. It should have a store keepers mark indicating it was accepted into stores.
SOZwG2r.jpg


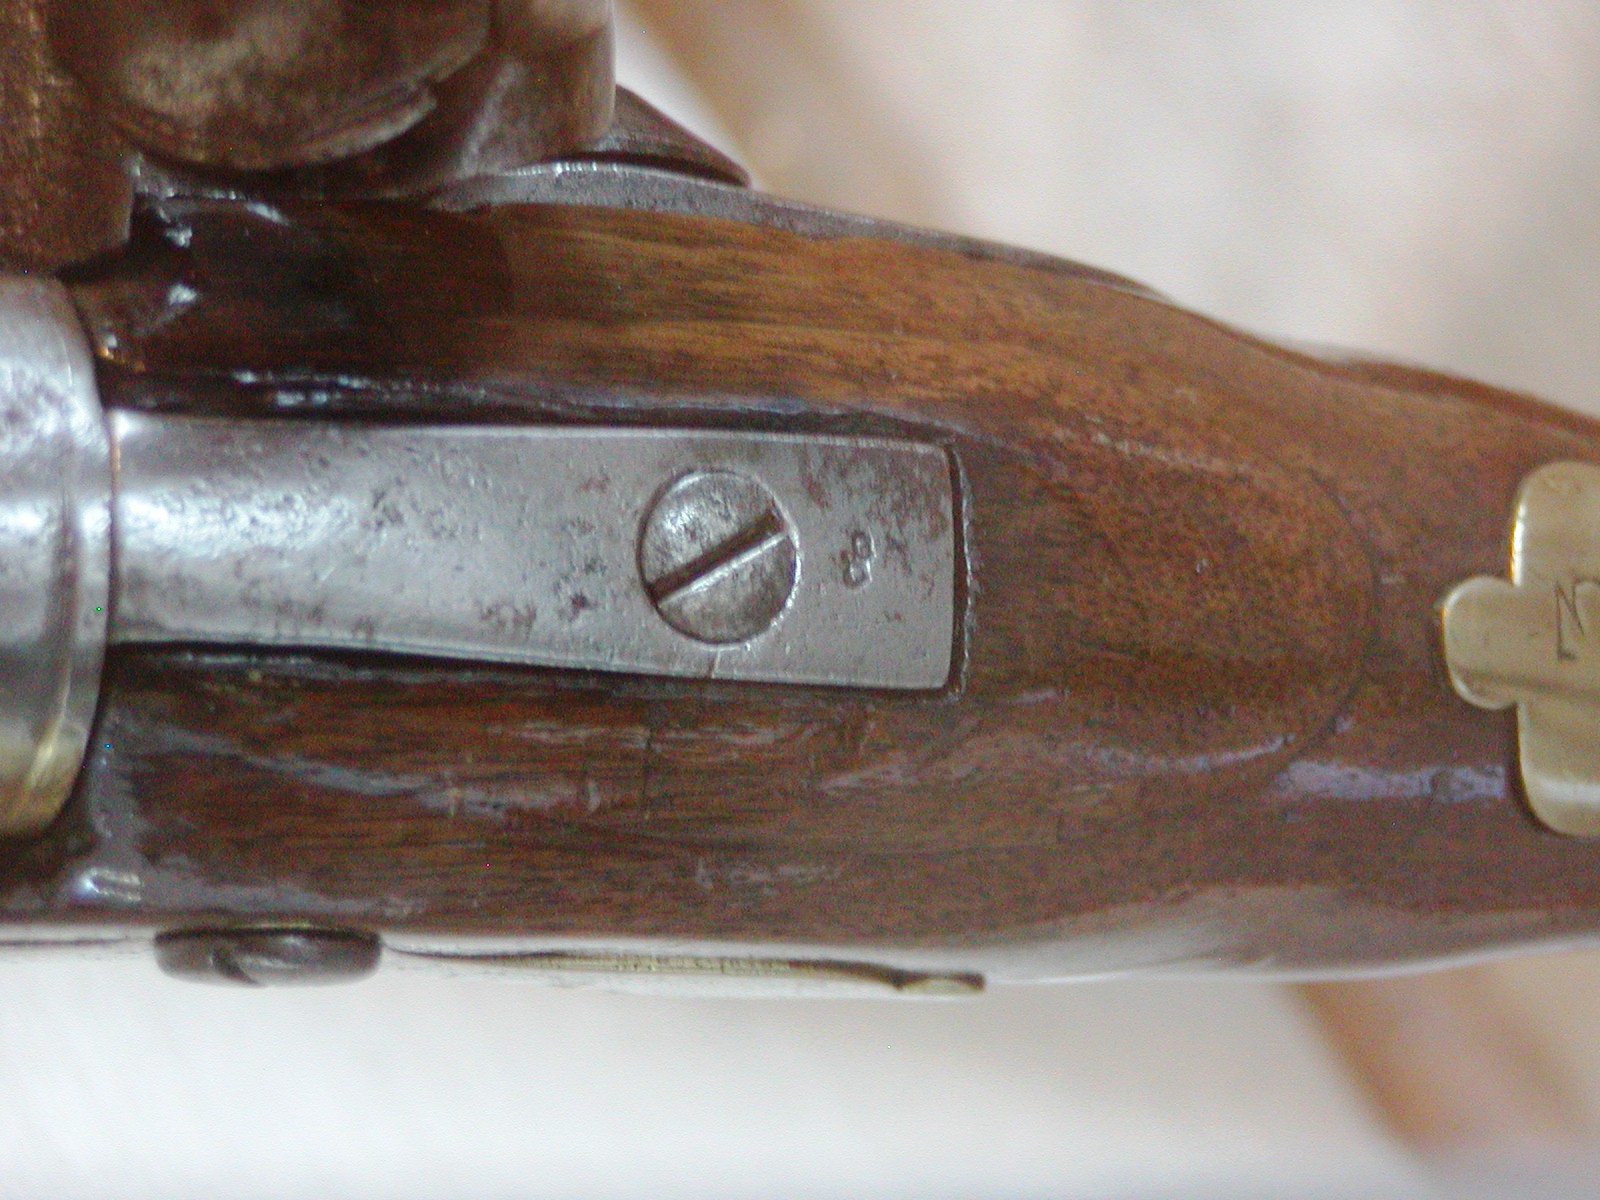
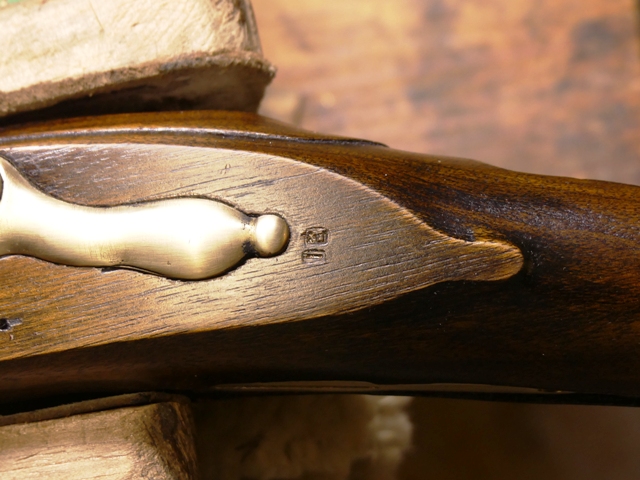
It also will have inspector's marks stamped behind the trigger guard and behind the side plate.

ZZkKwZ9.jpg

U5tQAyE.jpg


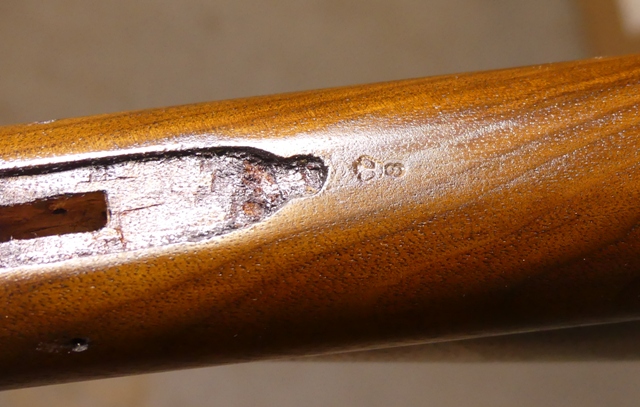
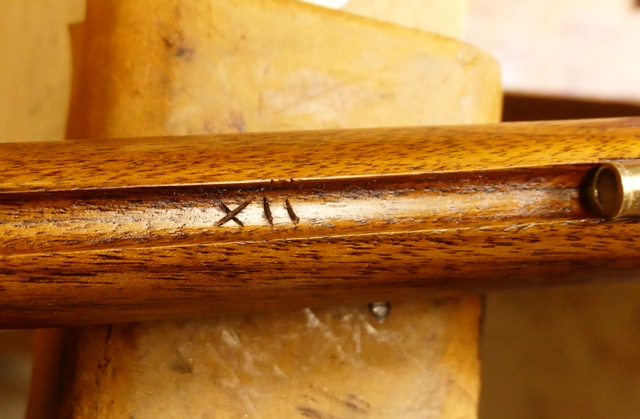
I also included assembly marks identifying components that went together.

Gn7eSMs.jpg

ZQdLR0F.jpg


So the musket is marked and looks right. More to come.

dave
 
Hi,
More markings and how to mount a bayonet but first the finished lock.
rItpNkU.jpg


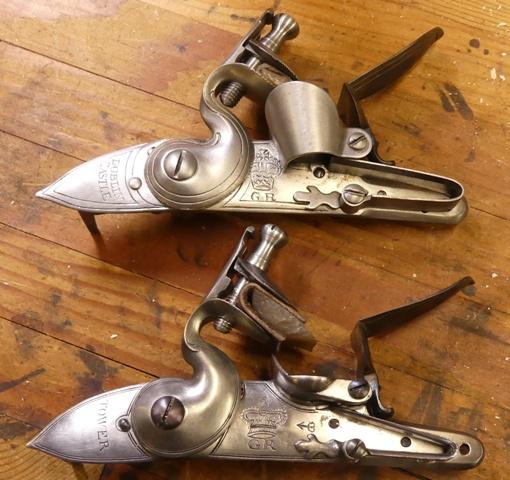
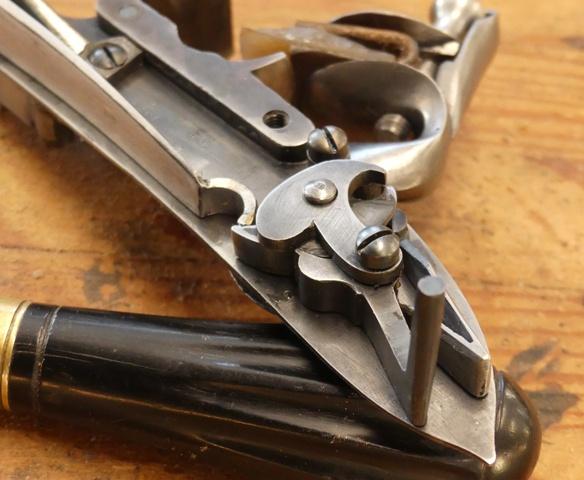
This shows the finished lock below a Pedersoli (modified for Dublin Castle).

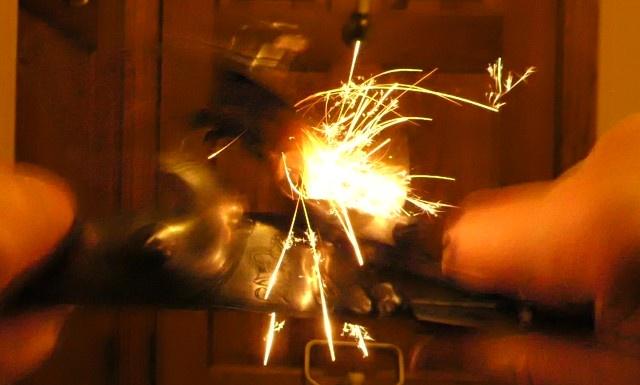
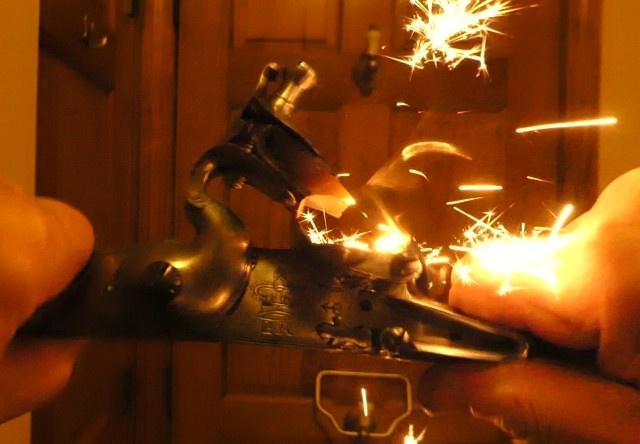
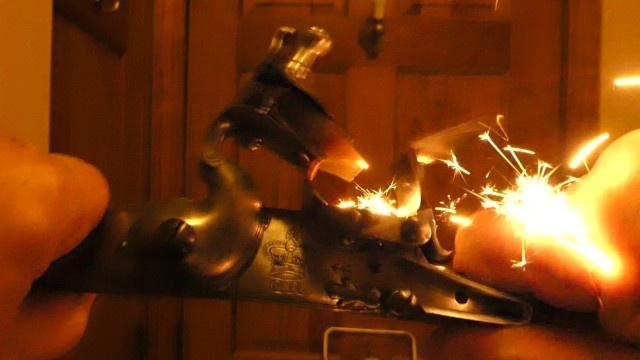
It is tuned and throws a scary shower of sparks mostly into the pan. I generally like the force needed to open the battery (frizzen) to be 30-40% of the peak force needed to pull the flint cock back to full cock from rest. However, the sheer mass of the flint cock requires substantial force to get it moving quickly. It benefits from a strong mainspring and a ratio of forces that means the force required to open the battery may only be 20% of the force to bring the flint cock back to full. All of the screw heads were hardened and tempered to resist wear and tear. As you can see, the components are precisely fit.
OEFY1sw.jpg

5UTtyLs.jpg

THIIOuR.jpg

dS8CsDv.jpg

f43Sb5G.jpg

PaQrtwl.jpg


That was standard for British ordnance manufacture. Compare that to India-made and all other repros. They are not in the same league by a mile.

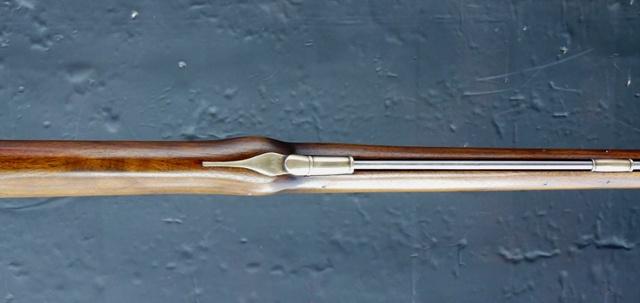
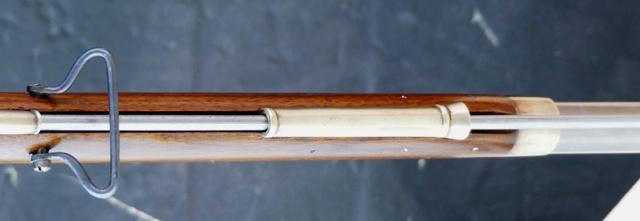
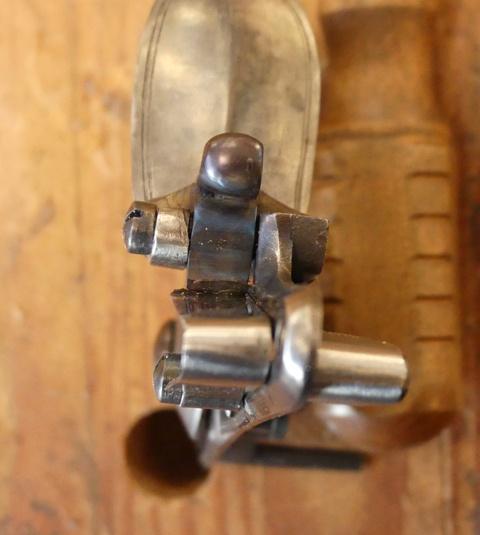
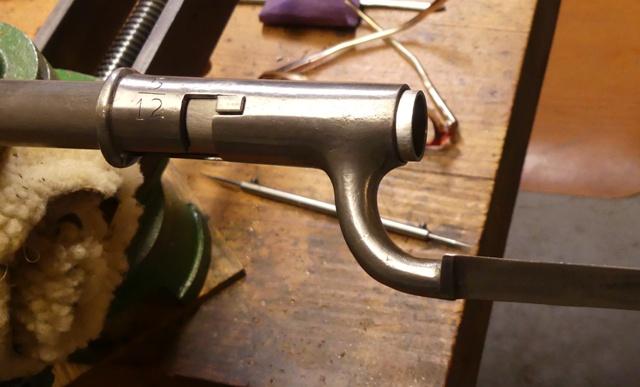
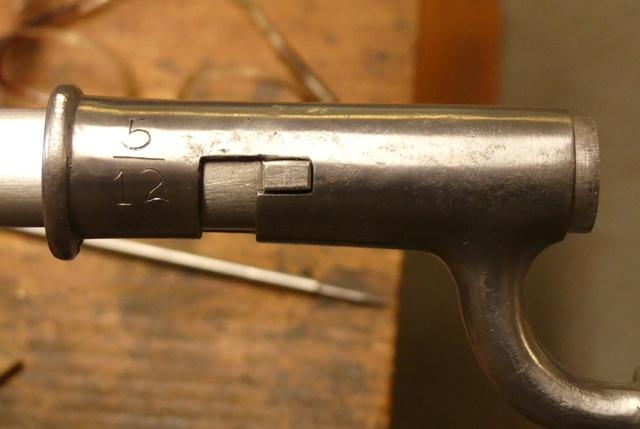
Now, fitting a bayonet. For this gun it should have the standard ordnance bayonet after 1756, which means it does not have a shield around where the bend is welded to the socket. A bayonet should fit snugly and there should be no rattle when it is installed. Your barrel and musket stock need to be designed so the bayonet fits snugly, that at least 1/8" or more barrel protrudes through the end of the socket, it does not rattle on the barrel, and it does not butt against the nose cap on the stock. It should mount easily but require a rap with the palm on the hand to loosen it off the barrel when it is removed. On the bayonet for this musket, I just needed to grind the interior of the socket with a sanding drum on a Dremel to fit it to the barrel. The "Z" or "L" groove had to be cleaned up and filed but not much. I was able to taper the end of the slot so the barrel sight (lug) fit snugly into the slot when seated.

rRMsngE.jpg

dtrygrn.jpg


When working on these brutal triangular bayonets remember the edges are not sharpened but the point is deadly. I put a cork or plastic tube over it before working on filing and polishing the blade.
mu5mtHb.jpg


Fit bayonets carefully. There is nothing more annoying than a bayonet that rattles on the barrel and falls off if the gun is tipped down.

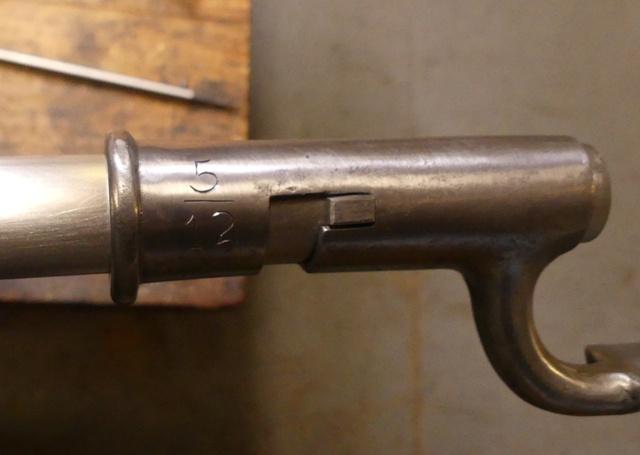
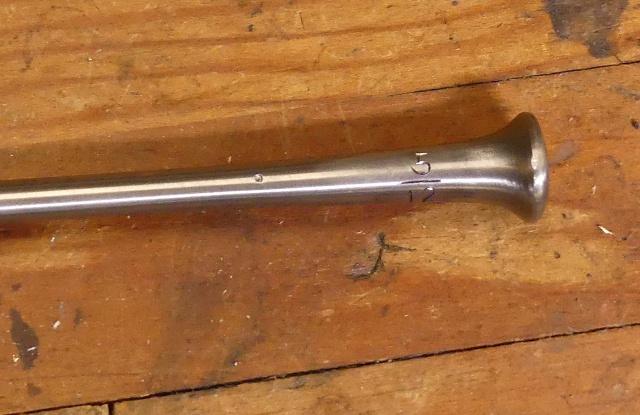
Some final marking details. I added an inspectors mark on the barrel below the vent hole. The vent hole is a Chambers "white lightning" liner but in carbon steel so it will tarnish with the barrel. I also added company and rack number markings to the bayonet and ramrod.
ADcqSON.jpg

Sry0i22.jpg


dave
 
Hi,
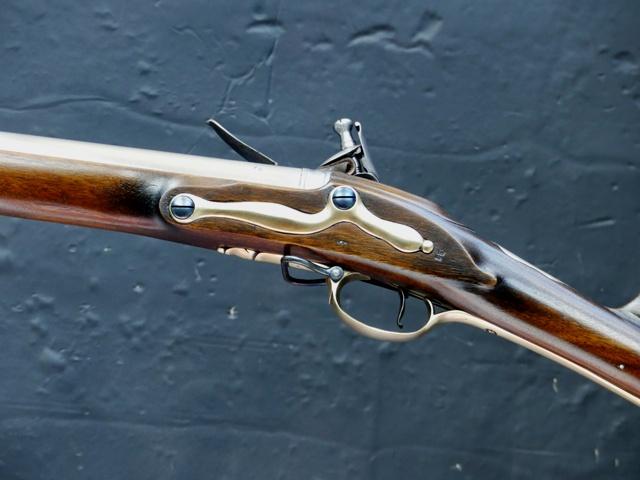
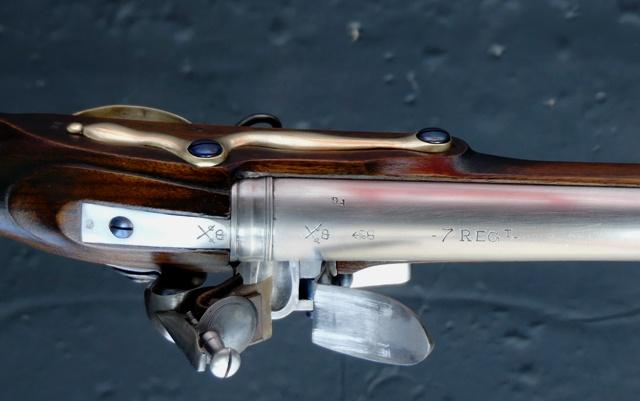
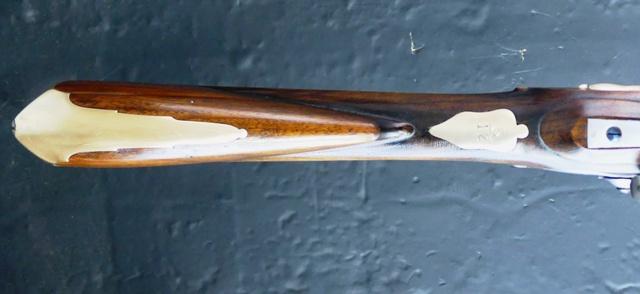
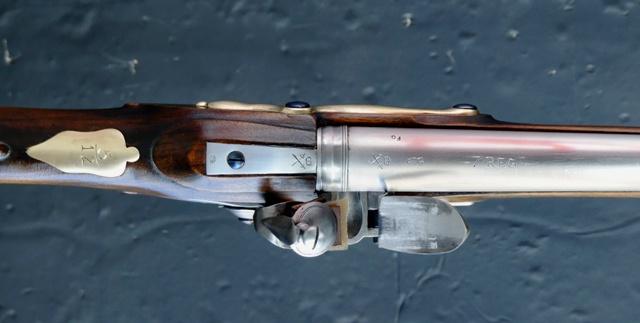
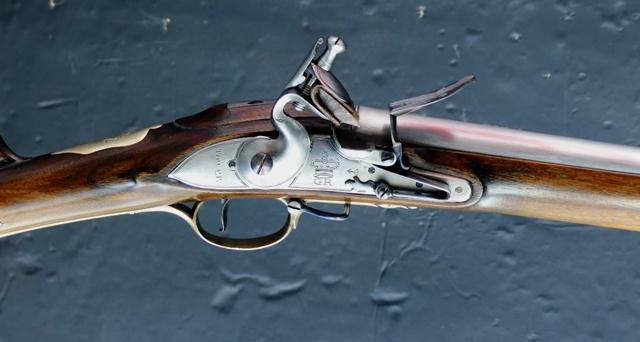
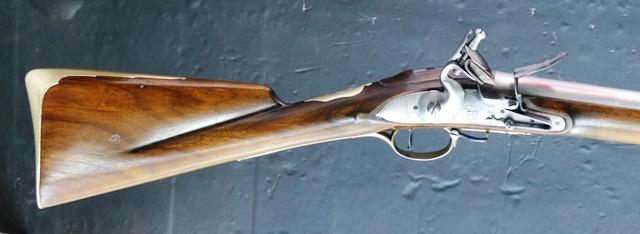
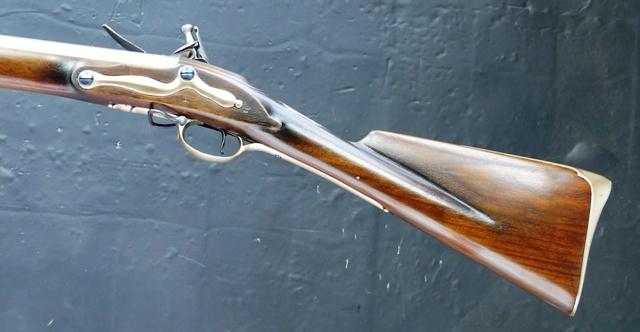
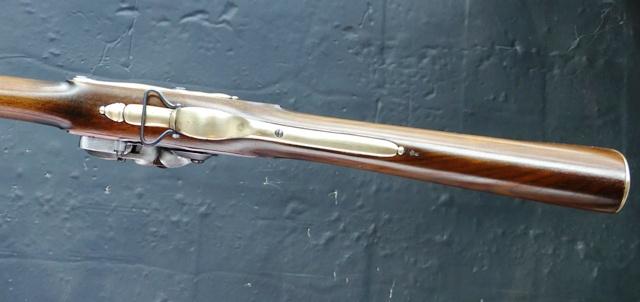
It is done. The finish is Sutherland-Welles tung oil wiping varnish. The brass was polished and then tarnished a little. I also added a little bone black glazing to the finish on the stock. I engraved "7 REG t on the barrel for the 7th regiment of foot. They are the Royal Fuziliers and were stationed at Fort St John north of Lake Champlain in 1775. They were captured by Americans under General Richard Montgomery in late 1775 and their arms were one plausible source of long land muskets for members of Seth Warner's regiment early in the war. Here it is. Enjoy. The red color you see on the barrel is a reflection of my balcony railing.
fQ52D0B.jpg

5jHm4bT.jpg

H2fDkav.jpg

98A0wpI.jpg

bilLoGX.jpg

Nc4DStV.jpg

YIAlQVD.jpg

ei52AC1.jpg

OyqJ2HF.jpg

tDR7HJL.jpg

d9h63BW.jpg

gF6dzka.jpg

Here is a split second burst of 3 photos taken of the lock firing.
yGJh55k.jpg

TYyFmhj.jpg

aoBKemR.jpg


Now I just have to test fire it and hand it off to its owner.

dave
 
Hi,
It is done. The finish is Sutherland-Welles tung oil wiping varnish. The brass was polished and then tarnished a little. I also added a little bone black glazing to the finish on the stock. I engraved "7 REG t on the barrel for the 7th regiment of foot. They are the Royal Fuziliers and were stationed at Fort St John north of Lake Champlain in 1775. They were captured by Americans under General Richard Montgomery in late 1775 and their arms were one plausible source of long land muskets for members of Seth Warner's regiment early in the war. Here it is. Enjoy. The red color you see on the barrel is a reflection of my balcony railing.
fQ52D0B.jpg

5jHm4bT.jpg

H2fDkav.jpg

98A0wpI.jpg

bilLoGX.jpg

Nc4DStV.jpg

YIAlQVD.jpg

ei52AC1.jpg

OyqJ2HF.jpg

tDR7HJL.jpg

d9h63BW.jpg

gF6dzka.jpg

Here is a split second burst of 3 photos taken of the lock firing.
yGJh55k.jpg

TYyFmhj.jpg

aoBKemR.jpg


Now I just have to test fire it and hand it off to its owner.

dave
It’s fantastic.
Enjoy shooting its “parting shot”and congratulations to you and the owner.
 
Dave, your detailed explanation of the work is inspiring. Thanks for the opportunity to learn about really knowledgeable building details.
Your resent post in the ALR forum about what makes a good lock would be well worth reading here.
 
Hi Folks,
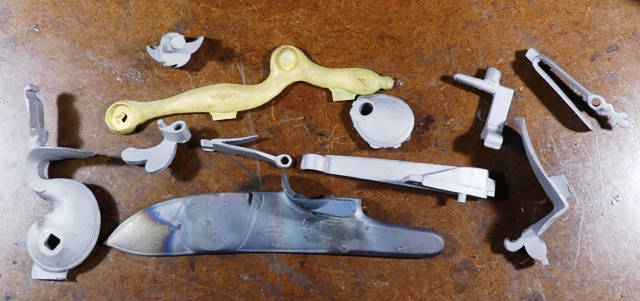
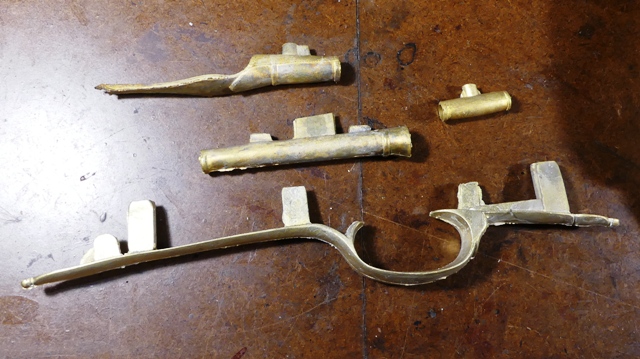
I am starting this thread a little earlier than I planned to help a member who is actively building the same gun. The first thing for me is always context. The gun I am building is a British pattern 1756 long land musket and inspired by an original Tower assembled musket issued to the 63rd regiment of foot during the American Revolutionary War. It may have served at Bunker Hill, Long Island, New York, New Jersey, and Pennsylvania. I will use direct measurements from that gun to guide this project. I ordered the parts set in June and received it at the end of September.
The parts were generally of excellent quality with a few caveats. The lock plate was warped and had to be straightened. That reqy=uired heating the tail and nose to red hot and hammering it straight. A MAPP gas torch is sufficient for that purpose. Then file the inside surface of the plate to see if there are high and low spots. I use a coarse single cut lathe file for that purpose and use it to flatten the inside of the lock. The rest of the lock parts and components seem to be fine.
WjpZoHz.jpg

7ZTR2cw.jpg

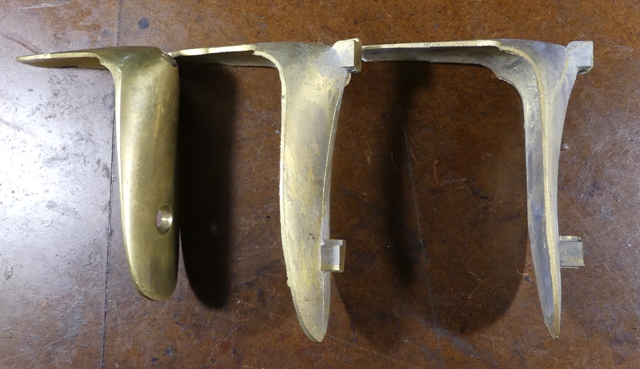
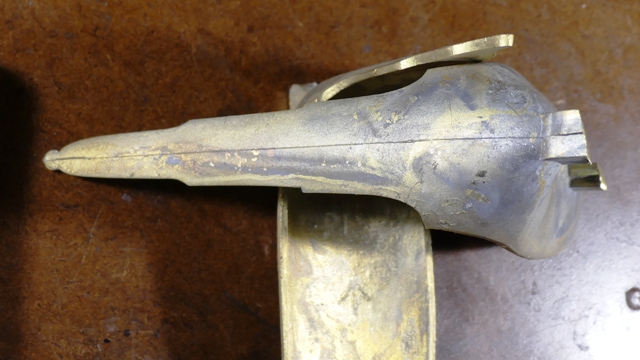
I arranged several cast butt plates to show you why none of the commercial reproductions can ever be considered authentic reproductions of the Brown Bess.
5Y2iGlc.jpg

BDw8UzG.jpg

The first butt plate to the left is from a Miroku Bess and is the same size as butt plates on Pedersoli Besses. The second is a casting from an original short land Bess, the gun the commercial repros purport to be, and the last is from a long land musket. The commercial butt plates are way too small and will never produce an accurate copy of the gun.

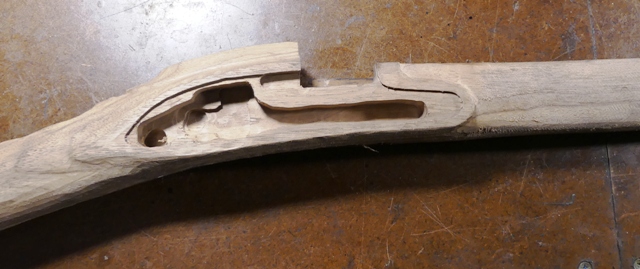
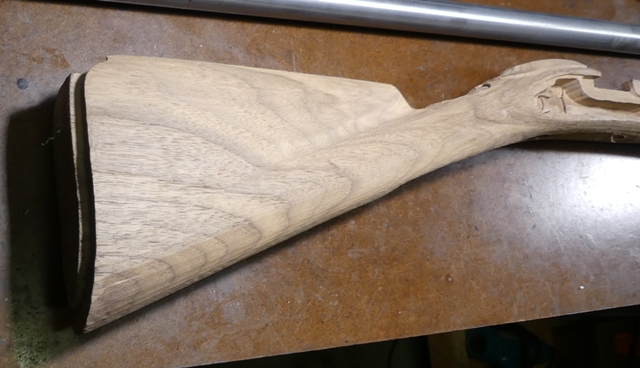
The TRS stock is pretty good. Fortunately, it falls within the dimensions of the originals.
Phb6phq.jpg

ZQhhKlQ.jpg

UJUjUnU.jpg

Unfortunately, the routed (not drilled) ramrod channel is off center.
K5yXcm2.jpg

I'll fix it and I will not let that routed mortise show. It will be covered over with a walnut strip and the barrel channel coated with a varnish thin layer of AcraGlas.

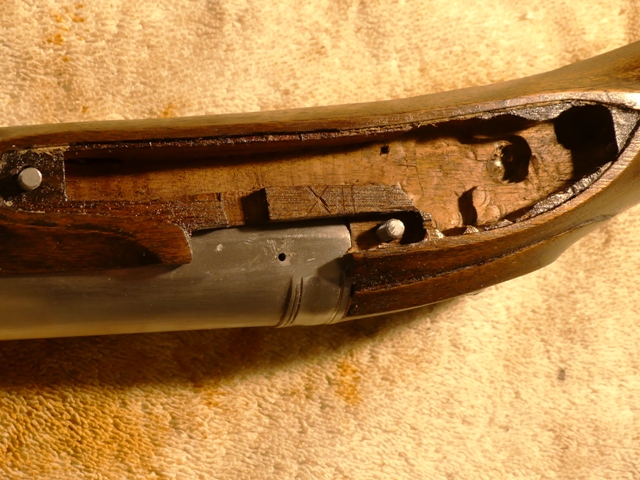
The first job is to fit the barrel in place. First it must have a flat filed on the lock side. To do that you need to make sure the breech plug is well fitted. Remove the plug and put blacking or Prussian blue on the face of the plug and screw it in all the way. Then take it out and hopefully the marking on the face of the plug is wipe off indicating the plug is snugging against the shoulder in the barrel. If it doesn't, file off some of the breech end of the barrel and install the plug until it butts against the shoulder. When it does, measure the depth of the threads in the bore and mark that depth on the outside of the barrel above where you will file your flat. Next file the flat just enough so the full length of the bolster on the lock fits the flat. Don't go overboard. Also file off the decorative rings at the breech on the underside of the barrel.
vLiLn4D.jpg

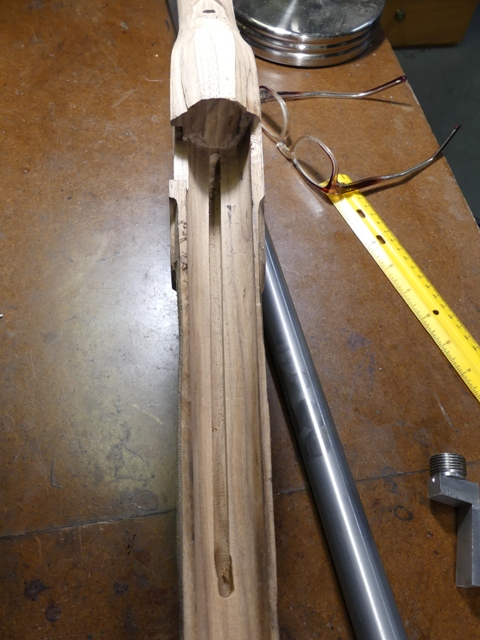
Those rings were hand filed into the top third of the barrel. They were not turned like the modern repros. Now you are ready to initially fit the barrel. File away the closing cap of wood at the muzzle end and using scrapers, barrel floats, and sandpaper, seat the barrel. You will need to clean up all the corners at the breech with flats and gouges.
Once down and in place, you get to see how the lock lines up with the potential vent hole location. I cover that in the next post

dave
Having a 1756 is like having the secret to everlasting life in revolutionary war reenacting.. they’re the most universal piece to have and everyone wants one! Hope your build is going well and can’t wait to see the completely finished product!
 
Back
Top