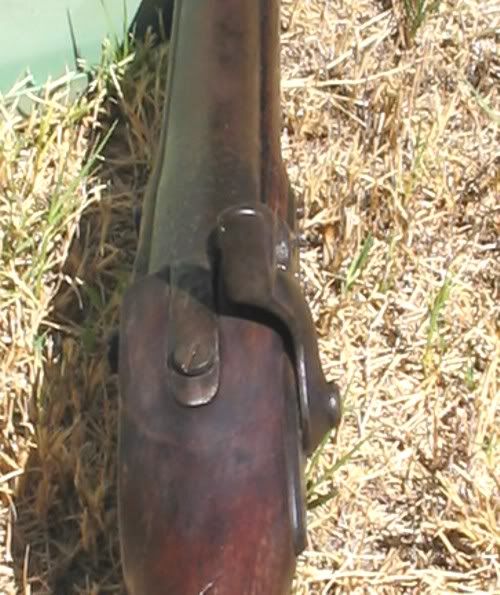
Several years ago, I bought a 1842 Springfield Musket.
The barrel is in a sorry condition and the lock needed a replacement screw. Someone, most likley in the 1950s, replaced the wood around the barrel tang with Plastic Wood, held in place with a few small nails.
I have replaced the locks sear arm screw with a Dixie Gun Works part so that is no longer an issue, but I got to thinking, Anything I do, has to be as good as that Dam Plastic Wood, so I now have another project to play with.
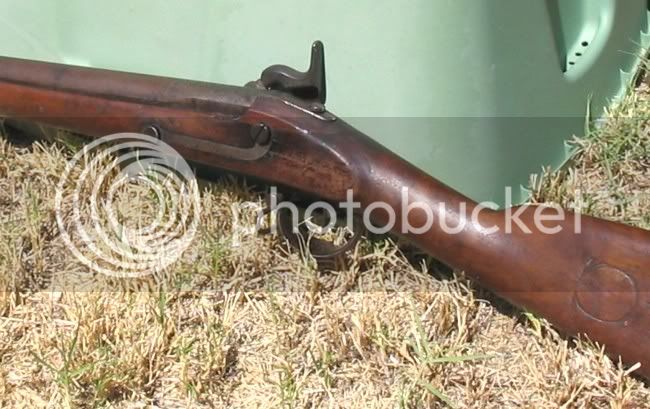
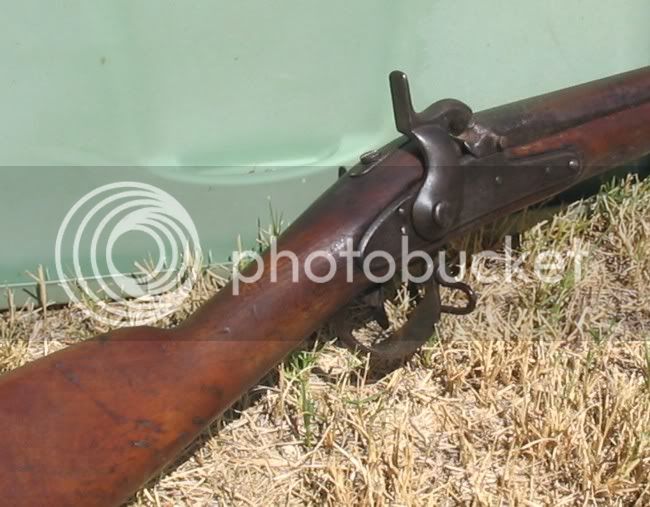
The first 2 pictures show the stock before I started my project:
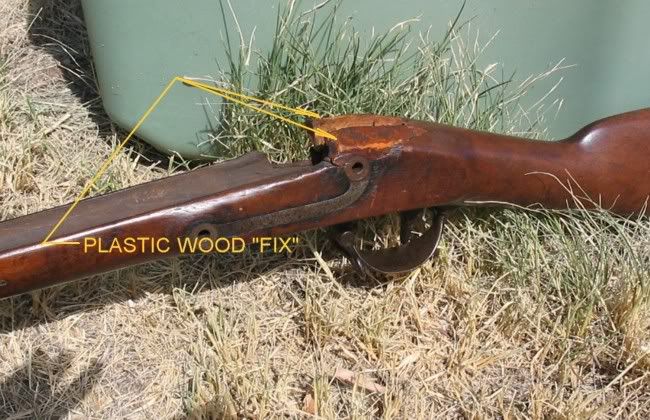
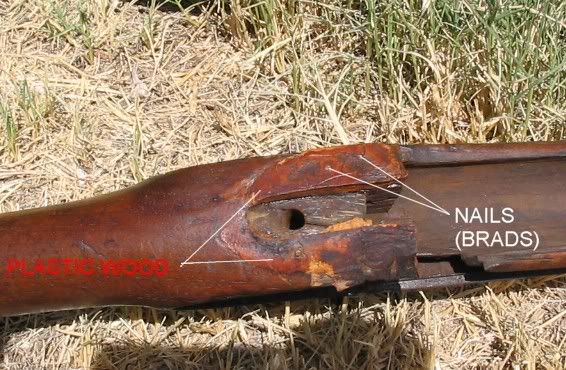
I took these pictures for references but thanks to the help I got on this Forum, I now have several photos of what a 1842 Musket is supposed to look like in this area.
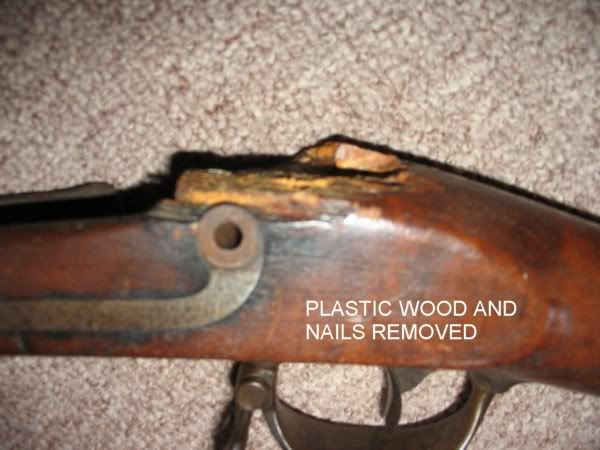
This photo shows the stock after I removed the old fix.
After this picture was taken, I proceeded to sand the area flat, removing only what was necessary to assure a good glue joint with a small block of Walnut.
I glued the block in place with yellow/white Wood Glue because I feel it not only gives a good bond, but it is a little more authentic than epoxy.
Sorry, I didn't take photos of the block of Walnut glued to the stock :shocking:
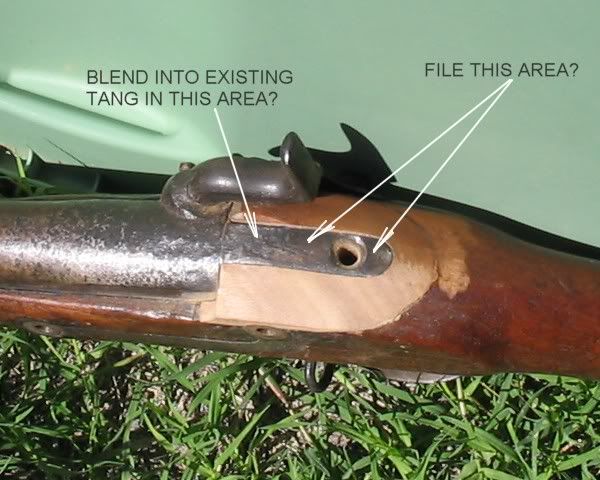
With the barrel tang inlet complete and the block sanded down to a "close" condition it looks like this:
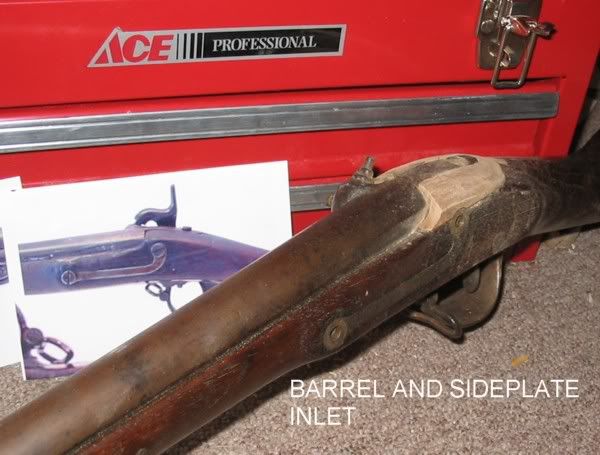
After I removed enough material to clean up the old splintered surface, the new block was lower than the lockplate inlet so I first had to reinlet the lockplate:
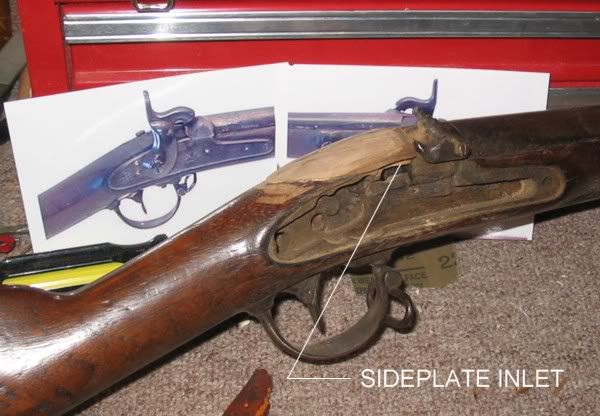
With this gun, the barrel breech block rests on top of the lockplate just underneath the nipple. With the barrel tang inlet so the two surfaces are just meeting, it becomes obvious that it can't go deeper.
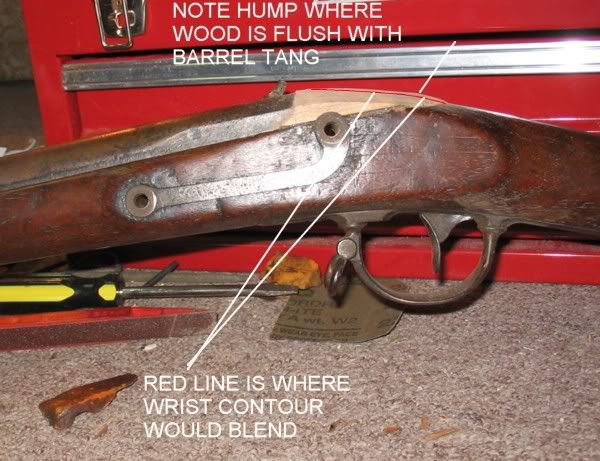
With 160 year old wood, there is always some shrinkage.
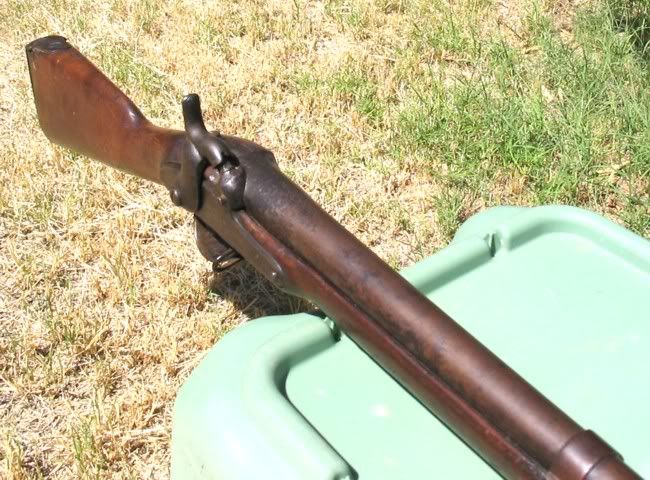
In this guns case, the shrinkage is enough that the "arc" or flow of the wrist will be below the top of the tang (as shown with the red line)
My question of you learned people is: do I try to duplicate the old shrunken line of the wrist with a smooth flowing surface, or do I try to blend in the wood to the existing barrel tang height and let the hump exist?? ::
The barrel is in a sorry condition and the lock needed a replacement screw. Someone, most likley in the 1950s, replaced the wood around the barrel tang with Plastic Wood, held in place with a few small nails.
I have replaced the locks sear arm screw with a Dixie Gun Works part so that is no longer an issue, but I got to thinking, Anything I do, has to be as good as that Dam Plastic Wood, so I now have another project to play with.
The first 2 pictures show the stock before I started my project:


I took these pictures for references but thanks to the help I got on this Forum, I now have several photos of what a 1842 Musket is supposed to look like in this area.

This photo shows the stock after I removed the old fix.
After this picture was taken, I proceeded to sand the area flat, removing only what was necessary to assure a good glue joint with a small block of Walnut.
I glued the block in place with yellow/white Wood Glue because I feel it not only gives a good bond, but it is a little more authentic than epoxy.
Sorry, I didn't take photos of the block of Walnut glued to the stock :shocking:
With the barrel tang inlet complete and the block sanded down to a "close" condition it looks like this:

After I removed enough material to clean up the old splintered surface, the new block was lower than the lockplate inlet so I first had to reinlet the lockplate:

With this gun, the barrel breech block rests on top of the lockplate just underneath the nipple. With the barrel tang inlet so the two surfaces are just meeting, it becomes obvious that it can't go deeper.

With 160 year old wood, there is always some shrinkage.
In this guns case, the shrinkage is enough that the "arc" or flow of the wrist will be below the top of the tang (as shown with the red line)
My question of you learned people is: do I try to duplicate the old shrunken line of the wrist with a smooth flowing surface, or do I try to blend in the wood to the existing barrel tang height and let the hump exist?? ::


