• Friends, our 2nd Amendment rights are always under attack and the NRA has been a constant for decades in helping fight that fight.

    We have partnered with the NRA to offer you a discount on membership and Muzzleloading Forum gets a small percentage too of each membership, so you are supporting both the NRA and us.

    Use this link to sign up please; https://membership.nra.org/recruiters/join/XR045103

51 Navy Bird Head conversion

Muzzleloading Forum

Help Support Muzzleloading Forum:

This site may earn a commission from merchant affiliate links, including eBay, Amazon, and others.

mazo kid

70 Cal.
Joined
Apr 8, 2003
Messages
4,794
Reaction score
14
I'm not sure if I should post here or the "Craftsman" section, but here goes. Ever since I saw a picture of an original Colt percussion revolver altered to a bird head grip, I have wanted to have one. Evidently this was done fairly commonly in the day. I purchased a '51 Navy revolver kit from a good forum member on the Classified Ads and after thinking long and hard, decided to take the plunge.
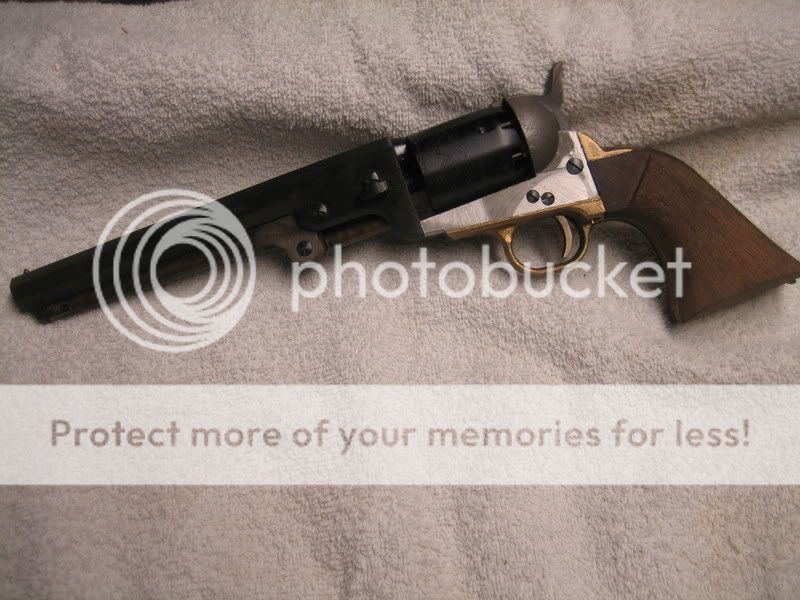
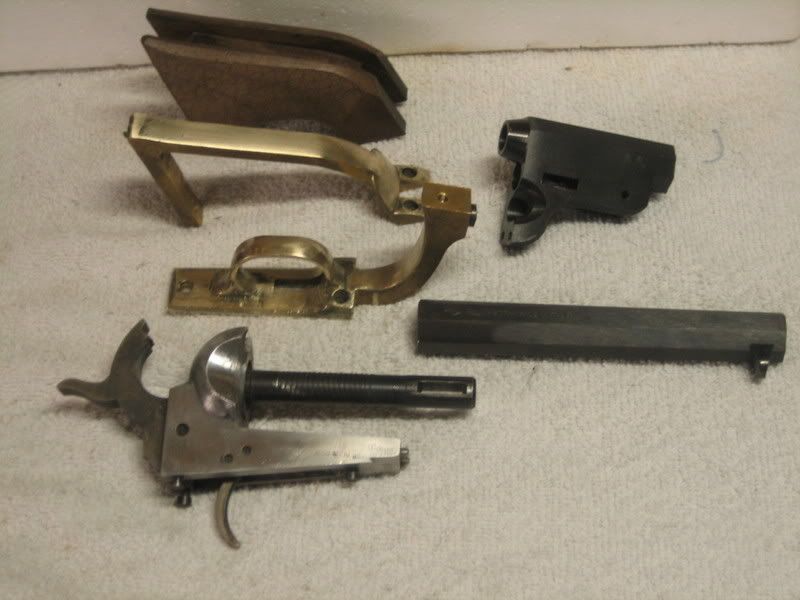
This is what I started with:
51Navy.jpg

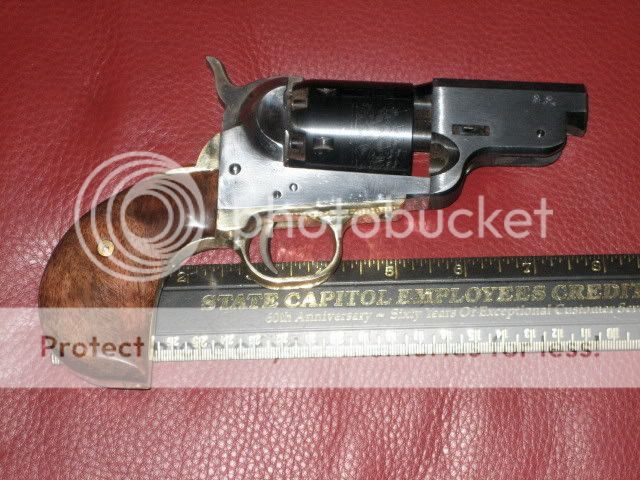
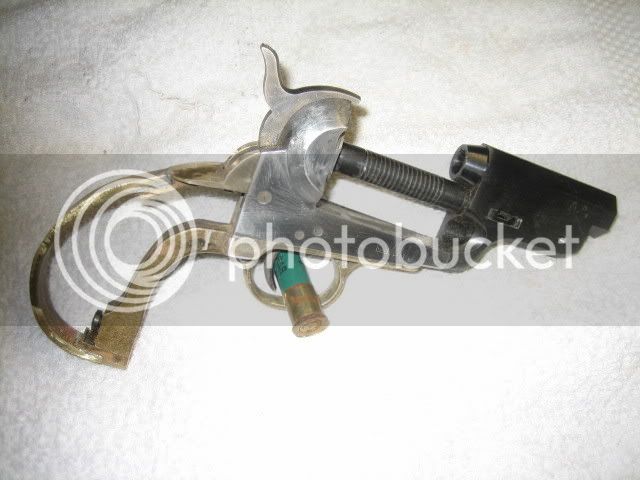
Then came the moment of truth....the hacksaw to the barrel
51Navy1.jpg

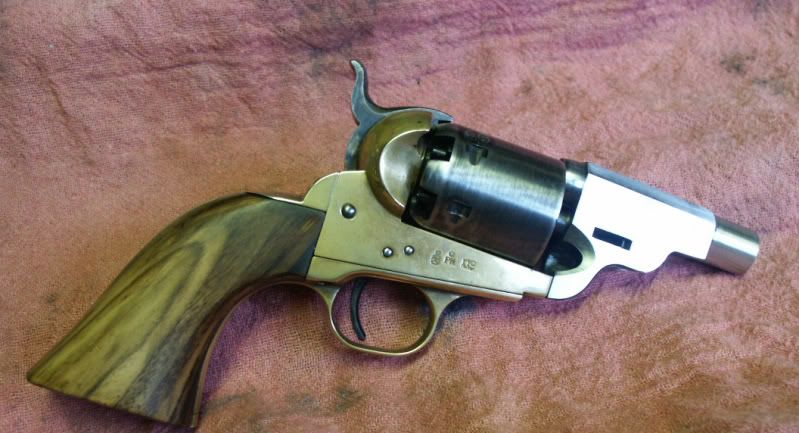
I tried to bend the grip frame and didn't succeed too well and it eventually broke. OK, so now I am committed to the bird head shape. I sawed out a 6" strip of 1/8" brass, (heaviest I had on hand), filed the edges smooth and bent it to shape; then soldered the broken parts together using the strap brass.
51Navy2.jpg

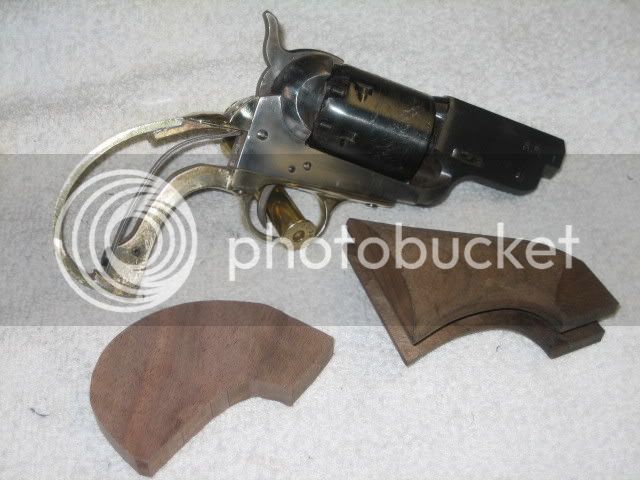
So far so good, then comes the making of grips as the ones that came on the kit are too small and the wrong size/shape.
51Navy3.jpg

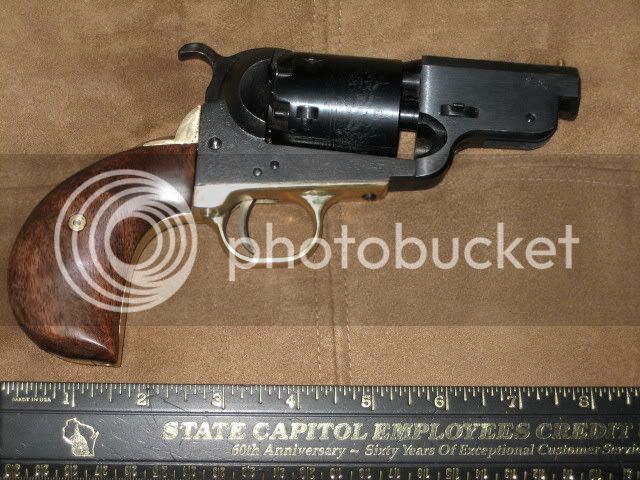
In between times I have been polishing parts and pieces as the only finished parts in the kit are the cylinder and barrel. All the other pieces are rough cast. Not too hard, just time consuming. Anyway, here is the nearly finished product; am still putting TruOil on the grips and then will need to learn how to time the thing.
51Navy6.jpg

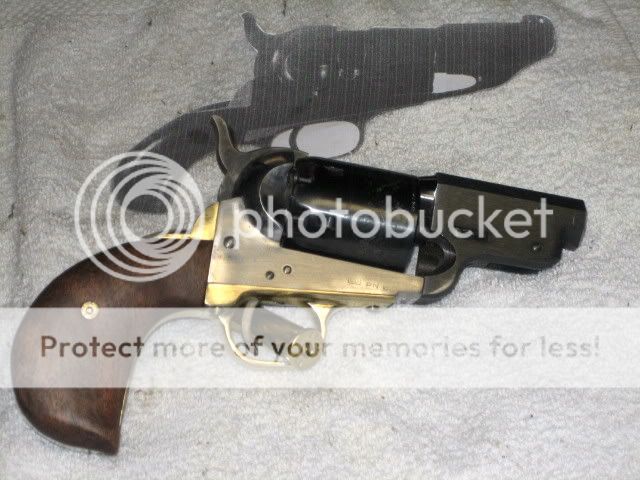
I am kinda liking the look of the gun, an early hide-out gun. I made the grip screw and escutcheons, and that turned out pretty good too. I have fairly large hands so made the grip frame a little "fatter" toward the bottom. Also have to decide how to finish the in-white frame. So, any suggestions, comments? Thanks for looking. Emery
 
Rust blue the frame. I would also consider reducing the height of the hammer spur, or even changing it to resemble that of the Ruger Super Blackhawk hammer, to make it more manageable as a " hideout " gun. Its clear that you can't replicate a true hideout, bird'seye grip, as the one shown behind your gun, exactly, but you can make your gun Better. I don't know what kind of accuracy you are expecting from the gun, or if you intend to shoot it at all. The short barrel will reduce velocity to derringer levels, so there is no purpose served in stuffing lots of BLACK POWDER in that cylinder.

With With the full length barrel on the gun, you are still limited in firing only 11.5 grains per cubic inch of barrel length, efficiently, particularly using RB in the cylinder. A champion pistol and revolver shooter puts a bushing in his chambers, to reduce the powder capacity to 18 grains for his .44 caliber, 10 inch barreled guns. The bushing also acts as a " stop " for loading the RB in each chamber, so he can put in the powder charge, and then his filler, and then the ball, and compress the filler as the ball is driven back to the front edge of the bushing. This gave him great consistency in loads for target shooting. It is also an effective load for small game hunting.

In a .36 caliber revolver, you would be limited to 12 grains with a 10 inch barrel. Measure the length of the cylinder and the barrel to get the total "Barrel Length" for this purpose, BTW.
 
Paul, thanks for the suggestions, bobbing the hammer didn't occur to me. Yes, I will shoot the gun and NO, I am not expecting a lot as far as accuracy. I have never been a proponent of "magnumitus" so that's not a concern. :rotf: The old gunsmiths/blacksmiths just used the backstrap of the grip frame and bent it to meet the guard section, resulting in a relatively thin grip. I wanted a larger grip so that is one reason why the minor change in design. I'm just glad it turned out as good as it did or I would be buying a new backstrap! Emery
 
The only thing I find wrong with the gun is that its not sitting next to my computer. :wink: Otherwise I like the looks and size of the gun, I agree with the size of the grip you put on it, I have always found that the ones the factories put on are too small and let the gun roll around when fired. Another idea on the frame is to send it out and have it case coloered, That would make it pop.

John
 
Nice conversion. I was doing the same thing on my '51' Navy short barrel and did exactly the same thing! I broke the back strap!

What kind of solder did you use to repair the damage?

Dan
 
Thanks Dan. The solder I used is made by Harris and is called "Bridgit", it's a lead-free, nickle bearing solder and is said to be twice as strong as 50-50 solder. You could use "Stay-Silv", which is also lead-free, and has silver in it, and probably regular 95-5 solder would work just fine too. I liked the way this gun turned out so well that I am considering doing a '60 Colt next. If I do, I will probably get a new back strap and modify that so I can switch back to the regular grip if I want to. Probably won't shorten the barrel though. Emery
 
Any Idea on how you will finnish the frame, and will you post pics when complete?
 
No, I haven't decided on the finish yet.....and yes, I will post pictures when it is done. Emery
 
Did you use heat to bend your brass backstrap?

I tried to use a torch on the original back strap and it snapped like a fresh carrot! Didn't see any bubbles in it to suggest a casting defect. It looks like your welded piece is a bit thinner than the original. That probably helped in the bend. Any advice would be appreciated. My '51' is an early Armi San Marco and it's the .44 conversion.

Dan
 
Dan, I started using a Mapp torch on the brass but started to get small surface "bubbles" and quit. When the top strap broke, I sawed/filed in a step deep enough that the brass strip fit flush, did the same thing to the bottom where it screws to the trigger guard. I just sawed out a strip of brass plate I had and cold bent that in my vise. I had a strip of cardboard that I had bent to shape, marked as to length, and cut the brass strip to that length. Just bend the brass, hold it to the frame, bend a bit more, until it fit snug on the frame, then solder. Hardest part was sawing the 6" piece of brass plate. I put a piece of angle iron in the vise, scribed my line on the brass plate and put it in the vise. The angle iron lets me saw a straight line to a hair above the scribed line, and makes it easier to file the edge smooth. I used a 4-40 Fillister head screw for the 2 piece grip screw, made the escutcheons from 1/4" brass rod. Dixie also has escutcheons and screws, but the shipping is more than the cost of the item.
 
I've decided to order the steel backstrap from VTI so I can bend it with heat, rather than trying to splice the brass ends. It's a bit more expensive, but in the end, it will be easier to do with less chance of messing it up.

Will let you know when it's done.

Dan
 
What part of Cheesehead land you from?

I was raised in Polk County, town called Saint Croix Falls.

Dan
 
Dan, just saw your last post....I was born and raised near Prairie du Chien, moved to Middleton for my Senior year of HS, ended up near Mazomanie 18 years ago, where we live now. Emery
 
Did you anneal the brass back strap before you tried bending? I have looked for info on bending cast brass but have come up empty so far.
I had an old Uberti .36 reb I cut down. I did some work around the loading lever frame work to clean it up a bit. I have to slot the barrel for a blade front sight.
short02.jpg
 
I tried annealing the grip frame but started getting strange looking "bubbles" and quit. The grip strap broke when I tried bending it; that's when I made the 1/8" thick frame and soldered it in place. Here is another picture showing the brass pin sight I made. I drilled and tapped the barrel and made a threaded sight, kinda like a shotgun sight except it is not a bead. That was a lot quicker and easier than cutting a dovetail and fitting a blade sight. I have been thinking of filling in the loading lever slot in the receiver frame, just haven't decided if it is worth the work at this time. That's a nice looking job on your revolver!
Birdheadgrip.jpg
 
Nice little shooter :thumbsup: I have a '51 earmarked for such a project . Then making a shoulder holster for it .

Ive had good luck heating the brass to a cherry and quenching in cold water to anneal .Gets as pliable as fresh licorice .
 
Bubba45 said:
Nice little shooter :thumbsup: I have a '51 earmarked for such a project . Then making a shoulder holster for it .

Ive had good luck heating the brass to a cherry and quenching in cold water to anneal .Gets as pliable as fresh licorice .
The shoulder holster would be next on my list of things to have for this gun; it would have to be a lefty though. Let me know how yours comes out. I was using a Mapp torch when heating the frame and I feel it just wasn't getting the brass hot enough. Then when those mystery bubbles started to show up I chickened out and stopped. This was a fun project, not difficult (except for trying to bend the original frame). Try it, you'll like it! Emery
 

Latest posts

Back
Top