Ancient Golden Age Precarved Kit Project

Muzzleloading Forum

Help Support Muzzleloading Forum:

This site may earn a commission from merchant affiliate links, including eBay, Amazon, and others.

Knobs

32 Cal
Joined
Jan 3, 2025
Messages
7
Reaction score
6
Location
USA
Almost 40 years ago ( perhaps 1986) I bought a golden Age Arms Kit gun with a 42" .40 Green Mountain straight sided barrel and small Siler lock.

I abandoned the job after making a mistake but kept the kit. I picked it up recently and and am stumbling through it again. I don't have a bench or a vice yet so it's all being done in my lap.

I found this forum and decided to post progess to get feedback. Here goes. I'm not claiming that this is going to turn out to be a work of art.

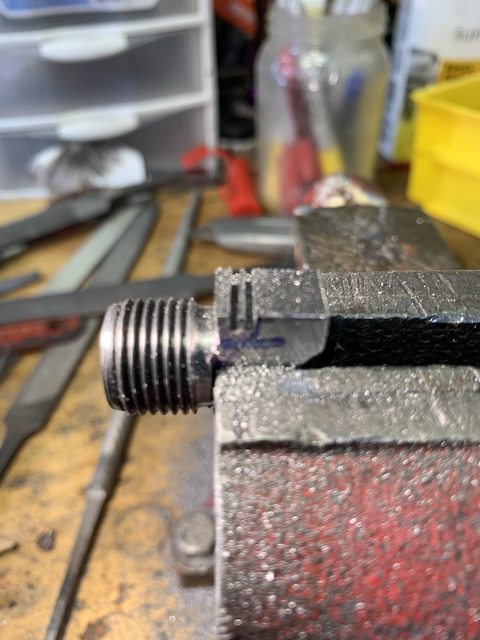
I fitted the breech plug back in the day. Recently i dropped a .1mm shim washer, followed by a second shim to test my fit. It appears I'm a little over half a thou from making contact with the face of the thread shoulder. Rather than finding someone to turn a 5 thou off the barrel and re-fitting I decided to call it good. If I want to get anal I'll stone down a thicker shim washer some day and put it in there.

Decades ago, in my enthusiasm, I took a spoke shave to the precarved stock. It shows up as the lighter area on the first of the pics below. During the process of inletting the breech plug I realized I never should have done that. That's when I gave up.

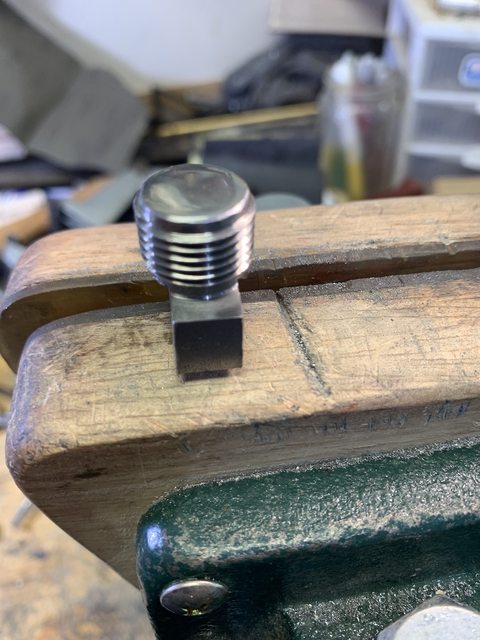
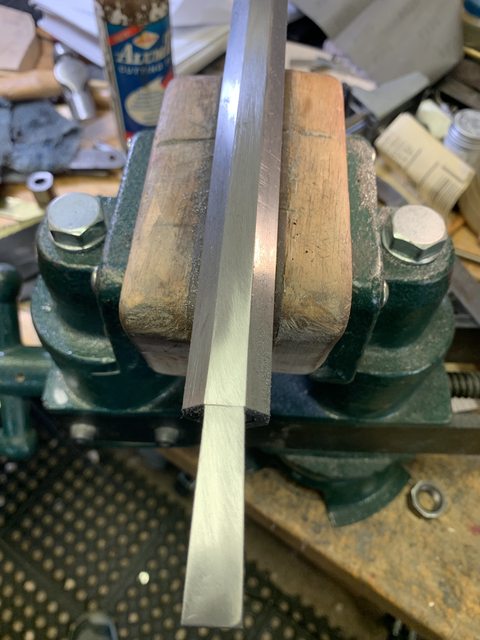
About a month I go i got the idea to re-bend the tang. You can see the results in the two following pics. Not pretty, but functional.

IMG_2229.jpeg
IMG_2233.jpeg
IMG_2232.jpeg


Last week I finished the breech plug inlet and decided to work on the lock.

I used an RO sander to get the side panel flat and square with the top flat of the barrel. That's when the fun began.

in locating the touch hole liner I found that it's OD is just a couple thou smaller than the flat of the 13/16 barrel. That dictated a center drill on. the barrel flat. Next I located the touch hole center on the side panel and began messing with the lock position. Two problems popped up.

1.) The web on top of the ramrod hole wasn't thick enough to cover the OD of an 8-32 sideplate screw. I figured I could find a work around for that.

2.) If I did get the front side plate screw just under the bottom barrel flat that dictated a rotation of the lock plate that was going to either put the lock plate off the bottom of the side panel or cover up the touch hole and require skipping the touch hole liner and drilling a standard touch hole high in the barrel flat, angling it down to the powder chamber.

I decided to rotate the lock to place the sideplate screw UNDER the ramrod channel bringing the lockplate back onto the side panel as you can see in the pic below. We'll see how this works out. My concern is it's going to look goofy when done, especially on the side plate side, but I hope i can find some way to "hide" that.
IMG_2231.jpeg


I've inletted the bolster down to the point of full side panel contact by the lock plate. Surprisingly the inlet holds the bolster tightly with no movement. The lockplate outline can be seen in the picture below.

IMG_2230.jpeg


Now it's time to inlet the lock fully. The I'll get to find out if I laid it out properly and the pan aligns with the planned location of the touch hole. Man, the layout is TIGHT!

Knobs
 
I’ve seen a few original guns with the lock not quite level, some were very nice guns when new.
 
Too late now, you have already inleted your tang, all of us have to file down the breech end of the barrel if the plug is a little too short. No big deal, just take a swipe or two with your file, check the plug seal and timing and repeat if necessary. It doesn't have to be pretty because the only thing that shows is where the tang contacts the barrel. If you are bottomed out and have a small gap, a little peening with a ball peen hammer will move enough metal to close the gap, a little draw to filing get rid of any hammer marks and you are good to go.
 
Last edited:
I built an Ohio Vincent half-stock with parts from Golden Age. Gotta have been over 40 years ago too.

Your build is looking good Knobs!
 
If it’s not to late you could use a #6-32 lockbolt instead of a #8. I’ve done this before with good results.

If the lockplate is drilled for 8-32, you could silver solder the hole up, redrill and tap. I’ve done that before and the results were excellent.
 
Too late now, you have already inleted your tang, all of us have to file down the breech end of the barrel if the plug is a little too short. No big deal, just take a swipe or two with your file, check the plug seal and repeat if necessary. It doesn't have to be pretty because the only thing that shows is where the tang contacts the barrel. If you are bottomed out and have a small gap, a little peening with a ball peen hammer will move enough metal to close the gap, a little draw to filing get rid of any hammer marks and you are good to go.
I appreciate the tip. I figured I'd need a full rev off the barrel to bring the tang back in alignment. Judging from where I am I'm about one barrel flat too far if I file the barrel breech down. I'd be fine if the sight dovetails weren't already cut.

At 18 tpi the other 7 flats to complete a full rev are around 50 thou. I was scared to attempt to file that much off and keep it straight.

On a more arcane note, I contacted Green Mountain about min thread engagement. They advised that if the installed the breech plug a minimum thread engagement of .55" would be used. That's 10 threads. I've got 8. I boogered up the bottom two treads due to the bottoming tap not seating far enough during the fabrication process.

I bought another breech plug and a 5/8 x 18 bottoming tap. The (McMaster Carr). Guess what? the bottoming tap is just a little too big for the female threads! So much for that idea.

Net-Net, if I turned one thread engagement off the barrel breech, and one off the breech plug front I'd be at. 60% of the GM recommendation.

I called a local Gunsmith who is supposed to have BP experience. His solution was to forget about it and use blue loctite.

I'm going with the spacer shim and loctite. It can wait until I make sure I don't mess this rifle up somewhere else!

Thanks Again

Knobs
 
If it’s not to late you could use a #6-32 lockbolt instead of a #8. I’ve done this before with good results.

If the lockplate is drilled for 8-32, you could silver solder the hole up, redrill and tap. I’ve done that before and the results were excellent.
Thanks. I hadn't thought of that. I may go that route.

Knobs
 
Just a plug for my shop. If you need the bbl and plug machined to fit, we do that work. Ive been doing it for 35 years. Phil at LRK Mechanical Services. 727 Brannen Ave, Prescott, AZ 86301. 928-776-6483
[email protected]
Fit your new plug, retap the bbl, align the tang at solid torque.
Just saying..
Phil
 
I have one GM barrel; I shortened the plug so the fence of my lock lines up with the end of the barrel. I understand that originals don't have nearly as many threads engaged on the plug as we use now. I also think that the long GM plug threads are probably overkill for possible future litigation reasons.
 
Do you mean 1/2" of thread engagement or 1/2" from the tang stop to the plug face?

Thanks
Here's the last rifle that I did with a hook-breech that I fabricated. This plug from the face to where the hook-breech touches the barrel measured .530".

ZmB0DHcl.jpg


And this one on my current pistol build is slightly over 1/2". May measure .540 at most. Never under .500 from barrel end to breech plug face.
ONOEnyRl.jpg
xQf8H3Sl.jpg
 
IMG_2262.jpeg


After 11 hours of rookie chisel work the lock plate is in. It ended up sitting as planned, which surprised me. The flash pan fence tops out at the corner of the barrel side flat & the flash hole ( located on the bottom of the red horizontal bar of the red cross) is going to sit just slightly above the flash pan top and it'll be covered by the frizzen ( shown by the black line).

The bottom of the flash pan is about 50 thou above the barrel flat corner. Cutting it close, but that's how I made it work. If I center the forward lock screw I'm probably going to have to put a flat about 60 thou deep on the last two inches of the ramrod. I can live with that.

In the process I learned:

1.) You can't get your chisels too sharp.

2.) The barrel flats aren't. They're slightly crowned.

3.) The lock bolster isn't flat either. It's level from the rear to the forward edge of the flash pan and then it steps away from the barrel slightly, maybe 3 thou. Maybe I should have stoned that surface into a plane, but I'm not sure of that.

4.) Inlet black is the same as black hatting a foundation wall. It gets on everything.

5.) The lock snaps into place with a positive click and it's not possible to move it. Still, I don't know what the wood to metal fit is going to look like once I take down the plane of the side panel. I'm not holding my breath.

I found a video that explained that I should have filed the edges of the lock plate back to a very slight 1-2 degree bevel in order to produce a better fit. I was 90% done when I found that. Oh well, next project.

What surprised me was how consistently it's possible to control the depth of progress just by leveling everything up to the same depth as your perimeter plunge cuts.

Now it's time to inlet the lock junk. I am going to use a router to do that to the max extent possible. It's pretty tight in there. LOL

IMG_2263.jpeg


I expected to have failed by now. Wish me luck.

Knobs
 
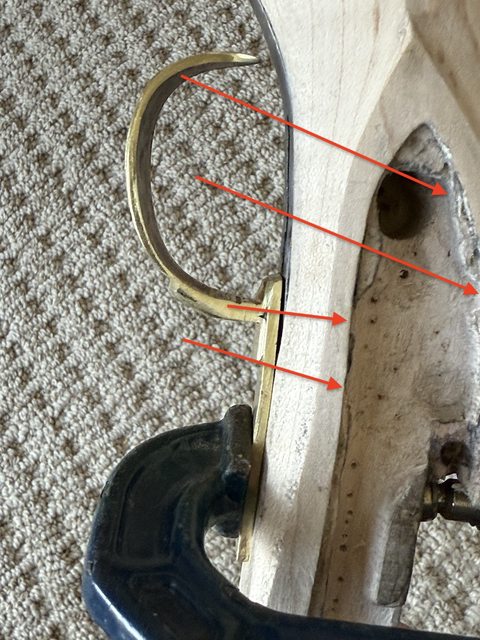
Don't overthink the wood clearing for the lock "guts". I use Forstner Drill bits to remove the bulk of the wood. I've linked a cheap set of those bits as you really don't need the expensive sets (at least I don't) for as often as I use them.

If you look at what appears to be pin holes, that's the tip of the Forstner drill that I used to remove the bulk of the wood to make clearance.

Also, where I have the red arrows, you will see that there is either no ledge for the lock plate to sit on, or very little wood. Don't sweat that. You don't need a ledge "all" the way around for the lock plate to sit on. Now, don't go nutz, but some spots of no ledge are normal.

EdTm52Vl.jpg
 
After 11 hours of rookie chisel work the lock plate is in. It ended up sitting as planned, which surprised me. The flash pan fence tops out at the corner of the barrel side flat & the flash hole ( located on the bottom of the red horizontal bar of the red cross) is going to sit just slightly above the flash pan top and it'll be covered by the frizzen ( shown by the black line).

The bottom of the flash pan is about 50 thou above the barrel flat corner. Cutting it close, but that's how I made it work. If I center the forward lock screw I'm probably going to have to put a flat about 60 thou deep on the last two inches of the ramrod. I can live with that.

In the process I learned:

1.) You can't get your chisels too sharp.

2.) The barrel flats aren't. They're slightly crowned.

3.) The lock bolster isn't flat either. It's level from the rear to the forward edge of the flash pan and then it steps away from the barrel slightly, maybe 3 thou. Maybe I should have stoned that surface into a plane, but I'm not sure of that.

4.) Inlet black is the same as black hatting a foundation wall. It gets on everything.

5.) The lock snaps into place with a positive click and it's not possible to move it. Still, I don't know what the wood to metal fit is going to look like once I take down the plane of the side panel. I'm not holding my breath.

I found a video that explained that I should have filed the edges of the lock plate back to a very slight 1-2 degree bevel in order to produce a better fit. I was 90% done when I found that. Oh well, next project.

What surprised me was how consistently it's possible to control the depth of progress just by leveling everything up to the same depth as your perimeter plunge cuts.

Now it's time to inlet the lock junk. I am going to use a router to do that to the max extent possible. It's pretty tight in there. LOL


I expected to have failed by now. Wish me luck.

Knobs
Knobs,

--Your 50-thou of bottom pan to barrel flat should be good...as long as the bolster is snug (not killer tight screws) agains the barrel.

--Constantly sharpen your chisels. Then sharpen them again. If the wood "rips" your chisels are dull.

--The lock bolster should be flat and contact the barrel at all points. Three thousands may be enough space for a pan powder of 4F to "sneak" between your lock and barrel and accumulate between the barrel and stock. That's not a good thing should it ignite. I'd suggest (yes....I know you don't really want to hear this) you stone or using a fine file and 220\360 grit sandpaper, the bolster flat so it contacts the barrel all the way across. You won't regret this additional work when you're finished. This will likely require you to scrap a bit more wood to get the re-done bolster to touch the barrel, but it will be worth the effort.

--I buy cheap Dollar store candles and "soot" the metal for a contact. IT's not as messy as inletting black. You will have "soot hands" with this, but I find GOJO hand cleaner works great.

--Next time, file a draft around the lock plate. You can still do this if you are going to adjust the bolster as I've stated above. Just don't "go nutz" with to much of a draft at this point. A slight draft is all you need and it will make the work a bit easier.'

--"level and square" are always good until you're doing the final shaping.

--Be very careful using a router. One slip and that's it. I never use a Dremel. It's too easy to screw up hours of work with one slip. If you have a drill press, use that. If not, and hand held drill will work as long as the piece is secure and you're careful.

I hope this helps.
 

Latest posts

Back
Top