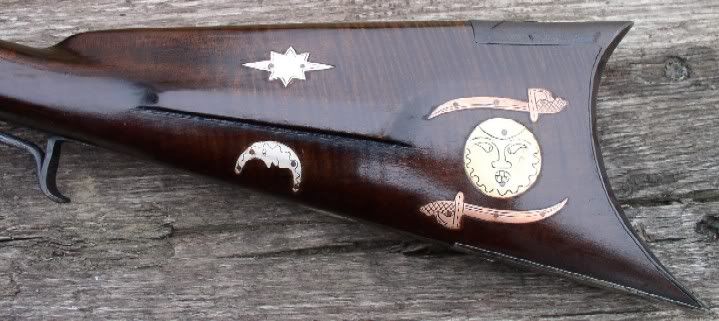
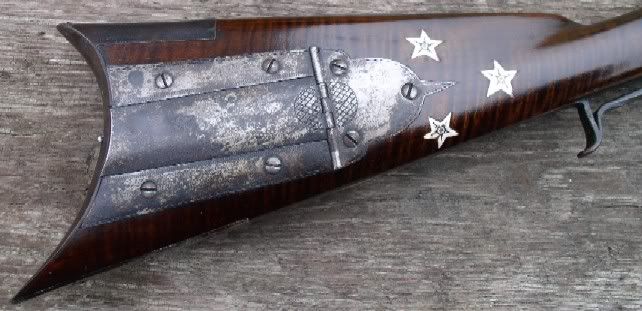
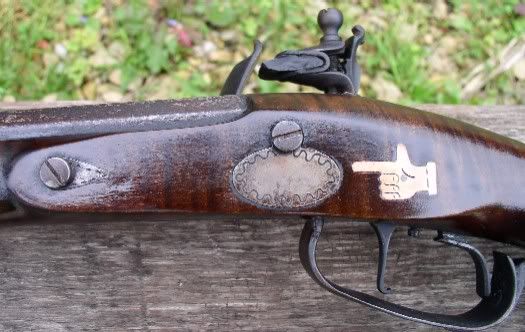
I'm almost ready to begin attaching the inlays to my Bedford rifle, but want to make sure I'm proceeding correctly. I already have most of them carved into the wood. I plan on epoxying them in place, draw filing them and sanding down to the wood, then drilling the holes for the pins and finally pinning them down with steel or silver brads. Would this be the correct sequence of steps????? I'm thinking that it would be difficult to draw file after I put in the pins.
-
Friends, our 2nd Amendment rights are always under attack and the NRA has been a constant for decades in helping fight that fight.
We have partnered with the NRA to offer you a discount on membership and Muzzleloading Forum gets a small percentage too of each membership, so you are supporting both the NRA and us.
Use this link to sign up please; https://membership.nra.org/recruiters/join/XR045103
You are using an out of date browser. It may not display this or other websites correctly.
You should upgrade or use an alternative browser.
You should upgrade or use an alternative browser.
Attaching inlays
- Thread starter bioprof
- Start date

Help Support Muzzleloading Forum:
This site may earn a commission from merchant affiliate
links, including eBay, Amazon, and others.
Several ways of doing them. I prefer to silver solder lil wood screws to the back of my inlays & then make a lil hole for the screw & then micro-bed the inlays in & they will never come out.
If you are going to engrave the inlay it is best to do that first & then put it on the rifle.
How difficult it is to file them depends on the pin & inlay, but I usually file mine afterwards. Normally the inlay would be elevated almost flush & you file it flush to the surface AFTER it is set for 24 hrs. Also best to bead blast or crosshatch sand the rear of the inlay so the epoxy can bond to it well. Try to file it too early & it may pop right off the epoxy as filing builds heat on brass & G.Silver & sometimes just a little bit of heat will release the epoxy if it is not set good.
:thumbsup:
Mike Brooks
Cannon
- Joined
- Jul 19, 2005
- Messages
- 6,686
- Reaction score
- 33
I inlay the piece then make a couple 1/16" nails, drill 1/16" holes in the inlay and counter sink slightly then drive home the nails.I've never used epoxy, and have never had one come off. I engrave them after they are attatched to the gun.


No expert, but here's what I do. Make inlay, drill and ctrsk holes, form and file backdraft. Inlet so inlay is a few thousands above wood surface. Use a small triangular file to make a groove .005-.010 deep around perimeter of inlay or at convenient edges. Drill nail holes and apply "Micro-Bed" to inlet and holes. Take nails and raise barbs or file grooves on dia. and press inlay and nails into inlet, squeezing epoxy out. The perimeter groove will "lock" the inlay when the epoxy hardens. File flush w/ wood. This procedure probably entails a lot of "overkill", and as Mike Brooks says, he's never had an insert pop just using pins ala the "old timers"....Fred
My mistake was to not fully inbed the brass into the wood. I had mine sticking out a mil or two. Now that I've done a few, I recomend placing the inlay a few mils deeper than the surface of the wood. "It's alot easier to remove a tiny bit of wood from the edges of the inlay than to file/sand down the brass a few mils.
I use epoxy with no nails and it seems to work on small inlays.
If you make a mistake and take a chunk out of the wood, I highly recomend peening the brass a bit larger or finding a piece of wood from like the patch box area and gluing it down. When the final sanding is done, the piece of wood will take stain and not stand out.
Have fun.
Regards
I cut my inlays out, dill the holes, sharpen a brad nail and tap them tight to the stock, trace around them with a knife, remove and inlet. Then I chisel little nicks on the underside, mix up some acraglas and a dab of brown shoe polish, then re-nail them back in place. Once dry, cut the nails flush with a jewel-saw, file flush, sand, engrave.
BTW... Mike I need to come up there and hang around your shop for a week. I need to learn your antique(ing) technique. I can't get it right....
BTW... Mike I need to come up there and hang around your shop for a week. I need to learn your antique(ing) technique. I can't get it right....
Mike Brooks
Cannon
- Joined
- Jul 19, 2005
- Messages
- 6,686
- Reaction score
- 33
heck, i was probably with in 100 miles of your place as couple days ago!BTW... Mike I need to come up there and hang around your shop for a week. I need to learn your antique(ing) technique. I can't get it right....
I found some steel brads today that look like they were made for attaching inlays. In fact, that's just about what they are for. They were being sold to attach metal inlays to mail boxes. I found them at my local "True Value Hardware Store". They are about 1/16" in diameter and have a nice dome-shaped head. The shaft even has ridges cut into it so they won't back out. Here's a picture of one (picture is enlarged).
 I'm tickled pink that I found these. Most of the pictures that I have seen of Bedford rifles look like they have rounded heads.

Mike Brooks
Cannon
- Joined
- Jul 19, 2005
- Messages
- 6,686
- Reaction score
- 33
I've handled a few Bedford rifles, and I don't recall the pins for the inlays having any heads at all. I could be wrong tho.....
Mike,
I think you are right. I was basing my conclusion on pictures in Whisker and Yantz's book. It appeared that some of the pins on the larger inlays may have had raised heads, but upon further inspection, it appears that most of the smaller ones were filed flat.
I found a box of wire brads with small heads at the same store that will work great. I've already attached three inlays, and they're lookin good. :thumbsup: I've got all 8 estacheons inlayed and just have a couple more to do on the wrist and butt.
If you tell your wife that I'm the one who told you this, I'll deny it! :grin:
Sneek into your wifes sewing supplies. There you will find the common "straight pin" by the thousands!
These little pins are steel, the pin shank is about .029 diameter and the pin head is about .072 diameter.
You might note that this head size is just a little larger than 1/16 (.062) so if you put a very small countersink on a 1/16 hole and tap the pin in place, you can file it flush and it will still hold the inlay.
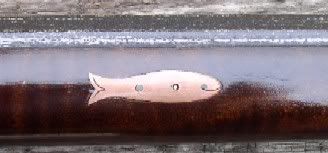
In some cases, I've even left the head as it comes. This works for me with things like the Fish. It gives him a three dimensional eye and holds him in at the same time.
No, I don't pound in the whole 1 inch length, I cut them off so there is only about 1/8 ro 3/16 of an inch of shank left. Positioned with some needle nose plyers and tapped in gently seems to work without drilling any holes in the wood.
Similar threads
- Replies
- 5
- Views
- 483
- Replies
- 4
- Views
- 446
- Replies
- 23
- Views
- 2K


