mikemeteor
45 Cal.
- Joined
- Nov 16, 2008
- Messages
- 660
- Reaction score
- 3
RULE #1) Strive to never have to do this.
...But... things happen. My inletting process for the longer lollipop tang nudged the barrel forward....
 .
.
I then had a 1/32" gap at the back of my barrel that I wasn't comfortable with, and this was the chosen fix.
So I took some pictures in case there are some newer builders who wanted to see one man's approach.
Most of this I picked up here on the forum (thanks Keith !) - any errors are my own.
If you KNOW you are going to bed the breech, you might do it BEFORE you inlet the lock plate.
Prepped the barrel and tang - filed the usual drafts and filled the back of barrel around breech plug with modelers clay - knife off completely flat.
1) Prepped the breech & tang area in order to facilitate clean-up later on.
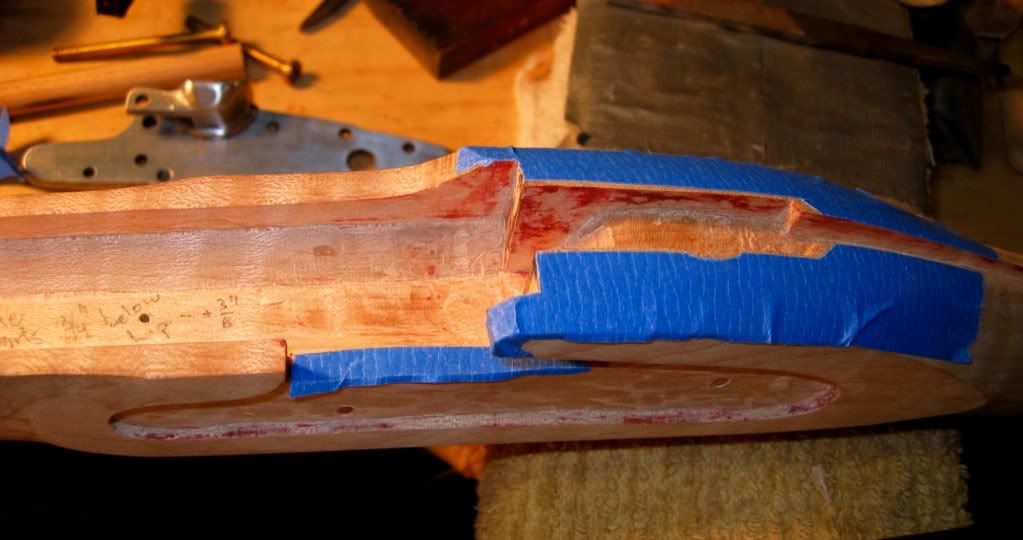
2) Mix the AccraGlas Gel as per instructions in the box. Used pared-down popsicle stick to knife the goop in the breech area in barrel channel, front tang channel, and the vertical area where back of barrel hits (i.e. my gap)- put in more than needed to fill the gap, but not TOO much more....
 .
.
3) Paint the barrel with release agent, twice, as per instructions. When release agent is dry, put barrel in place pushing back HARD. Red line points to gap I needed to fill.
I then clamp as hard as I can without crushing the wood underneath. Clamp all around breech & tang and at least half way up the barrel.
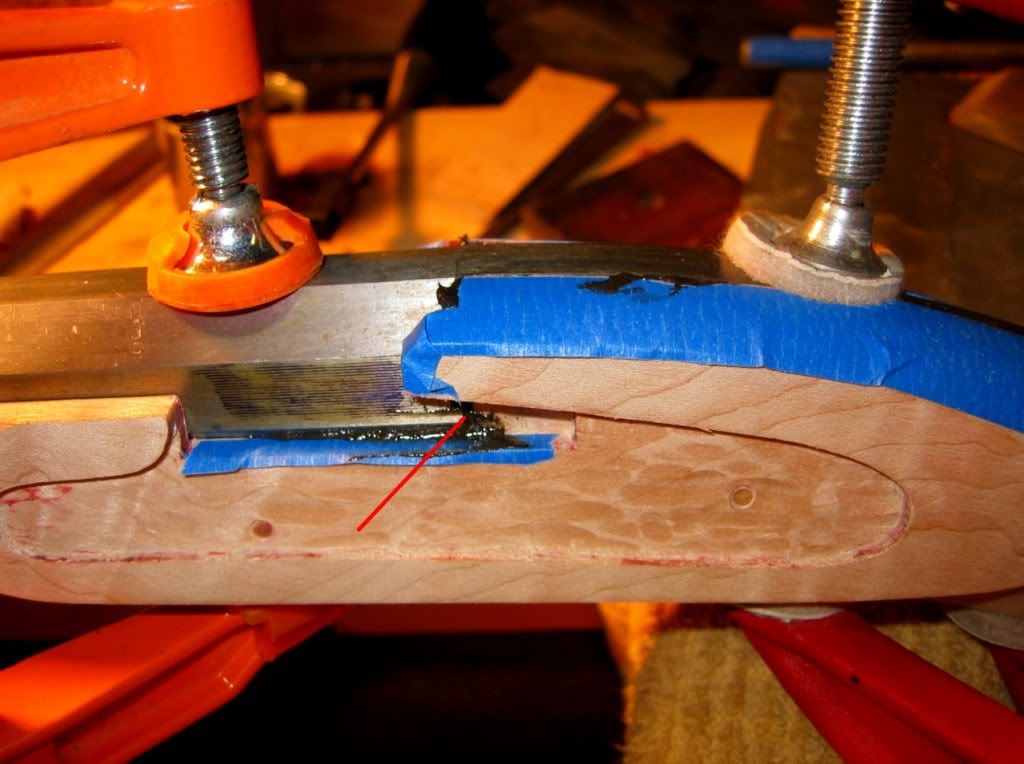
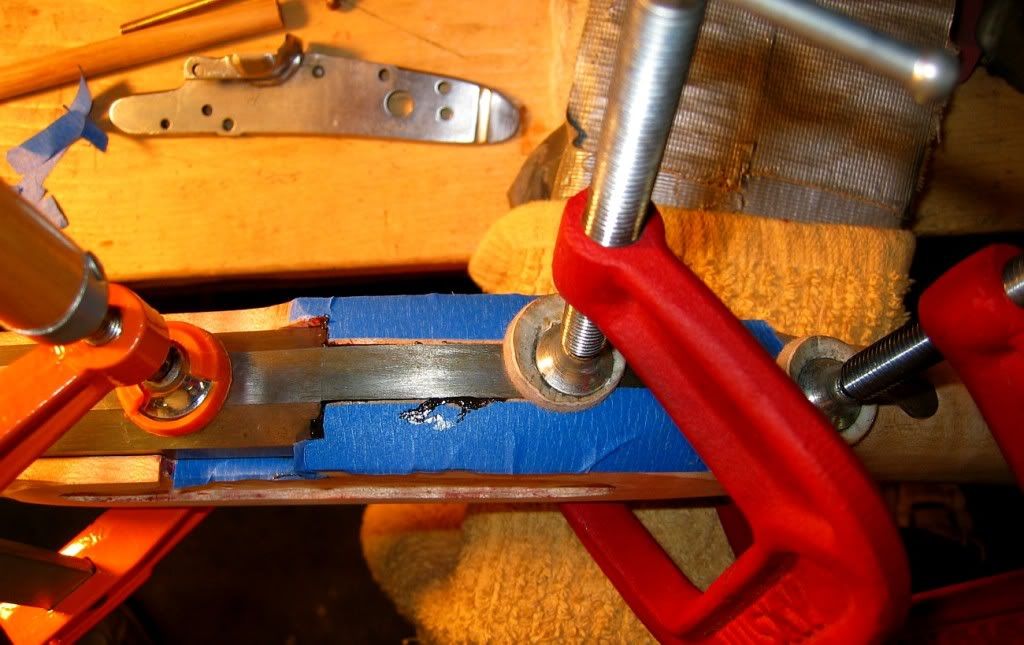
You should get some squeeze out. I choose to dab off the bigger globs, but don't mess with the minor stuff..... that all gets filed off smooth later.
I then went deer hunting and let it dry for 3 days.
4) Next step was to take of ALL of the dried excess/squeeze out, and any hardened gel that would crack/splinter wood upon removal. I used a file on the tang area.
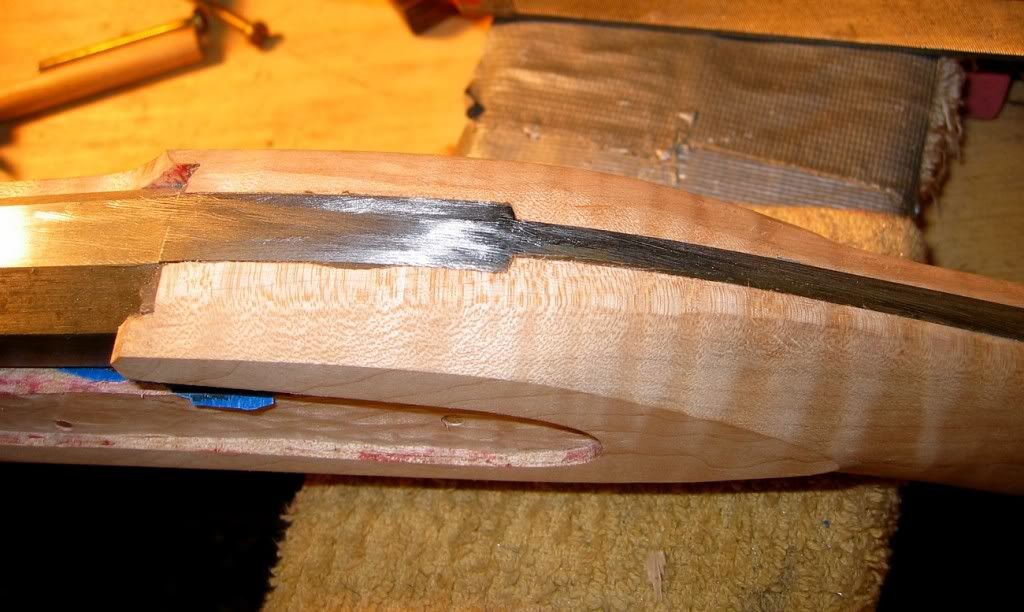
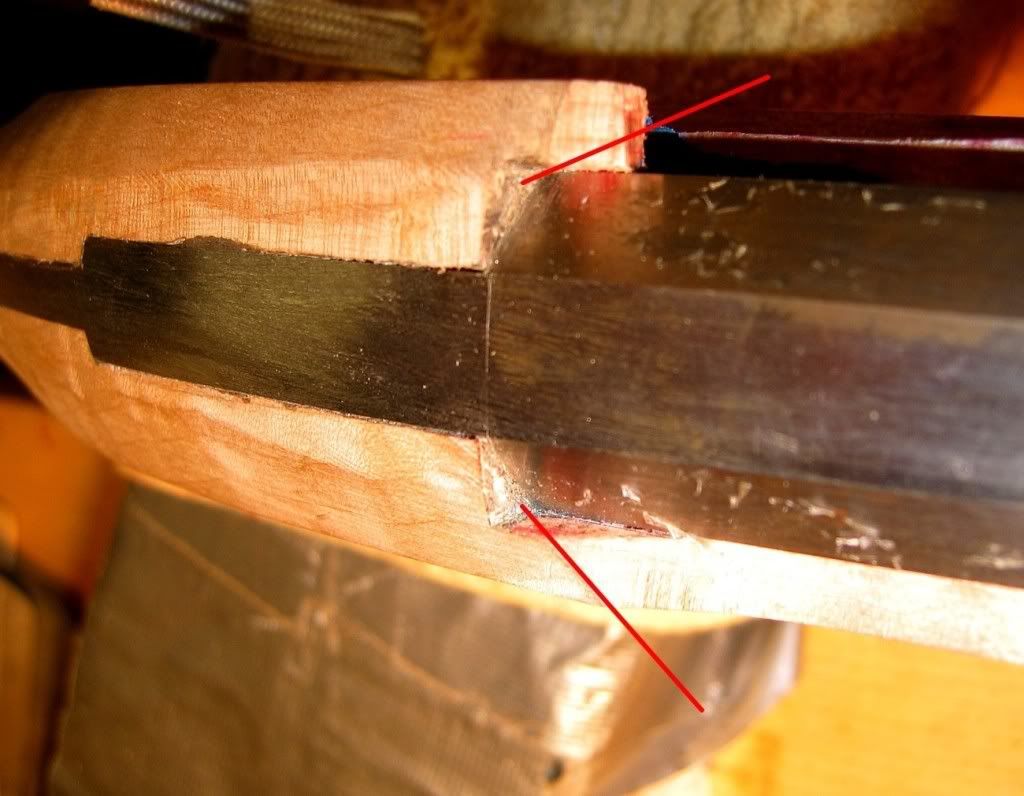
Cleaning up above the oblique barrel flats is also critical - this squeeze-out locks in the barrel and, if not removed, might take large chunks of wood with it upon removal. I used a chisel, razor blades and exacto knife to clean out the corners (red lines).
5) I then rapped the barrel a couple hard raps with a wooden mallet to help release it, and flipped the stock over and gently popped out the muzzle end first. Some careful tweaking, a short prayer, and the whole barrel and tang fell out with no problems.


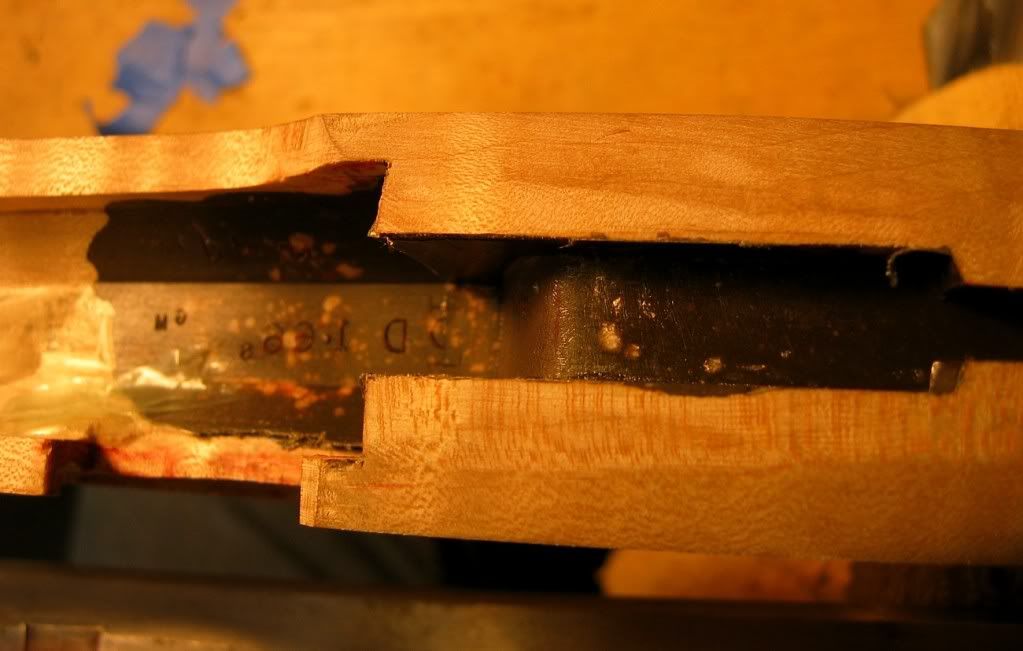
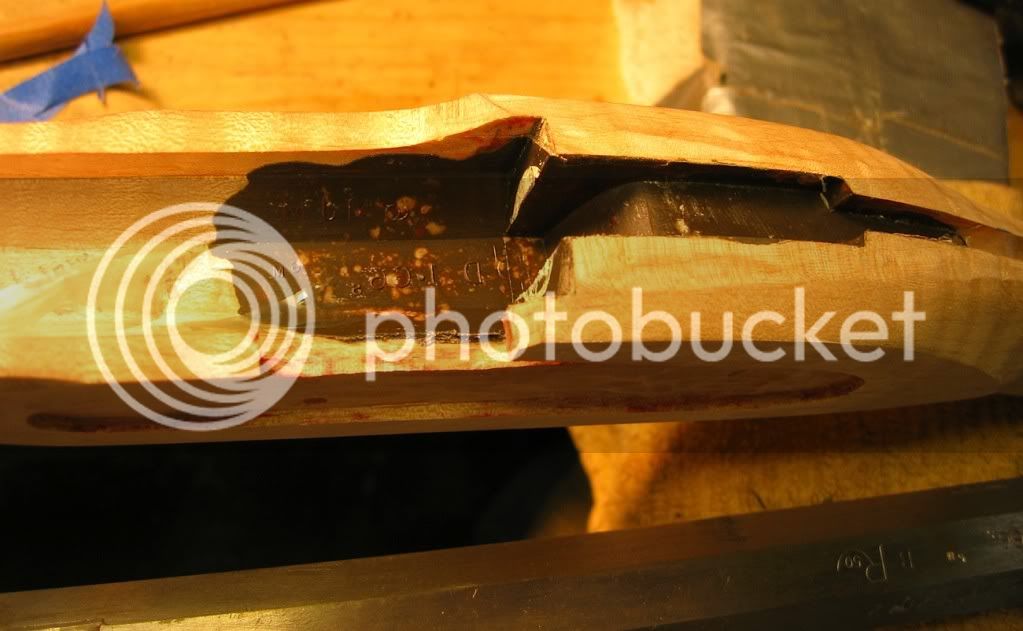
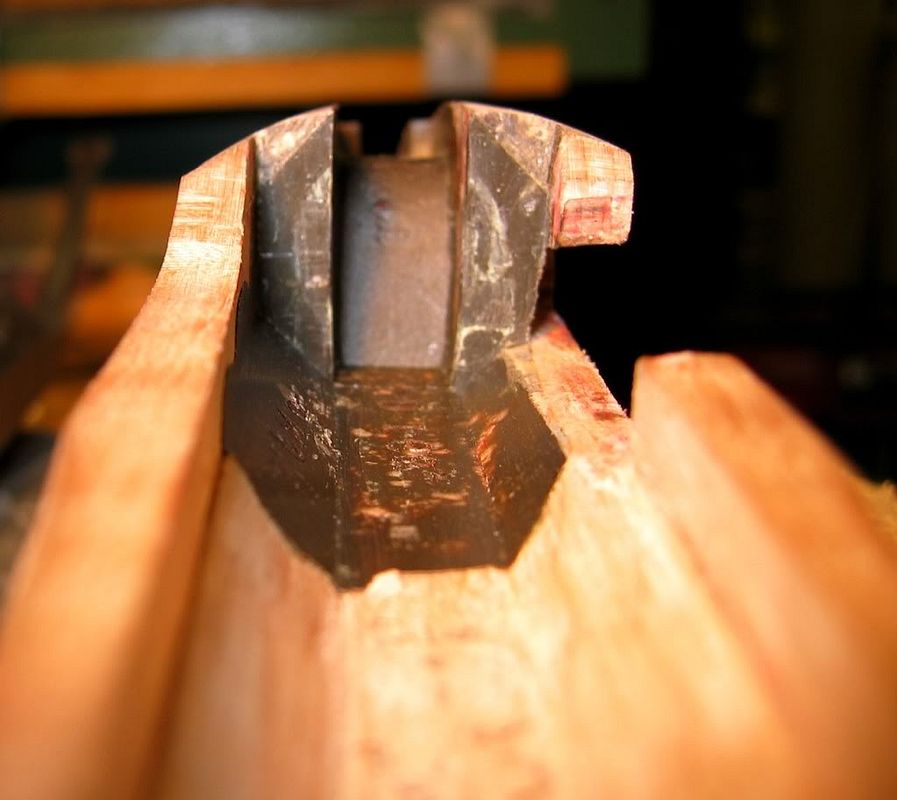
Bedded area before final clean-up looks like this.
the yellow crescents on vertical face are from the modelers clay.
There's probably better ways. This is the third job that has worked for me.
/mike
...But... things happen. My inletting process for the longer lollipop tang nudged the barrel forward....

I then had a 1/32" gap at the back of my barrel that I wasn't comfortable with, and this was the chosen fix.
So I took some pictures in case there are some newer builders who wanted to see one man's approach.
Most of this I picked up here on the forum (thanks Keith !) - any errors are my own.
If you KNOW you are going to bed the breech, you might do it BEFORE you inlet the lock plate.
Prepped the barrel and tang - filed the usual drafts and filled the back of barrel around breech plug with modelers clay - knife off completely flat.
1) Prepped the breech & tang area in order to facilitate clean-up later on.

2) Mix the AccraGlas Gel as per instructions in the box. Used pared-down popsicle stick to knife the goop in the breech area in barrel channel, front tang channel, and the vertical area where back of barrel hits (i.e. my gap)- put in more than needed to fill the gap, but not TOO much more....

3) Paint the barrel with release agent, twice, as per instructions. When release agent is dry, put barrel in place pushing back HARD. Red line points to gap I needed to fill.
I then clamp as hard as I can without crushing the wood underneath. Clamp all around breech & tang and at least half way up the barrel.


You should get some squeeze out. I choose to dab off the bigger globs, but don't mess with the minor stuff..... that all gets filed off smooth later.
I then went deer hunting and let it dry for 3 days.
4) Next step was to take of ALL of the dried excess/squeeze out, and any hardened gel that would crack/splinter wood upon removal. I used a file on the tang area.

Cleaning up above the oblique barrel flats is also critical - this squeeze-out locks in the barrel and, if not removed, might take large chunks of wood with it upon removal. I used a chisel, razor blades and exacto knife to clean out the corners (red lines).

5) I then rapped the barrel a couple hard raps with a wooden mallet to help release it, and flipped the stock over and gently popped out the muzzle end first. Some careful tweaking, a short prayer, and the whole barrel and tang fell out with no problems.


Bedded area before final clean-up looks like this.
the yellow crescents on vertical face are from the modelers clay.


There's probably better ways. This is the third job that has worked for me.
/mike


