• Friends, our 2nd Amendment rights are always under attack and the NRA has been a constant for decades in helping fight that fight.

    We have partnered with the NRA to offer you a discount on membership and Muzzleloading Forum gets a small percentage too of each membership, so you are supporting both the NRA and us.

    Use this link to sign up please; https://membership.nra.org/recruiters/join/XR045103

Bolt Locks on Jim Chambers "Siler"

Muzzleloading Forum

Help Support Muzzleloading Forum:

This site may earn a commission from merchant affiliate links, including eBay, Amazon, and others.

RubbleMaker

32 Cal.
Joined
Jul 3, 2012
Messages
10
Reaction score
0
I wonder if anyone may be able to help me with this puzzle.

So far I am at a loss as to how I would go about drilling and tapping Lock Bolt Channels on a "Delux" Jim Chambers Siler flint. Will I be in the market for a Mainspring vice to complete the inlet or am I barking up the wrong tree on this. As you can see in the attached image hosted by TOW the Pan is secured from behind by a recessed bolt identified by TOW's nomenclature guide as one of the "Lock Bolt Channel's".
lock-cd-fl-rh_2.jpg

Click here to see TOW's illustrated guide.

Would this screw simply be a placeholder for a pre-designated Lock Bolt Channel or would I be expected to drill and tap both of these features myself. The literature implies that these locks are 'beefed up' and 'tuned' large Siler's that can be dropped into already existing mortises. :doh:
 
RubbleMaker said:
Would this screw simply be a placeholder for a pre-designated Lock Bolt Channel
No. It holds the bolster on. It's part of the lock.


RubbleMaker said:
would I be expected to drill and tap both of these features myself.
Yes.

/mike
 
RubbleMaker said:
The literature implies that these locks are 'beefed up' and 'tuned' large Siler's that can be dropped into already existing mortises.
Yes, as an example, I've bought a couple of Flintlocks which had Chambers larger silers on them...sent the locks to Chambers to have them upgraded to deluxe silers, and they dropped right back in.
 
Regarding the main spring vice I would suggest you buy one.

I prefer to completely disassemble the lock when doing the inlet. Start with only the lock plate, then add the internal parts one at a time. Finish by adding the cock, then check the fit for the three positions for the lock, uncocked, half cocked, and full cock.

Make sure your lock bolts don't interfere with the lock parts.
 
Leo in PA said:
Regarding the main spring vice I would suggest you buy one.

I prefer to completely disassemble the lock when doing the inlet. Start with only the lock plate, then add the internal parts one at a time. Finish by adding the cock, then check the fit for the three positions for the lock, uncocked, half cocked, and full cock.

Make sure your lock bolts don't interfere with the lock parts.
Do yourself a real big favor & invest in a spring vise! They don't cost much. I thought that a pair of vise-grips would work on my first build . . . wrong. Result: broken mainspring! So then I had to buy another mainspring AND a spring vise!!
Pat R.
 
Locate the "lock bolt channels" like the picture in the link shows keeping in mind the following:

You will want the rear threaded hole to be as close to that tab as possible without hitting the tab.

Even locating the hole here there is a very good chance that the hole will cause the thru screw to interfere with the protruding material of barrel breech plug. If this happens, drill a hole thru the breech plug or grind away the metal that will interfere with the locks thru screw.

The location for the front hole will almost never be in the center of that forward area where the front of the mainspring bends.

This location takes some careful measuring to prevent the thru screw from interfering with the ramrod or the front of the mainspring.

Determine the top and bottom of the ramrod hole where it is passing behind the front of the lock.
Place the screw as central to the front of the lock as possible without interfering with the ramrod hole or the mainspring.

My process for drilling these two holes is as mentioned, to determine the location of the ramrod hole. Then I can decide where I want the front screw so that it won't interfere with the ramrod or with the front of the mainspring.
I mark and center punch this location.

Likewise, at the rear screw location I want the screw to be centered in that area of the locks bolster but to miss any tabs/tumbler etc so I mark and center punch this location.

With the lock stripped of its springs/tumbler/bridle/pan I then drill the two holes using the TAP DRILL sized bit.

With the barrel removed, I install the lock into the lock mortice and use a small C clamp to hold it in place.

Then using the new holes in the lock plate as a drill guide I use THE TAP DRILL to drill back thru the stock wood to the other side.

I then remove the clamp and lock from the stock and use a drill that is the same as the screws outer diameter to enlarge the two holes thru the stock.

Reinstalling the lock plate into the lock mortice I then run the tap thru the holes in the stock until its nose hits the lockplate.
The two thread sized holes in the wood will align the tap so that the threads should follow the tap drilled holes in the lockplate.

After making sure the tap is engaging the hole in the lockplate I turn it into the lock about 3/4 of a full turn. Then back the tap out 1/2 turn. Then run it in by finger pressure until it stops and then turn it in another 3/4 of a turn.

Removing the tap I then do the same thing to the other lock screw hole.

After these two 'starter threads' are made in the lockplate I remove the lock plate and finish tapping the two holes using a good thread cutting oil. This oil has sulfur added to prevent the tap from sticking and breaking.

After this I will select a drill bit that is about 1/32" larger than the screw threads and enlarge the two holes thru the stocks wood.

As I mentioned, after you install the barrel and try to run the rear screw thru the stock into the lockplate it may interfere with the breech plug or the rear of the barrel.
If it does, remove the offending metal from the barrel/plug.

Have fun. :)
 
Zonie is on the money. Some do it a little different here or there but his system works.

The only thing I would add is that if you have to drill a hole in the breech plug bolster for the bolt to clear make this hole oversized in case you get a little barrel set back upon firing the gun.

Even with a dead sure inlet at the breech face and bolster you can still have a little wood compression and get a little set back the first time you fire and you don't want to tweak your lock bolt as it will be tricky to remove.

Enjoy, J.D.
 
Zonie said:
Even locating the hole here there is a very good chance that the hole will cause the thru screw to interfere with the protruding material of barrel breech plug. If this happens, drill a hole thru the breech plug or grind away the metal that will interfere with the locks thru screw.

.. and to add one more small tip/opinion that may or may not be obvious.
If and when you drill that hole thru the breech plug bolster to allow your lock bolt to pass through, do the drilling with the barrel out of the stock.
I dimple each side of the bolster with a drill while the barrel is in the stock (clamped home tightly), then remove barrel and drill the bolster halfway from each side, starting in the dimples.
Once the holes connect, further open up the entire hole with a larger bit, as J.D. explained.

As you know, sometimes an exiting drill bit creates some sharp extrusions around the exit hole.
If you have made a nice tight inlet for the breech tang, and you drill the through-hole with the barrel and breech in the stock, the effect of these extrusions can make you sad the next time you remove your barrel and tang from that nice tight inlet.
I have been saddened in this manner before. :(
/mike
 
My thanks for your time and effort taken to explain these things in detail. It would seem my project has taken on a life of its own despite having the components ready for the assembly.


Would anyone be keen on sharing further opinions upon the suitability of collar vice fitted drill presses VS pillar drills, as it comes down to aligning the centered holes accurately. Will a simple press have the tolerances and clearance range for working on locks/breach block tangs or should I be looking at purpose built pillar drill systems for these tasks.
 
MeteorMan said:
.... the effect of these extrusions can make you sad the next time you remove your barrel and tang from that nice tight inlet.
I have been saddened in this manner before. :(
/mike
..... :rotf: :rotf: :rotf: ....well said, so well said!!! I feel your pain Brother......Thanks, I needed that!!!

Rubblemaker, A good quality standard drill press will do about anything you want to do in gun stocking. There are great builders out there who don't use a drill press at all and some don't use power drills.

Gun stocking or assembling ML is not a precision business, it is a problem solving business...thus the length of the responses to your simple question above. Making all the parts work together when building a gun is a series of problems that have to be solved while keeping each of the next steps in mind so you don't paint yourself into a corner.

If I drill the ramrod hole here can I put the lock there so the trigger can go here so my length of pull will be this when I install the buttplate thus....problem solving.

In fact, precision is so inconsequential, there are guys in this trade who can build guns with no rulers at all. They just go on what feels and looks right. But not me, not yet!!! :shake:

Enjoy, J.D.
 
In some ways I agree that this gunbuilding is not precision but one tool I can not live without is a dial caliper/depth guage capable of an accuracy of one thousandths of an inch.

I use it for everything from laying out hole locations, checking mortice depths and bore sizes to double checking the size of my drill bits before using them to drill a hole.

More than once this measuring and checking has prevented me from screwing up a good part.
 
I agree completely and I am of the measure twice, then measure again croud. :wink:

But guys do without....as did our forefathers. Again not me!!! :thumbsup:

I was just pointing this out to make the point about the drill press.

Enjoy, J.D.
 
Can't be too careful, I say. :grin:

Getting back to drilling the holes, yes, I agree that a regular drill press will work fine if the builder takes their time and double checks their setup before drilling the holes.

Not that I recommend it but the first two Pecatonica River 'kits' I built were drilled with a hand held electric drill.

I used a small 6 inch tri-square to eyeball the angle of the drill bit before drilling each hole.

I drilled the two lock screw holes, the barrel pin holes, the thimble holes and all of the other holes with that hand drill.

In fact, the method I gave above for the lock screws is based on the idea that by using the holes in the lockplate as a drill jig, even if they are off of some desired location the mating holes will always align correctly.

Likewise, line drilling the holes in the thimbles and the trigger guard while they are mounted in the stock makes them a matched set that will always assemble even if they are not exactly in the 'right place'.
 
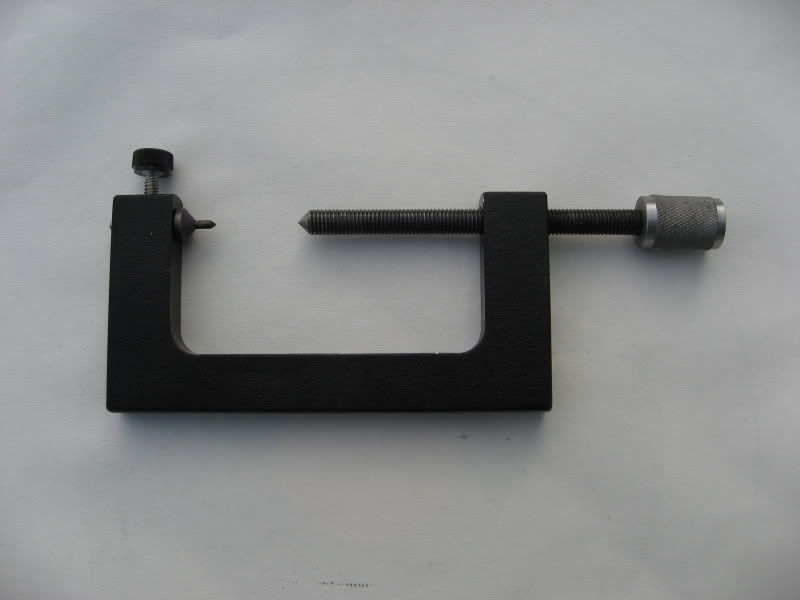
You can use a center drill guide such as this one made, and sold by Tom Snider. This one has a marking pin where the bit will go

Toolsforsale003.jpg


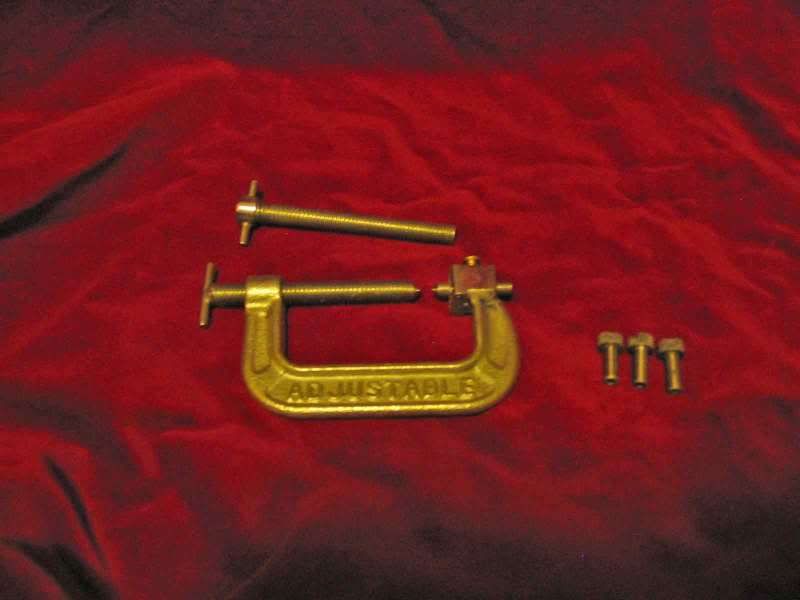
You can make one for a drill press with a bolt, a couple of nuts, and fender washers. Tom's tool is great for thimbles, and such, but for Tang, and lock bolts I like the drill press. I simply took a 3" bolt cut the head off, and chucked in my lathe (You can use your drill Press) sharpen to a point. Using the washers and nuts mount it to the center hole of the bottom plate, lined up with your drill. Mark your hole positions, and drill away, and has been mentioned, measure two or three times, then drill.

Bill
 
I built a similar drill jig using a small "C" clamp.

The drill bushings for my jig are industrial SR (slip renewable) bushings and the three of them set me back over $45. :(

JIG-002.jpg
 
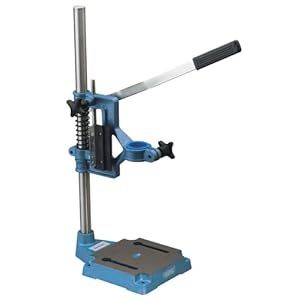
Those look to be very useful lightweight tools for the job and probably to be within my budget, that said I am most likely to opt for a generic drill stand.
41TM8MBMMAL._SL500_AA300_.jpg


Or if frustration proves too much upon inspecting the expensive woodstock purchased from Track I will opt for an underhammer ignition system in stead of the flinter.

Once more thanks for your input.

:thumbsup:
 
Rubble - just my opinion, but.... if you're a careful sort, with a moderate degree of patience,
drilling by hand, eyeball, and good layout technique is likely as good as - or better than - that thing.
/mike
 

Latest posts

Back
Top