(color) case hardening question

Muzzleloading Forum

Help Support Muzzleloading Forum:

This site may earn a commission from merchant affiliate links, including eBay, Amazon, and others.

Only Round

36 Cal.
Joined
Nov 15, 2005
Messages
88
Reaction score
2
I've been doing lots of reading/researching case hardening as I want to try it on a few lock plates and I've also got a Remington rolling block reciever I made that I'd like try to color case harden. I have a foundry I made originally for doing aluminum casting (sometime I plan to try some brass casting) that will work for doing the case hardening, but I have no way to measure the temperature. I think the easiest way for me to do this would be to use these (ceramic?) "sticks" that melt at different temps to help control the temperature but I have absolutely no idea what they are actually called or where to find them. :confused: Can anyone out there help me out?
 
they are called "cones" you should be able to get them at a ceramic supply place----Stick walker
 
I think you are going to have a hard time doing this in that fashion. I have been doing a lot of bone and charcoal color case hardening lately, but I wouldn't want to try it without some way of measuring the temperature pretty accurately. If you can keep it in the 1450 to 1550 range you might be alright, but look into a pyrometer so that you can accurately measure it. Too cold and you may get color, but no hardening, and too hot and your colors will rapidly dissappear. Don't ask me how I know.

The other consideration is your materials, stack the deck in your favor and buy the bone and wood charcoal from Brownells. This is a known quality material and you can eliminate the material choice from the equation if your results aren't what you desired. Also pay careful attention to your packing and quenching procedures. There are many variables that will impact your success and you don't want to change more than one at a time when experiementing.

I would also caution you against trying on the Rolling block the first time. Try the process with scrap first, and than possibly some old lock plates that you don't care about. You will probably find that, unless carefully blocked, your dimensions will change during the process and you don't want to ruin a valuable receiver by not knowing how to control it. I have posted several video stills from my own excursions into this process awhile back on this board, look in the archives and you can see how I did it. If I can, you can. Good luck and be safe.

Regards,

Alex Johnson
 
The Late Oscar Gaddy wrote a two part article on how to do Bone Charcoal Color case hardening, which were published int he Double Gun Journal back in 1996 and 1997. ( Winter and Spring additions) He did so because it had taken him years to rediscover the methodology that had been lost when all the old time masters took their formulae to the grave. He found 5 different formulae for the process in one source or another, but all left out key steps in the process. He finally worked it out by consulting both a Professor chemistry, and a Professor of Metallurgy. Oscar was a retired Electrical and Electronics Engineering Professor from the University of Illinois who collected Parker Shotguns, and was the Past President of the Parker Collectors Association. He collected and sold fine DB shotguns, both damascus and modern steel, parkers, L.C. Smiths, and other. He taught himself to work on restoring old guns out of necessity, and eventually was recognized as one of the few people in the U.S. that British Gun Makers would recomment to do refinishing work on old shotguns.

I tell you this because he showed me the process and his equipment to do this. He stressed that one of the steps he found that was missing in all the formulae is the need to aerate the water in the quenching tank for at least an hour before quenching. He had a pipe at the bottom of his tank hooked up to an air pump that kept air perculating through the water constantly while he was preparing and heating the parts up to case harden. The air was kept on during the quench. That was absolutely important to get good colors, he said.

It took him years to figure that out. Get his article so you understand the process completely. There are other smiths who do this work, but like Alexandre, they have spent years making their own mistakes. Learn from them so you don't ruin a gun frame. Oscar acqured junk actions from gun dealers at gun shows, and used them to practice, and then use to show people what color case hardening looks like, when done right. He threw away the stuff that was spoiled. He also re-discovered how to color various shades and colors for Damscus steel, from a redish color to dark blue, and had a series of damascus barrel sections that he prepared to show people the variety of colors that could be achieved with his methods. You will find 2 more articles by Oscar in the later 1997 DG Journals, on that subject. He did not want these processes lost to the ages again. So, rather than try to keep it as a " trade Secret", he wrote the articles and gave us this legacy. Please honor him by getting copies of those articles and reading them. He was an extraordinary man, And like the old time masters, there are plenty of smiths today who would not have published these " trade secret" processes for all the rest of us to use.
 
That is a good point and Oscar's work was invaluable to me. The quench tank that I use is a large rubber garbage can with a steel mesh screen near the bottom. I built a strange affair from copper pipe that I perforated all over and run an airline to that during the quench. I cannot honestly say that it makes a whole lot of difference in my results though. I have found that by filling the tank with fresh lukewarm (room temperature) water a couple hours before I start the process everything works fine. I think that it gets plenty of oxygen this way. Another master tipped me to the process of wraping the part before you pack it with iron wire which creates more vibrant plays of colors on the part. The one thing that Oscar mentioned that might explain this is the necessity of keeping the charcoal in contact with the part for as long as possible. I have found that when you block the parts the surfaces that face the blocking plates tend to get better colors, this might be because the charcoal is trapped in these spots. I think the wire also helps to hold the charcoal closer tot he part for longer. Like I said at the beginning this is a complex process and probably is still more art than science. I know if I can do it you can, but you still have to have the proper equipment and the desire to learn. I am a professor at the University of North Dakota and one of the classes that I teach is a manufacturing processes course. I started having my students use this process to color case harden some parts for the steam engines I have them build in the lab and many were very sucessful. The trick is to practice and, again, don't change more than one variable at a time. If you do you won't ever find out what produced the change. Also, make sure you write down everything as you proceed. You may magically discover the perfect ratio of wood to bone and appropriate furnace and quench temperature, air flow, etc, but if you don't remember what you did it won't do you or anybody else any good in the future.

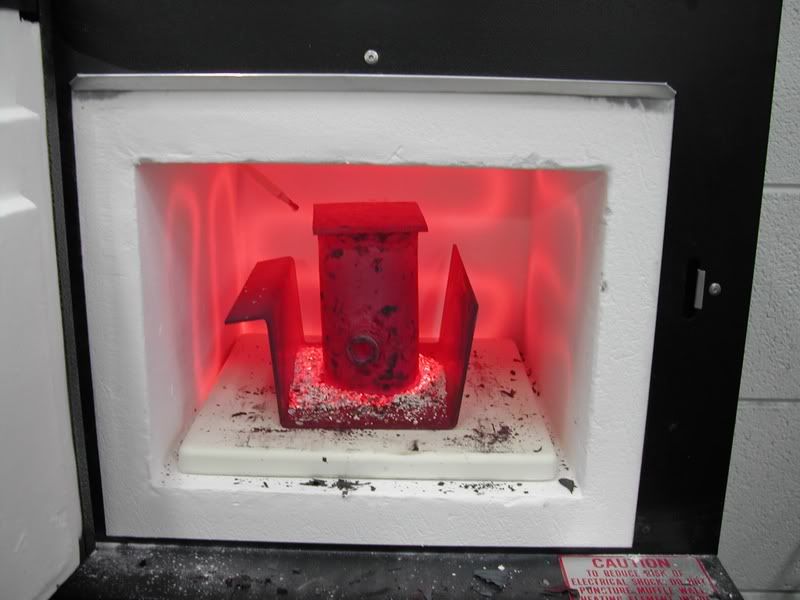
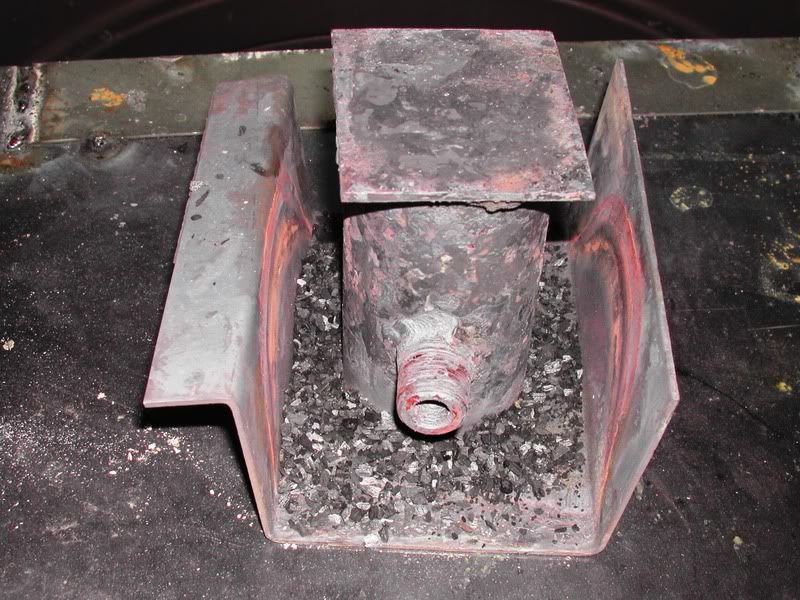
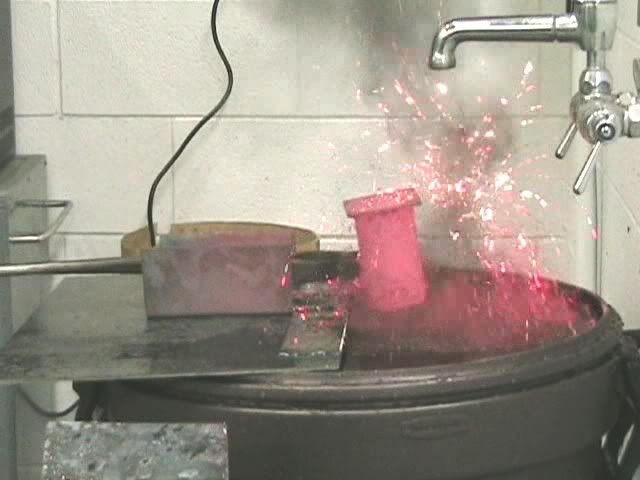
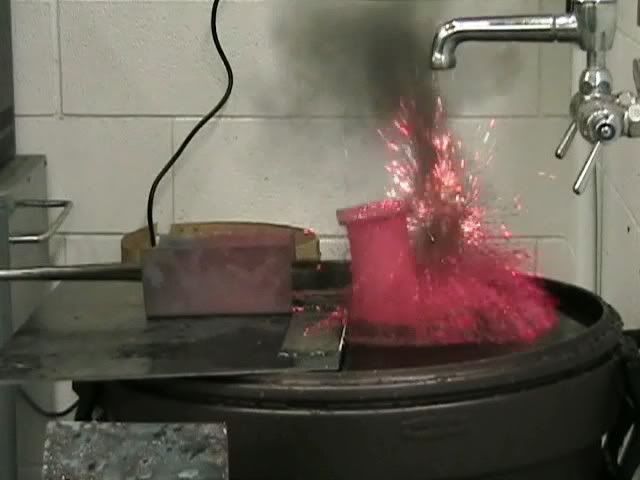
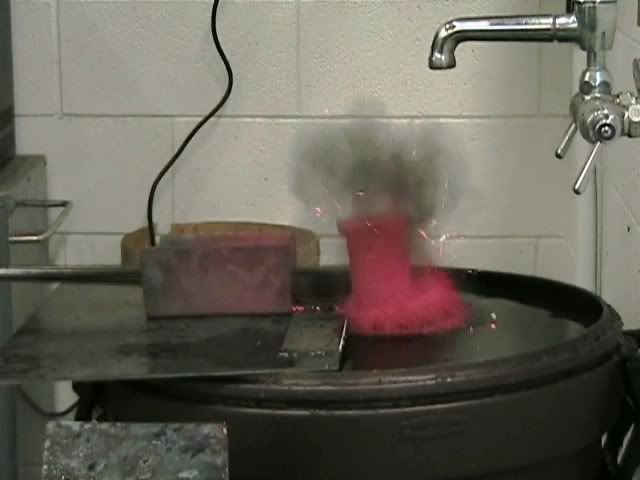
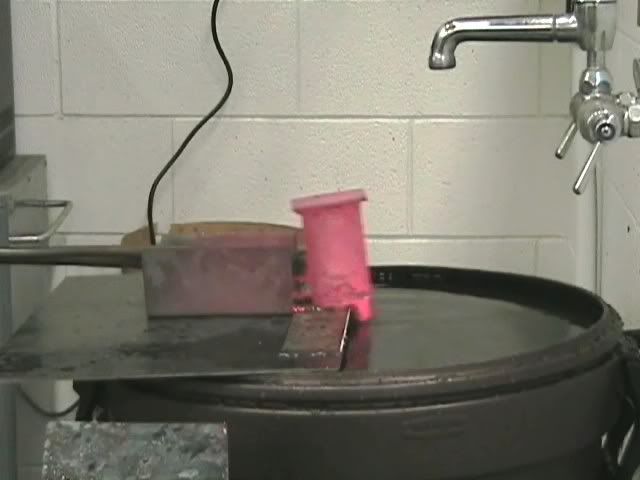
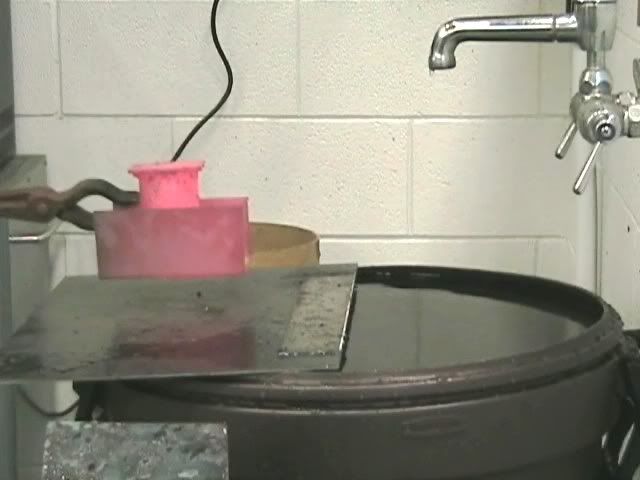
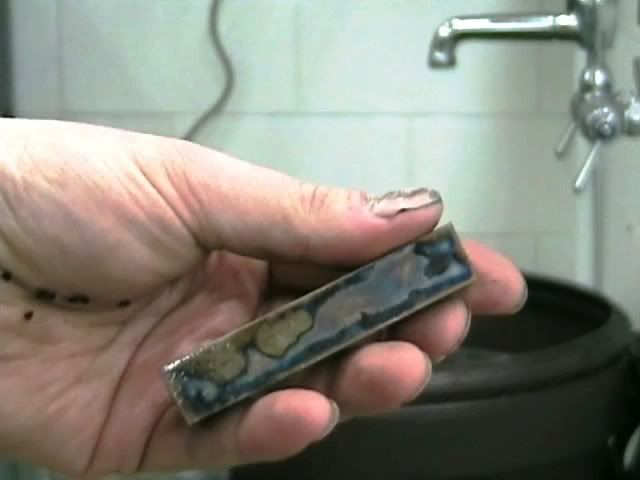
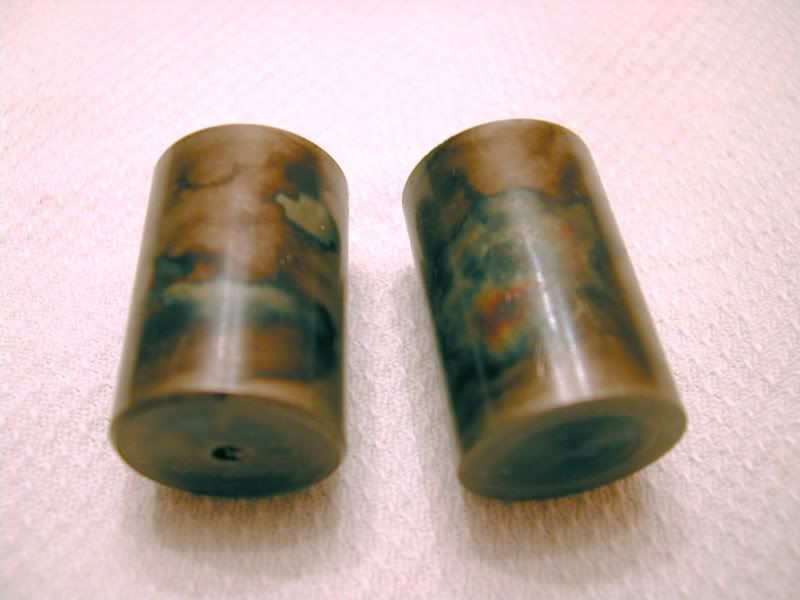
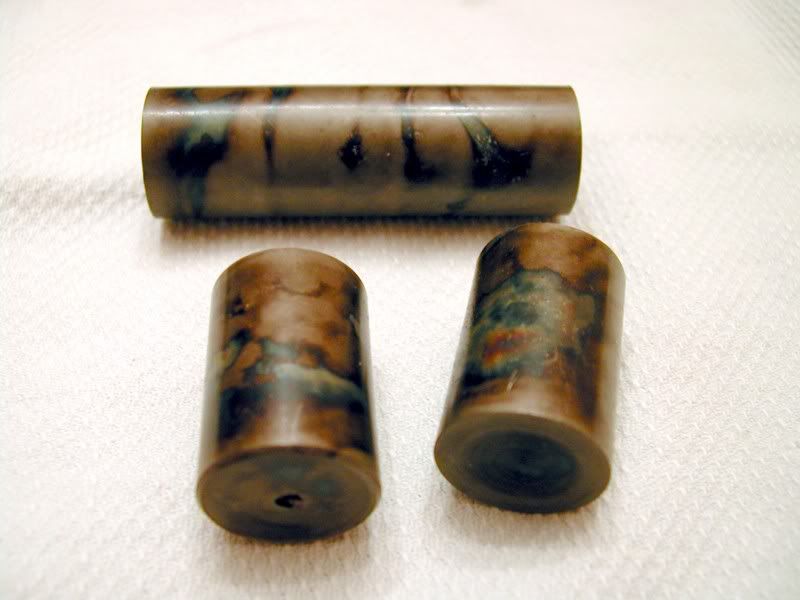
Here are a couple examples of some parts that I have done and some photos of the process.

Onehotcrucibaledited.jpg

LoadedCrucibalEdited.jpg

AnotherExplosionEdited.jpg

ExplosionEdited.jpg


TheQuenchEdited.jpg

GoingOverTheEdgeEdited.jpg

IncomingCrucibleEdited.jpg

TheGoodsEdited.jpg

ColorCasedCylindersCloseup.jpg

ColorCasedCylinders.jpg
 
Alexander: Oscar had spacer bars and washers, with bolts, and plates to hold the charcoal to the work during the heating. Bone Charcoal is more pure than that made of wood, and apparently was and is used to give the best colors. On parts of an action or some other small part that he could not screw plates to, I believe he did wrap them with wire, loosely, so that he could pack charcoal in, underand around the wire to get the good colors. He could, and did replicate the best color hat is found on the best grade shotguns made 100 years ago. The colors leaped out at you. For those of you who have never seen a well done case hardened action, the picture above are pretty good. I suspect the lighter colors shown here are more brilliant in life than in this photograph.

As an aside, My brother bought an 1886 Winchester Lever Gun in .45-90 caliber, made in approx. 1916. It has a beautiful fancy stock, a round sporting grade barrel, and a case hadened action. Several shooters who looked the action claimed that the gun had been refinished, and was ruined. The barrel said differently. In fact, the gun had never been fired. The lifter was the wrong one, and cartridges would not feed out of the magazine into the action. He got that fixed, at McGowen's Barrels in St. Anne, Illinois, and while visiting, we stopped by Oscar's home, and showed him the gun. Oscar took one look and said that the finish on that gun was original, and then looked up some of the pictures he had of collections of gun with original colors. No doubt about it. Of course, we just laughed at folks who told us that the barrel and action had been refinished. My brother paid about 1/4 its value for the gun. He has since shot the gun and is working on Black Powder loads for it. He would like to make paper patched bullets to shoot in the gun. While the Cody Museum had no record of this gun leaving the factory, I believe it was given by an executive in the company either to a politician, or a friend, who put it in a gun rack, and never attempted to shoot it. It was passed down through the family until someone decided to hire a dealer to sell part or all of the collection. The gun functions flawlessly, now, thanks to the great work done my McGowen's gunsmith.
 
Hey, thanx for all the quick replies!
Yes, I have found and read the articles in the double gun journal, I've found a good source for bone charcoal from[url] ebonex.com[/url] and I actually made 4 recievers- the first I made all my mistakes on and once I get to that point It'll also be the first for hardening.
Yeah, I've looked at pyrometers but wasn't really sure about spending that $! My first thought was to try with the "cones" (thanks again) and if that won't work I'll go to the pyrometer.
Thanks again, keep the commments coming!
 
Last edited by a moderator:
I looked at the site you posted and they do appear to be an interesting company. I initially messed around with various types of charcoal, some I even made myself. I don't knock trying different things, but I personally think you would be happier, at least in the beginning, if you went with the Brownells charcoal. It isn't cheap, but it is very good quality and, again, you won't have to worry about that variable if you try it. My own thoughts on the subject are that if I am going to play around with other charcoals, it's going to be something unusual like peach pit charcoal, or some such oddity like that.

The other consideration, and one raised by a very knowledgeable person on this subject was the problem with the impurities in some charcoal destroying the elements in electric furnaces. If you use unpure charcoal this is a genuine risk you face.
 
for anyone interested, I've found the 1st half of the Gaddy article posted online: [url] http://doublegunshop.com/doublegunjournal_v7i4_9.htm[/url]
Haven't been able to find the 2nd half though. I know I had it myself at one time but now seem unable to locate it.
Another factor for me is that I'm not using an electric furnace, but a charcoal/coal-fired foundry. Will impurities from that get into the crucible? Are there ways to prevent that? I'd read an article at one time that talked about doing pack hardening by using 2 flowerpot bottoms sealed together w/clay and baked to harden. The articel also mentioned putting a small piece of paper in the packed "pot" to use up any extra oxygen inside. I think that was one of the main points there was that you didn't wany any extra oxygen reaching the part as that would through off the final desired result.
 
Last edited by a moderator:
I have my copy of the magazines, with autographed articles. If you send me your address and name in a PM, I can arrange to send you copies. Paul
 
I have never actually done any color case hardening in anything other than a gas or electric furnace. Years ago I played around with casehardening in my charcoal forge, but I wasn't trying for any colors.

One thing you need to remember is that what ever you do to your crucible, it must still be able to dump the contents into the quench tank quickly and easily and with minimum exposure to air. If you look at the above photos you can see the arrangement that I use and it works pretty good. The parts are packed into the crucible, making sure that they don't touch the sides (leave about 1/2" of clearance all around), and than the crucible is inverted and placed on the carrier that you can see. I put any extra charcoal around the perimeter to help seal it a bit, but I don't bother placing a venthole in the cruicible like some other texts mentioned. I figure there is enough freedom for gas release at the bottom with the arrangement that I use. When it comes time to quench I grip the carrier first and set it on my tank cover. I have a sheet steel lip that is on the forward edge of the cover. All that I have to do is butt the edge of the carrier up against this lip, and than quickly grab the cruicible with my tongs and than slide it over the edge. The water level is right at the underside of the cover so my exposure to the air is barely the thickenss of the steel lid. This works very well for me and I don't think I get any contamination from outside air during the quench.

The gasses created by the burining charcoal do provide a bit of a shield against the oxygen, but not enough so that you could freely drop the parts several inches above the quench without some risk of contamination.

The long and short is be thoughtful of your process and comfortable using it in a quick and safe manner. Don't add steps that will rob you of time since this is a precious commodity during this process. Contamination of the contents shouldn't be a problem when done as I described above, or using a similar method.
 
Lots of good advice given in the posts above, acceptable results can be had without the use of air. This is my first attempt @ color case hardening and I will persue it. The reply above about blocking is most important though.

Img_0077.jpg
 
Nice looking lock. I also like the colors. Is it a Chamber's lock? Did you do the engraving? :thumbsup:
Billk
 
Thanks,
the lock is a siler, parts may have come from Chambers but doubt it was assembled there. Yes the engraving is mine, glad you like it. I am happy with the overall finished piece.
 
Back
Top