You are using an out of date browser. It may not display this or other websites correctly.
You should upgrade or use an alternative browser.
You should upgrade or use an alternative browser.
Copy of a Lovely Chambers Rifle
- Thread starter davec2
- Start date

Help Support Muzzleloading Forum:
This site may earn a commission from merchant affiliate
links, including eBay, Amazon, and others.
- Joined
- Mar 7, 2007
- Messages
- 729
- Reaction score
- 2,362
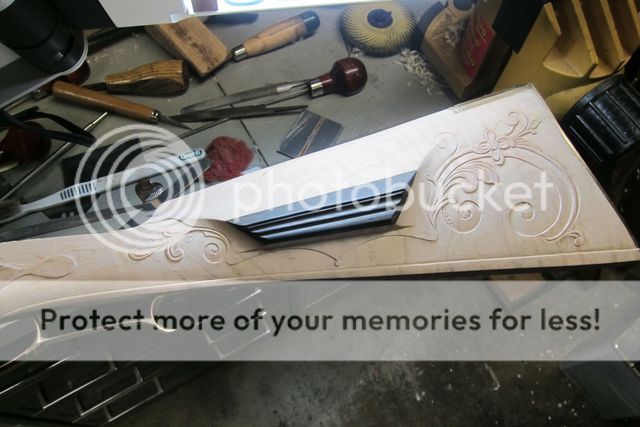
Carving is about as sculpted as I want it to be......needs some final refinements and, for me the hardest part, smoothing the background.........
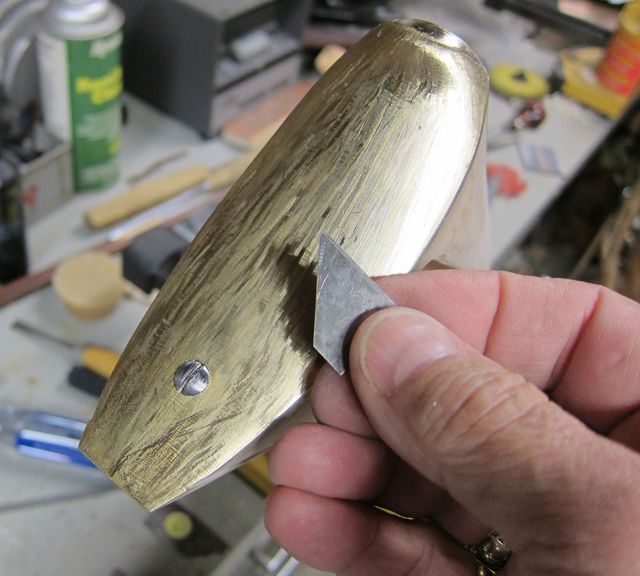
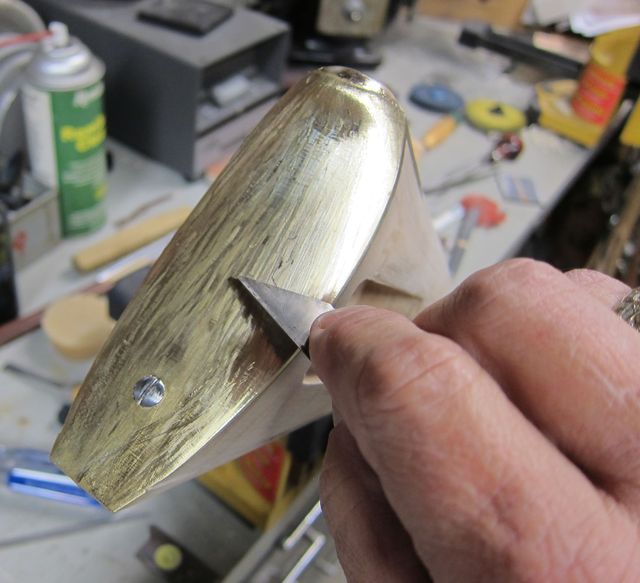
To take a break from the tedium of carving, I scraped the butt plate with the angled edge of a box cutter blade. Â It takes off brass more rapidly and more smoothly than a file and leaves a finish that does not take too much more work with fine abrasive paper.
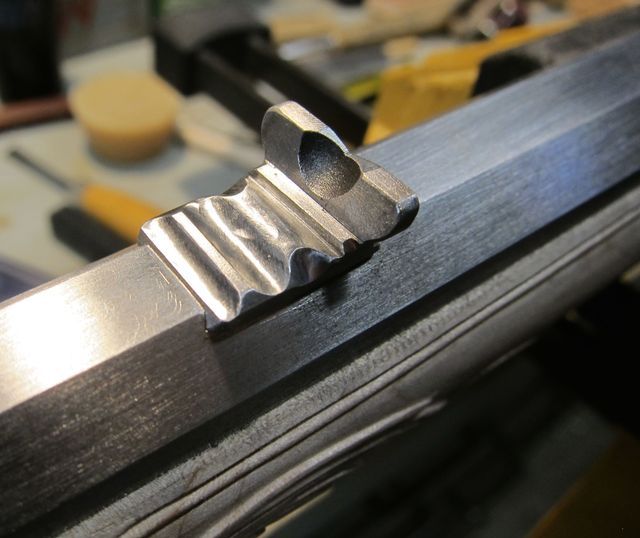
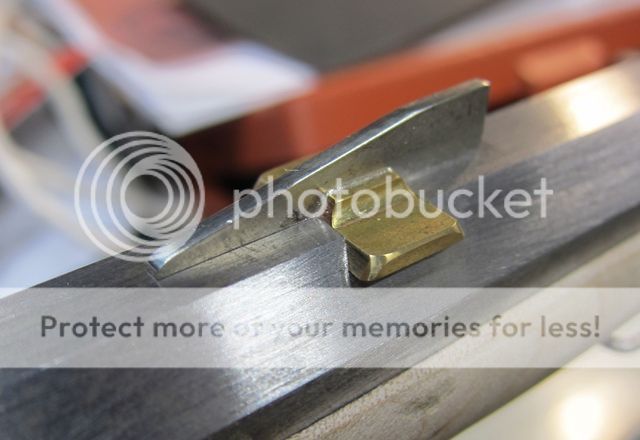
Rear sight is installed......
Front sight.........
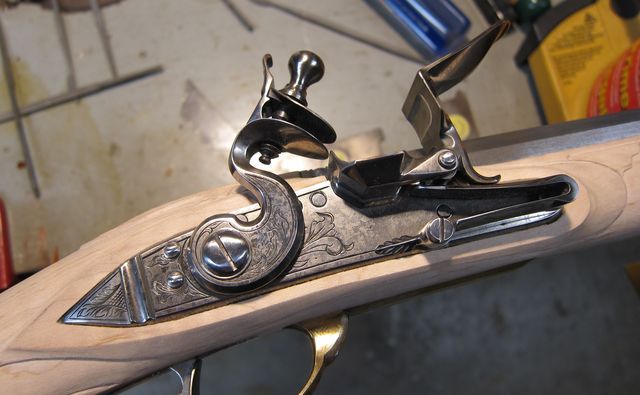
Lock parts case hardened and ready for final finish........

To take a break from the tedium of carving, I scraped the butt plate with the angled edge of a box cutter blade. Â It takes off brass more rapidly and more smoothly than a file and leaves a finish that does not take too much more work with fine abrasive paper.


Rear sight is installed......

Front sight.........

Lock parts case hardened and ready for final finish........

- Joined
- Feb 9, 2015
- Messages
- 3,075
- Reaction score
- 1,085
Keep the pics coming. We're loving every minute of it!
Hats off to you sir! :hatsoff:
Respectfully, Cowboy
Hats off to you sir! :hatsoff:
Respectfully, Cowboy
Your "work" is that of a gifted artisan and your previous builds and this one all reflect your artistic ability and gun making skills.
But...I have one question....why are you making a copy of a Jim Chambers LR? Just curious.
If I were Jim Chambers, I would be flattered to have someone of equal skills replicating one of my LRs....Fred
But...I have one question....why are you making a copy of a Jim Chambers LR? Just curious.
If I were Jim Chambers, I would be flattered to have someone of equal skills replicating one of my LRs....Fred
Micah Clark
45 Cal.
- Joined
- Dec 9, 2010
- Messages
- 623
- Reaction score
- 4
Wow . . . Wow to everything . . .but that lock engraving, wow !!
- Joined
- Mar 7, 2007
- Messages
- 729
- Reaction score
- 2,362
Flehto,
As of late I have been copying rifles made by makers who's work I admire just to expand my own experience base and design options. A while back, I made a copy of a rather plain but beautiful Jim Kibler rifle (partially covered on this forum here: "The rifle with the meteor sights" (Topic#291292)
I am also preparing to build copies of a Bill Shipman rifle and a few others
As usual, Dave, just outstanding beyond words. I don't know how you do work that fine in what seems like such a small amount of time. I guess it's something like Mozart writing perfect symphonies with no markups on the original scores in a day or two. A gift. :thumbsup: :hatsoff:
GreyWhiskers
69 Cal.
Great work! Thanks for sharing. :thumbsup: GW
- Joined
- Jun 12, 2005
- Messages
- 8,027
- Reaction score
- 1,031
I really like the ebony ... gotta remember that trick!
I have run out of superlatives.
- Joined
- Mar 7, 2007
- Messages
- 729
- Reaction score
- 2,362
Thank you all for the kind replies and the votes of confidence. As I am still up to my eyeballs in aerospace work, I only manage to work on a long rifle or powder horn in short bursts. So I will usually get a fair amount done and then have to lay down the tools for a good while as I go back to earning a living. At any rate, I hope to have this rifle and the blunderbuss I am working on done fairly soon. Wish me luck.
GreyWhiskers
69 Cal.
davec2 said:As I am still up to my eyeballs in aerospace work
And you're a rocket scientist too? :shocked2: :grin:
- Joined
- Mar 7, 2007
- Messages
- 729
- Reaction score
- 2,362
Grey Whiskers.....yes, this is what I do for a living. Worse yet, I own the company........ I'm the one in the Indiana Jones hat.....
https://www.youtube.com/watch?v=xsD3NKSSErw
https://www.youtube.com/watch?v=xsD3NKSSErw
Last edited by a moderator:
GreyWhiskers
69 Cal.
Kewl video! ðŸ‘ðŸ‘
- Joined
- Jun 12, 2005
- Messages
- 8,027
- Reaction score
- 1,031
I like the hat (could never find one that fit - my head is tall and narrow - Audie Murphy's hat fits me ... a long story)
neat video ... now I understand things better ...
by the way, the shape of the flame looked somehow familiar ... is there a connection I ought to be making?
- Joined
- Mar 7, 2007
- Messages
- 729
- Reaction score
- 2,362
Gun building has taken a back set to life for several months. However, I am anxious to finish this copy of a Jim Chambers rifle and the last big hurtle is the elaborate patch box. Â I have had to modify the profile somewhat because I was using up surplus parts and used a butt plate that is significantly different from the one Jim used. Â However, the domed door had to go in first, so here is the recent, minor progress toward finishing the rifle. Â
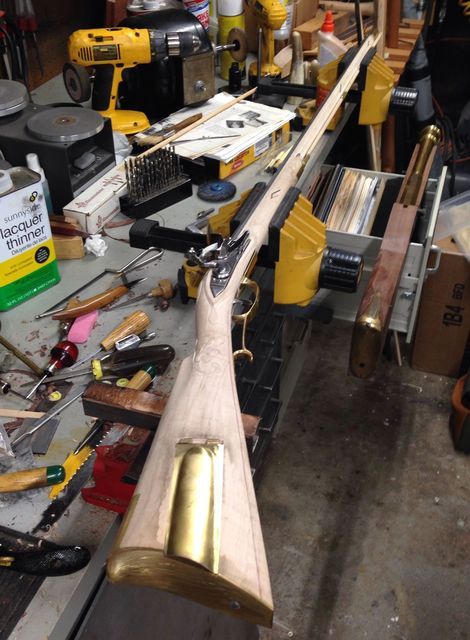
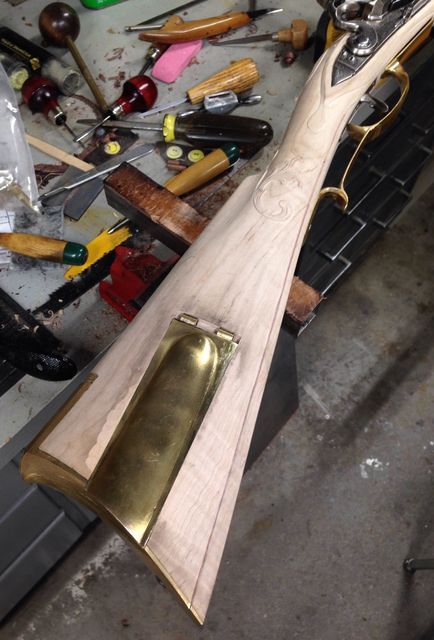
Cutting out the top and side plates now along with the silver inserts.


Cutting out the top and side plates now along with the silver inserts.
- Joined
- Mar 7, 2007
- Messages
- 729
- Reaction score
- 2,362
Ok.....I need to clear the work bench of all the half finished projects I have had sitting around for a year....so I can load it up with another batch of half finished projects !!! Â I realized that this Chambers copy is complete except for the patch box and the finishing operations. Â I started in again on the patch box only to realize that I cut the opening of the box a little too large for the type of release mechanism I wanted to use. Â I didn't leave enough wood at the rear end of the box
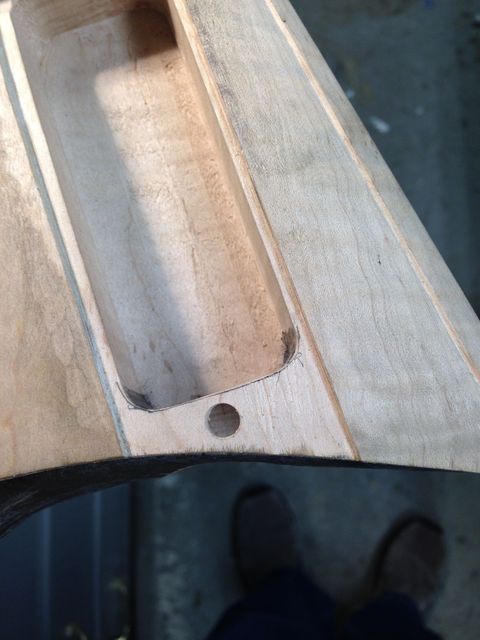
After I removed wood for the release spring mechanism, I had broken through the wall to the inside of the box.
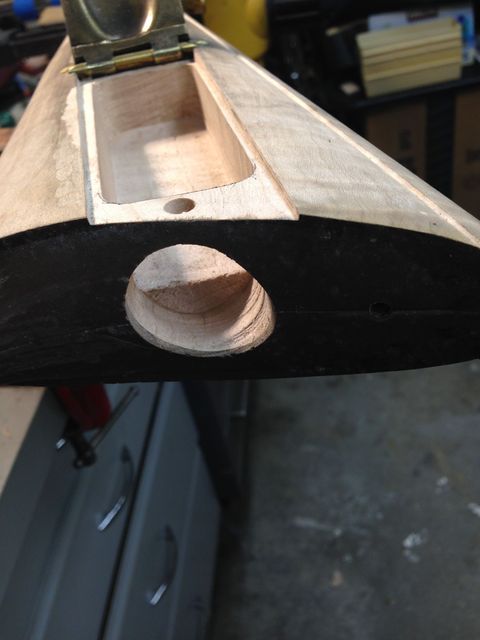
To recover the mistake, I made a patch that forms a new rear wall on the inside of the box cavity.
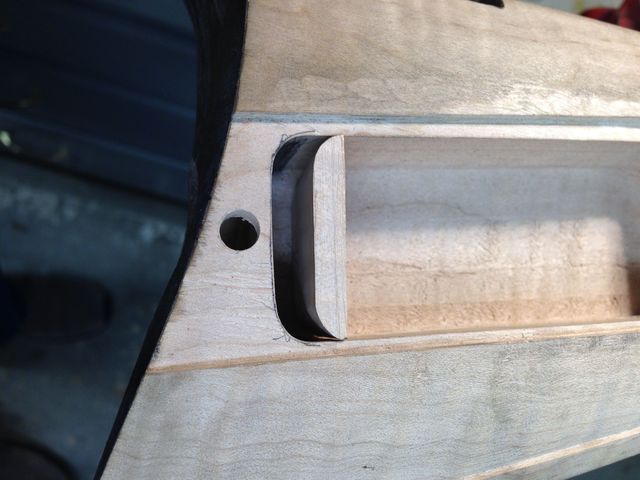
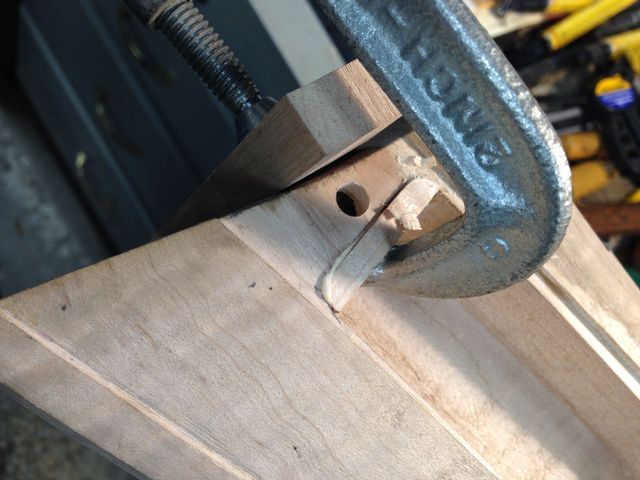
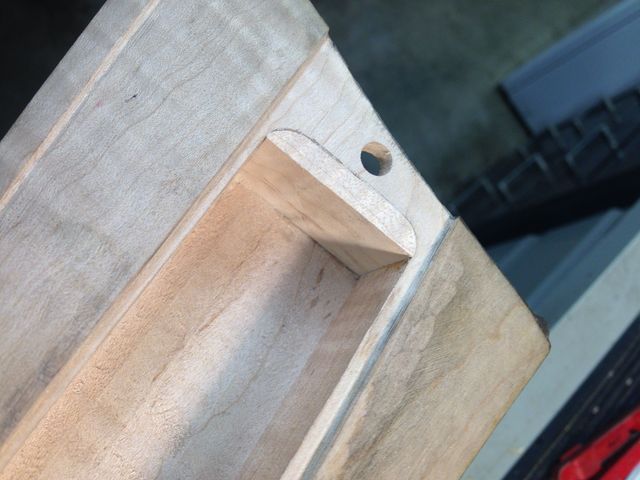
Having made that repair, I cut out the side plates and soldered in the silver flower parts. Â Just need to complete the inletting and the engraving on the box now.
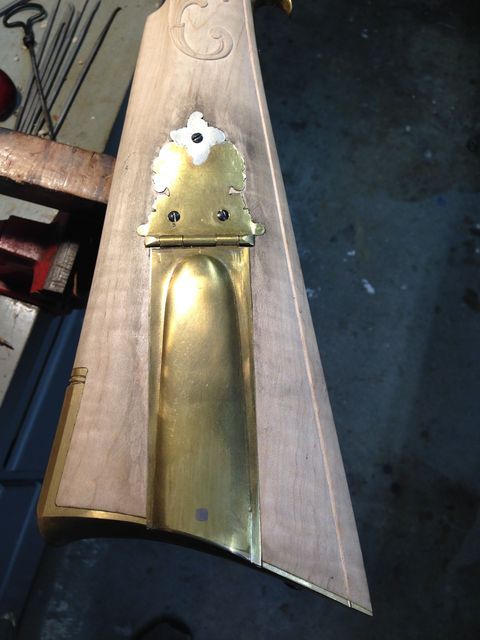
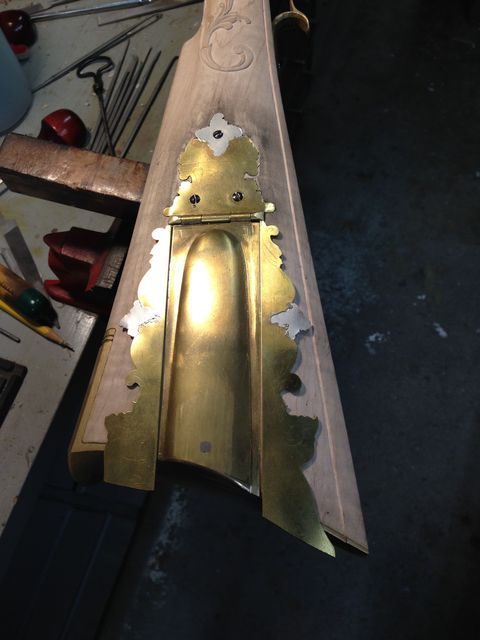

After I removed wood for the release spring mechanism, I had broken through the wall to the inside of the box.

To recover the mistake, I made a patch that forms a new rear wall on the inside of the box cavity.


Having made that repair, I cut out the side plates and soldered in the silver flower parts. Â Just need to complete the inletting and the engraving on the box now.


- Joined
- Mar 7, 2007
- Messages
- 729
- Reaction score
- 2,362
All the parts of the patch box are fitted, inletted, and ready for engraving. Â I have to say, this particular patch box was a real pain in the......well.....neck. Â I have never had to fiddle with a patch box so long and hard. Gives me an even greater appreciation for Jim's skills as displayed on the original rifle he built.
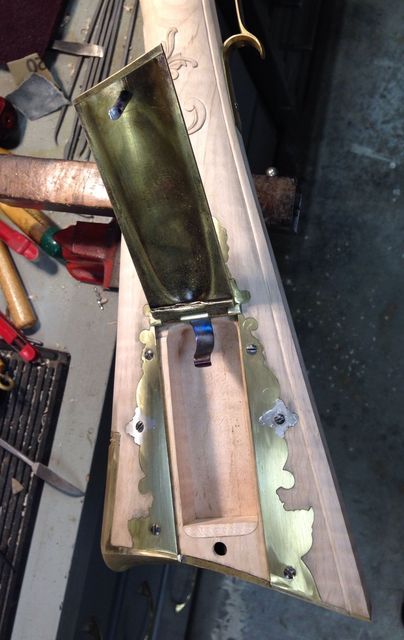
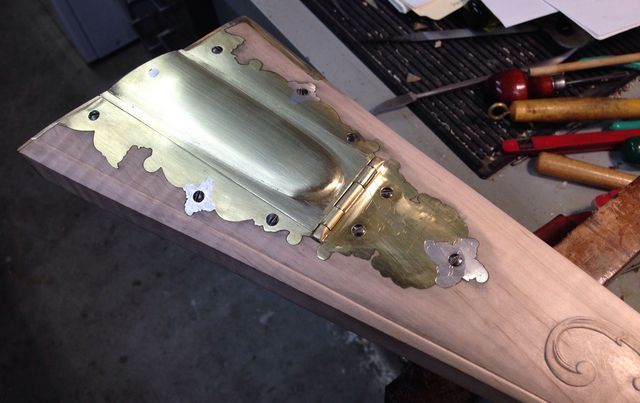
Next step is to finish the final engraving on this rifle on the patch box parts. Â Staining and finishing to follow that.....and I will be happy to have this rifle finally finished.


Next step is to finish the final engraving on this rifle on the patch box parts. Â Staining and finishing to follow that.....and I will be happy to have this rifle finally finished.
Similar threads
- Replies
- 57
- Views
- 3K
- Replies
- 5
- Views
- 589
- Replies
- 15
- Views
- 832


