Copy of an original blunderbuss

Muzzleloading Forum

Help Support Muzzleloading Forum:

This site may earn a commission from merchant affiliate links, including eBay, Amazon, and others.
I was getting ready to bend the breech plug tang and was tired of doing it the same way I have always done it with a lead hammer and on a lead block. It works but is not a very controllable process in the greater scheme of things. So I stopped long enough to make these magnetically attached brass bending "bars" (for want of a better description). Brass 7/16" round stock is silver brazed to a brass arm made of 1/2" x 1/8" flat stock. A strong magnet is then screwed to the other end of the arm. These can be positioned easily on the vise and allow complete control of how much and where the bend occurs. Much better than whacking things with a lead hammer.


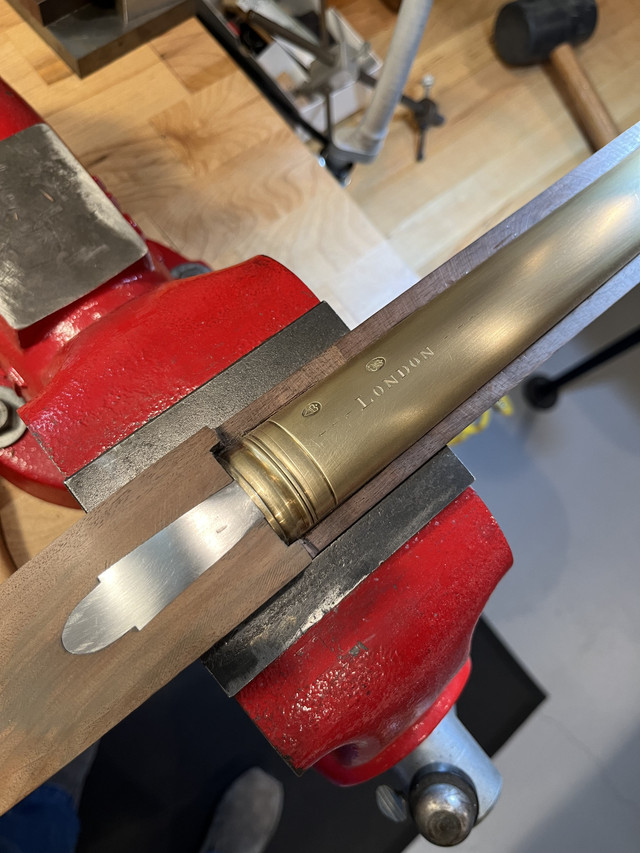
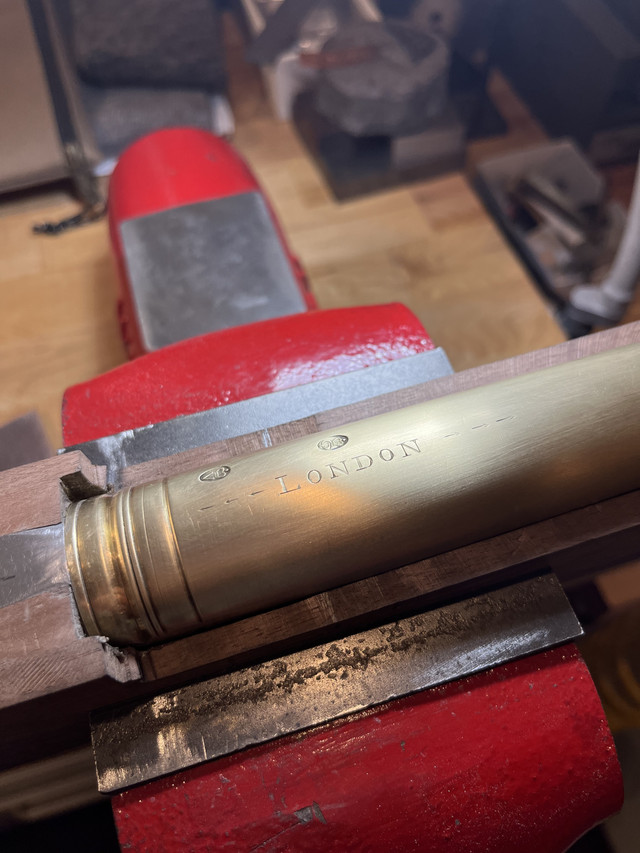
That’s really cool. I’ve been using chunks of metal and screwdrivers to use for those bending pins. I like yours way more 🤩
 
With most of the wood removed with the ball cutter, it only took a short while to finish the barrel inlet with hand tools and a Frank Mittermeir barrel rasp I bought 50 years ago....Also got the ram rod groove and hole drilled. As noted previously, since the barrel is only a foot long, all of this goes much quicker than it does on a long rifle....


Back on this one for a bit as well. Thought I would bend up some barrel lugs out of sheet brass and then (Hi Force) solder them to the barrel. Easy to do. The inlet them in to the stock.....so ready to drill for the cross pins.


Hi Dave,
Isn't it a shame that so much of that nice wood ends up as dust on the floor. Nice job! It is looking great.

dave
David,

Yes it is a shame. I said the same thing to an old fellow I used to buy exotic hardwood from. He responded that he just looked at the positive side of how much we saved by making beautiful things out of it.

Best,

Dave C
 
Silver brazed (with brass colored alloy) a piece of sheet brass on the rear ram rod pipe and then shaped it. With a lower fusing silver braze, I soldered the tab on the top of both pipes. Inletted the pipes and drilled for the retention pins. (Rear ram rod pipes are my least favorite part of building a gun.....have I mentioned that before :mad: )


Some continuing work......

Once the lock is inlet, I shape the lock molding roughly. Once that is done, I can drill for the lock bolts. With the lock bolt locations as reference. I use a piece of clear plastic sheeting to trace the lock molding outline and then transfer it to the side plate area. I know there is no absolute requirement for the two sides to match, but I like to get them as close as possible and this method works well.


Preparing the trigger, trigger plate, and trigger pivot housing.....


Side plate layout and start of the tedious inletting.......


Trigger guard layout, trigger housing, and trigger guard inletting......


Started the final shaping of the butt stock.....


Fabulous. Thank you for the update.


Write your reply...

Latest posts

Back
Top