• Friends, our 2nd Amendment rights are always under attack and the NRA has been a constant for decades in helping fight that fight.

    We have partnered with the NRA to offer you a discount on membership and Muzzleloading Forum gets a small percentage too of each membership, so you are supporting both the NRA and us.

    Use this link to sign up please; https://membership.nra.org/recruiters/join/XR045103

Drilling holes in tangs

Muzzleloading Forum

Help Support Muzzleloading Forum:

This site may earn a commission from merchant affiliate links, including eBay, Amazon, and others.

Larry Pletcher

50 Cal.
Joined
Jul 27, 2006
Messages
1,313
Reaction score
67
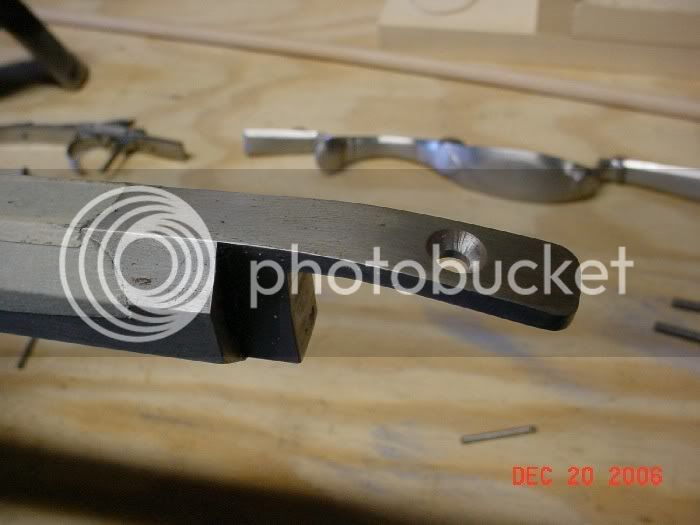
I often have problems when drilling the hole for the tang screw. It seems that no matter how carefully I work to center the hole exactly, when the countersink is used, the edge of the hole is closer to one side than the other. I have tried different methods for finding the center, but am usually unhappy with the result. Does anyone have a tip to help?
Regards,
Pletch
 
I try to get the punch mark as close to center as possible, then I drill the pilot hole about 1/3 of the final diameter needed for the tang screw. Then I check it to make sure it is perfectly centered, which it quite often is NOT! If it is off, I use a Swiss rat-tail file to get the hole big enough, and centered, to accept a chainsaw sharpening file. Then I use this straight, round file to open the hole to the proper diameter and centered in the tang by careful filing before chamfering it for the screw head.......

(I have discovered THE HARD WAY that generally, there is no fast or time-saving way to do anything having to do with building ML guns......)
 
I do my countersinking with a hand-held electric drill and countersink it slowly, checking constantly to see if the countersink is wandering more to one side. Then I just hold pressure toward the side it needs to go to. Or ,if you have access to a drill press with a stationary vise, you could lock it down tightly and prevent it from wandering that way. Either way, good luck to you.
 
Even with a drill press my eyes fool me. I sometimes scribe the tang centerline first. If I center punch it and the punch is off I will walk the hole where it is needed with multiple impacts. I don't go directly to the finish drill first but put a centerdrill in the drill press and enlarge the center punch hole in the work. A centerdrill is a short fat drill with a conical point and no flutes. If the centerdrill hole is centered nice in the tang I will put the finish drill in the quill, make sure that it is aligned and doesn't jog to the side when lowered to the work and drill it through. Most of the time this works. Good luck with your projects. GC
 
i used a 1/8" drill first after making sure my punch mark was centered....then drilled it out with the countersink drill :v .........bob

barreltang001.jpg
 
hey, thanks... i gotta try that, and it happens that i've just reached a point where i've gotta slay that particular dragon...
thanks again, and have a good New Year

msw
 
I take a scribe & mark a line down the center of the tang it's length. Then I find where I want the screw & I centerpunch a dot on that scribed line where I want the hole to go.
I put a small "C" clamp on the barrel & also holding the triggerplate secure.
I set the drill press up & clamp the barrel or tang so the area I drill is flat so the drill bit hits it exactly flat & I just start the drill so it the hole is started....... This is Important as this is where the drill bit is gonna walk on ya. If it is not flat, it is going to walk........
Now do the same thing on the trigger plate as you did on the tang.
Now mount a Drill Point in the drill press & drill the hole tang first & then triggerplate with a 1/8" drill bit, using the drill point so the angles are correct to make the holes meet. Now go to the tap drill size & drill thru the tang about 1/2 way down, turn it over & go from the triggerplate & do same & they will meet. Remove the tap drill bit & install the bolt clearance drill bit ya need & drill from tang to triggerplate but Do NOT drill the triggerplate.
Now put the tap in thru the tang & down to the triggerplate & tape the triggerplate.
Take the tap out & now countersink the tang hole to the size ya need to get the screw head where ya want it. Make sure you have it all clamped in place as if you push the triggerplate as tapping & it moves it makes the screw hard to start as you didn't tap it in the correct position it needs for the threads to align.
If ya get just a tad off center with the drill, you can put a milling bit in the drill press or a drill & ream the hole on the side of the way you need to move the hole, then take a countersink but & work it the same way & move it over a tad.....

You do the lock bolts/sideplate holes basically the same way once everything is inletted where ya want it. Make sure the lockplate is Flat when drilling to insure the hole don't walk. Drill 1/8" a pilot hole using the drill point mounted to the drill press. Go to a tapping size drill bit. Then clearance drill bit UP TO the lockplate but Do Not drill the lockplate. Tap thru the sideplate & stock just like you are threading the screw in & tap the lockplate. It it gets tough about 1/2 way thru, back the tap out & take it out of the rifle & finish taping it with some tap oil 1/4 turn at a time, back ooff tap til the chip clicks/breaks, go back in & cut 1/4 turn more, back off, etc. til ya get thru the plate. This will get your lockplate screws in straight & easy to screw in.

:thumbsup:
 
I made a tool to mark the CL of uneven dimensions.

This tool is nothing more than a 1 inch long X 1/2 inch wide, X maybe 1/8" thick piece of hardwood, Two holes were drilled in the 1/8 " thick edge, about 1/8 from each end. A short piece of nail was glued into each hole, and another, ground to a sharp point glued into a hole in the exact center of the distance between the two studs on the ends.

The studs on each end are about twice as long as the point in the center.

The dimentions don't matter, as long as the center point is exactly half of the distance between the studs.

The scribe is placed over the tang, and twisted until both studs are in contact with the edges of the tang. The scribe point is now centered on the tang. Run the scribe down the tang, keeping the
studs in contact with the edges of the tang.

The centerline will be...centered, no matter if the tang is straight, tapered, or flared.
J.D.
 
Now THAT is a good idea. I am not sure that will work on a flared tang & be a True center with it being a flared tang.... if I am envisioning it correctly. But ti should be danged close if the 2 outside points are as close as you say. And also what happens when the nail the furthest down goes off the end ? You get a partial line or a line most of the way, right ?

Can you post a photo of your lil jig ? Sounds like it would work good for scribing a straight tang most of the way til the nail runs out of surface ?

I usually measure width or top of tang & divide by 2, the do same at bottom & make a mark at center of each, then lay a piece of old steel measuring tape from dot to dot & scribe a line.
:hmm:
 
Thank you gentlemen for your ideas. Simply trying to measure to find the center hasn't been accurate enough. I have sometimes used a scribe set as close to halfway as I can and scribe a center mark. I usually do this from both sides. If I was exact in my adjustment I will have one mark. If not I will have two scribe marks very close to each other. I think my most likely place for error is getting my center punch in the right place and also getting the center drill exact. I like the idea of being able to adjust after seeing the hole location before using the final drill size.

Once the holes are located I use a dead center on the drillpress table to drill through the stock from tang to trigger plate. Someone earlier suggested the method I use.

Thanks again,
Regards,
Pletch
 
I am unable to hold a puch in my left hand (due to an accident in which I lost most of my left hand fingers) and hit it with a hammer. I find a Starret auto center puch works wonders for setting that inital centering mark. It also works great for wood marking for barrel pins and the like.
 
Back
Top