• Friends, our 2nd Amendment rights are always under attack and the NRA has been a constant for decades in helping fight that fight.

    We have partnered with the NRA to offer you a discount on membership and Muzzleloading Forum gets a small percentage too of each membership, so you are supporting both the NRA and us.

    Use this link to sign up please; https://membership.nra.org/recruiters/join/XR045103

First and Second Horrn

Muzzleloading Forum

Help Support Muzzleloading Forum:

This site may earn a commission from merchant affiliate links, including eBay, Amazon, and others.
Joined
Oct 26, 2014
Messages
299
Reaction score
149
Location
In the Still Free State of Wyoming
Well after just looking at Mockingbird's post maybe I shouldn't be overly impressed with my obvious lacking ability. Anyhow I received some horns from Powder Horns and More also on Friday. Had a few brass pieces from TOW and the wife was on her death bed (it seemed) with the flu so I decided to make a horn and then a second. The first one was the top one and was a nicer horn. The second one the horn was iffy but I gave it a shot on a more traditional style.
DSC000877.JPG
 
I like them! They look like they were made by a human and not all machine finished looking. For my tastes I like the old world, made with hand tools look. Too often you see things that look machine made/mass produced, and it looses that handcrafted feel. I think you did a great job on them both and you should be proud of them. :thumbsup:
 
You guys are killing me! How in thunder do you get those base plugs so tight? mine leaks like a sift!
 
Other than the artistic aspects I think the base plug is the most time consuming part. The trick is its a nicely rounded and tapered plug. I did use a sander to do this part. Trace the plug from the base of the horn. I used 1" pine. I think 1" is the minimum thickness to allow a good seal and have plenty sticking out to shape. Then sand the sides at an angle till the one side will go in with as little amount of gap as possible. Then I used the only other electric tool a heat gun and warm up the end of the horn to soften it. Push the plug in as far as you can and it will smooth out any gaps at this point. Now there's much debate out there on this next step so I guess each person has to do what they are comfortable with. I personally used a quality wood glue and put a heavy bead around the plug then pushed it in the still warm horn and then set it with the plug facing down to dry. Then after it's dry I pinned it all the way around with glue and toothpicks. Both of these horns are 100% airtight doing it this way.

By the way I will give the horn a blow test to see if it's airtight before I glue them and doing it this way they are and probably would be good with beeswax and pinning at this point if glue isn't your thing.
 
I hope I'm not speaking out of turn.
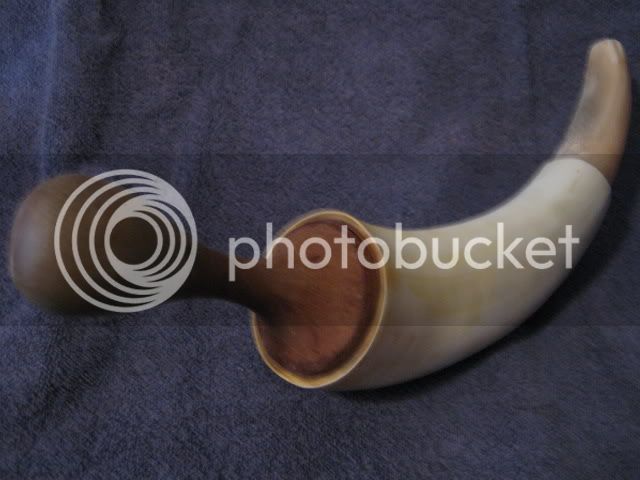
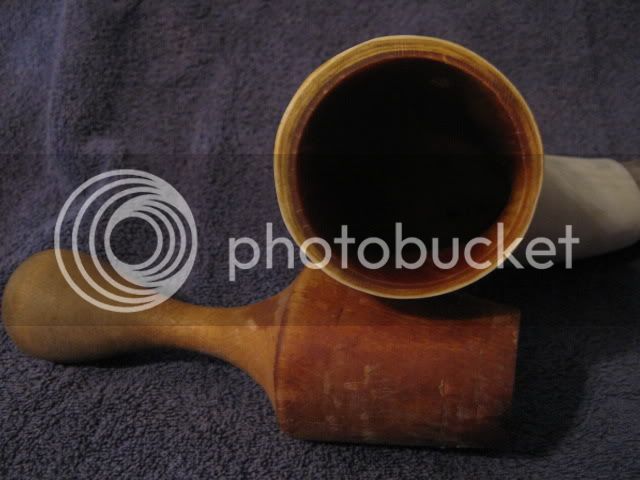
Mike, make a tapered plug approximately the size of your horn opening. Heat that end of the horn in boiling water until it's soft. Push the tapered plug in until you see no gaps, and let everything cool. When you remove the plug, you will have a round opening. Now you can either cut off your tapered plug and make the end of your horn, or you can make a different plug and save the tapered one for another horn.
I hope my feeble attempt at explaining helps.
 
There are numerous ways to reach the same end result for sure. Now that we have the internet and especially youtube you can get a wide range of opinions on how something can be done. Ultimately it's up to the individual doing the project to pick and choose what works for them. I had considered using boiling water instead of the heat gun but opted for the gun due to the fact that I could do it at my workbench instead of moving into the kitchen.

I'm still going to build some more horns and try to get a little better at it and will definitely be trying some different approaches.
 
When I was making my horn I used the hot water as well to shape it due to the danger of burning the horn itself. I used a heat gun once on horn to shape it for a spoon and it got too hot and bubbled up and smelled terrible lol. :barf:
 
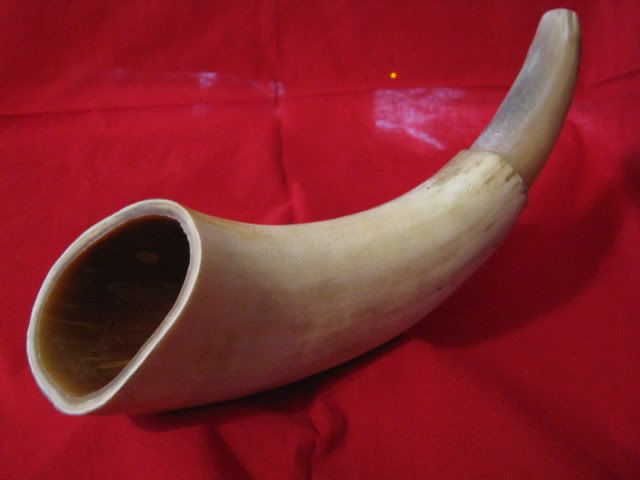
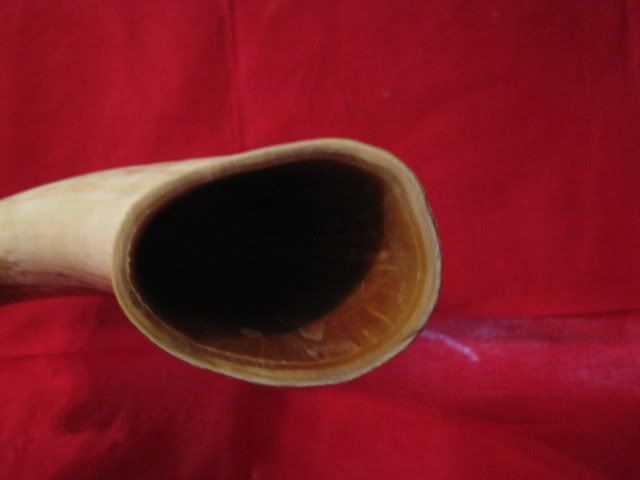
Take it for what it is worth to you, but boiling water is OK for real thin horns, but the water will not get any hotter than 212 degrees and even though the horn might bend and form. You need a lot more heat to relax or "shock" the horn fibers so the horn will not return to it's former shape. Heat gun is OK, but a lot of trouble trying not to scorch the horn. The best method and quicker is to use hot lard or cooking oil in a Fry Daddy at a temperature around 325 degrees and dipping the horn in and out of the hot oil a few seconds at a time until horn gets pliable and then put your rounding form into the horn and let completely cool.

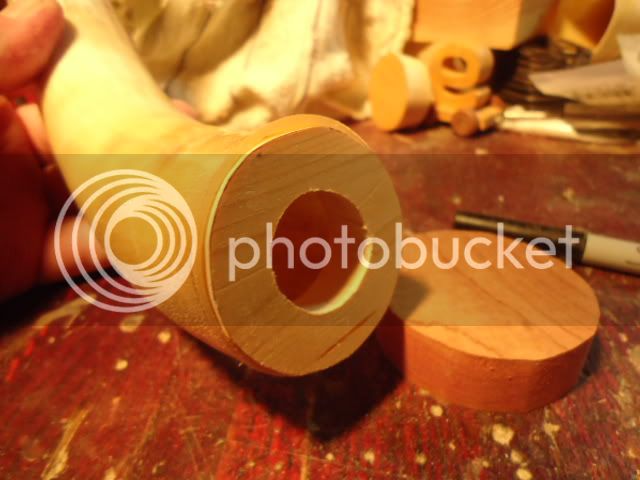
Before hot oil heating.


After oil heating. Note thickness of this horn walls. A horn this thick would never soften with hot water.

 
horner75's advice is spot - on ... I tried the boiling water thing and was rewarded with a clean and un molded base ... a fry daddy is a good investment (check out yard sales and so on - it need not be pretty, it need only get hot) a good thermometer is also a wise investment.

I take mine to 375F - your mileage may vary. use a good pair of gloves that you can get off your hands very quickly if you have to, and (I shouldn't have to say it, but I've see folks do dumb stuff too often) you should have a fire extinguisher handy. watch out that you don't get the horn too hot - I wait until I see a thin flow of what look like milky white stuff come from the horn (I think it's bubbles) and then I pull it out. it's OK to do 'dunk and try" - I use ten or fifteen second immersions. then try to squeeze it and if it's soft, shove the tapered molding plug in there and let stand overnight.

if you don't have access to a lathe, you can still make a good butt plug - press the base into a Styrofoam plate and use that impression as a pattern. it will take a bit of whittling, but your plug will look pretty darn good at the end of the project. there's a good tutorial on this technique (I think horner75 wrote it), but I can't find it.

good luck with your projects!
 
Never made a horn but plan on trying my hand. Why use two pieces of wood for the plug?

Ignorance is curable, stupid is fatal!
 
NICE work, imVho.

I don't make powder horns but when I occasionally make hunting horns (for calling cat/wolf/fox hounds), I use hot olive oil (heated in a 3 buck garage sale deep-fryer) to soften the horns, when fitting the mouth-piece. = To me, the hardest thing is getting the cut tip pliable but hot burned or brittle.
(350 degrees F seems about right for heat.)

yours, satx
 
Thanks. I have a fairly good ability to listen and learn from others. I can grasp the concepts that are being described really well. Again my biggest problem is putting them to practice to the level that others seem to be able to do. I have a good vision of what I want but getting my hands to do it are another thing altogether. Like my bottom horn was supposed to have a wedding band design of some sort but it was just not going well in that direction. The end result ended up being an antique blob top bottle design.

Fulminator I think the main reason for a two part plug is for the allowance of a fancier finish on the butt of the horn then just the plain low domed plug. Of course that's just my take on it.
 
Thanks for those excellent shots on the horn plug and also for the tutorial that is available through that link.

I have a quick question for you on that picture tutorial. It appears that you are actually using two pieces of wood for that domed horn plug. One was the inner plug and the other was the shaped outer dome. What are you using to attach the two pieces together? Ever have any problem with them coming apart?

Twisted_1in66 :thumbsup:
 
I probably should of mentioned the following in the first pictures and Tutorial posted. Yes, this are an inner and outer constructed base plug and I did it for people who might not have a lathe. Most craftsman who have used this method usually just glue and clamp the two wooden pieces together with a good quality yellow wood glue adhesive. I use Elmer's Yellow Wood Glue. I have never had or heard of anyone having the glued joint come apart,as long as you use plenty of glue and seal the base plug AND horn to wood seam your base plug will last better than any adhesives that might of been used in original antique powder horns.

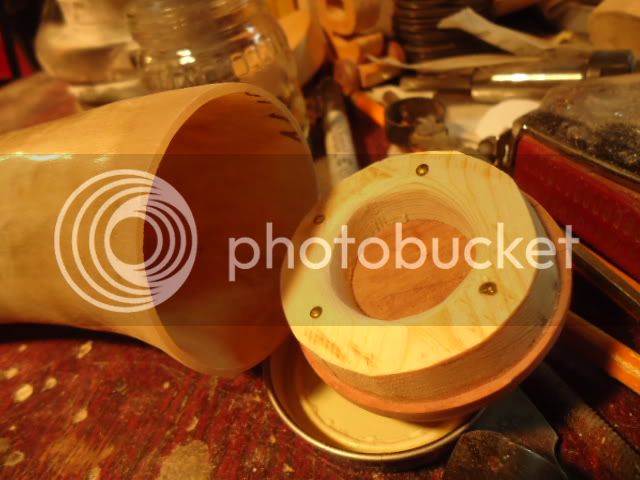
There is a couple of additional things that I like to do in recent years, if I have to make a two piece base plug, as the picture will show, Some might call it overkill, but I look at it as a little extra security.

Cut and fit inner plug. Here I cut a portion out to lighten and add room for a bit more powder.


Drill some pilot holes and carefully pound in some solid brass tacks or wooden pegs. Put a spot of glue on each.

Base glue together ready to attach to the horn.
Note! Do not attach base until you totally put the horn dye or finish on the horn, unless you apply your final plug finish first, as the dying (If horn is dipped in RIT or other liquid dye) process can swell the base and possibly crack your horn from the moisture of the dye etc!


One last note. ALWAYS DRILL SPOUT HOLE BEFORE HEATING HORN IN OIL TO AVOID SERIOUS BUBBLE ERUPTION FROM TRAPPED AIR INSIDE HORN SPLATTERING YOU!


Rick
 
Back
Top