• Friends, our 2nd Amendment rights are always under attack and the NRA has been a constant for decades in helping fight that fight.

    We have partnered with the NRA to offer you a discount on membership and Muzzleloading Forum gets a small percentage too of each membership, so you are supporting both the NRA and us.

    Use this link to sign up please; https://membership.nra.org/recruiters/join/XR045103

First Horn (flat)

Muzzleloading Forum

Help Support Muzzleloading Forum:

This site may earn a commission from merchant affiliate links, including eBay, Amazon, and others.

JBird

36 Cal.
Joined
Mar 16, 2011
Messages
142
Reaction score
297
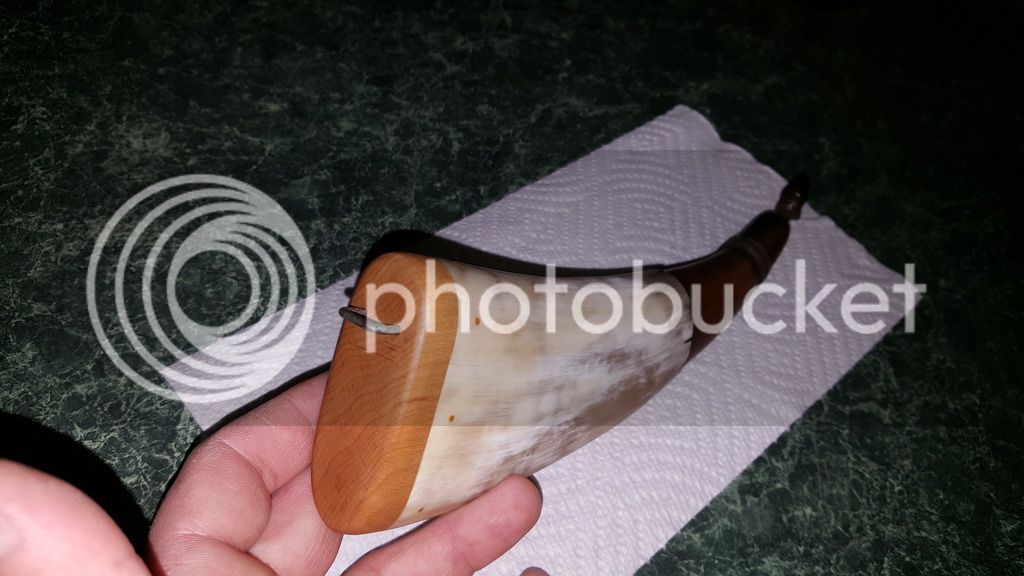
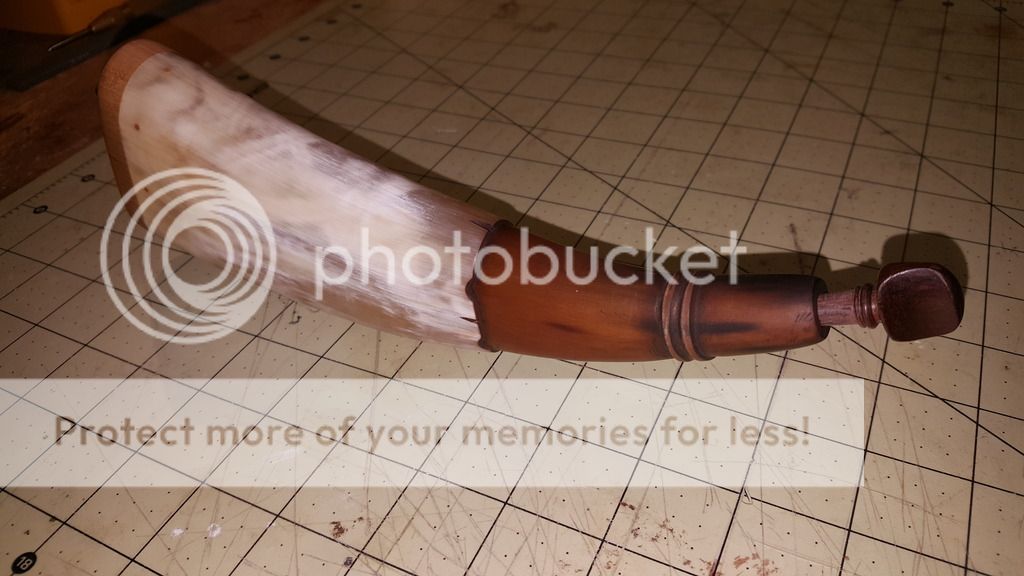
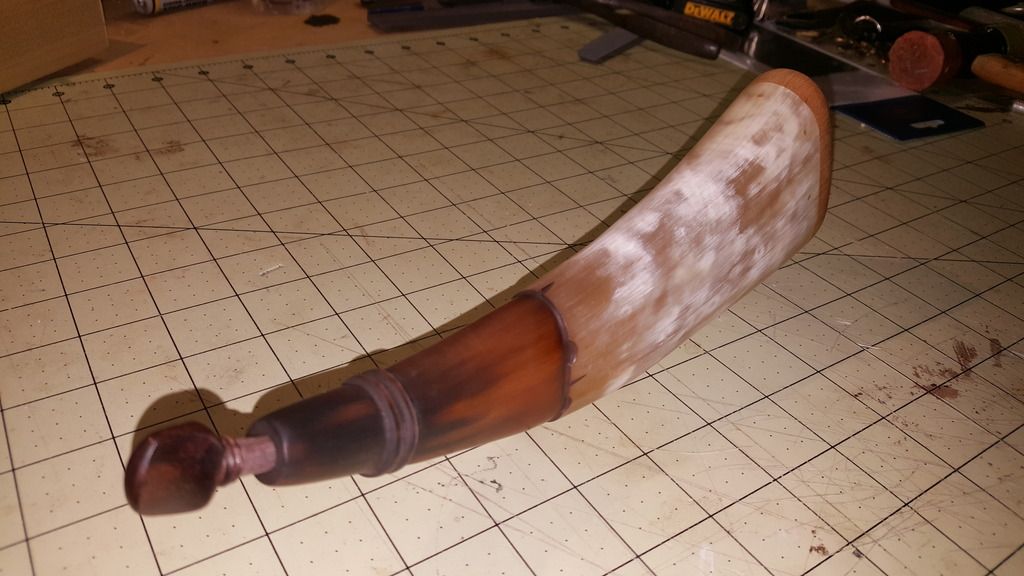
Just completed my first "finished" horn. this would be attempt 3 over the years. first one got ate by my Coonhound. 2nd one was nearly done till I decided to rework it a few weeks ago and ruined it.

So I ordered a few horns from powderhorns & more and decided to get one of there flattened horns to play with before I went through the trouble of trying to flatten one on my own. still took a fair bit of filing and scraping to get it where I wanted

Open to all suggestions I decided to quit while I was ahead and had a horn to show for the work, I intend to make a few more.

I may try dying it again I used a whole bottle of chocolate brown rit dye (darkest I could find)and this is as much as the horn would take

Base plug is Maple pinned in place with toothpicks both with just a plain BLO finish


Very nice!

and we all have ruined projects that we had to get in "just one more tweak"
 
Thanks for the comments guys. Anybody have tips on making a simple braided hemp strap?
 
Nice looking horn! I have braided both 3 and 4 strands of jute twine for horn straps. I do try to find a good quality twine as some of the cheap stuff has "thin spots". I also wax the strands to lay down the fibers a bit before braiding.
 
Thanks, it soaked for 30-45 minutes maybe the water wasn't hot enough? I may try again. I'm going to try and find a darker dye
 
thanks for all the compliments. maybe I can throw a strap together this coming weekend. already looking forward to working on my next horn
 
Driftingrz said:
Just completed my first "finished" horn. this would be attempt 3 over the years. first one got ate by my Coonhound. 2nd one was nearly done till I decided to rework it a few weeks ago and ruined it.

So I ordered a few horns from powderhorns & more and decided to get one of there flattened horns to play with before I went through the trouble of trying to flatten one on my own. still took a fair bit of filing and scraping to get it where I wanted

Open to all suggestions I decided to quit while I was ahead and had a horn to show for the work, I intend to make a few more.

I may try dying it again I used a whole bottle of chocolate brown rit dye (darkest I could find)and this is as much as the horn would take

Base plug is Maple pinned in place with toothpicks both with just a plain BLO finish


Nice horn. Your engrailment is particularly well thought out and pleasing.

It seems to have followed the natural curve of the original horn which is rare for new horners.

Wiping with some dark substance will help you find and remove any remaining scratches.

Remember that scraping with a very sharp edge is a better method of final smoothing than sanding or filing.

For the fine ring work, rolling a good fine file is a tough skill, but that is how I have seen that work done.

I think you are asking about attaching a carrying strap, but the general reason for making a flat horn is for the horn to fit inside a bag or pocket. I suggest that you tie a thong to the staple for easy retrieval from your hunting bag and/or to tie it to the bag to secure the horn against loss in the field.

Or are you trying to make a strap to retain your stopper?

Again, I like the horn and only make these other comments to give the feedback that you seemed to request.

CS
 
What happened to the horn that you believe is ruined? I would be willing to work with you on salvage efforts since I enjoy such challenges.

Hit me via PM if you like.

CS
 
The throat was originally round and looked fine. But I decoded to go back and change it up the step-down from the main body was to great and I ended up with some big flat spots, wasn't enough meat left in the throat to taper it

I cut it up and plan to make a box or 2 from the remains. So no big loss
 
CrackStock said:
Nice horn. Your engrailment is particularly well thought out and pleasing.

It seems to have followed the natural curve of the original horn which is rare for new horners.

Wiping with some dark substance will help you find and remove any remaining scratches.

Remember that scraping with a very sharp edge is a better method of final smoothing than sanding or filing.

For the fine ring work, rolling a good fine file is a tough skill, but that is how I have seen that work done.

I think you are asking about attaching a carrying strap, but the general reason for making a flat horn is for the horn to fit inside a bag or pocket. I suggest that you tie a thong to the staple for easy retrieval from your hunting bag and/or to tie it to the bag to secure the horn against loss in the field.

Or are you trying to make a strap to retain your stopper?

Again, I like the horn and only make these other comments to give the feedback that you seemed to request.

CS

Thanks for the compliments,

I tried to finish it off with a scraper but could not get clean lines around the areas the throat stepped up. I will go back and remove the tooling marks that showed when I re-dye the horn

As far as strapping it or not, I'm not sure yet the horn seems a bit big for a bag. The stopper will be attached but I'd like to make one out of the same maple as the base before I make a lanyard for it.

The strap ring didn't come out as clean as if hoped and it may be too narrow for anything but attaching the stopper
 

Latest posts

Back
Top