• Friends, our 2nd Amendment rights are always under attack and the NRA has been a constant for decades in helping fight that fight.

    We have partnered with the NRA to offer you a discount on membership and Muzzleloading Forum gets a small percentage too of each membership, so you are supporting both the NRA and us.

    Use this link to sign up please; https://membership.nra.org/recruiters/join/XR045103

Flintlock for a friend - finished my second build

Muzzleloading Forum

Help Support Muzzleloading Forum:

This site may earn a commission from merchant affiliate links, including eBay, Amazon, and others.

steved

40 Cal.
Joined
Feb 11, 2004
Messages
255
Reaction score
20
After two years of late nights in my basement workshop and timely advice from forum members I finished my second build - a Jim Chambers Early Lancaster kit with a 44" swamped .54 cal barrel. I build it for Brew "Mighty Oak" Moscarello in appreciation for his work to help organize the annual Southern Vt Primitive Biathlon and for providing the camp for our annual PA flintlock hunt. Brew ordered the kit and had it shipped to my house, then the fun began. My first build was from a blank in the Lancaster style. I found the experience building a kit compared to a blank more or less what I expected, with a lot of the heavy lifting already done (layout, turning square to round, barrel inletting, etc.). Of course this saved time but I did find in some instances where building from a blank has its advantages, such as locating the touchhole relative to the breech face; there was very little leeway in the lock panel inlet to move the lock forward or backwards. I guess I could have set the barrel back but I was afraid of messing up the swamped barrel position in the pre-inlet barrel channel. I ended up having to file a cone into the breech plug face. Also, the pre-inlet on a part or two was actually touch too wide for the part no matter how I tried to position it to cover the inlet boundaries, making it necessary to fashion a small shim to fill the gap (ex. side plate). It would have been easier to layout and inlet the side plate. I stained the stock with Aqua Fortis stain from Track of the Wolf. Three applications of the stain at full strength, with heat blushing after each application. The finish is two coats of Finishing Oil from Keith Casteel (purchased at the Dixon's Fair) and a coat of Tru-Oil.

Here is the kit as it arrived from Chambers:
P1030788_zps9693371b.jpg
[/URL][/img]

Now for a few shots of the finished rifle

f88018d7-9ea3-4a2e-a586-83d19599794e_zpsda6ccbf7.jpg
[/URL][/img]

P1110551_zps2b3749d8.jpg
[/URL][/img]

P1110543_zpsffd579de.jpg
[/URL][/img]

P1110540_zps0295e763.jpg
[/URL][/img]

P1110553_zps4239fef0.jpg
[/URL][/img]

P1110522_zpsf3a8f2ae.jpg
[/URL][/img]

P1110523_zpsd4effd17.jpg
[/URL][/img]

P1110546_zps86d21ba4.jpg
[/URL][/img]

Here is Brew's rifle next to my first build. Brew named his rifle Maryann. Mine is named Ginger. (can you see the Gilligan's Island connection).

778b1895-99ec-4483-ab4c-2e53553aa4de_zps0f9a964f.jpg
[/URL][/img]

Christmas came early for Brew.

P1110561_zpseb66258f.jpg
[/URL][/img]
 
:hatsoff: All I can say is WOW!!

You have some talent there, and while two years is a long time, I think it was worth it... (I might be a better craftsman if I had your patience)
 
Gentlemen,

Thanks for your compliments.

Id love to see your 10th rifle if this is your second

I hope I'm around long enough to see my 10th build, at the rate I work. Good thing my bills aren't paid by making rifles. Patience is definitely key, and when combined perfectionist tendencies and the fear of taking off wood that I can't put back on, a task that would take an experience builder minutes to complete takes me one or two nights.
 
What can I say?

I am the happiest and most fortunate guy on the Forum. Fortunate to have such an beautiful piece of functioning art work, but more importantly, fortunate to have a friend like Steve.I will cherish Marry Ann till the very end and then it will be passed on for generations to come.

Steves craftsmanship is absolutely amazing regardless of the fact that this only his second build ! He has the patience very view of us can ever dream of. He also has a very understanding wife I might add. One that allows him to express his creativity and talents. I am forever indebted to them both.
What great people. I cant wait to be in the woods with my buddy Steve, his girl Ginger and my new love Marry Ann.
Hopefully we will be posting pictures of some meat made by one of our two girls.
 
Very nice work! Brew is lucky.

My only real critism is, and it could be the light, the lock seems to have the same finish as Chambers ships 'em new. For next time, may I suggest that you polish some, rust the externals to give it some texture, apply some cold blue and rub it back. It will give it that forge case-hardened look.

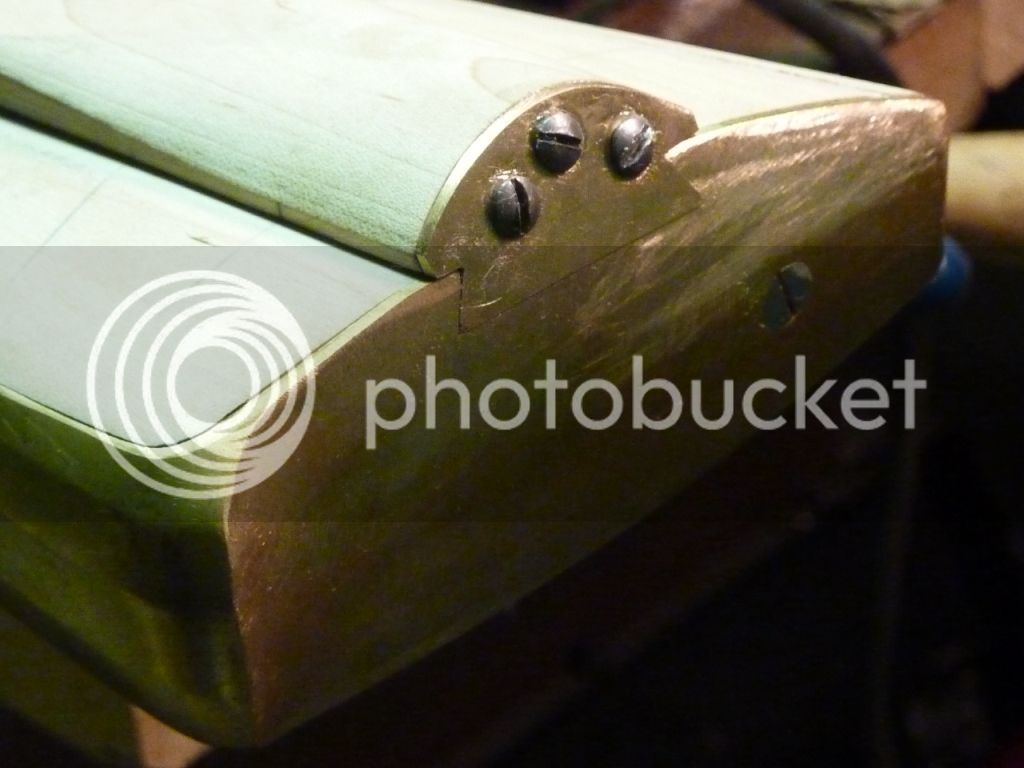
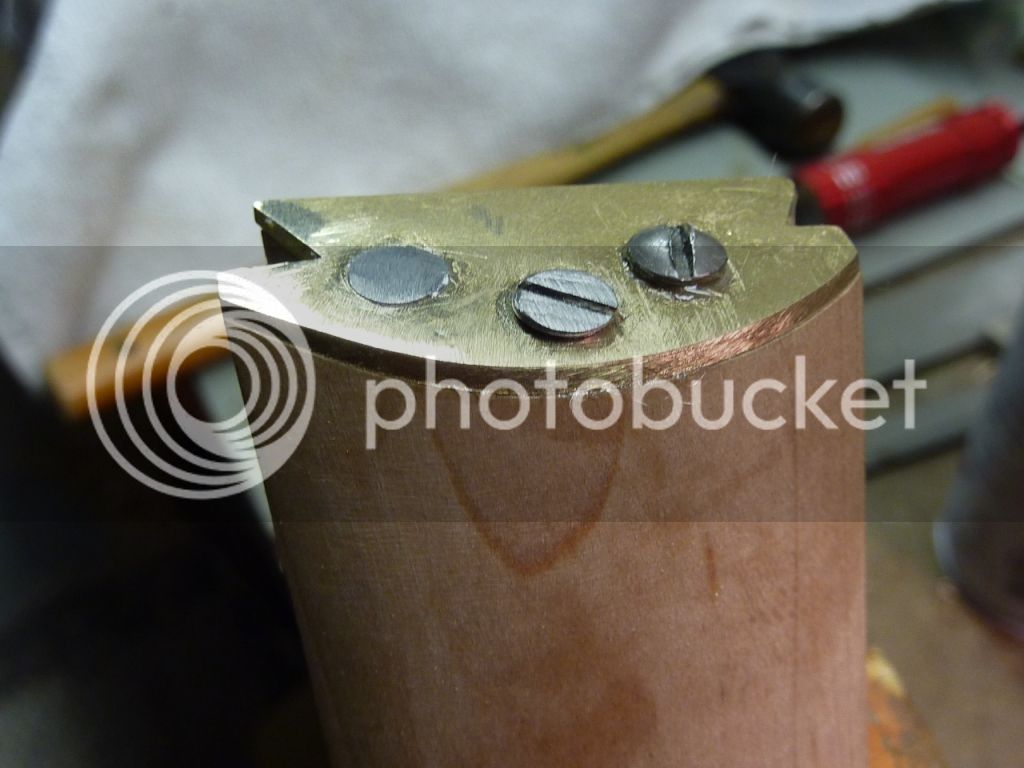
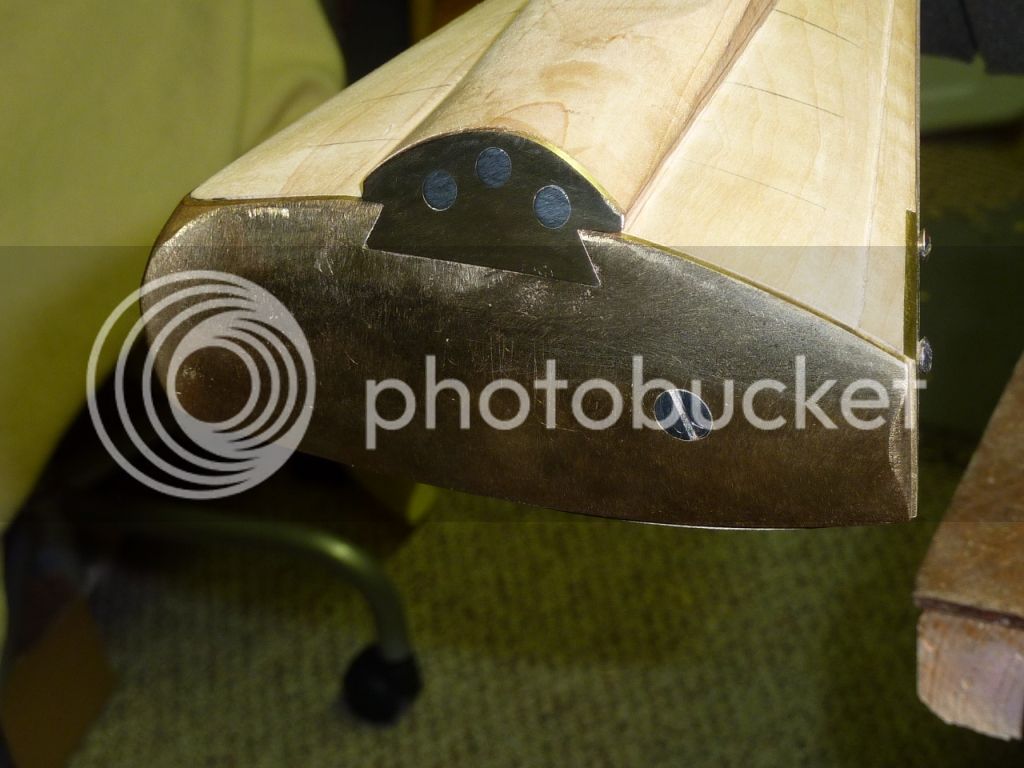
Please tell me about the treatment on the brass on the end of the patchbox....the three round steel circles. What did you do there? I like the affect.

Again, great work. :thumbsup: Keep it up and Enjoy the Journey! J.D.
 
If that don't make you grin---nothing will. A good friend & a superb rifle. Targets & meat next....Tom
 
What great work! :hatsoff: I love the simple, yet very elegant carving.

Your post was so very timely because this kit is the next on my list as my second build. Just ready to place the order. May I ask if the stock is the standard (vs the upgraded versions for hard maple and/or more curl?)

P.S. I won't be naming mine Gilligan! :grin: :wink:
 
My only real critism is, and it could be the light, the lock seems to have the same finish as Chambers ships 'em new.

Good eye, JD. Yes, I did not do anything to finish the outside of the lock. One of the first things I did was to take down the lock and polish the inside surface of the lock plate and the contact points, but I figured I'd return to the outside at a later date. Turned out I had to meet a "deadline" because Brew was going to be in the North Jersey vicinity and I did not have time to work on the lock finish before handing her over. Something he can work on himself during those cold winter nights in Vermont.

Please tell me about the treatment on the brass on the end of the patchbox....the three round steel circles. What did you do there?

The round steel circles are wood screw heads that were filed flush after setting them into countersinks in the brass plate. The taper of the screw head setting into the countersink essentially acts as a rivet. To avoid any gaps between the screw head and the countersink, after filing down the protruding screw head about two thirds of the way I peened the remaining head to fill any unseen gaps (hard to see until it's too late). Here are a couple of pictures of the procedure:


If anyone's interested I can make a new post on the whole procedure I used to make the two piece wood patch box lid and box cavity. Let me know.
 
May I ask if the stock is the standard (vs the upgraded versions for hard maple and/or more curl?)

Spikebuck,

From what he can recall, my friend thinks he ordered a mid-grade stock. For what it's worth, I suggest ordering along with your kit the Ron Ehlert DVD on how to build a Jim Chambers kit. I pretty much followed it step by step and it was invaluable for me to see the procedure on film first before doing it myself
 
You do very nice work. You must have a good friend, I hope he appreciates the effort that goes into making a flintlock. I saw your other post where you were practicing your relief carving, you have come a long way. Congrats on a job well done.
 
Back
Top