folding skillet

Muzzleloading Forum

Help Support Muzzleloading Forum:

This site may earn a commission from merchant affiliate links, including eBay, Amazon, and others.

skunkskinner

50 Cal.
Joined
Aug 10, 2005
Messages
1,107
Reaction score
2
DSC00238.jpg

DSC00239.jpg

DSC00240.jpg


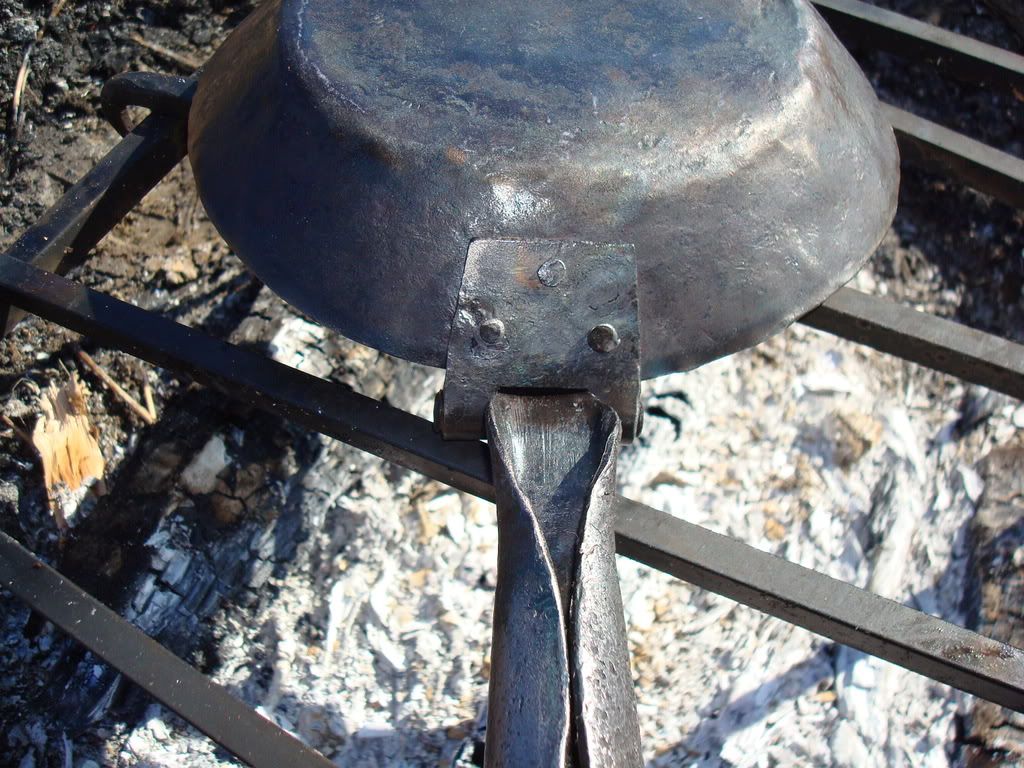
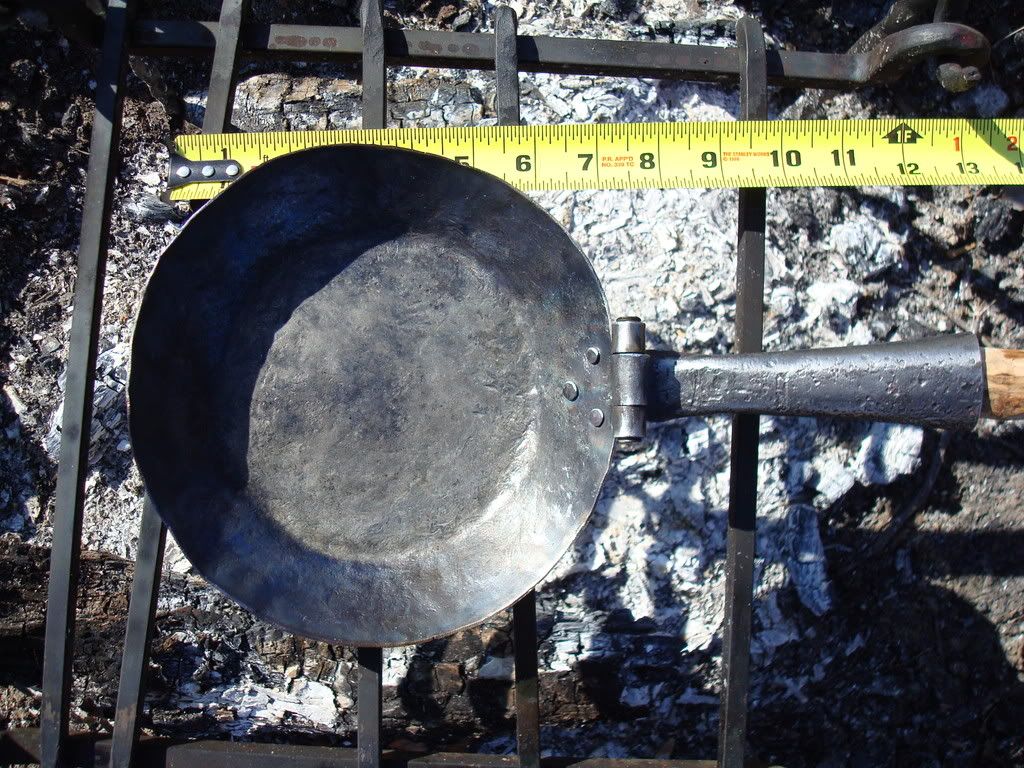
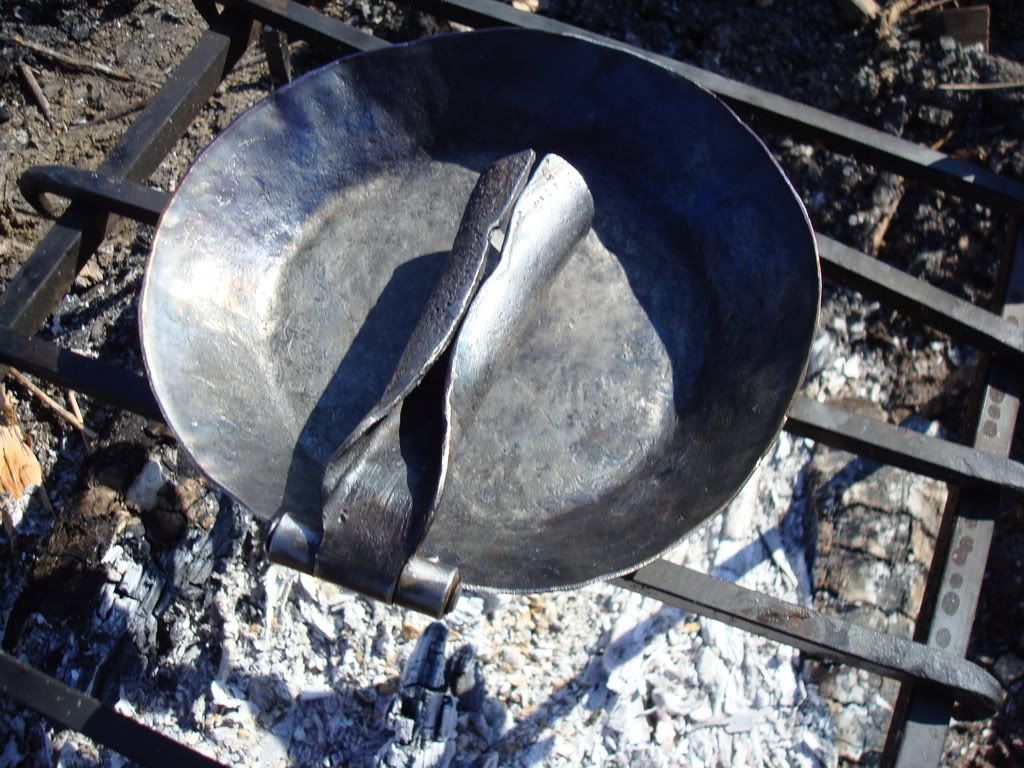
The pan part of the skillet I cut from the top of an 50 gal. oil drum. The thickness seems to be just right. I tried to shape it with a hamer while cold, after 45 minutes of beating it with little progress it was time to start up the coal forge,(worked much better). The part of the hinge that is riveted to the pan is store bought, I welded there holes shut and drilled the 3 for the rivets. I used #9 wire for the rivets, it worked better than I expected. For the handle I cut a piece of old 1" x 1" square tubing, cut down the length, heated, spread open, flatend, cut to shape, then heated and turned it in side out to what it used to be. This was because there much rust pitting on the inside that I wanted to show on outside.

The total construction time was 6 hours, not a bad way to spend an afternoon. Bacon was the first food to cook, roasting green coffee beans finished out the day.

Hope you enjoy the looks of it.
 
Skunk skinner do you have any authentication for the folding handle skillet? I know lots of people that would love to see it if ya do. Best guess is most guys go by the picture n statement,aw dang I can't remember his name but it was in one of the known acoutrament books. No one else can seem to find anything documentable on them n feel they are a 1900s "rondevous" piece of equipment. For trekking or just going out for the day they seem great, nice n packable, but historicly no one has been able to pin one down yet, maybe yer the lucky guy who has?.Great job by the way, real nice work n cool idea useing the drum lid for the metal, great idea YMHS Birdman
 
There is one existing folding handle skillet that was pictured in the Madison Grant book, but the provenance was considered shaky. The skillets of the day would have most likely been whatever you could get away from the wife.

As to convenience, I prefer a handle that doesn't have a mind of its' own. I have seen those folding handles work very well when they shouldn't have....

That said, the skillet shown looks well made. Making a fixed handle with a socket would be very handy.
 
Birdman, sadly I must say no I don't have any authentication.

But I got her ready and good to go when someone does find that one well placed sentence. :wink:
 
Thanks Black Hand thats the reference I was thinking of, LOL getting old sucks :doh:
 
Wasn't there one in the "Sketch Book" series?

I know I saw a reference and drawing somewhere, but can't remember.

Skunkskinner!...How did your horn turn out?
 
Nice work on the forging. And with the heat from the forge required to mold the metal, any oil residue should have completely burnt off, so no worries about that petroleum stuff when cooking.

I do like folding handled skillets. I've had one for over 2 decades. They are handy and pack a whole lot better.

But documentation is lacking. The one and only piece anyone has come up with is that one pictured in Madison Grant's Hunting Pouch book. But it IS NOT described or labeled as a skillet. It is listed as a folding handle "Mess Kit", and used during the Rev War according to handed down oral history within the family.

So the only documentation points back to that one picture in one book, and is based upon a story passed down within a family.

Yes, it could have been used as a skillet, but that goes against military rules and practices of the times. Frying food in that time period was viewed as "unhealthy" - especially in the military. Ditto grilling the meat. The meat issued to each 6 to 8 man "mess group" was supposed to be boiled - per military regs, and their officers were also supposed to monitor the men to make sure they cooked their food properly an in the prescribed military manner (boil it till it is gray and almost mush). But boiling the issued food did make the most of the issued supplies, and fed the men in a more equal manner. But we also know just how well those soldiers follow proper rules when nobody is watching. Note the Barrel Hoop Grills recovered at Rev War sites. And that shovel turned into a frypan also found at a Rev War fortification.

Yes, the folding handle skillet is one of those "holy grail" items that sooooo many people are looking to document. It just hasn't happened yet.

Great smithing work. Projects like this test your skill and your imagination - and make a great "tinkering" project. But you have to make it for yourself. People couldn't afford to pay for all the time you end up putting into making it.

Now, one "skillet" project I still want to work on is replicating that original documented one that was made from a shovel head. The original had the sides bent/forged up all around to form a lip - and make it into a very shallow pan. The socket for the original shovel handle was still there. So it could be used with a green stick shoved into it. No, nothing folded on the handle, but that socket only ends up sticking out a couple inches - while a true frypan/skillet handle of that time period would have been long (as in 18 to 36 inches long). Plus, if needed, you could still scrape out a trench with it if you really had to. Yeah, I gotta get that added back onto my "projects" list.

Just my humble thoughts to share, and best used in conjunction with your own research.

Mikey - yee ol' grumpy German blacksmith out in the Hinterlands
 
How did you form the skillet? I've also tried beating cold, heavy tin on a sand bag with a ball peen. It worked but not very well. I want to make one of these things but can't get my brain around the subject. I've seen plans to make one, but you have to make this huge contraption that has a "C" clamp that holds the tin to the top of a wooden piece of sorts that will form the bowl. You would then heat the metal edge with a blow torch. I don't have a welder and I don't have a blow torch so that pretty much does it for me.

Any suggestions would be really appreciated.

Regards
Loyd Shindelbower
Loveland Colorado
 
I do a lot of cold forming of sheet iron - on the anvil, in special steel swedge blocks, and in wood blocks.

Take a large wood block, and saw/carve a shape into the end grain. You can then hammer down into that shape. Just tweak the shape of the depression you formed in the wood to get the results you want.

Last year I made a replica of a late 1600's to early 1700's French frypan for a friend (fixed handle). To form the sides up, I carved a wide V shaped groove in the end of an oak stump. I then took my round blank of sheet iron, marked a line 1 1/2 inches in from the edge, and then carefully and slowly hammered along that line to ... push ... the metal down into my V groove. Since my V groove was mostly straight, I only hammered about an inch of the pan at a time, and kept rotating it. I only raised that side on the pan a little at a time - instead of trying to do it all at once. When I had the sides high enough, I made another wood form to help smooth and even the sides up. Having a well-rounded peen on my one hammer really helped push the metal down into that V notch, and keep hammer nicks and marks to a minimum.

Of course, this all goes a lot easier if the metal is hot. So the second one I did I forged hot. The metal moved faster and better. But my wood form scorched back a lot. But, in the end, that helped form the wood mold to a better shape to make the slanted sides of the pan.

That classic method to form a skillet using that inside form and big C clamp works, but is not really necessary. That is a way of forming your skillet by hammering it to shape from the outside of the pan. Hammering from the inside of your pan, and down into a V type form does the same thing. It just might take a little more careful work.

The hard part is that you have to "shrink" the outside edge of your metal as you slant it up and in to form the sides. That is the really hard part. It's also best done with heated metal.

And you don't really need a forge or torch to heat up sheet iron to forge. A hot campfire will easily do the trick. The sheet iron is thin enough to heat up pretty easily in a hot campfire. But you might occasionally need to add a little extra air to perk up the fire to burn a little hotter. It will also take a little longer to heat the metal up hot enough, but that gives you a little more rest in between hammering, and more time to think through what you need to do next.

I hope these humble thoughts help. Good luck with your project.

Historical note: A lot of early frypans (with fixed handles) had rounded bottoms. They were much more like a shallow bowl. A small oriental WOK could easily be converted into one. Just remove the loop handles, rivet on a long straight fixed handle, and then rivet on three legs so that you can set it over the coals as you cook in the fireplace of your cabin. Check out the pictures of originals in Collectors Illustrated Encyclopedia of the American Revolution, and Early American Antique Country Furnishings by Neumann.

Just my humble thoughts to share. Take them as such.

Mikey - yee ol' grumpy German blacksmith out in the Hinterlands
 
Horner75,

I seen a sketch of one in A Pilgrims Journey. The horn turner out good, I put a picture on the origanal post. Thanks for the help. :grin:
 
Loyd,
I did all of my shaping on top of a peice of rail road iron. I did all the hamering in the........ the bottom is flat...then it turns upword....were that bend is ,is were I did the hammering. I did'nt stretch the top of it at all,just some hamering to keep it in shape. I held one end of the tin up an inch or so from the RR iron and hit it at the bend point, and just kept turning in a circle. All the stetching was done at the bend part. I hope that makes sence.

To make forge, dig a hole in the ground one foot deep by 18' across, cup shaped. Get some 2' pipe with 3 elbows, place an hair dryer on the end of it with some duct tape. Configure it so that the air comes up from the bottom of the hole. Put some charcole brickets in, get it burning and put the air to it and you should have a very hot forge.
 
Mike, when you get that shovel handle skillet done, show us a picture. Sounds like a cool prodject. :thumbsup:
 
Thanks for the help guys, I'm off to try it tonight if the wife gives me a moment of rest. All kinds of ideas are going through my head like making a swage block out of wood that mimics the outside angle of the skillet. Stuff the swage block in the hardy hole on the anvil and rotate tin around as I'm forming it down along the edge of the swage block. That should mimic the inside demensions of the wooden pan shaping device, that Mike mentions above.

Thanks again.
Loyd Shindelbower
Loveland Colorado
 
And another "tinkering" project is born.

Just remember that it is easier to hammer metal down into the inside of a V shaped mold than down over a sloped edge.

Yeah, a section of a railroad rail has a lot of interesting ... angles ... to work with, and some pretty good mass to back up your project. And so does a classic shaped anvil. Don't be afraid to turn it on its side to get a curved area to work with - or even upside down. Your imagination is the only thing holding you back.

I've also used pieces of farm machinery and engines to get the right angles and curves to work with.

If you still need to have that inside angle/form for the sloped side of your skillet, just make a short "pie shaped" section of it. Take a thick flat bar, and bend the end to that angle/slope. Smooth off and round each edge a little and you have your form to hammer over and down to. There's no real need to make a metal mold the size of the whole inside of your pan. That little "slice of the pie" is all you really need.

And keep whatever you are hammering against SMOOTH - whether metal or wood. Any dings/dents/pits/gouges/etc. in it will get transferred to your work piece.

Have fun.

Did I mention the one warning? Blacksmithing is ADDICTIVE!

Mikey - yee ol' grumpy German blacksmith out in the Hinterlands
p.s. Yes, I'll post a pic of that shovel skillet when I get a round "toit".
 
Back
Top