• Friends, our 2nd Amendment rights are always under attack and the NRA has been a constant for decades in helping fight that fight.

    We have partnered with the NRA to offer you a discount on membership and Muzzleloading Forum gets a small percentage too of each membership, so you are supporting both the NRA and us.

    Use this link to sign up please; https://membership.nra.org/recruiters/join/XR045103

Freshen a barrel

Muzzleloading Forum

Help Support Muzzleloading Forum:

This site may earn a commission from merchant affiliate links, including eBay, Amazon, and others.

Guest
I am still looking for a guide on how to freshen a barrel. I have no intention of actually doing this, but I would like to understand the process. A few weeks ago I bought a book written by a chap named T.B. Tryon called The Complete Rehabilitation of the Flintlock Rifle. Unfortunately the author has written the book using a style of writing that I assume is supposed to mimic the way people spoke (and wrote?) when we were living in caves or trees. Some of the information is good, if you can get past the authors cutie attempt to be a contemporary of Daniel Boone. His discretption of how to freshen a barrel is complete nonsense. Can someone suggest an alternate source I can take a look at on the subject?
 
Barrel freshening is not hard to understand,The barrel is unbreeched, the top of the lands or rifleing is smoothed off if it is rough, A lead slug is cast around a short piece of rod while inside the barrel and then removed . a saw like device is inserted in one of the raised portions of the slug and drawn through the barrel, thus cutting into the groove inside the barrel. do this over and over untill you have removed steel from the bottom of each groove. Simple no? It's also a lot of work and time . and a very good way to screw up a barrel. specially your first time, find someone for hands on teaching first. Very very old Bob . Good luck, been there done that.
 
I'll see if I can find my tool I made to do this very same thing and get a pic of it for you.
 
Hang in there, the new Mark Baker Video will have a section on doing just this. It's on Mark's old rifle and from what I have been told will be out early summer 2007. Jim Wright ran into a few delays , death of a friend and death of a family member if I remember right, but hang in there it will be out and well worth the wait.
Jeff
 
Alright... this may take some time...

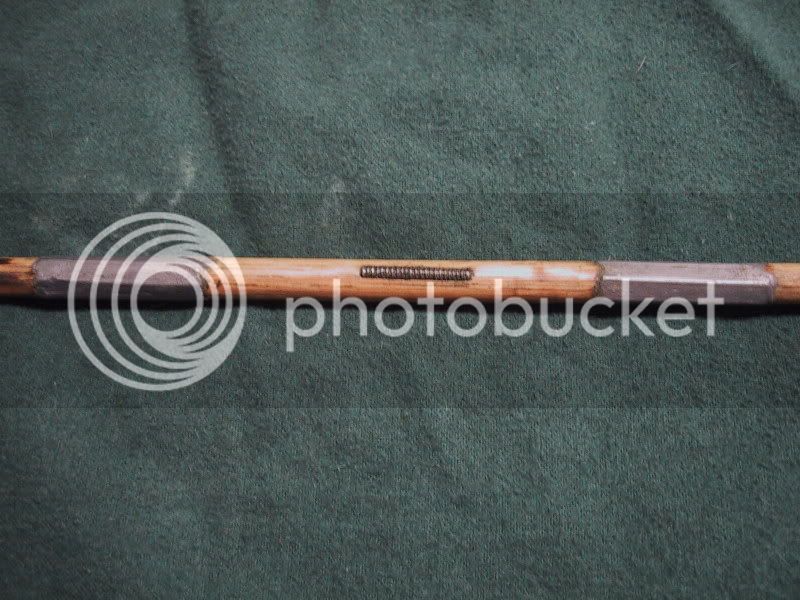
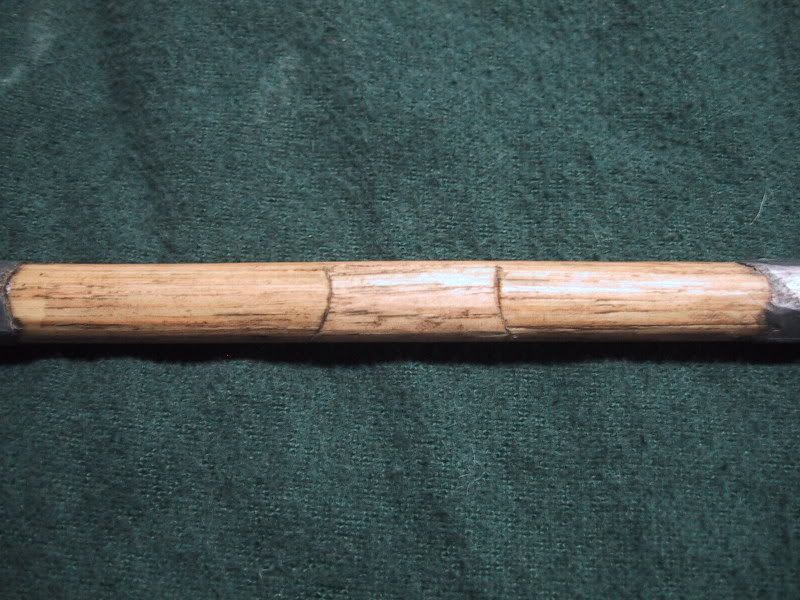
First remove the breech plug and vent liner. You make a hardwood(hickory) dowel slightly smaller diameter than the bore of the barrel. About 3.5" to 4" apart from another cut away two area's for the "lead slugs" about 2" long a piece. I like to cut sqaures so the lead will not turn around the dowel. Start the one of the cut away areas down the bore and pour the lead slug. Clean up the slug so that it smoothly follows the rifling. Push the slug down the barrel so it allows the other cut away area on the dowel into the bore and pour your second slug. Clean up the second slug. Draw lines between the lands and the grooves on the dowel make a cutter for the grooves and inlet it into the dowel.

IMG_2127.jpg


cut a dove tail on the back side of the cutter so that it can be removed to release the pressure on the cutter on the bore. This is also a good place to add shims (ciggarette papers) to make new cuts.

IMG_2128.jpg


I'll write more later.
 
I always cut in one direction from the breech to the muzzle. You have to add a lube to the cutter, I use Crisco. After each pass clean off the cutter and the slug, white gas works well to cut the Crisco. Always leave a slug in the barrel to have it lined up on the same groove. I usually take 2 to 3 passes on each groove or land per shim. Keeping a slug in the grooves will help keep everything even on cuts. I tend to rotate the tool only at the breech keeping count or marking the starting flat on every pass to keep track. Each time cleaning the cutter and removing the dovetail for pulling the tool back through. When you add a new piece of cig paper the cutter darn near feels that it hits a wall. When you feel that the grooves are properly done and are even to one another its time to make a new stick and cutter for the lands.
After about a week or so you'll have a freshed barrel. :rotf: :blah:

My first barrel I did was a Green Mtn 45 cal. I used before freshening .440 balls and a .010 patch. After freshening I am quite sure that I had one of the only round bottom rifling GM barrel that now uses .451 balls and a .020 patch.

This taught me at a young age to keep the barrel clean :haha:

Anyone: if I missed any steps please feel free to add on. :thumbsup:
 
LoL not to worry..Kind of hard sometimes to understand an excited Southern boy..
 
Clutch said:
Could you mention how you go about making your cutter? Great thread!

Clutch

I made it from a piece of tool steel. Hand filed all of those little teeth and hardened it. Not too much to it, just tried to keep the teeth as smooth as possible before hardening so it would leave cleaner cut marks.

I also used a bit of super glue in the slot where the cutter went in to harden the wood a bit more so that it would'nt compress as much.
 
any chance of getting a pic of the dove tail with a couple of shims in place ? I'm having trouble getting that part straight in my mind ?
 
I just used ciggarrete papers and with barely any glue stuck them to the bottom side of the removable piece and trimmed to shape. You wouldn't think that would be much of a shim, but its more than enough for a new pass.
 
There is a paperback book "Lock, Stock, and Barrel" that covers restoring a rifle to Shooting condition that describes the process if I recall correctly.

Regards, Dave
 

Latest posts

Back
Top