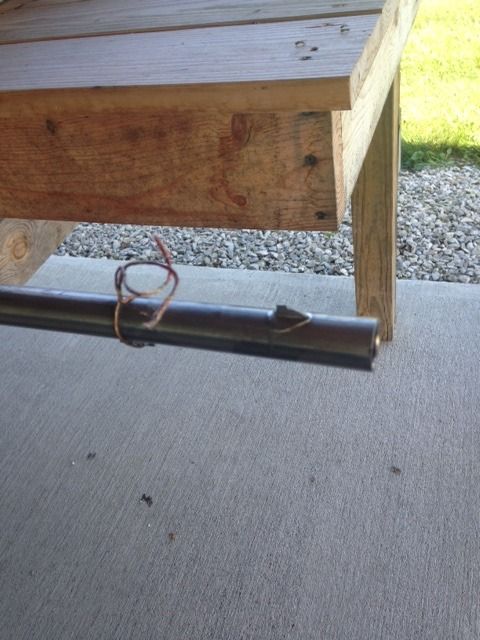
OK, having soldered I don’t even remember how many replacement front sights on UnCivil War period Arms and some Brown Bess Muskets, here are some things I learned along the years.
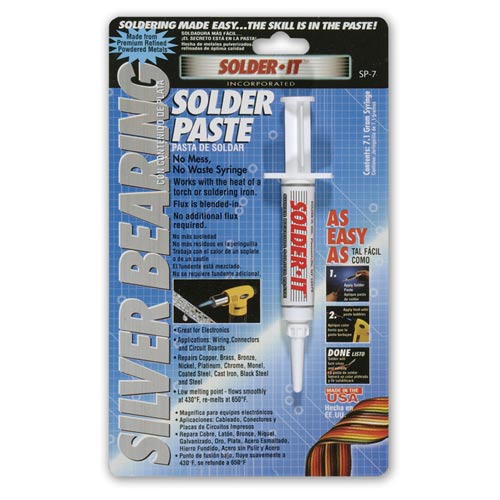
First, you need some good LOW TEMP Silver Solder. Over many years, I found what worked best for me was Brownells 080-649-001WB 1 oz. Hi-Force 44â„¢ Wire AND the flux they recommend for it, but I don’t remember the name of the flux now.
https://www.brownells.com/gunsmith.../solders-flux/hi-force-44-solder-prod709.aspx
OR ”¦.. Here’s a Low Temp Silver Solder Kit that Forum Member Wick Ellerbe recommends that has the flux and flux brush in the kit. You can get it from Home Depot, Lowes, etc., etc. On Wick’s recommendation, I have this kit sitting in front of me now, but I have not used it yet.
H-20/5 Water-Soluble Paste Flux Kit with Safe-Flo Solder
http://www.homedepot.com/p/Oatey-H...lux-Kit-with-Safe-Flo-Solder-506912/202515582
Next you need a heat source. I have seen folks use low temp silver solders with just a propane blow torch, but it did not work for me as I was trained with an Oxy Acetylene Torch to Silver Solder. What I found worked best for me was the Bernz-O-Matic combination MAPP Gas and Oxygen Kit as shown in the photo link below. I used one of these kits for well over 20 and maybe 30 years and finally had to replace the kit as I dropped it and cracked one gauge head. I checked with Home Depot, Lowe’s etc. and while Home Depot stocked them, they could not get them in Richmond. So I bought a similar kit from Harbor Freight for around $ 80.00. (BTW, I learned to purchase the special and inexpensive sealant tape for Gas Lines, that can be found in hardware stores, to wrap around the threads on the bottles before screwing them into the gage heads. This tape is sold in the plumbing section.) Fair warning with these kits, the Oxygen Bottles will leak out AFTER you use them. Sometimes the unused Oxygen would be good for the next day or sometimes two, but will leak out beyond that. So when I took this kit to the National Championships to use for soldering sights, I always brought at least one bottle of Oxygen per day to use soldering sights and hardening/tempering parts. Of course if you have access to an Oxy Acetylene Torch, this is not a problem.
https://static.grainger.com/rp/s/is/image/Grainger/3X673_AS01?$mdmain$
OK, now both because a thin layer of solder is usually the strongest AND to help position the front sight and keep it in place to solder it on, I learned to do some important things by trial and error.
First, the bottom of the sight will normally not match the curvature of your barrel. So get a piece of 220 grit Emory Cloth (sand paper for metal) and use a piece about two-three inches wide to “shoe shine” sand the top of the barrel where the sight will go to clean it. Next, wrap the Emory Cloth around the barrel in the area where the front sight will go and this time, MAKE SURE the grit side is facing away from the barrel. Rub the bottom of the front sight forward and back over the grit side near where the sight will be soldered on. This will sand the bottom of the sight very close to the curvature of the barrel. You will see when it has been sanded all along the bottom of the sight to match the curvature and stop sanding at that point. BTW, this will also help clean the bottom of the sight for soldering.
Tenngun is right you then need to “tin” the bottom of the front sight with a small drop of heated solder and work the flame around so it coats the bottom of the sight as evenly as possible. Then put the front sight back on the Emory Cloth covered barrel (with the grit facing away from the barrel) and sand the bottom of the sight a bit, so it is a little closer to the curvature of the barrel, just don’t sand off most or all of the solder. This will also clean the outer surface of the solder a bit. Flux the bottom of the sight and the top of the barrel where you want the sight to go.
When I first began soldering front sights on barrels, we tightened the barrel in a vise and either I or my Mentor would sight along the barrel while the other held the front sight with a very large pair of sacrificial pliers and held the sight to solder it on. You see, the problem is the front sight will move when the solder is melted and before the solder cools, if not held in place. When I did it alone, at first I used a similar technique, but sighted from the front of the barrel to get the front sight in the right place while I held it in the pliers. Tenngun wrote about using a small “C” clamp to hold it in place and that works well, especially when you file/groove the moveable jaw to hold the front sight and you sand the solid jaw to fit the curvature of the barrel. I thought about making up a spring loaded jig to hold the sight for soldering, as shown in the link below, but just never got around to doing it.
http://media.midwayusa.com/productimages/880x660/Primary/840/840929.jpg
There is another way to hold the front sight for soldering and I think it was called a “blacksmith’s soldering hook.” It is a piece of bar or round stock and one end is bent down 90 degrees or more and a groove filed to fit the top of the front sight. From that bend, the rod or bar goes back straight for a while and then is bent about 60 degrees to the side. Another piece of rod or bar is welded/soldered on that goes 60 degrees in the other direction. The idea is that the two side bent pieces form legs and the hook rests on top of the sight and holds down it by gravity, even as the solder melts and the sight settles. Sorry, could not find a photo of one.
Gus


 Just wanted to recommend another choice. :hatsoff: