Going a little nuts

Muzzleloading Forum

Help Support Muzzleloading Forum:

This site may earn a commission from merchant affiliate links, including eBay, Amazon, and others.

petes

Pilgrim
Joined
May 4, 2010
Messages
9
Reaction score
1
341C9E1A-2CC7-4A50-AF12-C29B9BBCDF43.jpeg
at christmas i bought a traditions mountain rifle kit in flint. I realize it is not sn actual “build”. I would however like to assemble it correctly and not endanger myself or others when i can actually fire it.
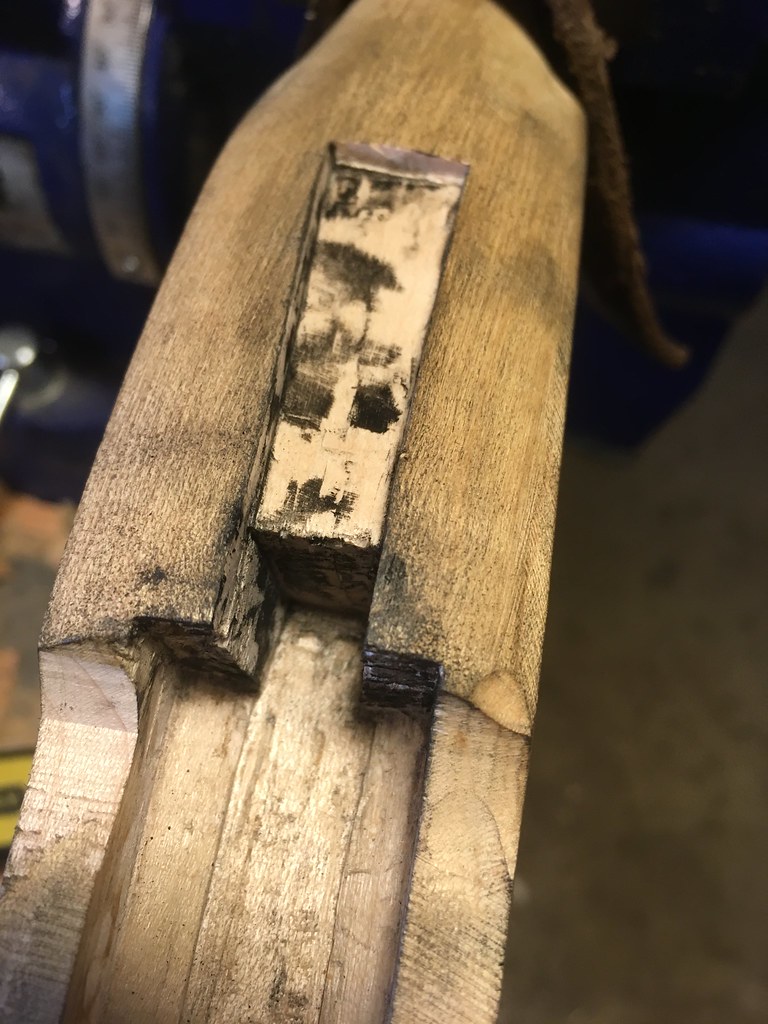
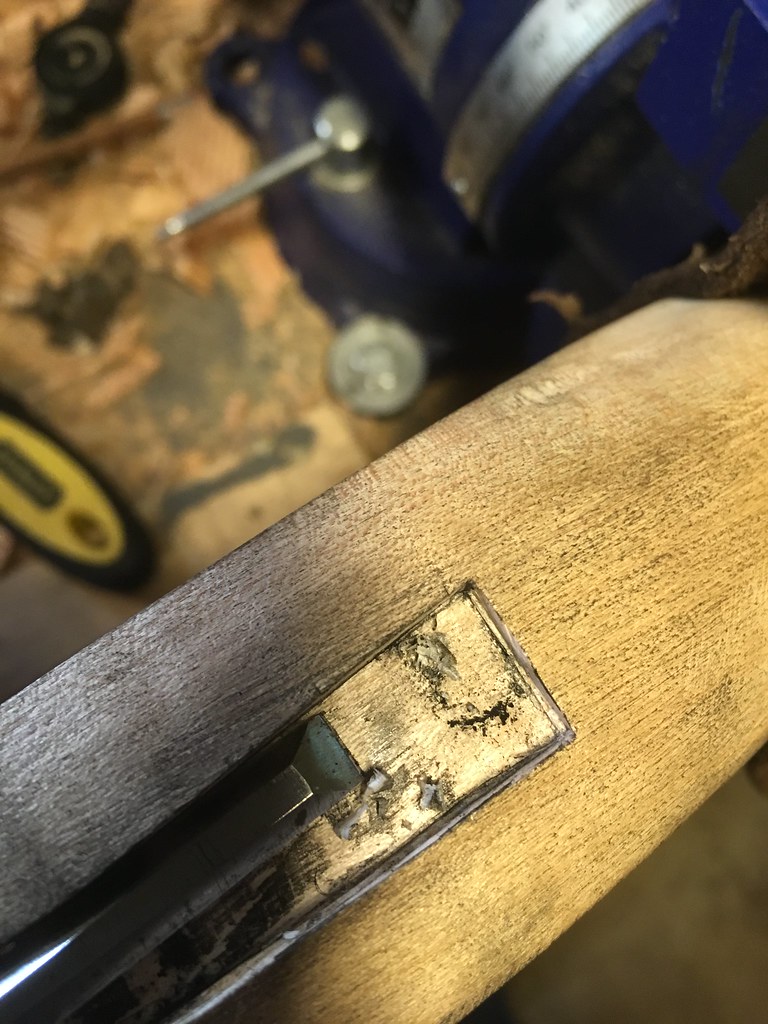
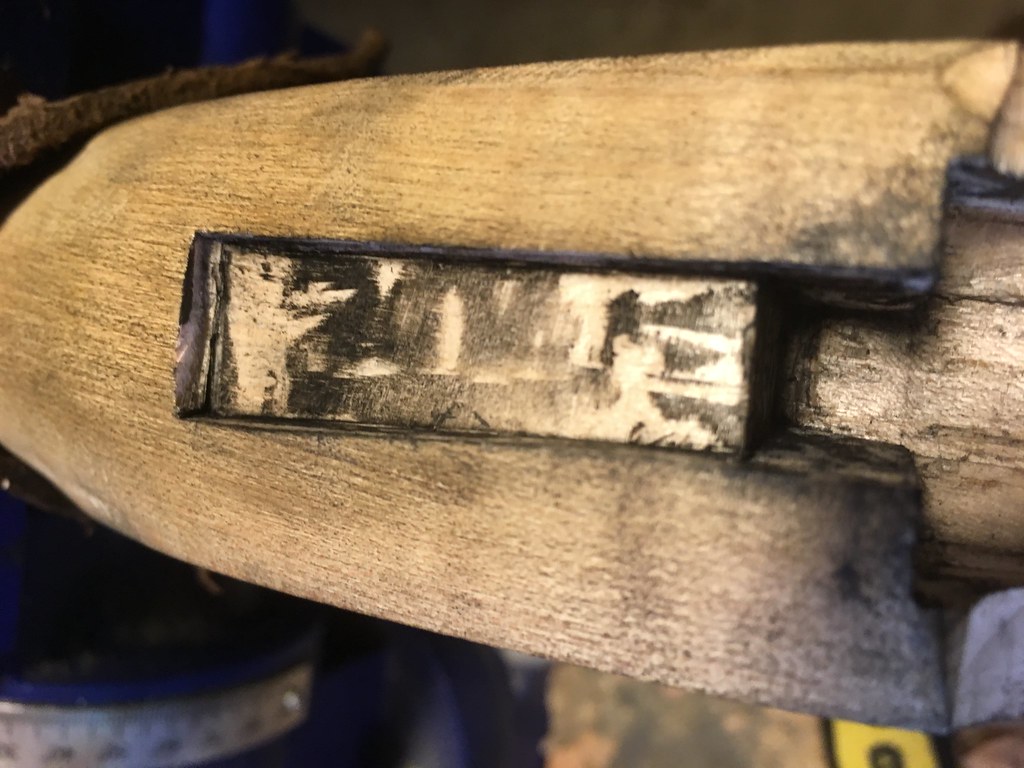
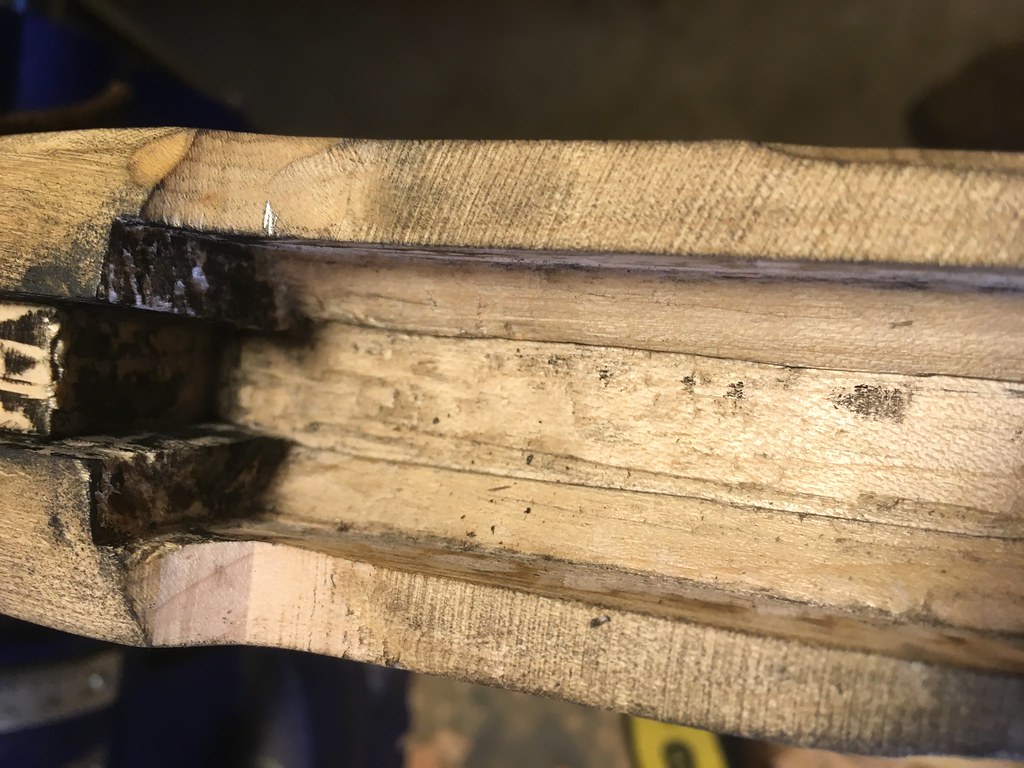
My problem is the tang that the hooked breech goes into. The barrel sits perfectly with the lock and flashpanthe triggers function perfectly. There is a gap between the stock and the tang that I cannot eliminate. It is making me nuts. The inletting on the kit left a bunch to be desired but I’ve been patient. I haven’t had any time to work on this for the past two months but hopefully I’ll get it done in a couple of weeks. Here are pictures of the gap I mentioned. Any input would be greatly appreciated. I do know now that I should’ve bought a better quality kit.
 
This picture shows the gap better
 

Attachments

  • 57E1A212-567C-4C18-884D-B7DB52AC30AD.jpeg
    57E1A212-567C-4C18-884D-B7DB52AC30AD.jpeg
    61.4 KB
Is the gap big enough to put a thin piece of brass, or nickel silver ? You could put bedding compound on the bottom, and put a decorative shim/ trim at the top.
 
Is the gap big enough to put a thin piece of brass, or nickel silver ? You could put bedding compound on the bottom, and put a decorative shim/ trim at the top.


I could do that! I wasn’t sure if filling the space was the right thing to do or the lazy thing to do :)
 
Thank you!
I wasn’t sure if filling in the gap was the correct thing to do.
 
A man who specialized in gunstock work told me some fixes cannot be hidden. When that is the case he said to use bedding compound colored black, which would leave a decent looking black line. That's what I would do on a rifle like yours. Brownell's Acuraglass comes with powders to color it. Tempra paint powder can be mixed with clear epoxies for the same effect.

Alternatively, find a small piece of beech wood and set it in the tang inletting and recarve it for a almost invisible repair.
 
Thank you!
I wasn’t sure if filling in the gap was the correct thing to do.
Well, I know it's more work than you thought it would be to build your gun but looking at the pictures you posted, it looks like the rear of the tang is what is keeping the block from moving back to where it should be.

With this in mind, there are three different things that can be done.

1. Remove the metal block and get out your pocket knife. Using the sharp pointed blade and working at the bottom of the end of the slot with the radius in it, start removing some wood at the bottom of the mortise. You are trying to undercut the area a little.
I suspect once the excess wood at the bottom of that mortise is gone, the block will slide rearward and that will allow the block to slide back so that both shoulders are resting on the wood on both sides of the tang.
Sometimes, all it takes is a little wood removal to make a lot of difference so, keep on checking the fit as you whittle away the excess wood.

2. If simple whittling won't do the job buy a 1/8 inch wide chisel. Holding the chisel straight up and down with respect to where the barrel would be, plunge down thru the wood starting on one side of the slot where the radius meets the straight side of the mortise. You just want to nibble away at the wood so keep the cuts only about .010" (three sheets thickness of printer paper stacked together) deep. Work your way slowly around the radius. Keep eyeballing the shape your producing. You want it to be the same nice radius as the one that was there before you started. Remember, the top surface is the one that people can see so do your best to keep the shape so that it matches the end of the tang. Undercutting this upper area won't hurt anything so if the area below the top surface becomes hollowed out a bit, no harm done.
In fact, some builders (like me) intentionally make a small gap between the end of the tang and the wood. Doing this assures that both sides of the breech block will rest on the wood at the end of the barrel channel and it keeps the tang from pushing against the wood when the gun fires.
(If the end of the tang is pushing against the wood like it is now with your gun, it will concentrate the force of shooting the gun in a very small zone. That has been known to crack the wrist on the gun.)

3. Get a flat metal cutting file and something to firmly hold the tang block. Then, file metal off of the rear of the tang, keeping it as round as you can so that it will match the existing radius in the wood. Here again, it doesn't hurt to undercut the tang in this location. It should not be contacting the wood in that location anyway.

Hope this helps.
 
As was mentioned, a little work with a small chisel and exacto knife is in order. Its a pretty simple job really. If you do not want to do that, Acraglass bedding compound will do the job. Get the gel, not the regular stuff which is too thin and will not stay in place. I use acraglass to remove small gaps in inlets and also for barrel bedding as I always seem to remove just a bit more wood than I should at times.

Dont fret over this, it isn't a big issue. Its an easy fix.
 
Since you say the lock is in the correct spot in relation to the barrel I would go with the filler approach. Moveing the barrel/ tang back will snow ball the problems that are common to thes Spainish guns.
 
Either way you need to have a tight fit back there. It helps transfer the shock of shooting to the stock and spreads out the energy. As it is, you have a better chance of cracking in the tang area. I have used epoxy and brass shims, just depending on the fix needed. For this if you cant get it back more, I would use colored epoxy. You can use a little leather dye in epoxy as well.

Test your stock with the stain under the barrel, and see what color you need to match.

Fleener
 
This picture shows the gap better
You could experiment with some popcicle sticks; sanding to thickness; but, I wouldn't glue them in until I tinkered with stain or finish to see how they would match up with your stock. I did this once with a CVA Kentucky at the nose cap that had a similar, but wider gap. It turned out acceptable to me. You could notice the splice if you looked for it, but your eye wasn't drawn to it upon a casual inspection.
 
I would go with the filler approach

I agree with Phil and the others. Fill the gap. I'll suggest you use some Osage Orange wood. It can be sanded and whittled to fit. As it ages it will turn dark brown giving you a contrast with the stock wood and a blend with the browned barrel. With a factory made Spanish rifle there are some things that can't be fixed but they can be worked around.
 
I would like to see a picture of the touch hole in relation to the pan. It looks like the tang only needs to go back about a 1/16 of an inch. It may be something that wouldn't be detrimental to the touch hole / pan relationship. Of course I see the tang bolt is already in and i am sure it is lined up with the trigger plate, so it may make the most sense just to fill it.
 
Heres the pan and touch hole.I have chisels and have had to touch up the inlets in quite a few spots. Just using graphite to show where excess wood is. When it’s not screwed into the trigger assembly it sits flush in the spot. Hence making me nuts! I wasn’t sure about stress on the parts when fired if there was a small gap. My old stevens side by side would need occasional adjustments to keep the barrel tight to the breech. Explosions and loose parts are a bad mix
First time doing this and would like to do it again!
 

Attachments

  • 20F697B9-80D5-4CAE-BEF4-7882EFBDAF6E.jpeg
    20F697B9-80D5-4CAE-BEF4-7882EFBDAF6E.jpeg
    93.9 KB
I would like to see a picture of the touch hole in relation to the pan. It looks like the tang only needs to go back about a 1/16 of an inch. It may be something that wouldn't be detrimental to the touch hole / pan relationship. Of course I see the tang bolt is already in and i am sure it is lined up with the trigger plate, so it may make the most sense just to fill it.

Bingo!!

Petes...
There is no difference in the final fitting of a $10,000 rifle and this $5-700 kit. They all finish pretty much the same. This means to get superior results you have to do careful and superior work to finish it.
While "Gunstocker in a Tube" has it's uses I don't think you are there yet.

1. Get some JB weld or other epoxy.:rolleyes: (Yea I know but hold on...) A Torch,flux and some plumbing solder will work just as well as the epoxy, anyway, solder or epoxy, you'll need a propane or MAPP torch.
2. Glue or solder the hooked tang to your barrel like it would sit in the stock...the goal is to have the barrel and tang in one piece. (trying to fit the little part by it's self is more than aggravating)....fit the tang and barrel as one piece for now. After the solder or epxy sets..go back and file off the excess.
3. File a "draft" on the tang.... Untitled by Travis Brown, on Flickr
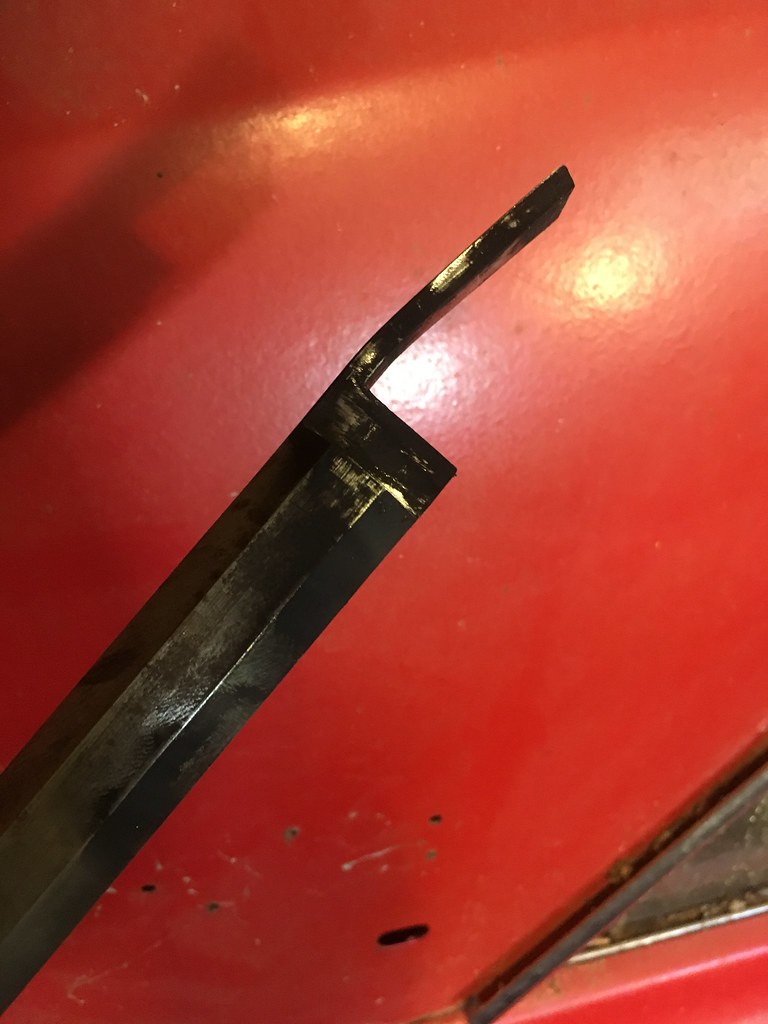
You should have something that looks similar to this. Look at the far end of the tang you can see the angle of the "draft" filed in. The top of the tang ot the surface that shows is left...The part that contacts the wood the wood in the inlet is filed smaller.

You are not filing the steel to fit the wood, You are filing the steel to make fitting into the wood easier. Next photo is a lockplate with the draft filed on it...
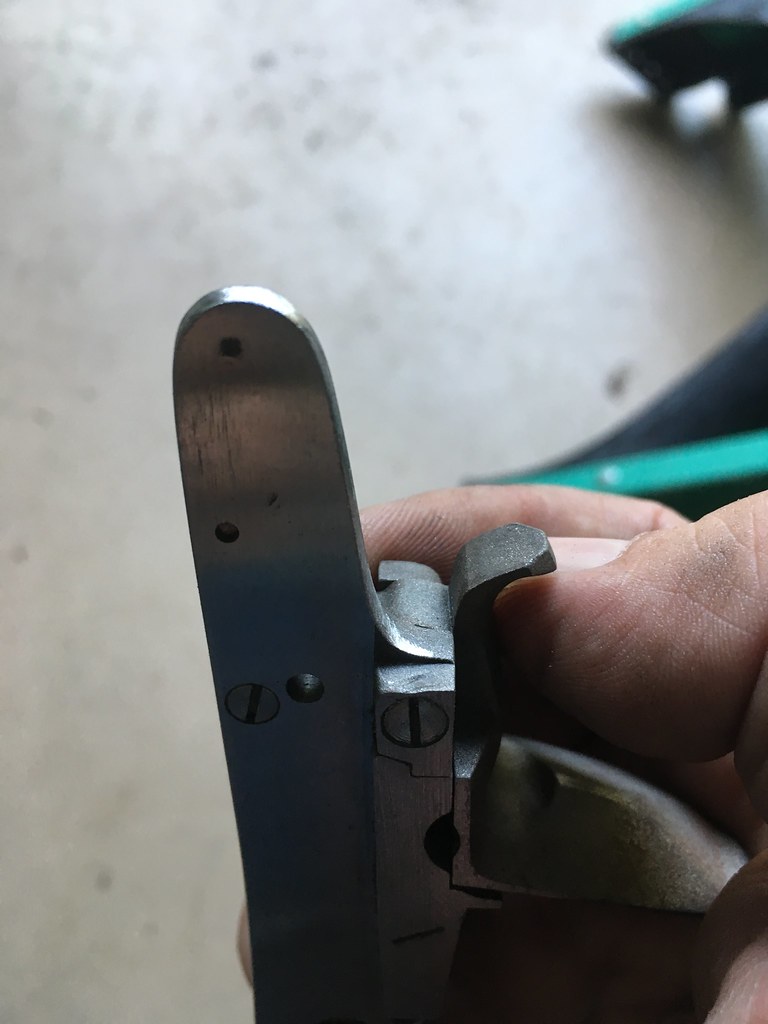
Untitled by Travis Brown, on Flickr

Now you can hold onto the part...
4. Set your stock in a padded vise that's mounted solid...
5. With a candle...Soot the tang and barrel breech. Lip stick and all that baloney...forget it..just use a candle it's easy and it works well on that white wood....
6. Fitting...
Your tang and barrel is one piece. You may want to try and dry fit it before you soot it to see what's going on. With the stock mounted solid and secure, hold the barrel above the channel, slide it back so the rear breech face of the barrel (glued on tang) makes contact with the breech face of the stock. Hold the barrel and tang above it's inlet. Ease it straight down. Likely the tang will want to rest proud if the inlet...Let the tang rest there..try to hold the barrel straight above it's channel (you may have to put something in the barrel channel to help support the barrel....Mark around the tang with a sharp pencil to see what need to be removed.
You can do the pencil mark above or do the soot to start with ...it's up to you.
7. fitting ....start reading the marks and removing the high spots...
Untitled by Travis Brown, on Flickr

As the tang goes down it wants to mark farther back..Look close at the photos above. You can see it going down and also printing at the rear.
I use chisels and I Have a gouge...you may can do with with small rounded files or very careful use of sand paper (maybe glued to a suitable shape? and fingernail files. Or, you could try Zonie's tips mentioned above.
The goal is have very good contact with the breech face of the stock.
After the barrel is fitted....
Heat the breech with a torch, this releases the hooked tang. Then clean it up and fit it to the stock.
 
Heres the pan and touch hole.I have chisels and have had to touch up the inlets in quite a few spots. Just using graphite to show where excess wood is. When it’s not screwed into the trigger assembly it sits flush in the spot. Hence making me nuts! I wasn’t sure about stress on the parts when fired if there was a small gap. My old stevens side by side would need occasional adjustments to keep the barrel tight to the breech. Explosions and loose parts are a bad mix
First time doing this and would like to do it again!
Petes,
Are you saying all fits well(no Gaps) until you tighten the tang screw?
If that's the case all may need to do is clean up and see whats going on with the trigger plate inlet and make sure your bolt angle is correct.
Also make sure there is enough clearance for the bolt. Don't drill it with a power drill but you can clean up the hole carefully by hand with a bit (drill).
You may have to go back and fourth...tang...trigger plate...tang trigger plate.
 
View attachment 6371 at christmas i bought a traditions mountain rifle kit in flint. I realize it is not sn actual “build”. I would however like to assemble it correctly and not endanger myself or others when i can actually fire it.
My problem is the tang that the hooked breech goes into. The barrel sits perfectly with the lock and flashpanthe triggers function perfectly. There is a gap between the stock and the tang that I cannot eliminate. It is making me nuts. The inletting on the kit left a bunch to be desired but I’ve been patient. I haven’t had any time to work on this for the past two months but hopefully I’ll get it done in a couple of weeks. Here are pictures of the gap I mentioned. Any input would be greatly appreciated. I do know now that I should’ve bought a better quality kit.
Repurposed an old swiss army knife just for situations like this.


SM
 
Is the gap big enough to put a thin piece of brass, or nickel silver ? You could put bedding compound on the bottom, and put a decorative shim/ trim at the top.
Look up hobby lobby or even better model expo on line. They sell thin strips of birch mahogany and walnut on line for model makers. They come from 1/2 mm thick up to 4 mm. You can glue these in and make a tight fit that will stain and be almost invisible., especially if you stain dark.
 
Heres the pan and touch hole.I have chisels and have had to touch up the inlets in quite a few spots. Just using graphite to show where excess wood is. When it’s not screwed into the trigger assembly it sits flush in the spot. Hence making me nuts! I wasn’t sure about stress on the parts when fired if there was a small gap. My old stevens side by side would need occasional adjustments to keep the barrel tight to the breech. Explosions and loose parts are a bad mix
First time doing this and would like to do it again!
Just a quesion: The photo showing the lock close up is not 100% clear in my view. Looks like the vent it on the large side, or really coned out. What do you other posters see?
Flintlocklar
 
If it were me I would solder a bit of sheet brass on the backside of the standing breech. A little chisel work will let it settle back tight and once the brass is cleaned up you will have a neat detail. Just keep clear of the hook area so you dont have to futz with the fit of hook to standing breech.
 

Latest posts

Back
Top