• Friends, our 2nd Amendment rights are always under attack and the NRA has been a constant for decades in helping fight that fight.

    We have partnered with the NRA to offer you a discount on membership and Muzzleloading Forum gets a small percentage too of each membership, so you are supporting both the NRA and us.

    Use this link to sign up please; https://membership.nra.org/recruiters/join/XR045103

Help, Yelp

Muzzleloading Forum

Help Support Muzzleloading Forum:

This site may earn a commission from merchant affiliate links, including eBay, Amazon, and others.

sse

45 Cal.
Joined
Feb 1, 2004
Messages
693
Reaction score
1
I'm sposed to stitch up a belt bag outta leather and don't know nuthin!! Anybody got any tippers on stitchin leather, that aint proprietary, please put 'em up!!

rollingb already tolt me a few, but could always use more info from you guys that know whatchyer doin!!

Thanks!! sse :p
 
SSE,..... I've been do'n some think'n since I last talked to you. If I rember right, you mentioned thet yore leather was "tough",.... do you mean, thet it is "stiff" (kind'a like 8-10oz chrome-tanned??

If thet's what you meant,.. then I reccomend thet you "punch" the holes while yore leather is "dry", then wet it good 'fore stich'n it together.

After you git done stich'n,... "shape" the 8-10oz leather in the shape you want it, and let it dry.

The "flap" will "break-in" with "use", or, you can even make it more flexible by work'n warm Crisco into the leather after it's dry!! :: /ubbthreads/images/graemlins/cool.gif
 
If you want strength, use artificial sinew (three foot lengths, pulled apart to make two lengths and waxed with beeswax. For authenticity, used linen thread. I wax mine by dragging the thread through a cake of beeswax and then rolling it on my leg with the flat of my hand. It is MUCH easier to punch the holes first and then use a blunt needle to stitch it up.

Here's generic leather stitching instructions.

stitchingpage1.jpg


For the divider, all you need is two nails in a stick. The inner one sharp and the outer one dull. I always use the running stitch.

Tandy leather has tools.

http://www.tandyleather.com/

I got mine at a store that used to be nearby. You may be able to find cheaper locally, but at least they're a start.
 
use two needles with linen thread wax with Bow string wax its tacker.slso use a diamond awl to poke your holes...put a needle on each end of the thread thread back through it self to lock in place wax then poke a hole run the thread through do another hole and put one neddle from each side pull tight then do another hole...oh yea hope you have a stich wheel to mark your spacing...
 
Thanks for all the great info. I read over everything a few times and some gets through the "bedrock". Would sure be good to WATCH someone do this stuff!!!!

Anyway, the pouch is pretty simple, two sides, with the back having a long tongue to fold over the front. Anybody got any ideas to close the flap shut?? Antler button or antler tip for a toggle??

Think this will call for a runnin stitch, then the thang is turned inside out. The leather does seem pretty stiff. Also, was told the holes should be one half inch apart, but that seems to far to me. ??!! Also, there is a "welt" that is stitched between the front and back pieces.

Don't care what rollingb says, I'm "skeered" to do this without no help. :: ::

Yelp!! :eek: :eek:

THANKS, sse
 
For that type of bag I will usually use soft leather for the body of the bag, putting the smooth sides together, sewing aroun the edges then turning it right side out so the stitching is on the inside then sewing a heavier piece on for the flap which the weight of will keep it closed.
Your right, about 1/4" between holes will be right and as someone already said use 2 harness needles, one on each end of your thread. If you don't have a wheel to mark where your holes go just take a ruler and mark every 1/4". If you have a drill press, the easy way is to drill the holes.
Take some contact cement and glue the two layers and the welt together, then punch or drill the holes, wet it then sew it.
 
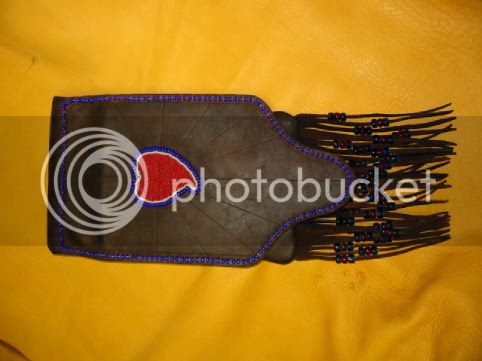
Here's one I made with the softer leather and a heavier flap. Left a 3rd piece on the bottom when I sewed it to make a fringe, use to use this one for my wallet but have another now that I like better but don't have a pic of.


Leather_belt_bag.jpg
 
That's a nice looking bag!

So, you need to wet the leather before stitching and stitch while wet??

Thanks, sse
 
The only time I've wet leather is to make it more pliable so I can turn a double bag outside-in after sewing up the seams. The pieces are sewn and then turned so the stitching is inside the bag when finished. But if the experts say wet . . .
 
When you stitch it dry ,the thread tends to stay on top of the leather but when it's wet the thread will compress it so the thread lays below the surface then as it drys the leather expands and hardens making your stitching much tighter than if stitched dry. :winking:
 
There you have it.

But, he said pain-in-the-arsingly, doesn't the leather shrink, not expand, when it dries and wouldn't the threads then be loose again? :shocking: How many times did we see Gabby tied out in the hot sun getting pulled apart as the leather thongs dried before Gene arrived and rescued him? Were we misinformed?

With the artifificial sinew, if it cut any farther into the leather it seems it would slice right on through. Seems to be the case with my fingers, too.
 
Wet rawhide shrinks as it drys,.... wet tanned leather expands a liddle as it drys. /ubbthreads/images/graemlins/cool.gif
 
Stumpkiller,... Sure beats the "alternative",.... don't it!! :haha: :haha: /ubbthreads/images/graemlins/cool.gif
 
Deadeye - Please advise of the corect use of the contact cement. Would you advise that for a beginner? Seems like I could make one heck of a mess with that. Especially when turned inside out, seems the glue would be visible and ugly and difficult to remove. ??!!

Thanks, sse
 
Draw a line where your stitching will be, before applying any glue, then make sure you don't put glue past where the stitching will be. Only a 1/4" or even a 1/8" of glue will hold the pieces together while you punch or drill your holes. Your stitching should be at least 1/4" in from the edge. Take a couple of pieces of scrap leather and try it.
 
The first one is the hardest!You may make a few mistakes,but most can be corrected.My Mother taught me the basics of sewing 60 years ago and glad She did.Most of Her advice came back to me when I started makeing bags,sheaves and so forth.constructing gear is a great pastime,helps to understand what the old timmers went through to get their gear set up. Just take the advice given here and go at it! /ubbthreads/images/graemlins/cool.gif
 
Back
Top