Is it as hard as it looks

Muzzleloading Forum

Help Support Muzzleloading Forum:

This site may earn a commission from merchant affiliate links, including eBay, Amazon, and others.

AzShooter

36 Cal.
Joined
Nov 2, 2006
Messages
90
Reaction score
0
I just bought a Traditions Trapper Pistol Kit and I think I made a big mistake. The screw holes for the lock didn't line up. The breach screw to the trigger is off by 1/4 inch and the angle is wrong. Is this normal or am I just not familiar enough with what I am doing?
 
I built a Trapper early in the summer. Originally I thought I had some holes that were off also. Fully assemble the gun according to the instructions before you start work on it. Make note of any holes that won't line up. Some of them that look wrong, might turn out right. Most of mine did.

I had trouble with the tang screw hole looking like the wrong angle also. If I remember right, the instructions mention attaching it to the trigger group before attempting to seat the trigger group in the stock. That worked for me and I didn't need to alter the hole. They also mentioned that the hole might need adjustment though. If it does, it's easy to grind it out a little.

It's not uncommon for kits to have holes that aren't aligned. It's a simple fix. Take wood glue and glue toothpicks in those holes to fill them. Let them dry, then cut flush with the wood. Reassemble the parts again and mark the new holes, then drill. Only takes a few minutes to get everything all aligned.

The Trapper was a pleasant kit to build overall. I wish you the best of luck with yours, and if I can be any help, just let me know.
 
Thanks for the encouragement. Good ideas with the toothpicks. I spent a few more hours on it and and finding a few more things I need to do. But it is a lot of fun. I think it will be a great gun when done.
 
Howdy!

Here is an online step-through which details the assembly of the Traditions Trapper. Hope it helps.
[url] http://www.hobbygunsmith.com/Archives/Nov03/FrontStuffer.htm[/url]

James
 
Last edited by a moderator:
Sure sounds a lot like my kit. All the same problems. Found the archives and am really learning how to do it. Got the trigger all inlayed now and it works. The rest should be a walk in the park. Thanks so much for the info.
 
Steven, when you get it finished and take it out to shoot, I think you're really going to like it a lot. Not only is it made by your own hands, but if it shoots like mine and the others I've heard comments on, it's a very accurate and sweet gun. Mine is easily as accurate as my Thompson Patriot and it has a better trigger!

Speaking of triggers, mine wouldn't set properly as it came from the factory. If yours does this, tinker with the rear screw a bit and it'll work, then follow the directions for proper adjustment. Took me the whole of maybe 5 minutes to do.

Then USE LOCKTITE on them! I can't stress that enough. The trigger adjustment screws tend to vibrate loose from recoil. This can lead to the gun discharging on it's own or even the screw falling out of the trigger group.
 
Thanks. Locktite and I are friends, but I hadn't thought of using it on those screws. Now I definately will. Trigger is very pleasant as it is now.

The project is moving right along.
 
When you finish it, share some pictures with us if you can. In my opinion, the Trapper is the prettiest production pistol to ever hit the market. I can't wait to build another, and maybe embellish that one with some carving and engraving.
 
Yes, share the pics I almost bought one at Kittery Trading Post a couple months ago but was unsure of the quality. Thanks for the post I was wondering about these kits.
 
Ya know, my wife asked me that same question just the other day... :rotf: :rotf: :rotf:
 
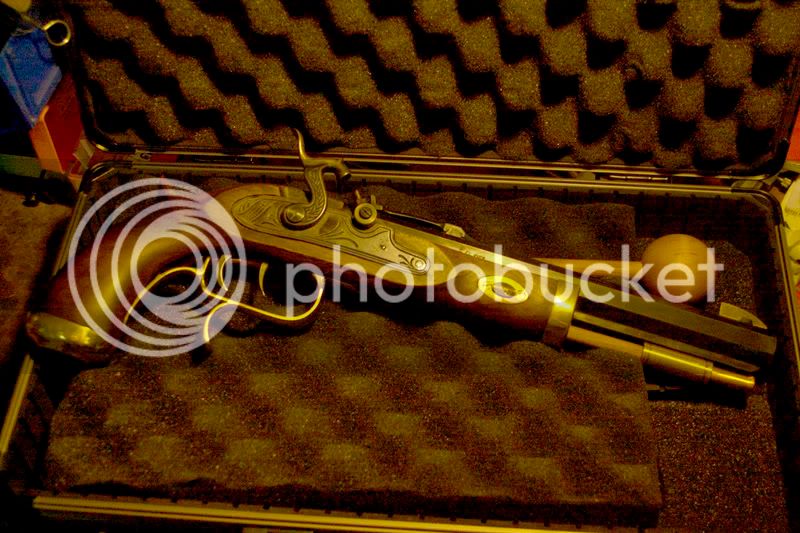
Pictures should follow but I have the pistol together now with a few coats of linseed oil and everything is nice and tight.

Blueing came out better than I thought it would. Terrible the first time so I sanded the barrel down degreased and did it again. I'm much happerier with the way it looks.

I'll probably add a few more coats of oil but I can't wait so I'm taking it out to see how it does.

I'll keep everyone poasted. Thanks for all the advise.
 
That's great to hear, Steven. I can't wait to see how it came out. Enjoy shooting it and as always, if you have any questions, let us know. :)
 
Traditionslockside.jpg


Looks good, still needs a few more coats of Linseed oil but I had to take it out. Started with 30 grains of FF shot 3 1/2 inches at 25 yards.

I then switched to 40 grains and got a nice 2 inch group just low and right of the bull. It shoots amazing and I can't wait to develope the right load for it.
 
Back
Top