• Friends, our 2nd Amendment rights are always under attack and the NRA has been a constant for decades in helping fight that fight.

    We have partnered with the NRA to offer you a discount on membership and Muzzleloading Forum gets a small percentage too of each membership, so you are supporting both the NRA and us.

    Use this link to sign up please; https://membership.nra.org/recruiters/join/XR045103

Is this lock ok?

Muzzleloading Forum

Help Support Muzzleloading Forum:

This site may earn a commission from merchant affiliate links, including eBay, Amazon, and others.

Onojutta

45 Cal.
Joined
Dec 19, 2007
Messages
876
Reaction score
112
Location
Martic Township, Lancaster County
I realized a little too late that my precarved stock was "pre-inlet" for the wrong lock. The kit came with a "late" style lock but you could substitute an "early" lock instead. I chose the early lock and didn't realize until it was too late that it appeared to have come precarved for the "late" lock. Anyway, I was able to modify the mortise to accept my lock. I couldn't get a tight fit, so I will have to use an epoxy bedding. Oh well, this is my first gun so I'm not too proud to use a little epoxy this time around. :wink:

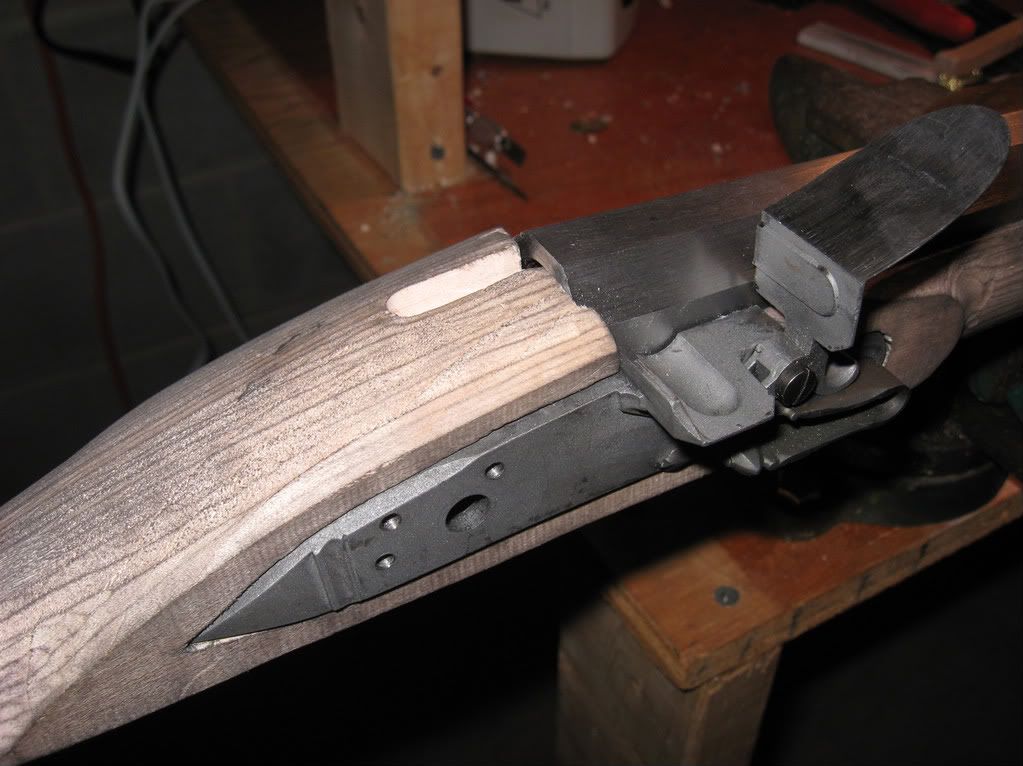
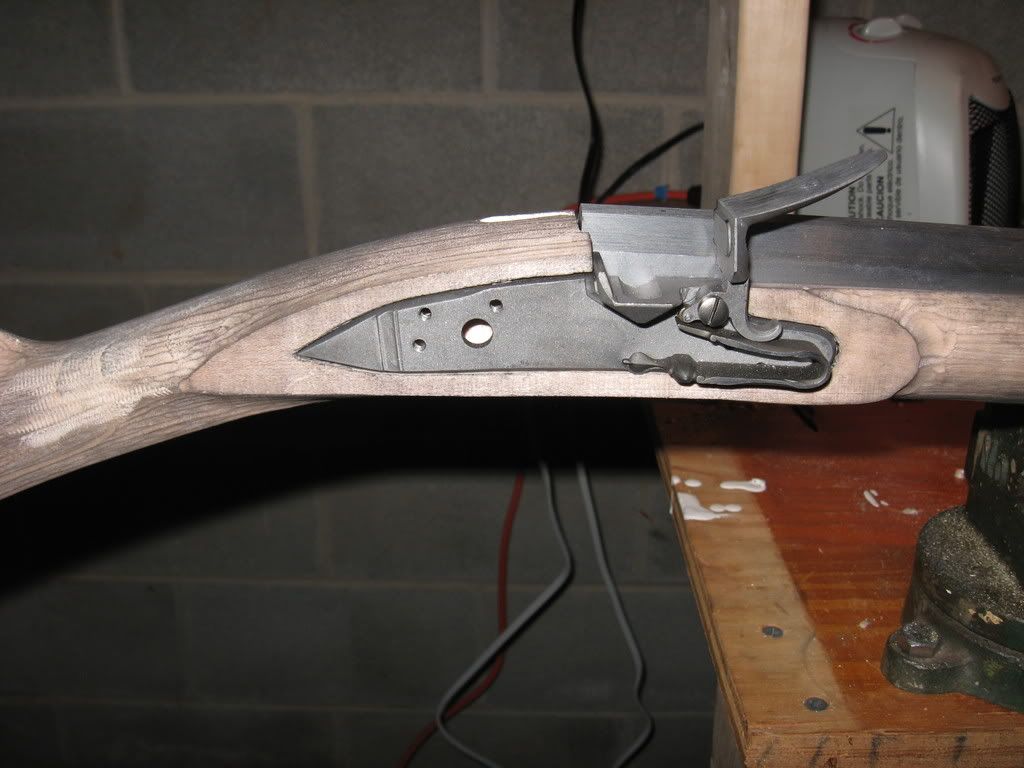
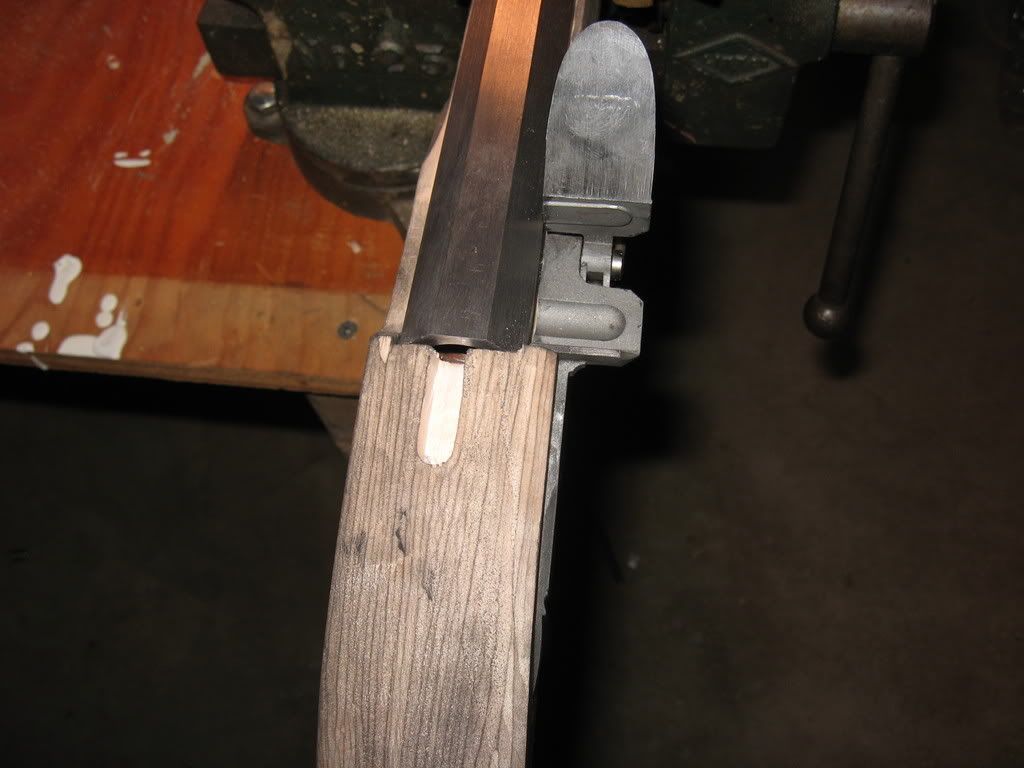
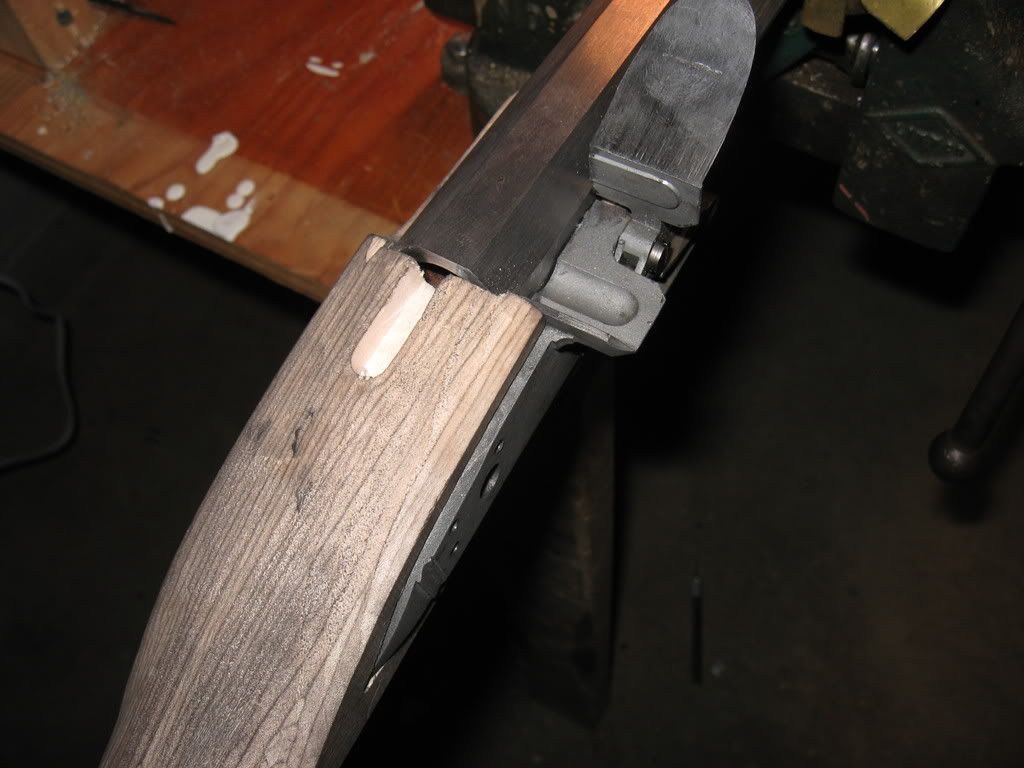
Now for my question... How does the "elevation" of this lock look? I was expecting it to be like most locks I have seen- flush or nearly flush with the surrounding wood. As you can see in the pictures, this lock protrudes about 1/8th of an inch from the wood. I cannot relieve it any further into the mortise since the bolster is against the barrel. I am suspecting that the "late" lock this stock came cut for must have had a thinner plate. Or, could this be the style of the plate? Either way, does this look normal or acceptable to you experts, or should the lock plate indeed be lower? If it should be lower, what do I do?
IMG_0077.jpg


IMG_0073.jpg


IMG_0074.jpg


IMG_0075.jpg


(No idea why those pictures won't post right-side up :doh: )
 
It looks just about right to me. :)
The locks with a chamfered edge like your lock has are supposed to be sticking out.
Well, actually the unchamfered part of the lock is supposed to be in the wood but the wood should be sanded until it meets the chamfer.

That flat area on the top of the lock in the area of the cock is supposed to protrude as it is.
The cock has a shoulder or protrusion on the inside surface that will hit that flat to stop its downward movement.
Ideally, the protrusion will stop against that surface just before the tumbler stops on the bridle but don't worry about that for now. :grin:

From your picture it looks like you have just enough wood to remove the milling marks before you get to the start of the chamfer in the area of the cock.
At the rear of the lock you can lower the panal quite a bit. Just use the corner of the chamfer as your guide. :thumbsup:

For the moment I'll assume the barrels weight has raised it a bit out of the barrel channel as the lower picture shows it protruding above the wood at the wrist.
If it will seat down into the wood so that the top flat is even or slightly below the wood in that area then charge ahead.
If it is down in the barrel channel and still protruding up above the adjacent wood at the wrist you will need to deepen the barrel channel a bit.
 
The lock looks fine. But first things first on your first build you want to go to fast. My self I always inlet the barrel all the way down then the breech plug then pin the barrel then inlet the lock. It will work out just take your time and think every thing out ahead you are doing fine.
Ephraim
 
Zonie said:
For the moment I'll assume the barrels weight has raised it a bit out of the barrel channel as the lower picture shows it protruding above the wood at the wrist...

I knew someone would mention that! :) I'm not completely done inletting the barrel yet. I did about 90% of the lock first because I read somewhere (possibly on these forums) that pre-carved stocks should have the lock set in first and then adjust the barrel to the lock since you can't adjust the lock to the barrel.

Inletting this swamped barrel even on the pre-carve stock is a bear. The barrel channel is way undersized, which is a good problem to have, but working it out to the right size without boogering up the sides is a real chore. It seems to me that starting from scratch on a blank would be easier than trying to modify an existing mortise without damaging it. But, I think I'm getting it. The only thing I screwed up so far with the barrel is I made the breach area about 1/16 wider than the barrel. I had a false inletting black mark on the side of the breech that I removed, so now it's a little wide. But I'm assuming as long as the tang and breach are flat against the wood, being a little wide should be ok. Oh well, I'll save that for another post. :wink:
 
Try making a scraper. I us an old file heat it and bend it to a right angle sharpen it on a grinder to half oct. shape see if that helps with the barrel channel just go slow and have fun with it.
Ephraim
 
Ephraim said:
Try making a scraper. I us an old file heat it and bend it to a right angle sharpen it on a grinder to half oct. shape see if that helps with the barrel channel just go slow and have fun with it.
Ephraim

You wouldn't happen to have a picture of that would you?
 
Hello Ephraim

If I send my email could I please have a picture of that scraper also. Thanks Boon
 
Onojutta that looks good so far I wish my lock would had inletted that nice. Keep up the good work. Boon
 

Latest posts

Back
Top