Kibler Colonial Kit Assembled

Muzzleloading Forum

Help Support Muzzleloading Forum:

This site may earn a commission from merchant affiliate links, including eBay, Amazon, and others.
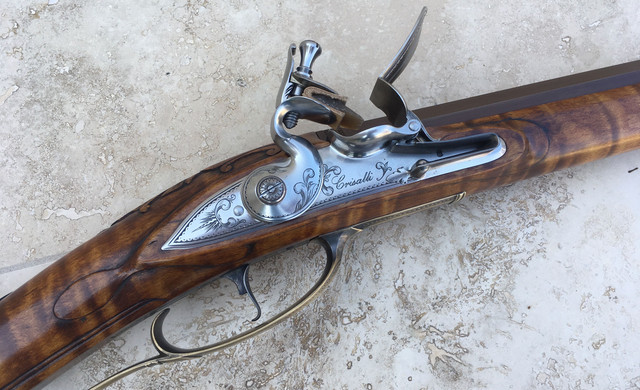
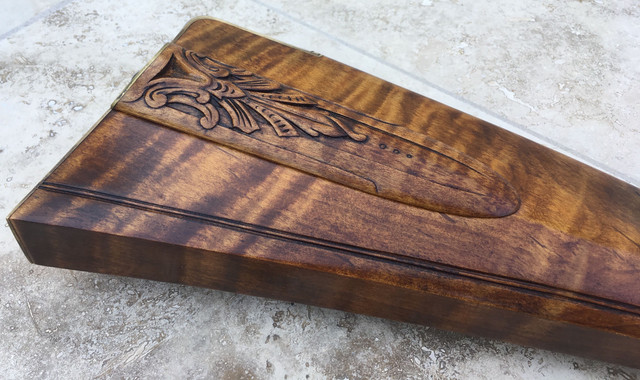
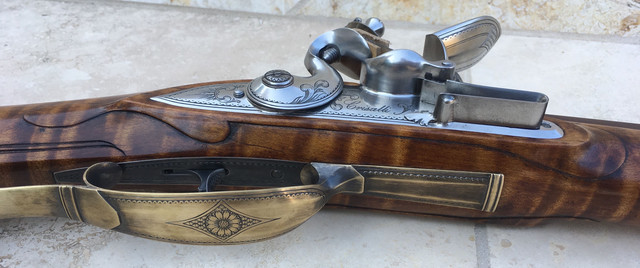
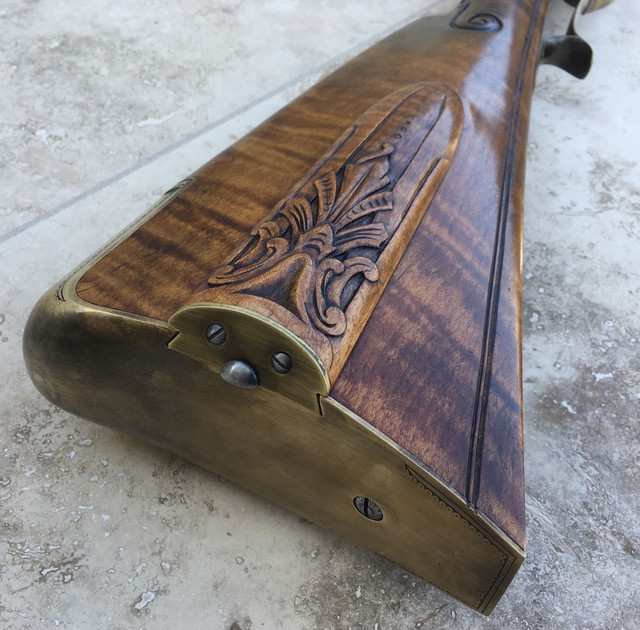
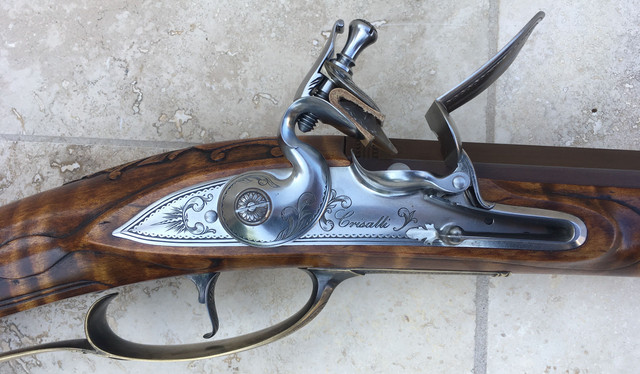
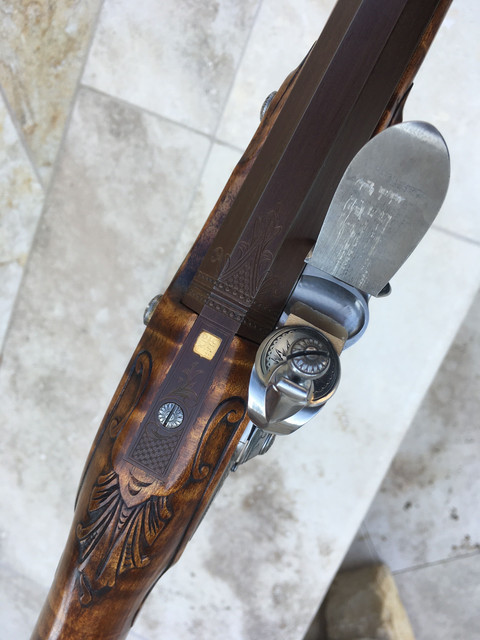
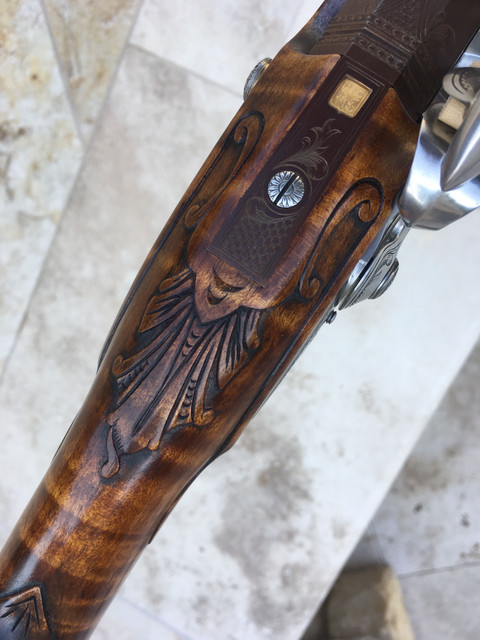
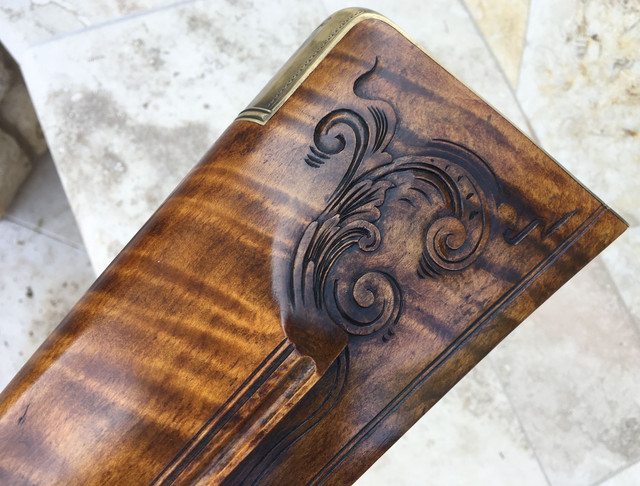
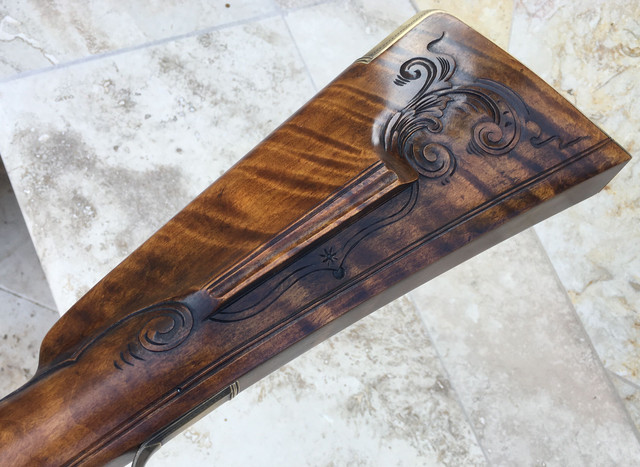
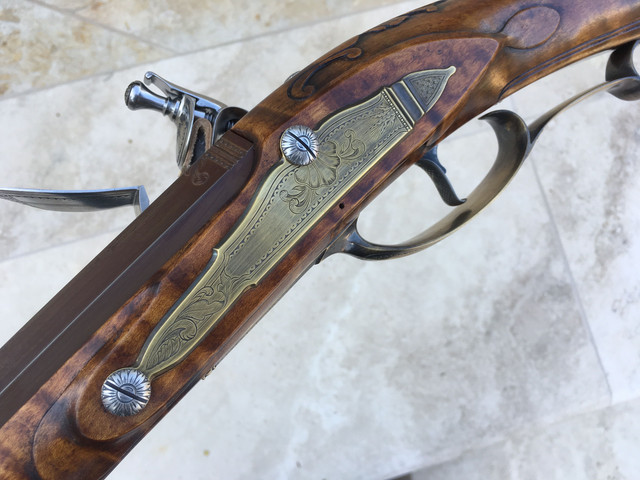
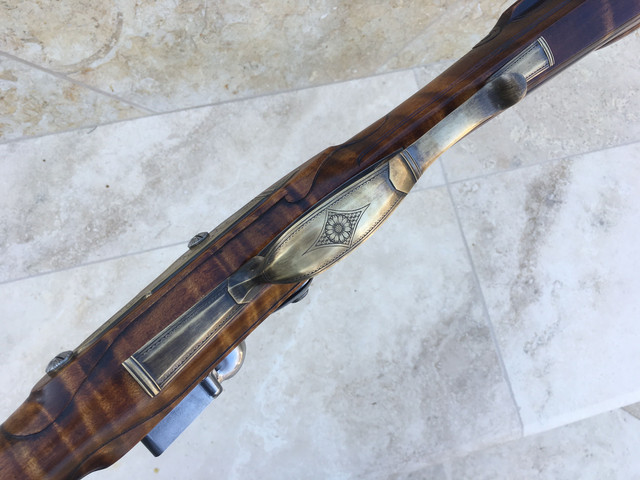
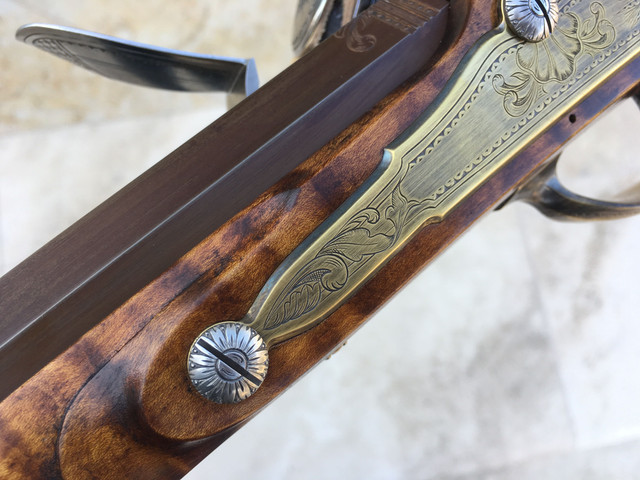
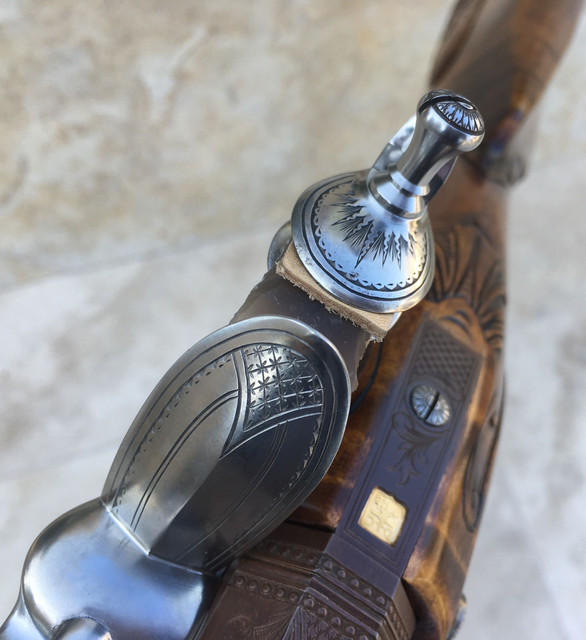
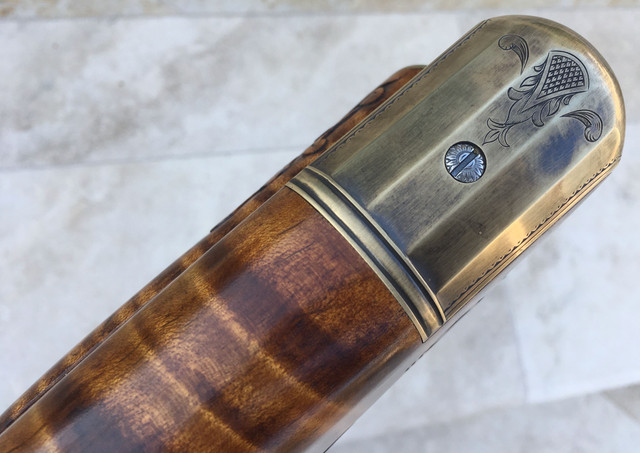
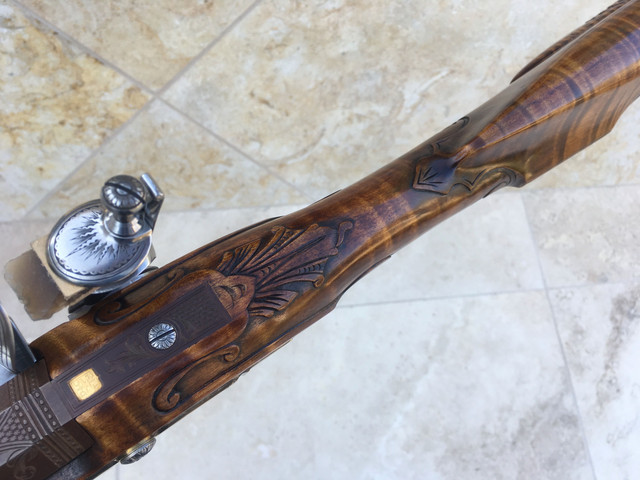
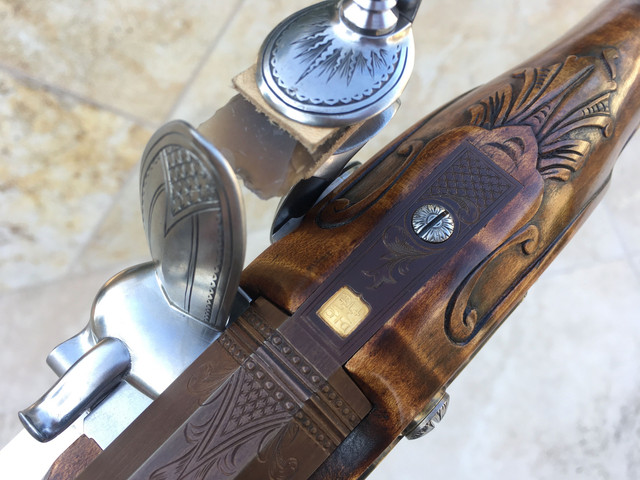
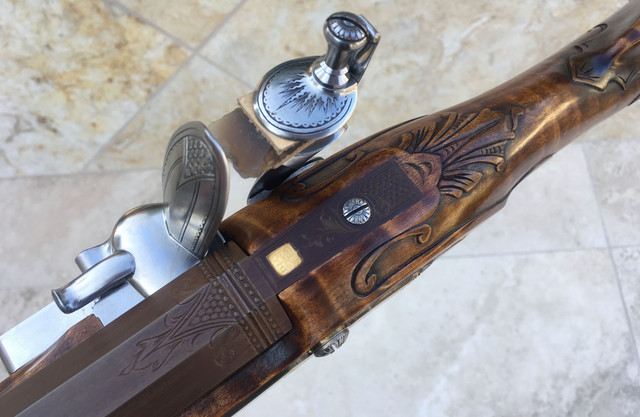
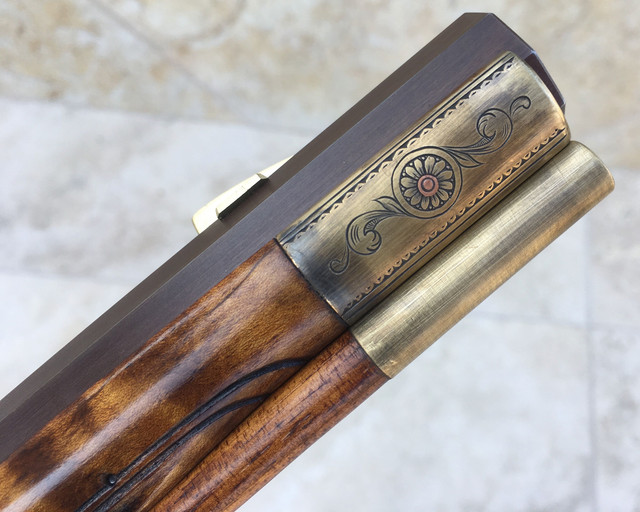
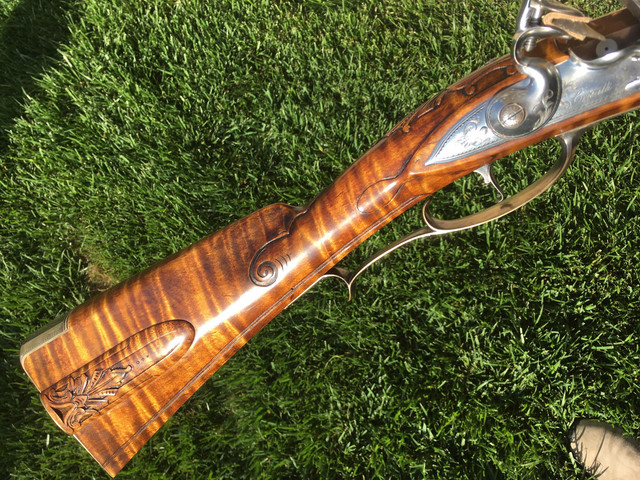
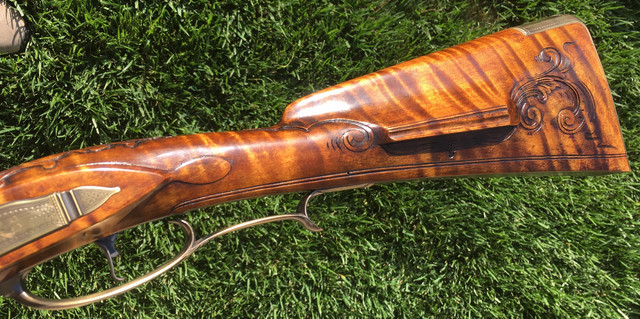
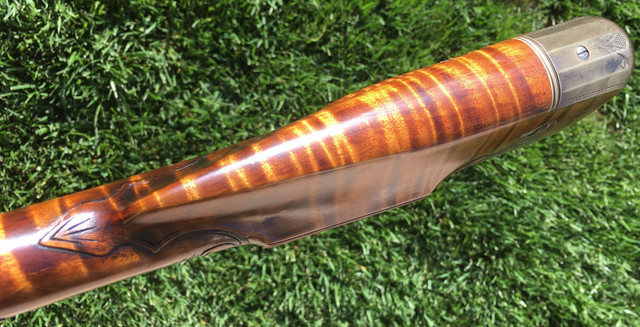
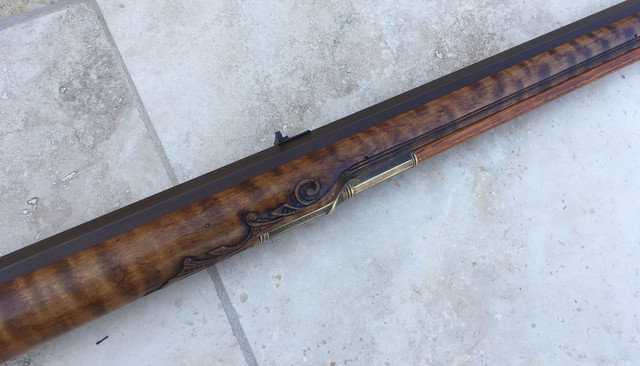
Well......I think I'm done anyway. I can't think of anything else I want or need to do. I made some carving and engraving choices I like on this one..... and others that I'm not wild about. Live and learn, but I think it came out good enough. Anyway, here are a bunch of pictures. When I have a little more time to write, I will make some final comments on building up this rifle from one of Jim's excellent kits.

Before you proceed, be advised that I am a lousy gun photographer and I have no place to really control lighting, etc. These photos do not show the color and grain of the stock wood very well so I took the last three photos in bright sunlight. There is a lot of glare but the wood and color show better......


Dang I do not know how everyone is able to build those rifles from a kit. Your work looks exceptional.
 
Some general comments on the Kibler Colonial Rifle kit.....

First of all, let me qualify my comments by saying that I have built several rifles and pistols from scratch, including hand making my own locks, but do not have much experience with kits. However, I have been asked to finish some kits that others had started and not completed. While the quality and precision varied considerably, I can say unequivocally that none that I worked on were up to the standard of Jim's kit. At the beginning of this thread, I mentioned that, excluding the little time it took to draw file the barrel, I had all the parts assembled in about 5 hours and the majority of that time was spent getting the brass parts from a cast surface finish to a near polish. That step could have taken much less time if the brass did not need to be taken to that high a finish level.....that was just my preference.

I don't think I spent more than a few minutes cutting any wood and getting parts to drop into the precisely cut mortises. This is the only kit I have ever personally worked on that I didn't have to spend time trying to re-orient and re-inlet parts to minimize the gaps left by over-cut inlets...or trying to patch gaps that just could not be made right by metal stretching, water soaking, etc.

As far as the architecture goes, I don't think there is anyone who will (or should ;)) contest Jim's excellent eye for style and authenticity. The kit is beautiful right out of the box. Again, just from a personal preference standpoint, I thinned out the wrist about an 1/8" top to bottom and the same amount from side to side. I then blended the new narrower wrist contour into the rest of the lines of the stock. The only other wood I took off was to thin the forearm some from the front of the lock panel to the muzzle. I think Jim left a tiny extra bit of wood there so the builder could decide to leave it or thin it as might be their preference.

Obviously from my posts, I decided to use the kit as a "canvas" for some engraving and carving which took the great bulk of the time I spent to finish the kit. I did not take the barrel metal finish beyond draw filing, so that didn't take very long. But because I wanted to engrave the lock, I did spend a fair amount of time polishing the lock parts to the level I like before engraving. And I did polish all the brass to a high level before engraving and then knocking back the finish level some during the light antiquing. But I will also say that the lock could easily have been left as it came from Jim and then browned or blued and been perfectly acceptable without the builder spending any great amount of additional time polishing.

The bottom line here is that if I had gathered parts for a nearly identical rifle, and purchased a good stock plank, then had the barrel inlet and ram rod hole drilled by David Rase (or one of the others who do that work), I would have spent considerably more money than the kit cost and I don't have to tell you how much more work it would have been to assemble the rifle. Now I understand that, often, there just isn't a kit that represents the type of rifle you might want to build and you just do not have a choice but to build from scratch. But if you are looking to build a Colonial type of early flintlock rifle, I don't think you can beat this kit from Jim.....and I am assuming here that the mountain rifle kit he offers falls into the same category. And as a final comment, I think you can tell from this series of posts that if you want to "customize" one of these rifles, there is really no limit to what can be done. What I did on this rifle certainly doesn't reflect everyone's taste in either the amount or style of carving and engraving (heck....I even don't like some of what I did here), but it does show that you can go from a simple, plain working rifle to one with "spoke wheels and a chrome trailer hitch".

Again, my compliments to Jim and Katherine.....I think I understand the level of commitment and the amount of difficult work it takes to put out a product as excellent as this rifle kit. As we say in the Navy with signal flags, "Brave Zulu" Jim and Katherine !!!!

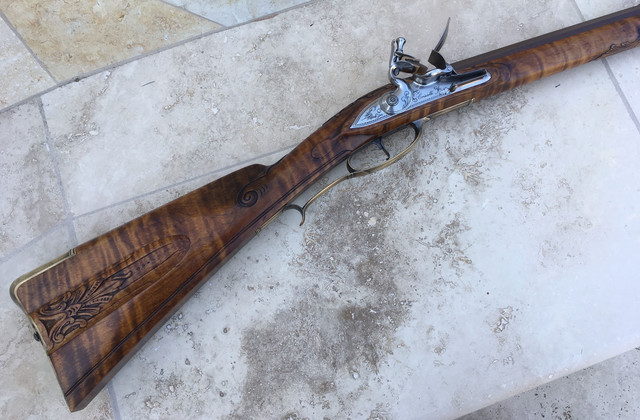
 
That is a beautiful, tastefully done rifle. I hope to get an order placed for a Colonial Rifle kit in the next month or two. Alas, I do not have the skills to even attempt simple carvings, but I think Jims rifles are beautiful as is. I would like, most likely, a moon inlay, which may be in my skill set. Does anyone know of a shop/ engraver who will do some modest engraving...likely on the trigger guard?
 
Outstanding work as always. Mayne I missed it as I drooled over the photos, what caliber is she? Any other particulars, weight, l.o.p., barrel length?

Those last photos were what I was waiting for, I was starting to think everything came out much darker than what I was really starting to like in some earlier photos.

This is an outstanding rifle. Thank you very much for sharing.
 
Some general comments on the Kibler Colonial Rifle kit.....

First of all, let me qualify my comments by saying that I have built several rifles and pistols from scratch, including hand making my own locks, but do not have much experience with kits. However, I have been asked to finish some kits that others had started and not completed. While the quality and precision varied considerably, I can say unequivocally that none that I worked on were up to the standard of Jim's kit. At the beginning of this thread, I mentioned that, excluding the little time it took to draw file the barrel, I had all the parts assembled in about 5 hours and the majority of that time was spent getting the brass parts from a cast surface finish to a near polish. That step could have taken much less time if the brass did not need to be taken to that high a finish level.....that was just my preference.

I don't think I spent more than a few minutes cutting any wood and getting parts to drop into the precisely cut mortises. This is the only kit I have ever personally worked on that I didn't have to spend time trying to re-orient and re-inlet parts to minimize the gaps left by over-cut inlets...or trying to patch gaps that just could not be made right by metal stretching, water soaking, etc.

As far as the architecture goes, I don't think there is anyone who will (or should ;)) contest Jim's excellent eye for style and authenticity. The kit is beautiful right out of the box. Again, just from a personal preference standpoint, I thinned out the wrist about an 1/8" top to bottom and the same amount from side to side. I then blended the new narrower wrist contour into the rest of the lines of the stock. The only other wood I took off was to thin the forearm some from the front of the lock panel to the muzzle. I think Jim left a tiny extra bit of wood there so the builder could decide to leave it or thin it as might be their preference.

Obviously from my posts, I decided to use the kit as a "canvas" for some engraving and carving which took the great bulk of the time I spent to finish the kit. I did not take the barrel metal finish beyond draw filing, so that didn't take very long. But because I wanted to engrave the lock, I did spend a fair amount of time polishing the lock parts to the level I like before engraving. And I did polish all the brass to a high level before engraving and then knocking back the finish level some during the light antiquing. But I will also say that the lock could easily have been left as it came from Jim and then browned or blued and been perfectly acceptable without the builder spending any great amount of additional time polishing.

The bottom line here is that if I had gathered parts for a nearly identical rifle, and purchased a good stock plank, then had the barrel inlet and ram rod hole drilled by David Rase (or one of the others who do that work), I would have spent considerably more money than the kit cost and I don't have to tell you how much more work it would have been to assemble the rifle. Now I understand that, often, there just isn't a kit that represents the type of rifle you might want to build and you just do not have a choice but to build from scratch. But if you are looking to build a Colonial type of early flintlock rifle, I don't think you can beat this kit from Jim.....and I am assuming here that the mountain rifle kit he offers falls into the same category. And as a final comment, I think you can tell from this series of posts that if you want to "customize" one of these rifles, there is really no limit to what can be done. What I did on this rifle certainly doesn't reflect everyone's taste in either the amount or style of carving and engraving (heck....I even don't like some of what I did here), but it does show that you can go from a simple, plain working rifle to one with "spoke wheels and a chrome trailer hitch".

Again, my compliments to Jim and Katherine.....I think I understand the level of commitment and the amount of difficult work it takes to put out a product as excellent as this rifle kit. As we say in the Navy with signal flags, "Brave Zulu" Jim and Katherine !!!!
As usual, Great work DC!
Only one thing left to do...
Visit BML to punch holes in paper!!
Then You’ll see how Jim and Katherine’s work keeps on shining!!
 
Back
Top