Kibler kit assembly and carving

Muzzleloading Forum

Help Support Muzzleloading Forum:

This site may earn a commission from merchant affiliate links, including eBay, Amazon, and others.
Hi,
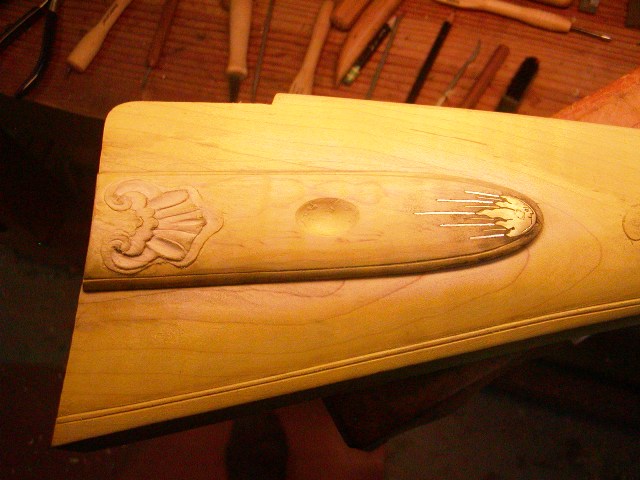
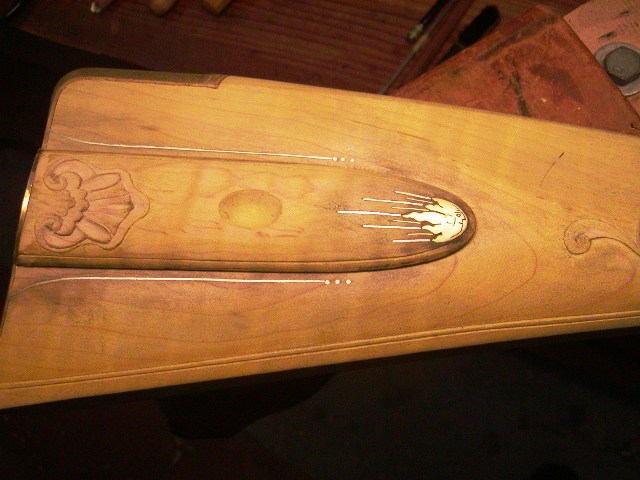
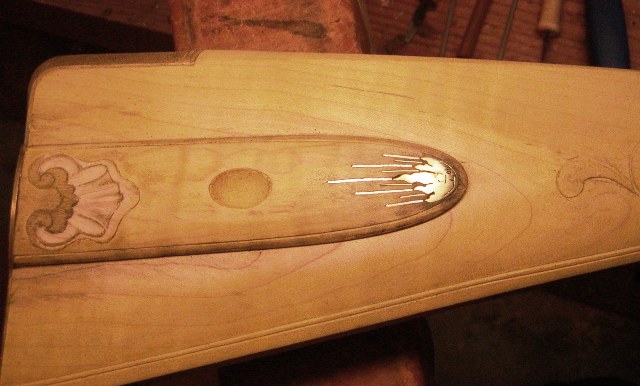
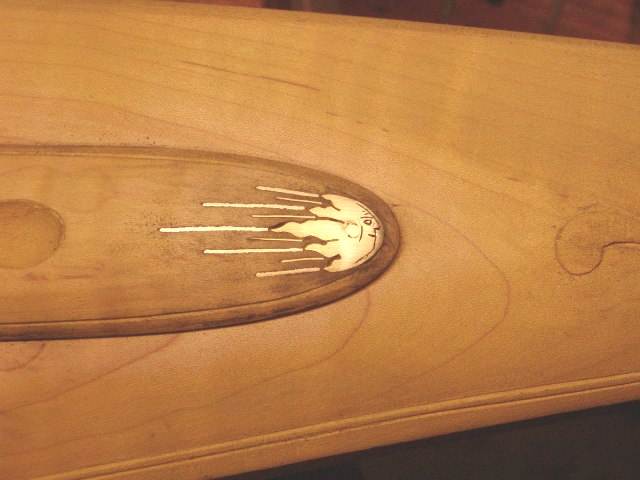
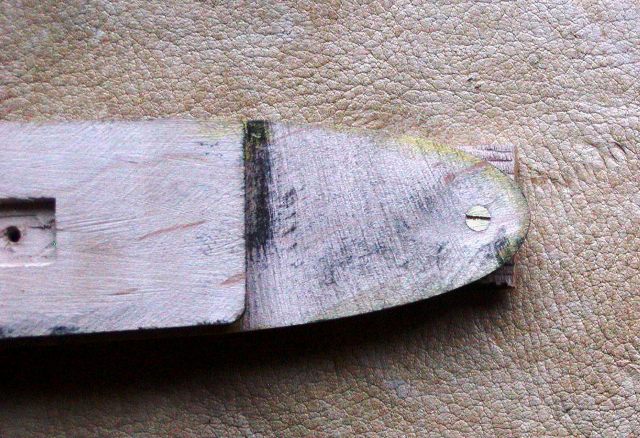
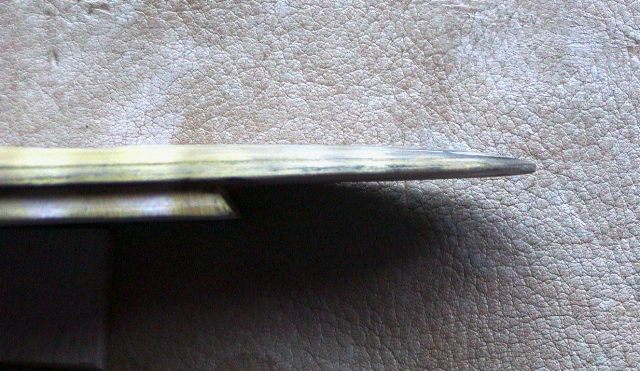
I had a great day doing folk art. I love the naïve nature of good folk art but I don't like crude. Crude has no appeal to me whatsoever and good folk art is not crude. I inlet a brass "comet face" in the tip of the patch box lid. It was a challenge because the lid is thin and fragile at that point. It just took scary sharp tools, a light touch, and patience. I glued it in place but also riveted it with a tiny brass wood screw. I drill the hole just large enough so the wood screw threads into the metal inlay. I counter sunk both sides of the hole and peened the end of the wood screw into the counter sink in the brass inlay. I engraved the comet face with a simple folk art depiction of a face. Then I inlayed silver and brass wire to create the fiery trail of the comet. I am beginning to carve the details in the carving on the patch box. The design is Moravian inspired and owes a lot to a rifle by Allen Martin. When starting to carve details on a rifle, I always start with the wood patch box lid if it has one. Sometimes I get rusty in my skills because of the long intervals between carving on guns so I figure if I forget stuff or am rusty, I can always make a new wooden lid if I screw it up. Fixing mistakes on the stock is much more difficult.


dave
 
Hi,
I had a great day doing folk art. I love the naïve nature of good folk art but I don't like crude. Crude has no appeal to me whatsoever and good folk art is not crude. I inlet a brass "comet face" in the tip of the patch box lid. It was a challenge because the lid is thin and fragile at that point. It just took scary sharp tools, a light touch, and patience. I glued it in place but also riveted it with a tiny brass wood screw. I drill the hole just large enough so the wood screw threads into the metal inlay. I counter sunk both sides of the hole and peened the end of the wood screw into the counter sink in the brass inlay. I engraved the comet face with a simple folk art depiction of a face. Then I inlayed silver and brass wire to create the fiery trail of the comet. I am beginning to carve the details in the carving on the patch box. The design is Moravian inspired and owes a lot to a rifle by Allen Martin. When starting to carve details on a rifle, I always start with the wood patch box lid if it has one. Sometimes I get rusty in my skills because of the long intervals between carving on guns so I figure if I forget stuff or am rusty, I can always make a new wooden lid if I screw it up. Fixing mistakes on the stock is much more difficult.


dave
WOW! I just love the comet!
 
Awsome, Dave when you finish that there rifle gun no one would probaly want it so just send it too me, even though it is right handed I rekon I could adjust. Now you need a piece of meteroite for a front sight blade and rear sight that would be fantastic. This is going too make someone very happy.
 
Hi Don,
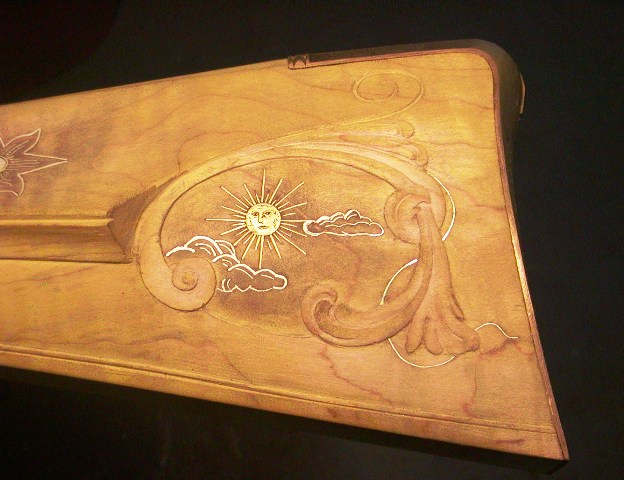
Thanks but did you look at the cheek piece side posted previously?

dave
Yes I did, I have been following this thread. The sun/clouds are nice. It is an inspiration for me to try this on my next build. I have a lot to learn so will keep it simple.

Thanks for taking the time, especially the pictures. It fills in the "in progress" info you don't normally see.

Don
 
Dave, I an on the verge of ordering a Kibler SMR kit and not really wanting anything fancy. I was thinking about a walnut stock and no patchbox. I was watching a video where they were fire bluing the hardware and really liked the look. Does this sound like a plan or am I making a mistake. THANKS
 
Dave, I an on the verge of ordering a Kibler SMR kit and not really wanting anything fancy. I was thinking about a walnut stock and no patchbox. I was watching a video where they were fire bluing the hardware and really liked the look. Does this sound like a plan or am I making a mistake. THANKS
Hi,
I am not sure what you mean by fire bluing. There is charcoal bluing, in which the polished and degreased parts are packed in charcoal and heated to 900 degrees for up to 3 hours. Then you usually let them cool until you can handle them with gloves and rub with rottenstone and linseed or some light oil. Then you degrease them, pack them in the charcoal again and repeat the heating -polishing cycle. Here is an example I did for a late flint English rifle:
HDDxM8F.jpg

MNwjAno.jpg

mAI4vez.jpg

Z9cuxvu.jpg

8eWp1gK.jpg

qNF0RGm.jpg

When done right, it is an extraordinarily beautiful finish and is fairly robust. Then there is temper bluing, which is just heating the polished and degreased parts with a propane or MAPP gas torch until they turn a deep indigo blue. The parts are cooled and oiled and that's it. It can be very metallic blue colored but it does not stand up for very long and generally fades. Both methods are historically correct for the 17th-19th centuries in Europe and America. They can be fairly rust resistant but that is mostly because to get best results for the finish your parts should be very well polished, and it is that polish that deters rusting. I am not sure if heat bluing was common among the Appalachian rifle makers but it certainly was known and used in other places. Here are examples of temper bluing of screw heads, something I commonly do. The lock on this rifle is also temper blued after case hardening:
JFztE8H.jpg

MCplaIf.jpg

dhCs9dx.jpg

zumneJN.jpg


dave
 
Newbe here. I've done alot of fire bluing as I've called it and Dave is giving you sound advice. Stay away from it unless it is your last option. Very cheap and easy to do but anti-rusting wears off in a few years depending on hummed areas. Heat the part with a tourch and watch for the color change, usually blue , then dunk it in cheap motor oil. If too slow then red color starts coming in and you will have to start all over. Hard to get even colors and you may be softening your parts.......... Dave you do fantastic work and so nice of you to share your advice and expertise plus photos.........
 
Hi,
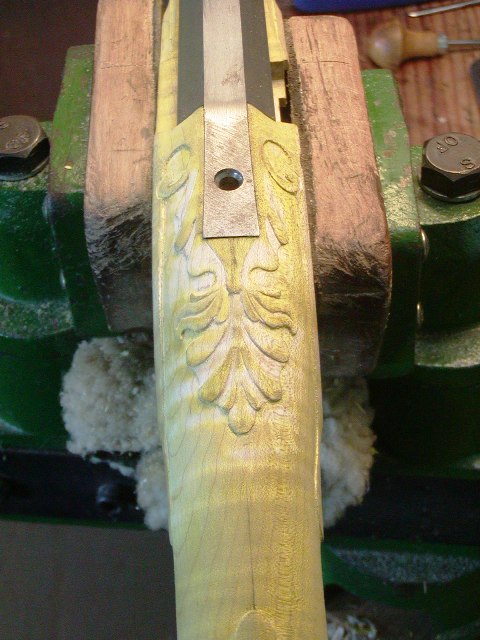
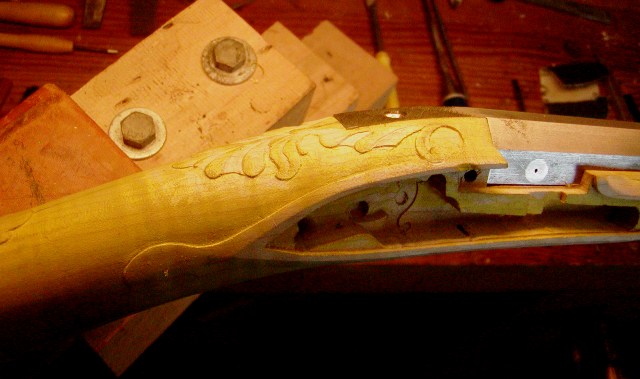
The carving is mostly detailed although I will go back over things for final cleanup and any further detailing before stain. This has been fun. The stock is mainly good and hard but there are two soft spots that were difficult, right behind the barrel tang and the lower part behind the cheek piece. Each stock has a personality and this one has mostly really good wood but a few really soft spots.


dave
 
Hi,
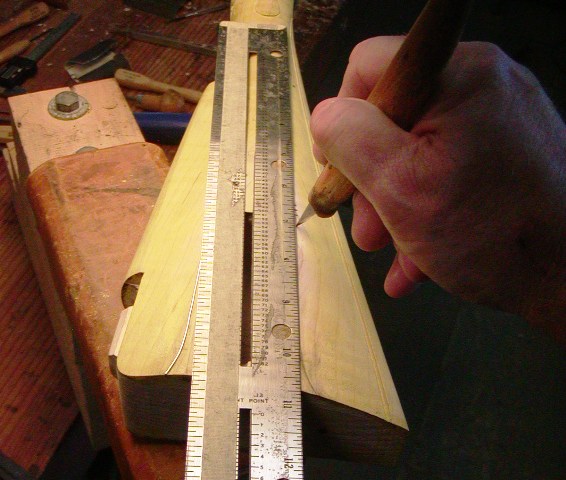
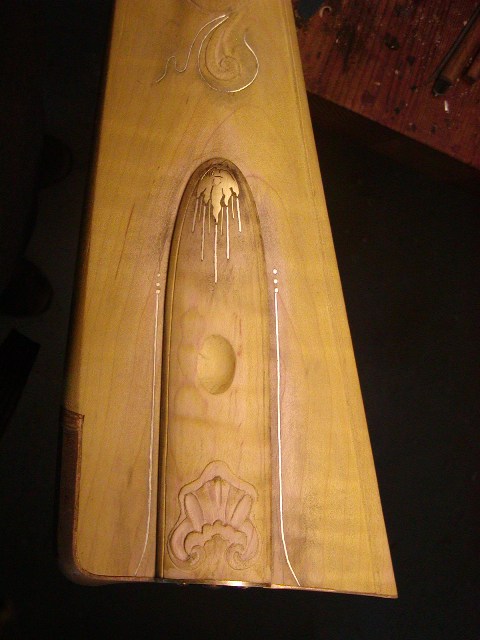
Thanks for looking and commenting. I added wire decoration to the sides of the patch box. I was originally going to do a complete border with some volutes at the base. However, I decided to simplify it but still jazz it up a little in a way that better complements the lid decoration. When I inlay straight borders I first incise a line with a carving knife guided by a straight edge. This assures a "laser" straight line.


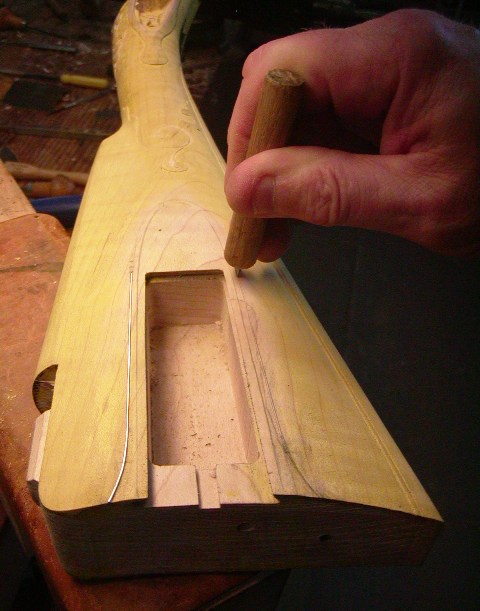
Then I use my longest incise cutter to deepen the line for the wire ribbon using the previous incised line as a guide. This keeps everything very straight.


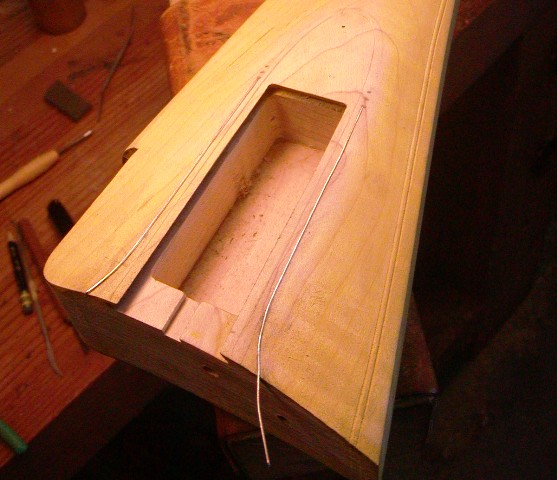
I used 0.013" thick annealed fine wire for the job but I usually prefer hard or half hard wire for this because it resists bending and is easier to keep straight. However, the key is the incised line and if that is straight, the soft wire will follow suit. I just flatten a ribbon of wire by drawing it between 2 files pressed together, cut the lenght needed and tap it in.


I simply file it off flush filing along the wire rather than across and finishing up with sand paper. Then I added 3 silver dots to each end using 22 gauge round silver wire cut as 3/8" nails and tapped into predrilled holes. File and sand flush and I am done.


dave
 
Hi,
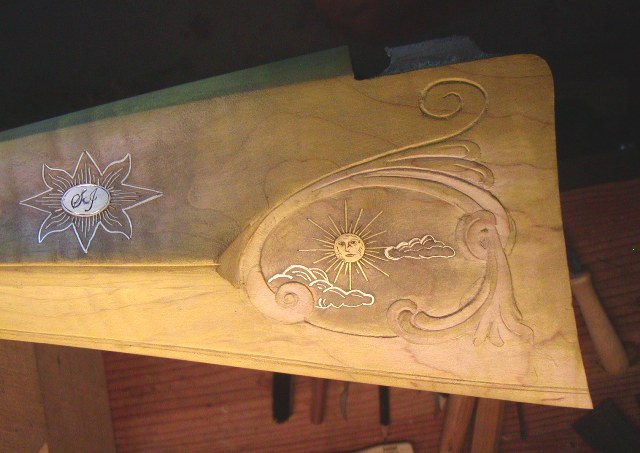
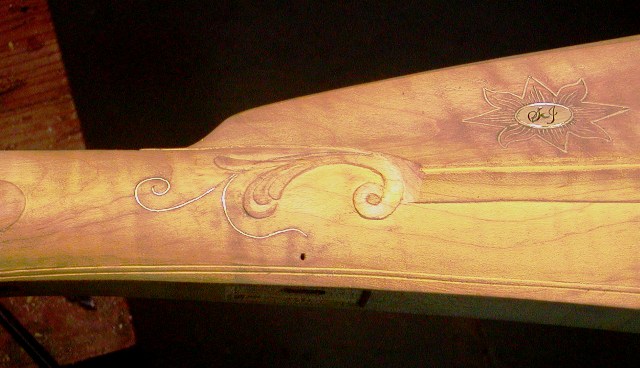
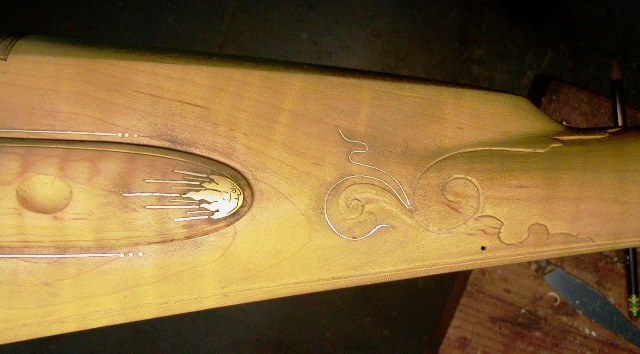
I just finished a delightful day of finish work on the rifle and adding the last wire inlay (I think). I added a twisting tendril to the cheek piece carving.


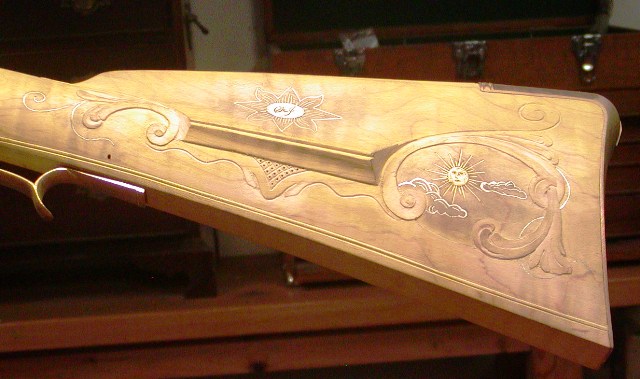
Then I added accents to the carving on the forward end of the cheek piece. For this design, I used double wire above the carved volutes and anchored in the cheek piece to simulate a thick stem that dives under the carving. Then single wire diverging from under the carving into a volute and tendril. It adds a lot to the carving.


On the patch box side, I added the wire border to the lid that I posted previously and then a few accent tendrils to the wrist carving.


I believe it all fits together nicely. I don't find wire inlay to be very hard but it does require patience and good procedure. It really does not require tool skills like carving does. However, it is all about design and your ability to draw that design on the gun. Moreover, like incised carving, it is hard to fix mistakes in the incised lines. A single ribbon of silver or brass wire is a very subtle decoration and often gets lost unless it has other wire near and around it. I am sure many of you start learning to do it tentatively, as I did, a single short strand of wire here, another there, and those single accent wires usually get lost and look like they were not really planned. Often they look like poor lost orphans. Learn to wire inlay well, it is not hard but first learn to draw. Practice on scrap wood. A really good exercise is to make a little tablet with your name done in wire inlay. It is a fantastic practice and you can make something decorative for your family. Practice straight lines, volutes and scrolls and learn to combine wire into decoration that shows up and makes a statement. They certainly did that in Europe but Oerter, Rupp, and others did it very well in America. Tomorrow, I do the incised carving under the cheek piece and final finish details. Then stain.

dave
 
Hi,
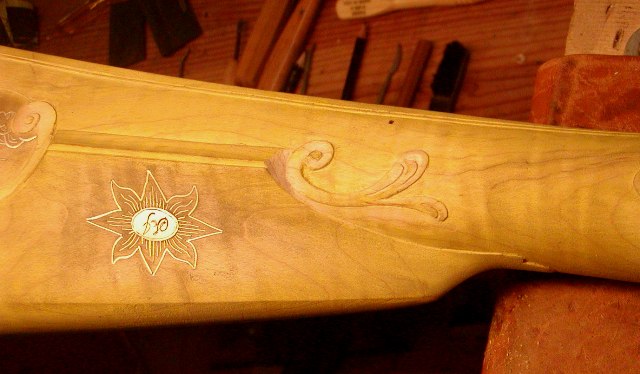
I wanted to show a little more work I did today, I have to put the gun aside for a couple of days to work on a paper. I incised carved a design similar to the Edward Marshal rifle below the cheek piece. However I wanted to modify it it a bit so I checkered the triangular area under the cheek piece and added dots to each diamond. Notice how the dots add mass to the design balancing out the mass of the Moravian star. It is a simple technique but one worth remembering.


dave
 
Back
Top