Leather Ballbag - photo tutorial

Muzzleloading Forum

Help Support Muzzleloading Forum:

This site may earn a commission from merchant affiliate links, including eBay, Amazon, and others.
Thanks For the great tutorial :grin:

If I was you I would carve the stopper/plug in the shape of a turtle head... That would make it a master piece :wink:
 
What is the purpose of dunking in the hot wax?

The wax helps hold the leather in shape or it would fall flat which keeps the balls from coming out easily. Another approach would be to use something to form a stiff neck made of copper tubing with flared ends or wood so that the balls come out easily.

The wax also lessens the likelihood of oxidizing the round balls inside. Most veg tanned leather is okay, but some still frost the balls.

To make an easy ball bag, take a soft ball and cut the thread connecting the sides of the cover. Then fold one side over onto itself. Cut the connecting strip and sew it up. Sew with two two needles and you have your first bag. From there use your imagination.

You can tie it shut or add a neck and stopper.

I like the turtle design quite well. Might need to heat up my beeswax again - been a while.

CS
 
hanshi said:
Thanks; that's a very informative tutorial. I've made several by going through the basic steps you outlined but your skill far exceeds mine. Where did you get your tools; especially the stitching wheel?

Among other places you can get stitching wheels from Tandy Leather. Here's a link to their
3-wheel Overstitch Wheel System. They also offer wheels of waxed linen thread which is not only perfect for saddle-stitching, but is historically correct for both 18th and 19th century leather items.

You can also get a bunch of leather tools and supplies at Leather Unlimited.

Hope this helps,
Twisted_1in66 :hatsoff:
 
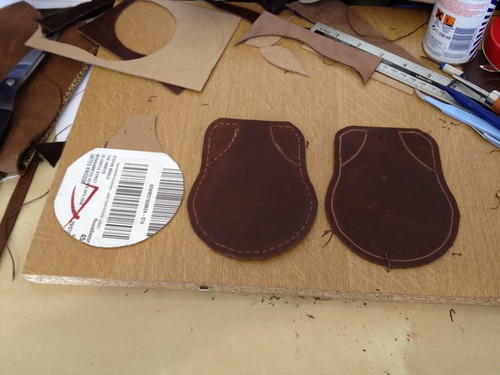
Hi all, not been on here in a while largely due to work commitments but thought I'd try something similar to this whilst I'm on holiday. I dug out some scraps left over from when I made my Gladstone bag and followed a method similar to PC's (thanks for the fantastic tutorial btw). Below are some pictures of the construction process:

Pieces cut out and ready to stitch, template on the left.
7716928922_e31233480d.jpg


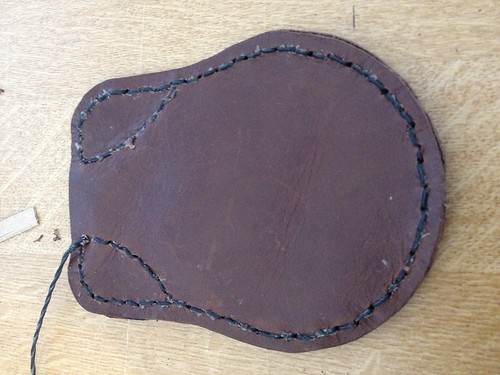
Stitched together and ready to shape.
7716932980_b83817fdae.jpg


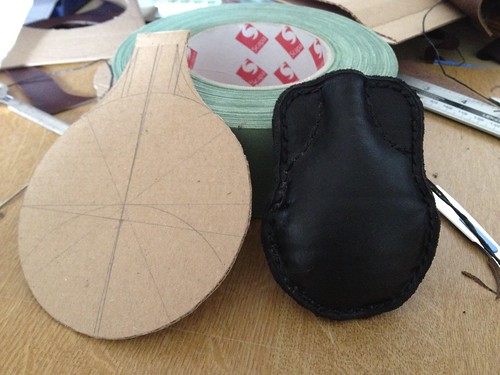
I experimented with boiling the leather to make it harden in the correct shape, I was really surprised by how much it shrank, note the template to give you an idea of how much smaller it is than the original.
7716937816_2d631271a8.jpg


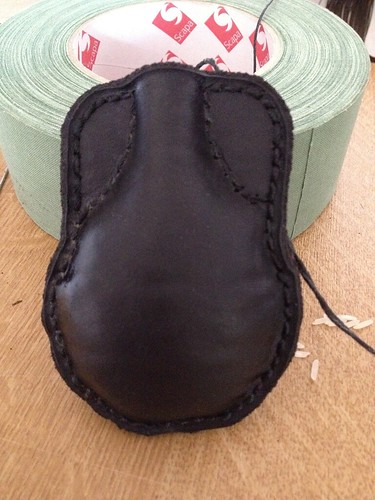
And finally the flask on it's own:
7716943144_560958bf0a.jpg


I'm just waiting out on some beeswax to finish treating it in the manner described by PC so I'll put up some pics when it is done. Not sure what I can use it for, it's probably too small to carry more than a couple of balls though it'd probably do a good job as a shot flask. I'm fairly pleased with it as an experiment.
 
Back
Top